THIS LITTLE CLASS OF MINE
  • Home
  • Contact Me
  • Lesson Plans

Metal Bugs

1/14/2018

0 Comments

 
Picture
I am guilty of pinning a LOT of ideas on pinterest, but never actually making anything from my pinsperation boards. I have a HUGE roll of aluminum that I have been hoarding for a while. It was pretty expensive so I didn't want to waste it on any old thing. While I was pondering how it could be used in a project, I ran across an old pin and I knew it was perfect for my 5th and 6th graders. 

Nichole Haun's color scheme bugs were perfect for my students. We had already gone over color schemes pretty extensively so we didn't focus on that too hard for this project, I mentioned color schemes, but I didn't spend a ton of time on the instruction going over color schemes again. 

​ I did use part of her video for the metal tooling steps, which I will share below. 

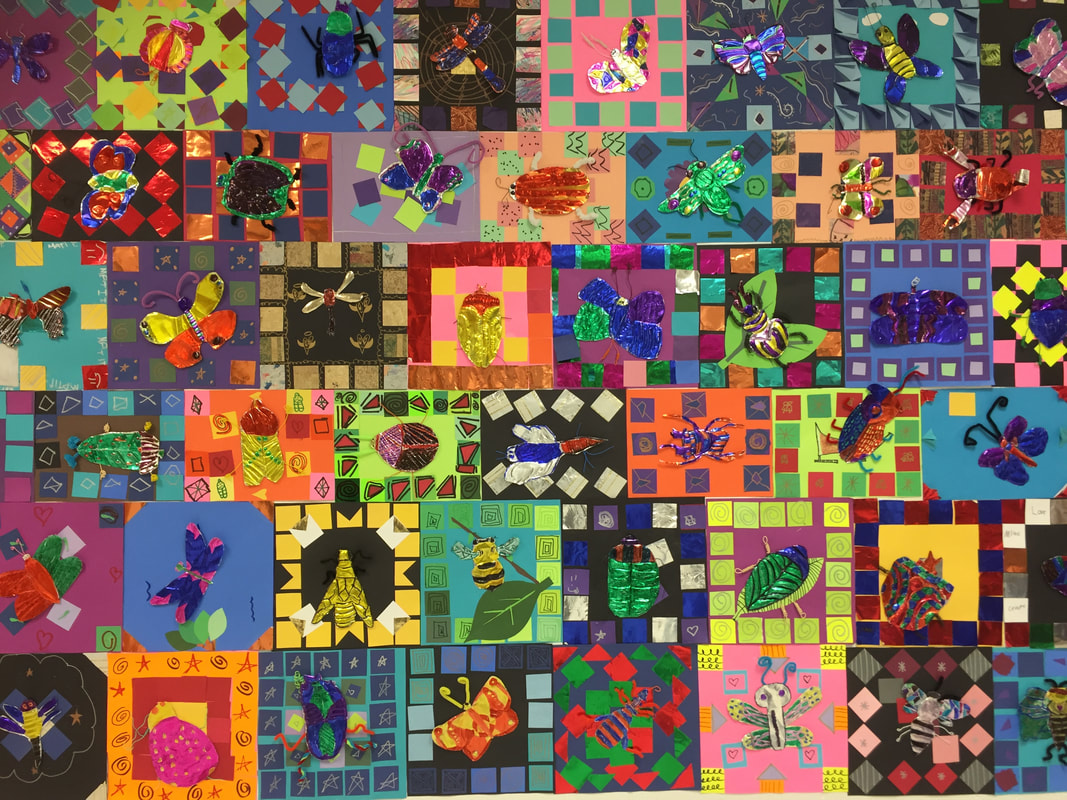
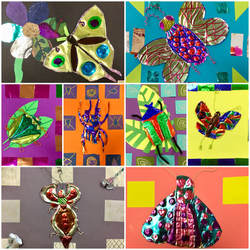
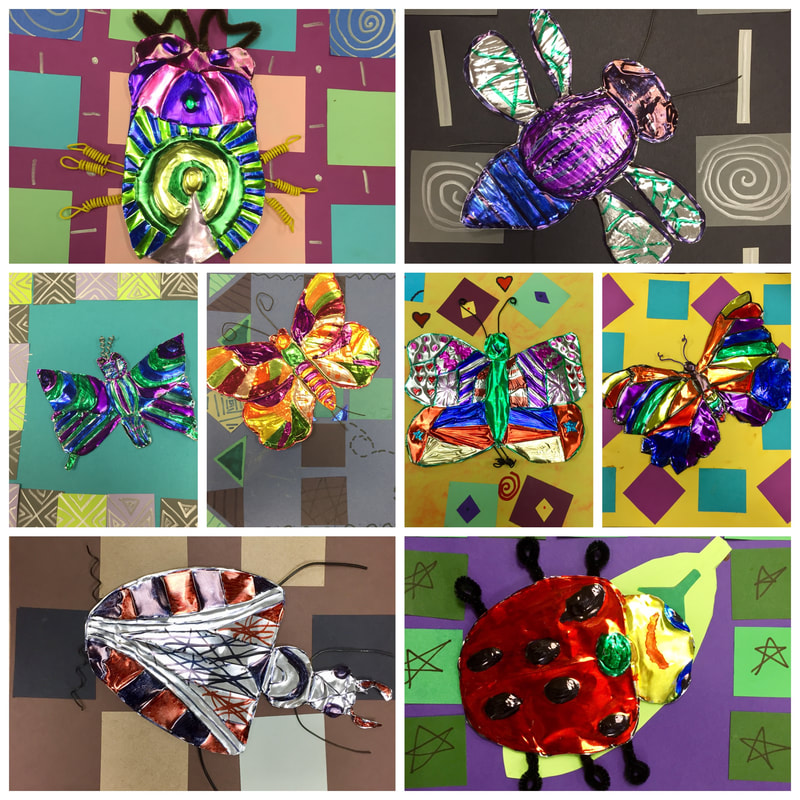
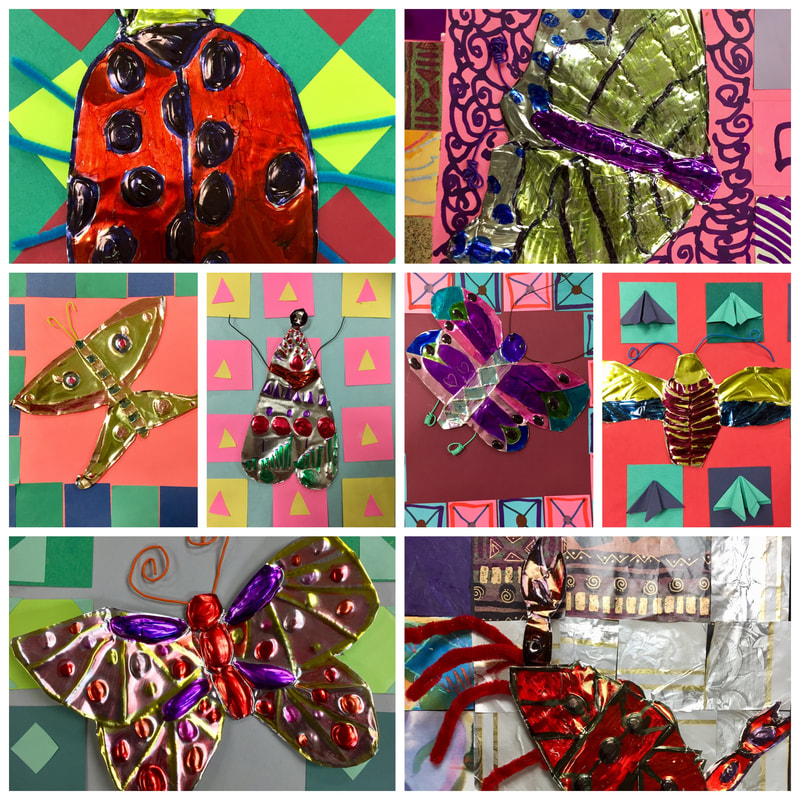
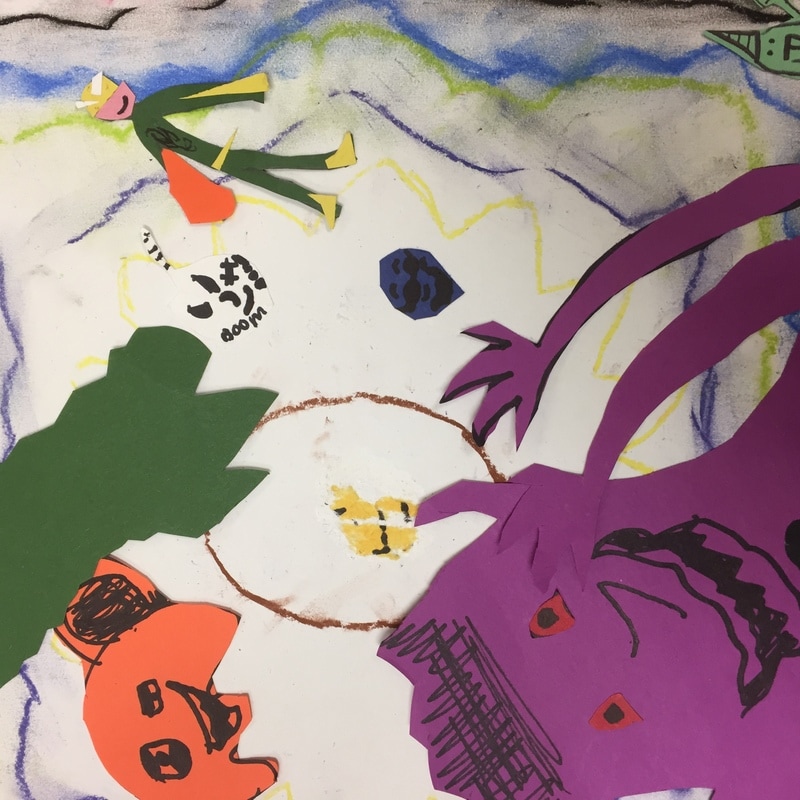
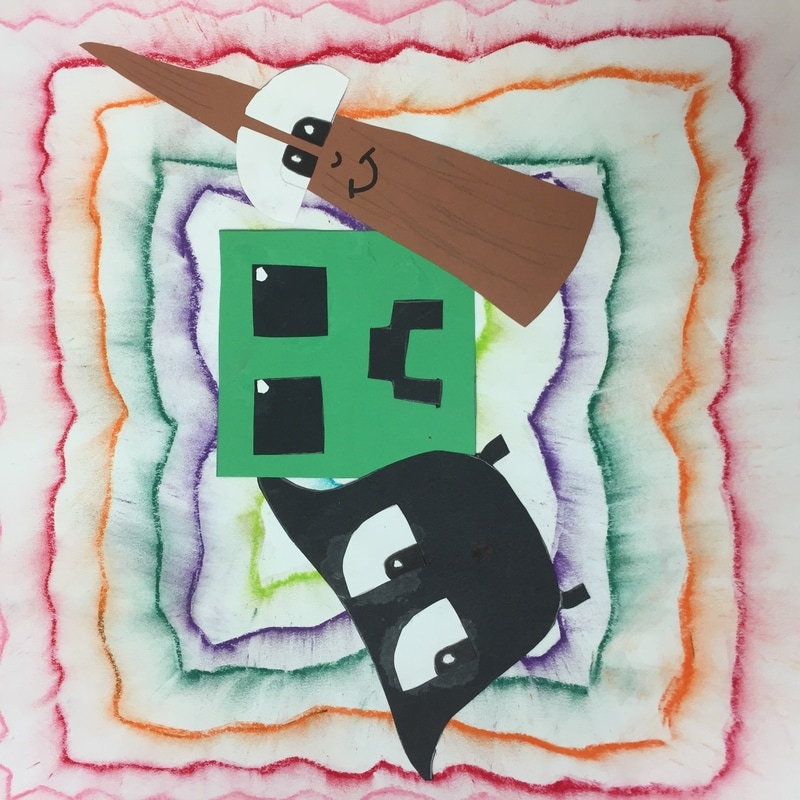
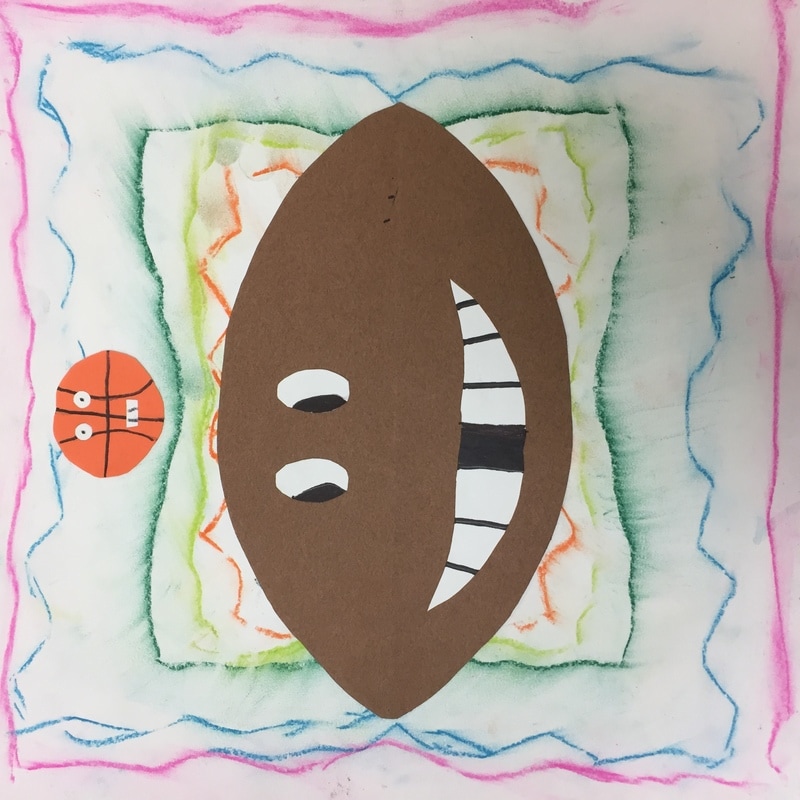
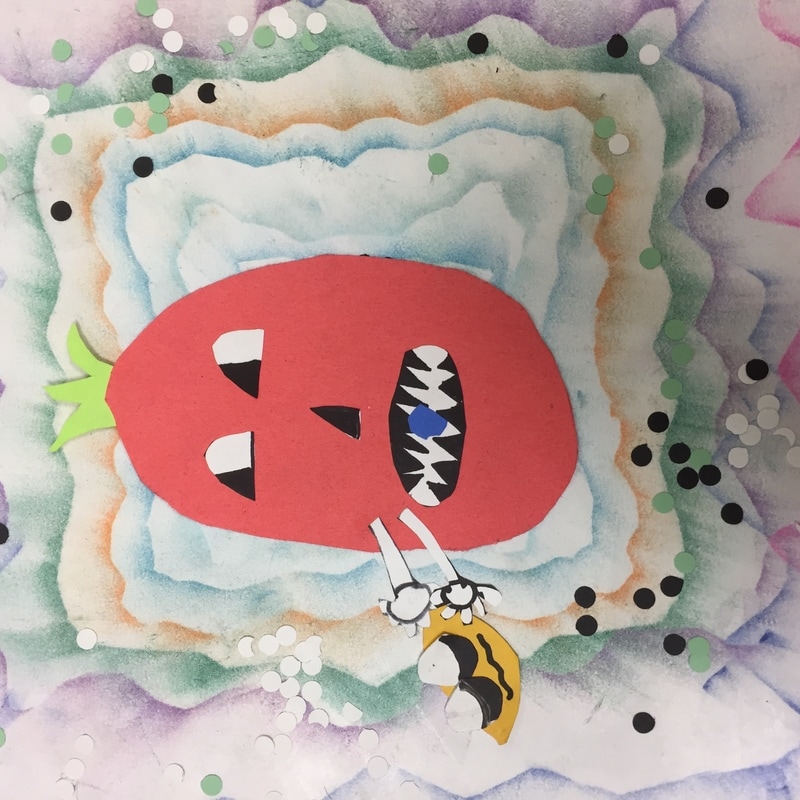
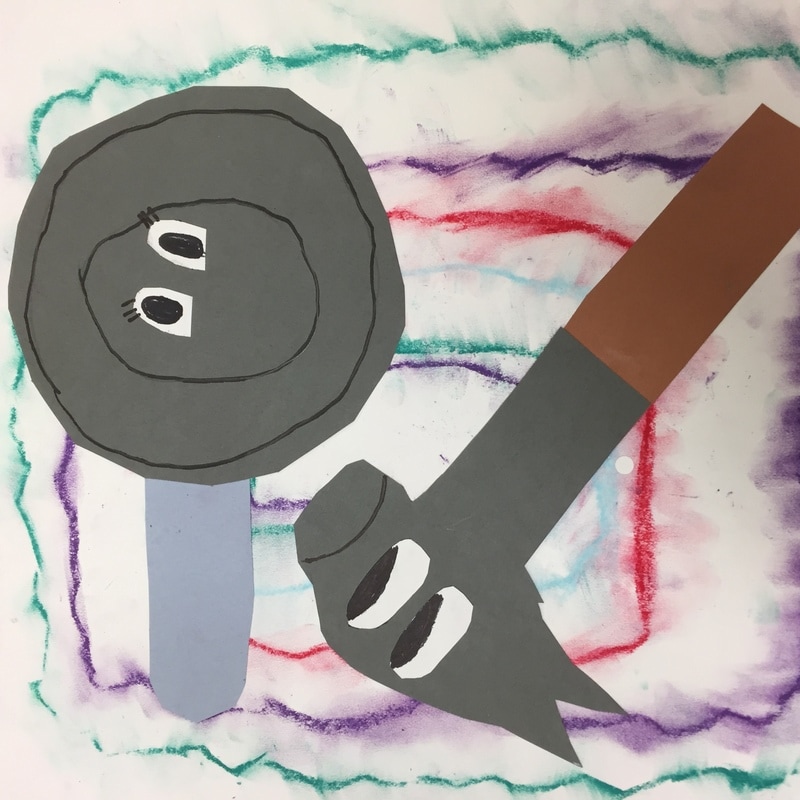
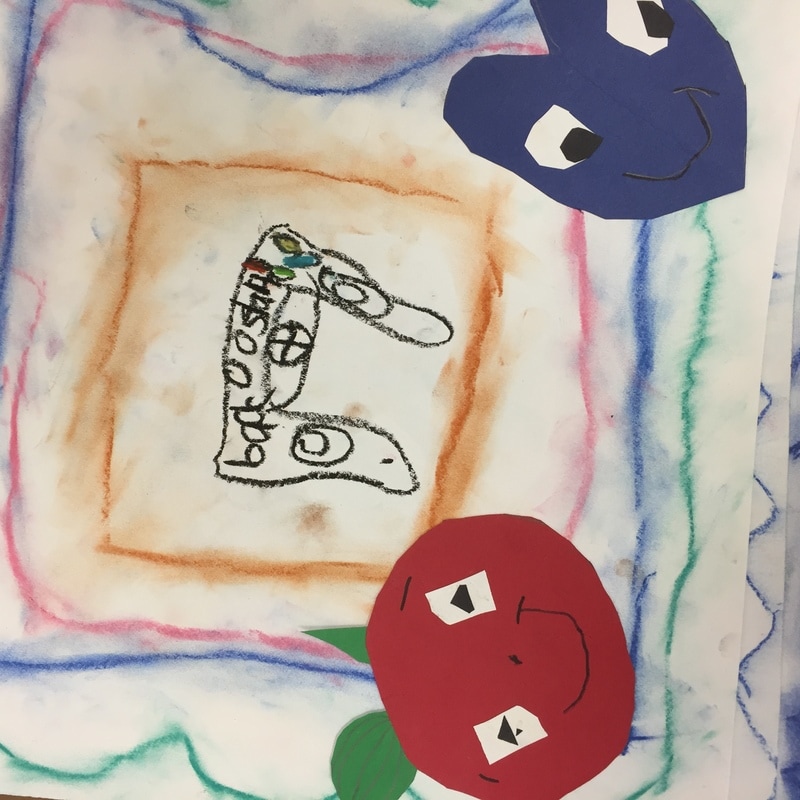
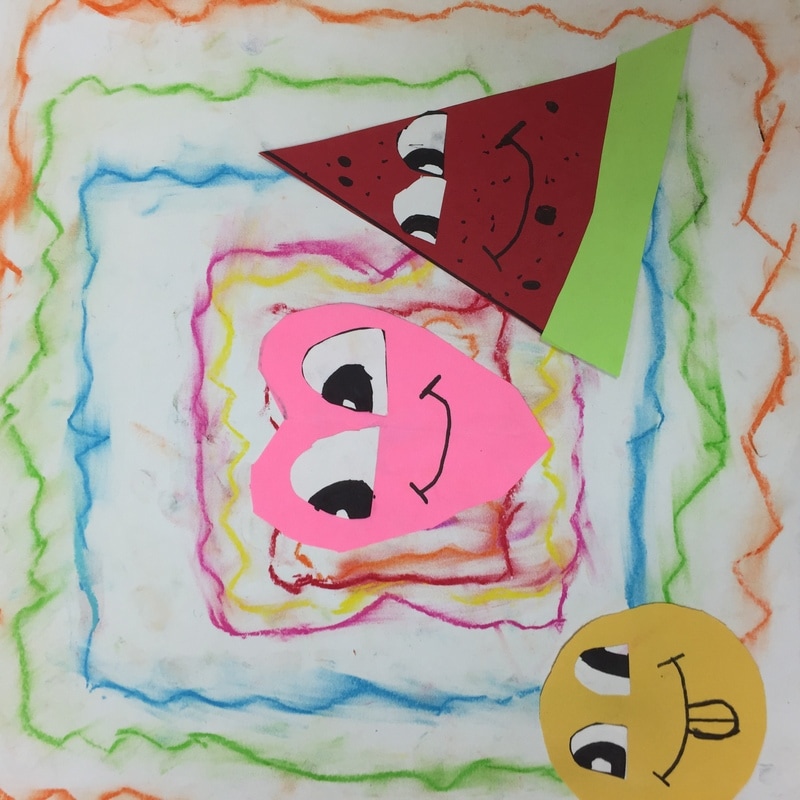
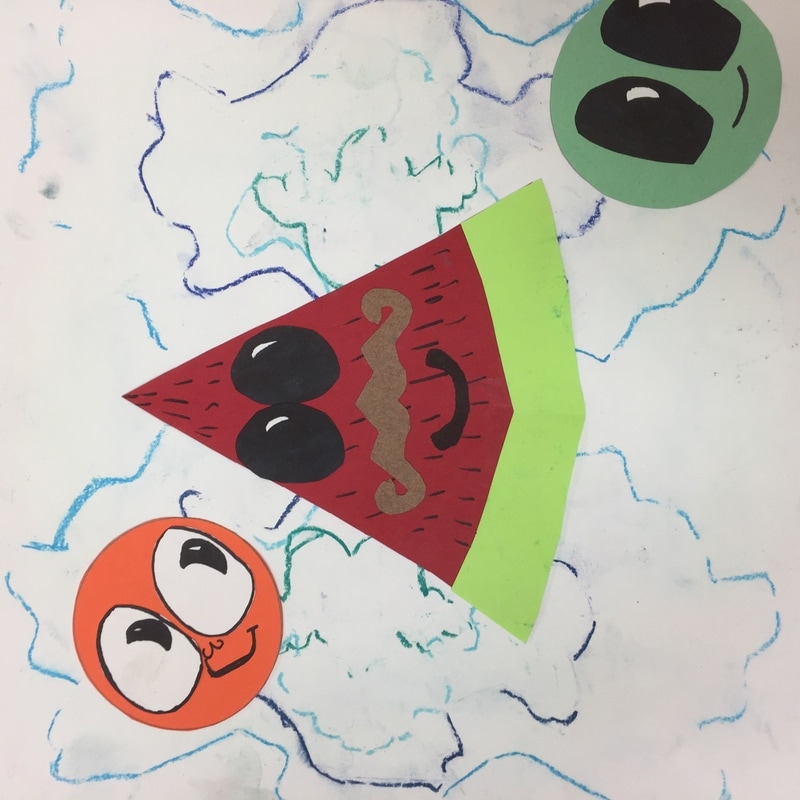
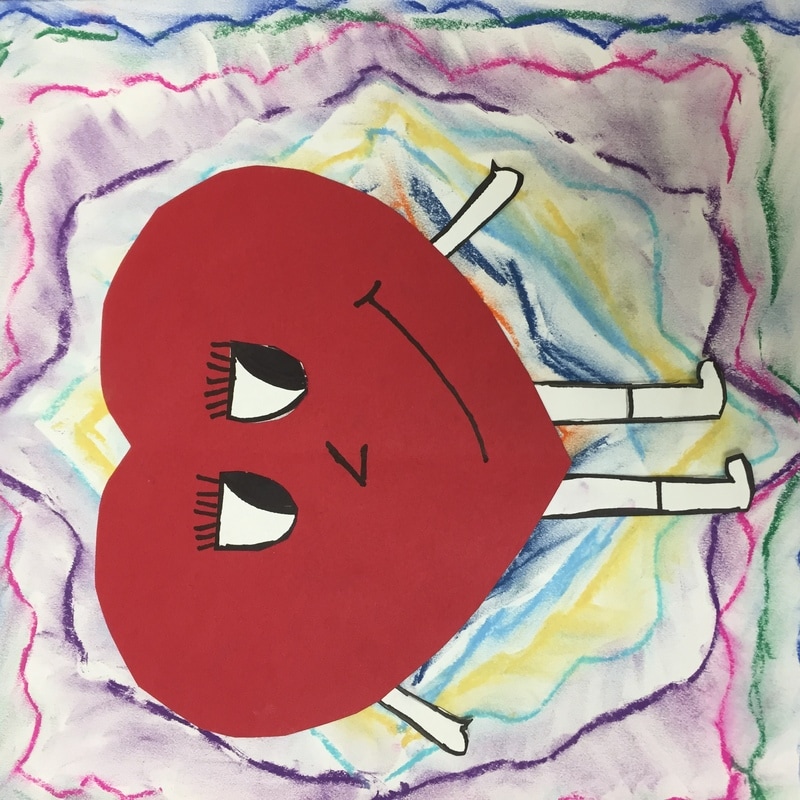
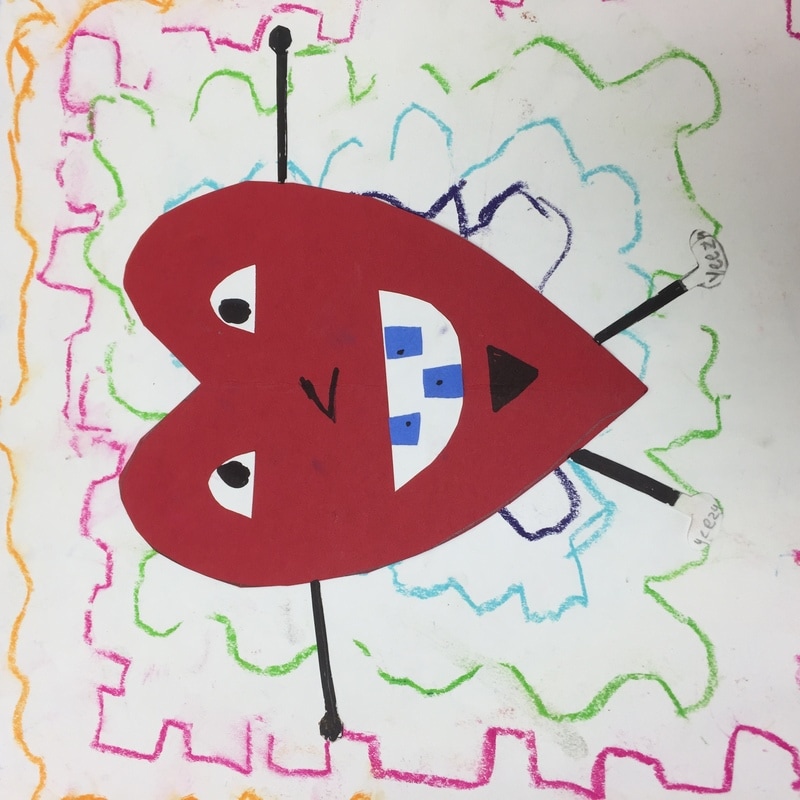
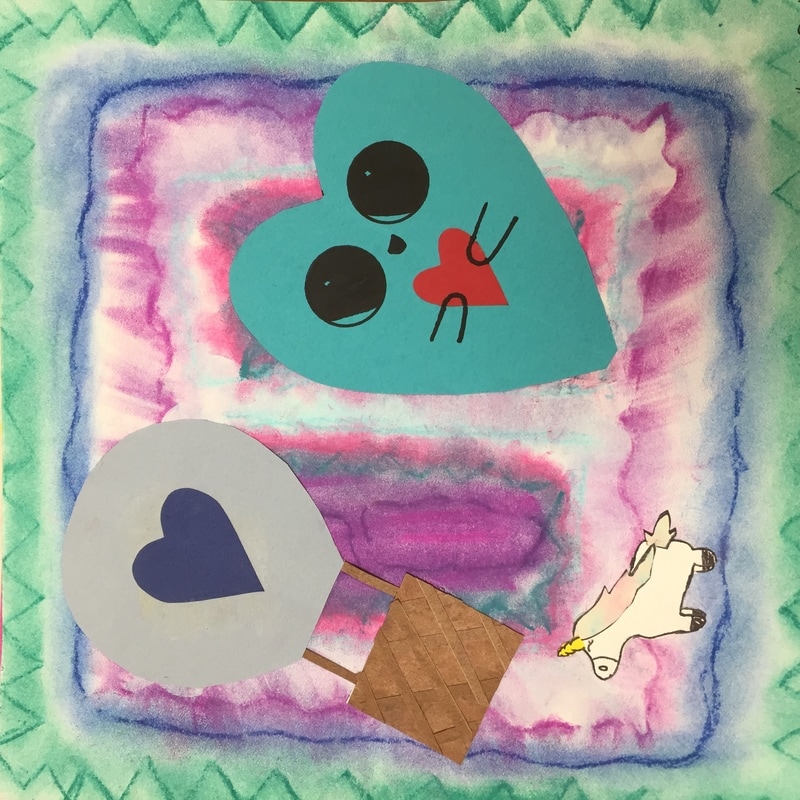
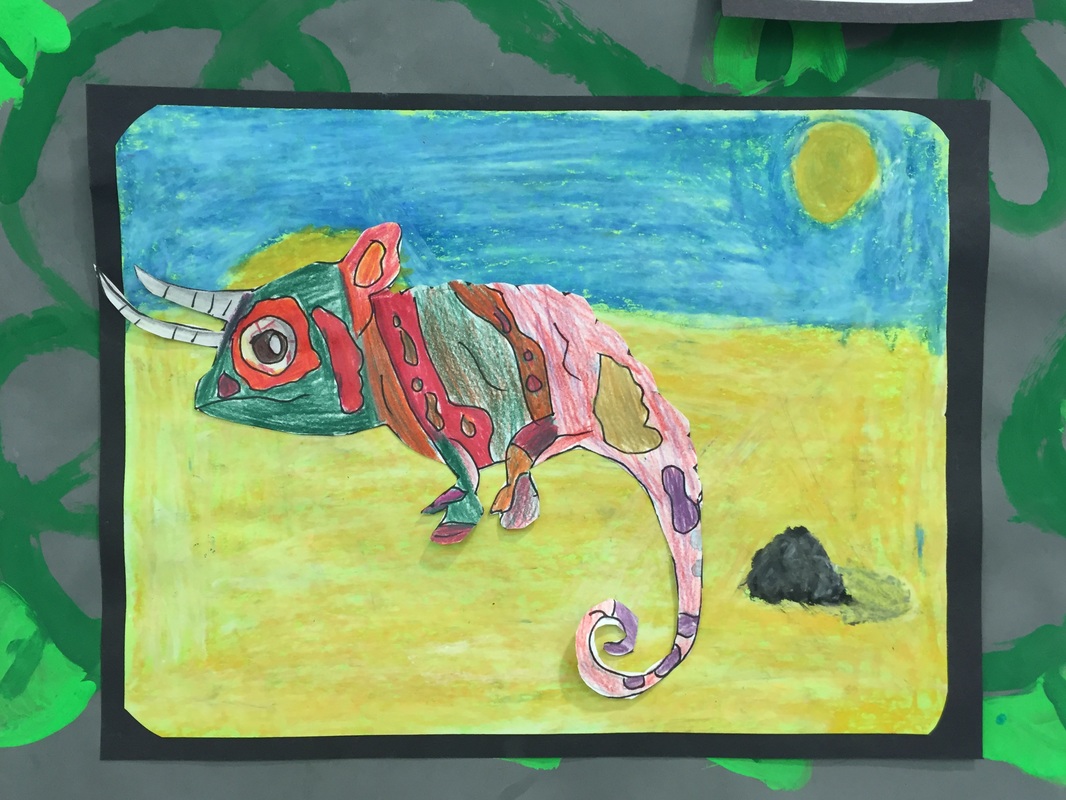
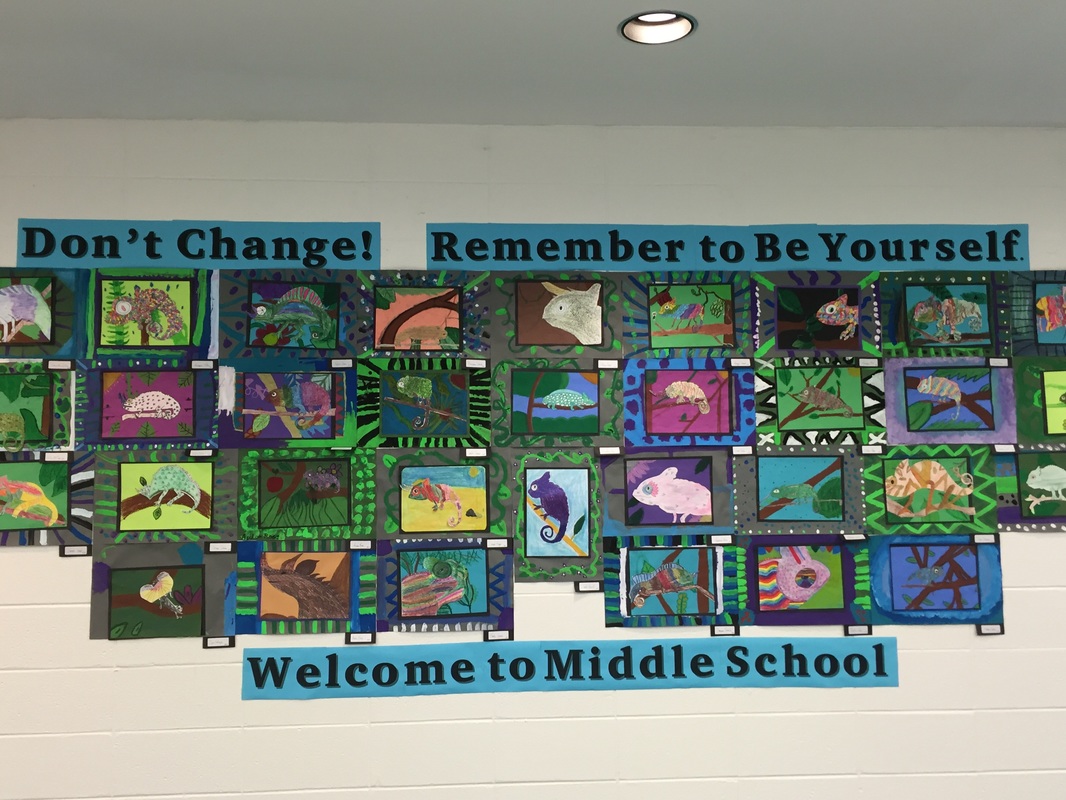
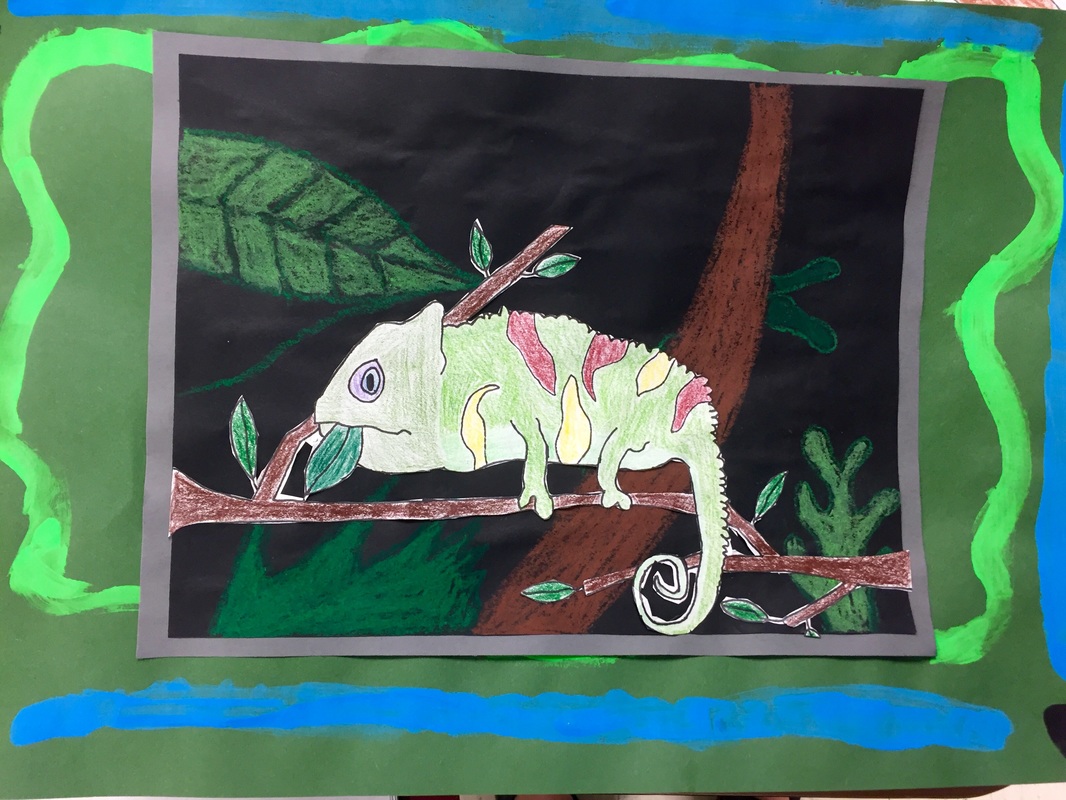
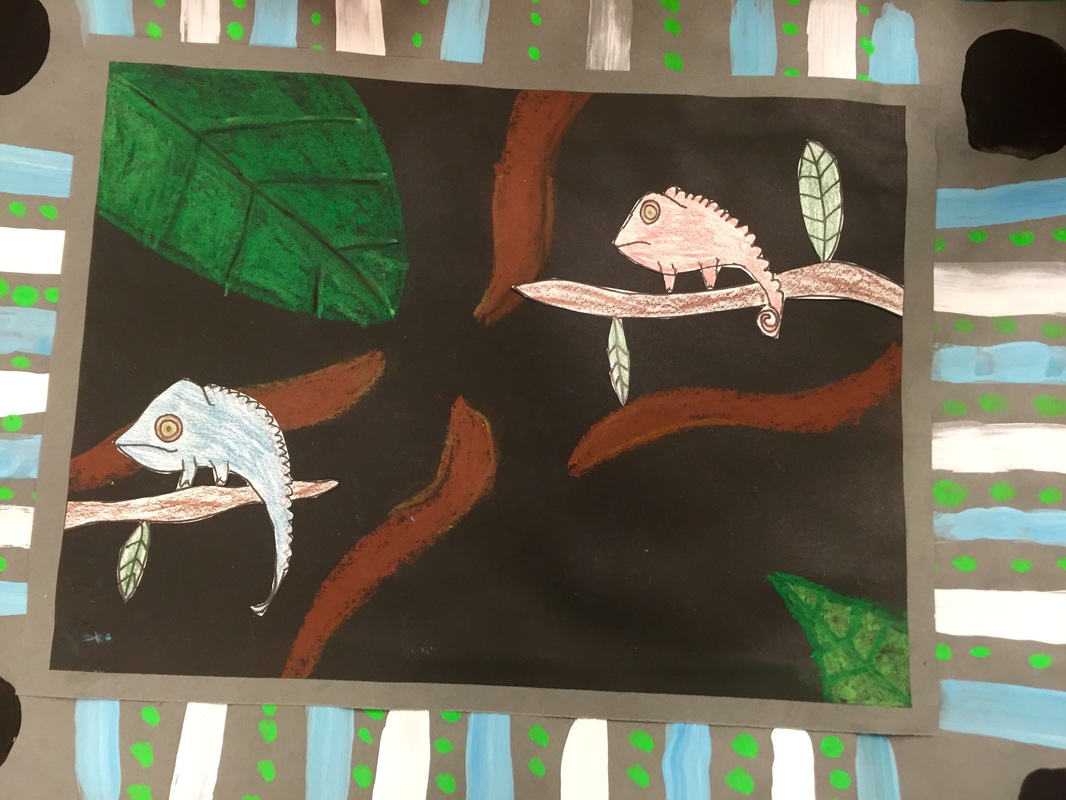
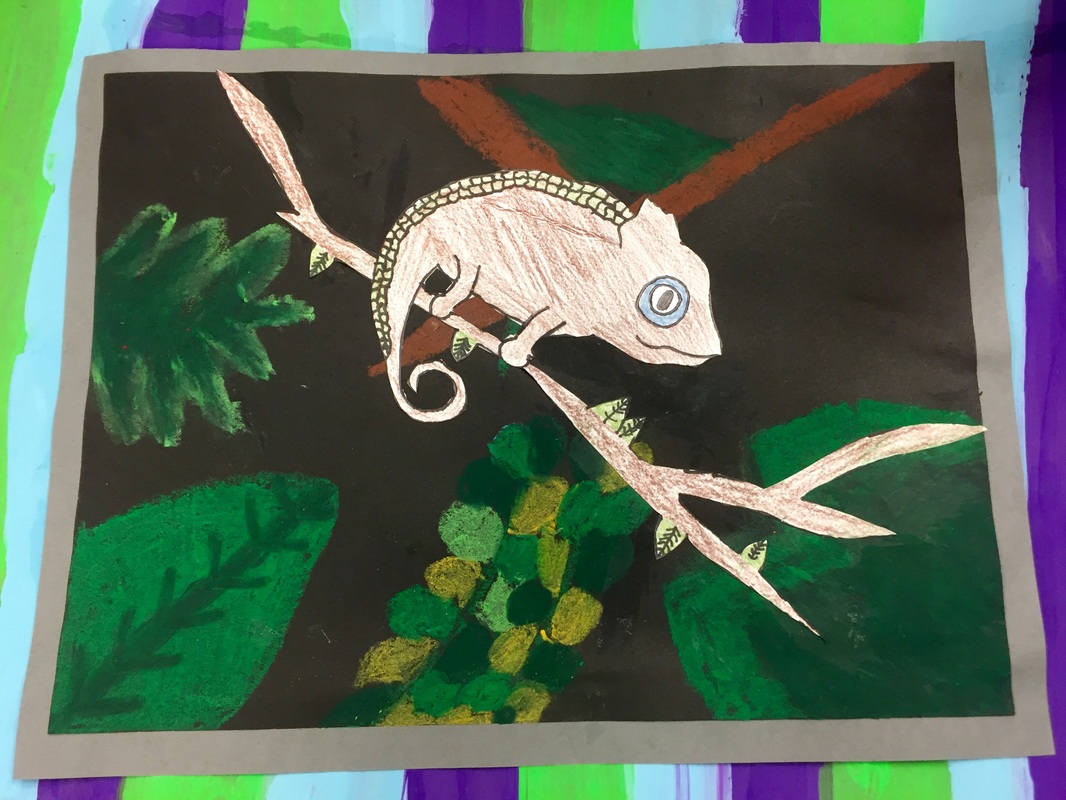
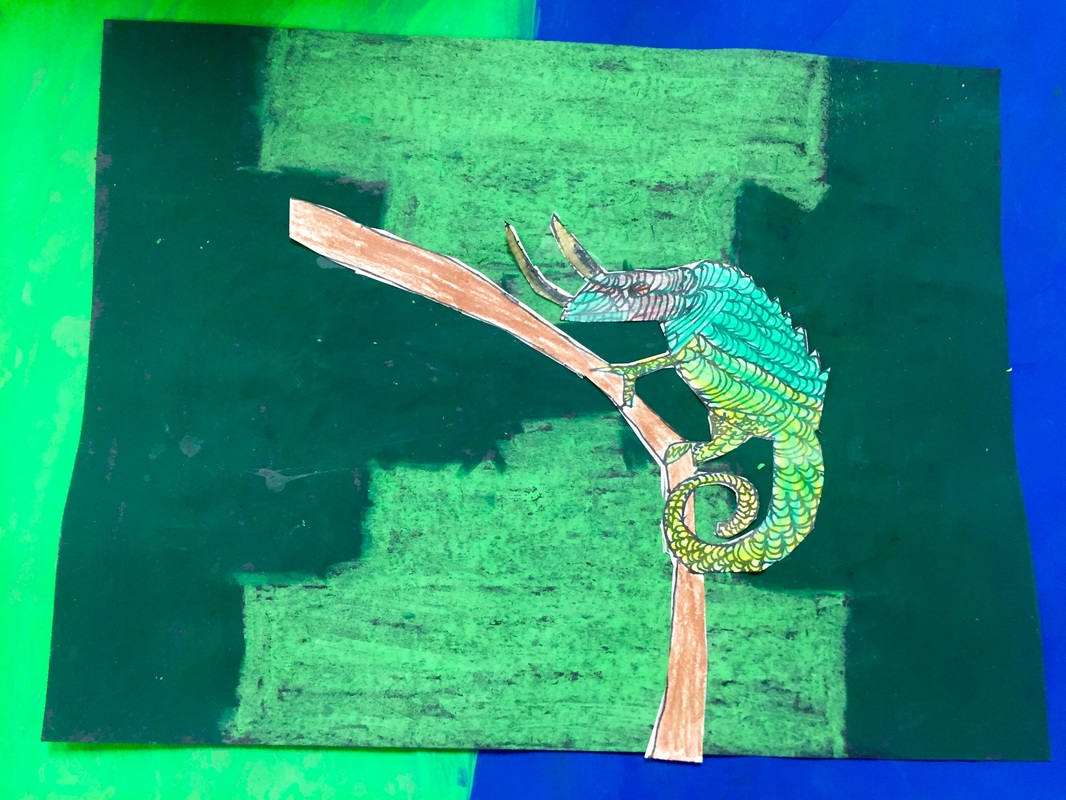
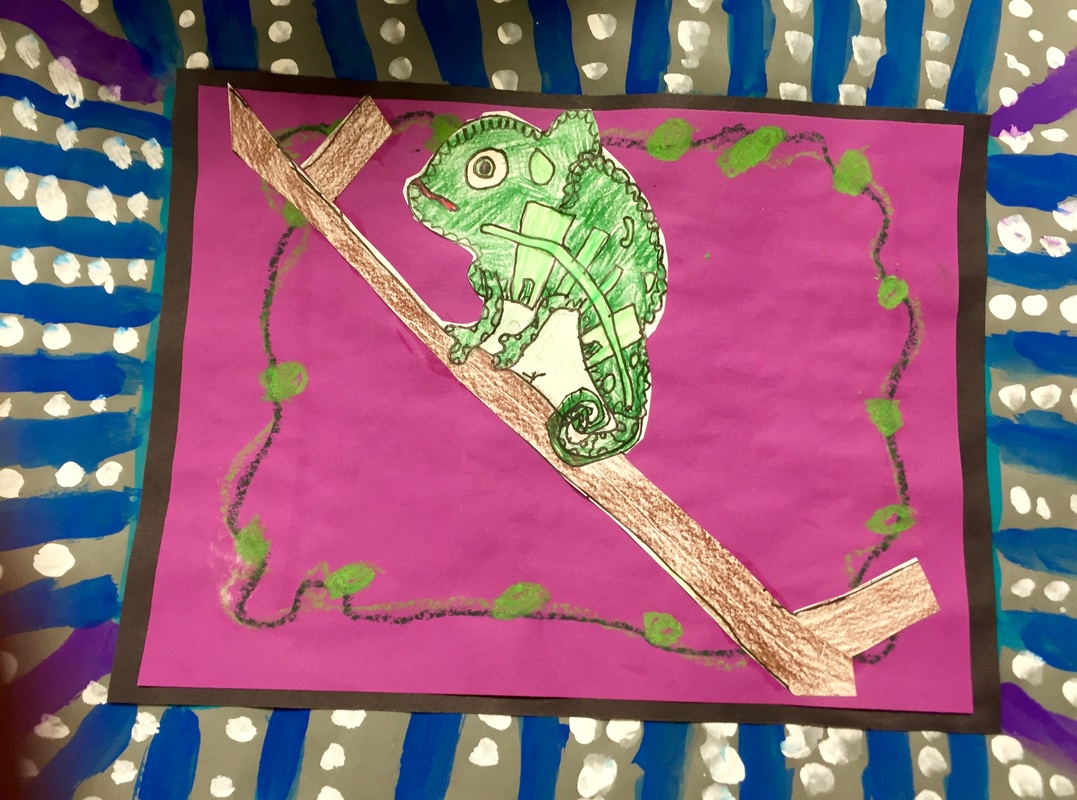
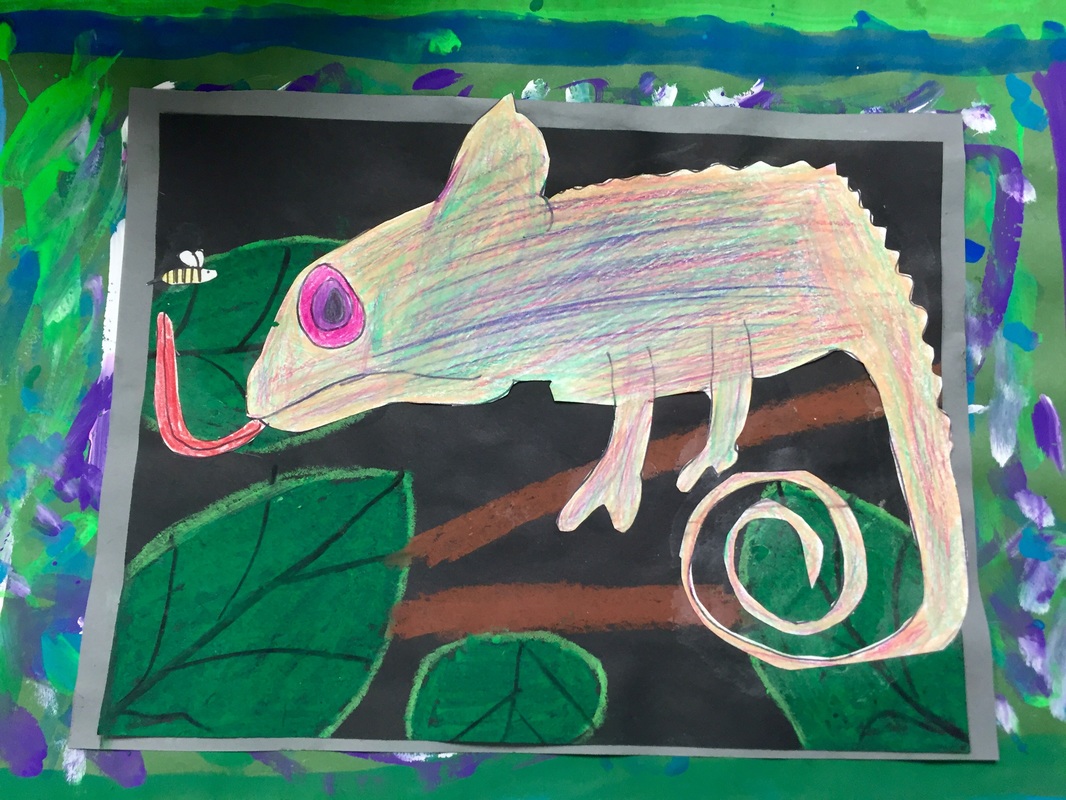
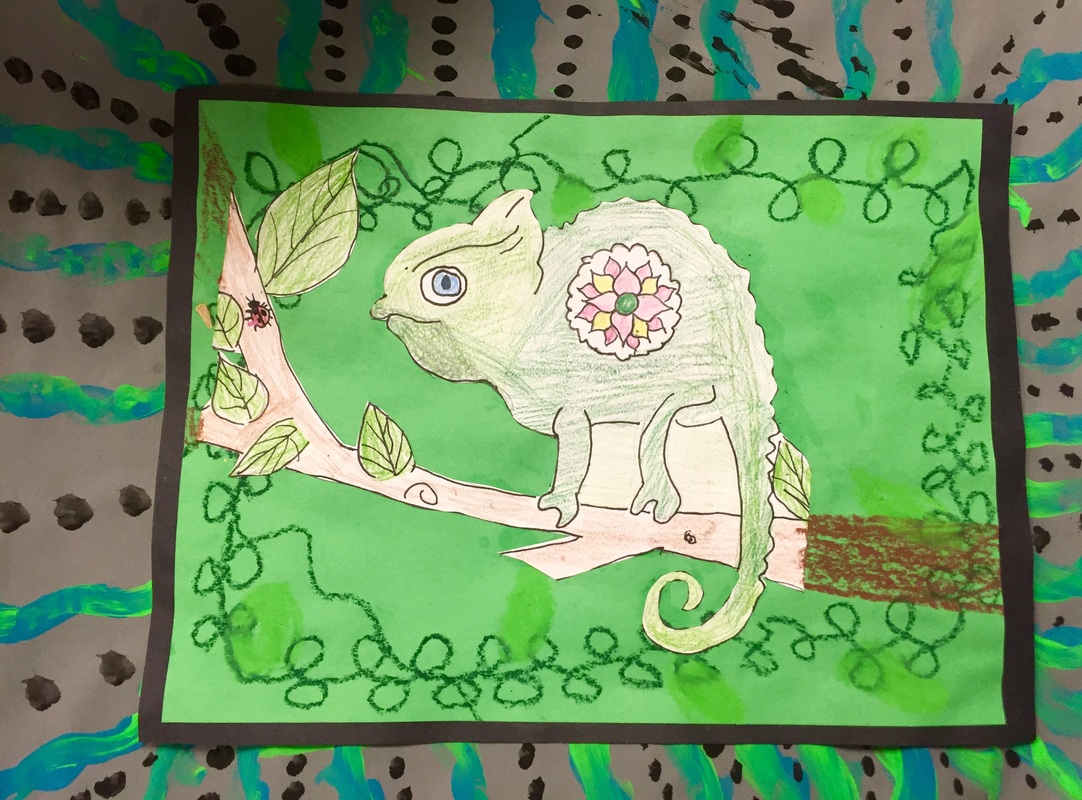
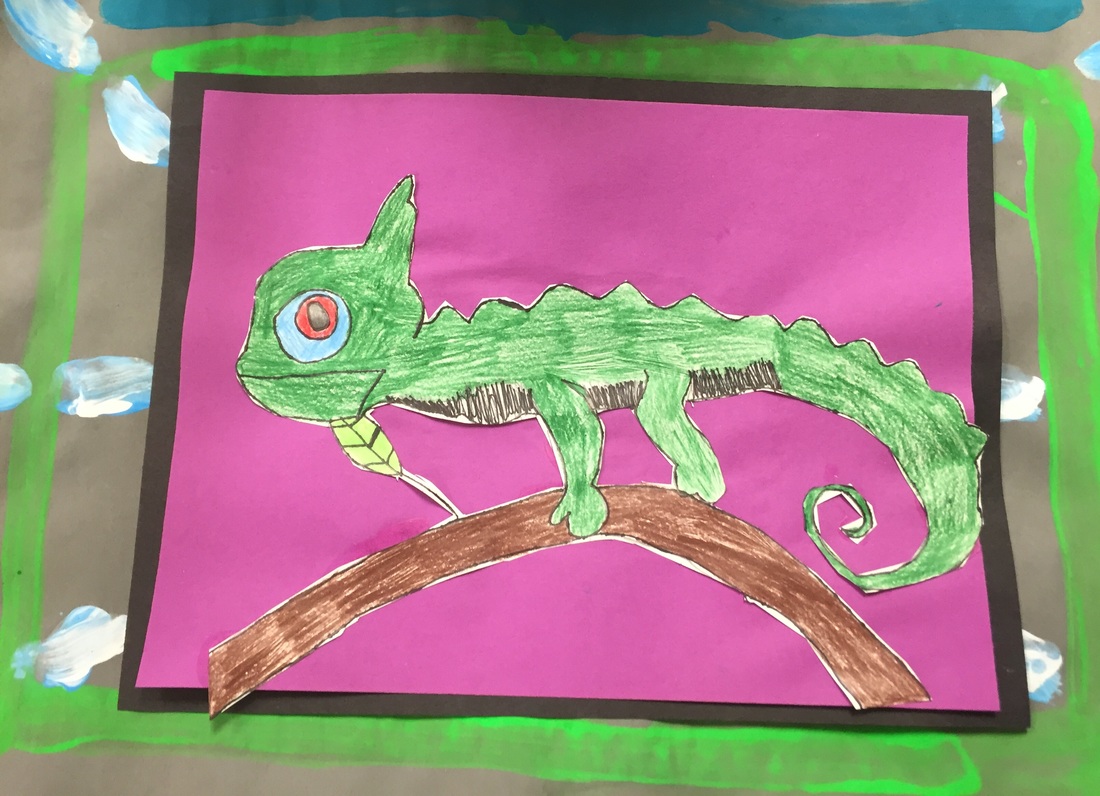
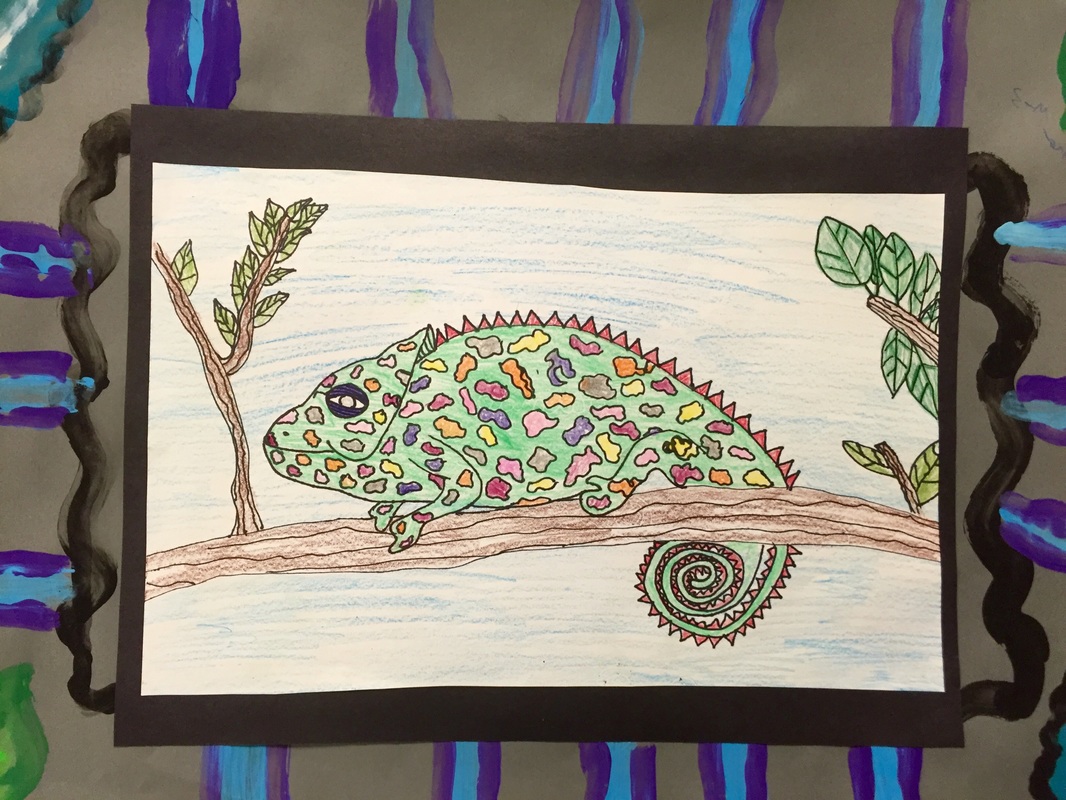
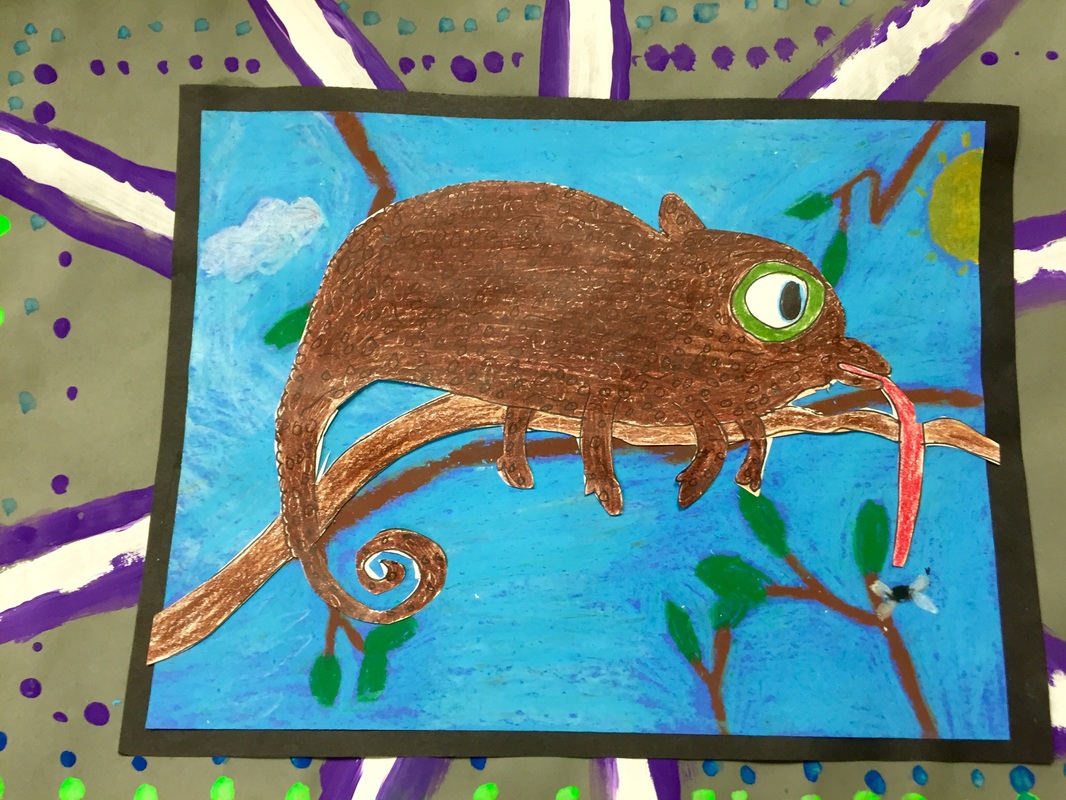
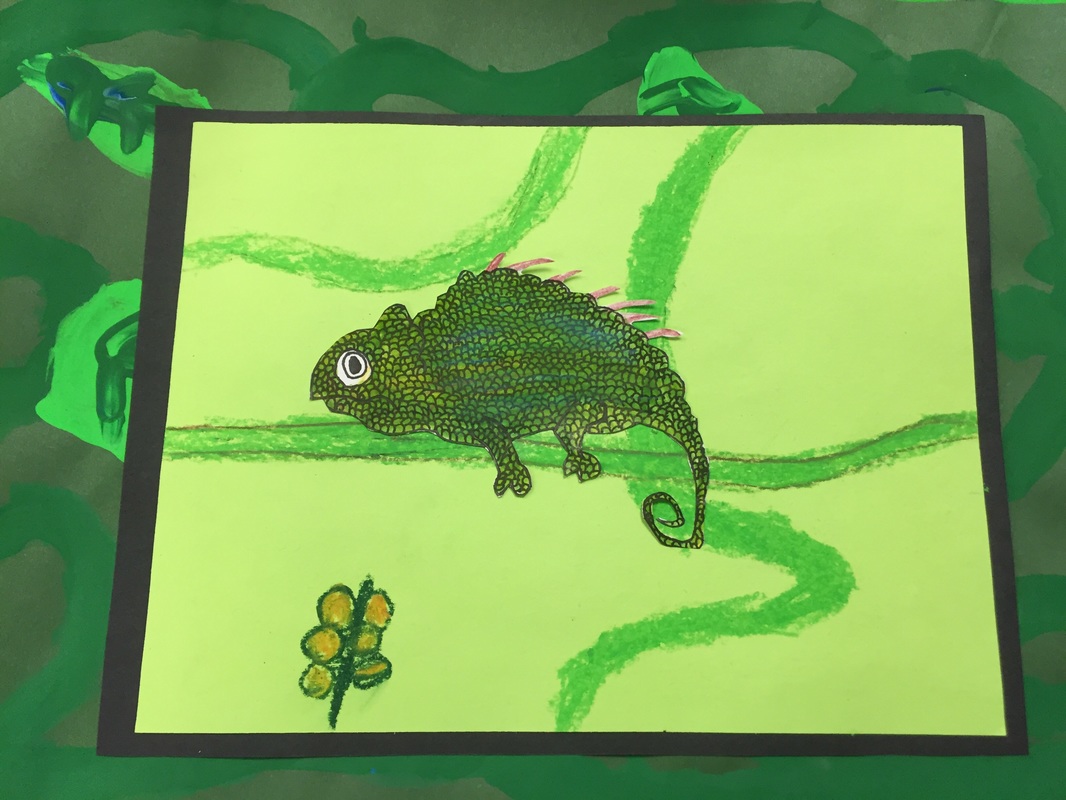
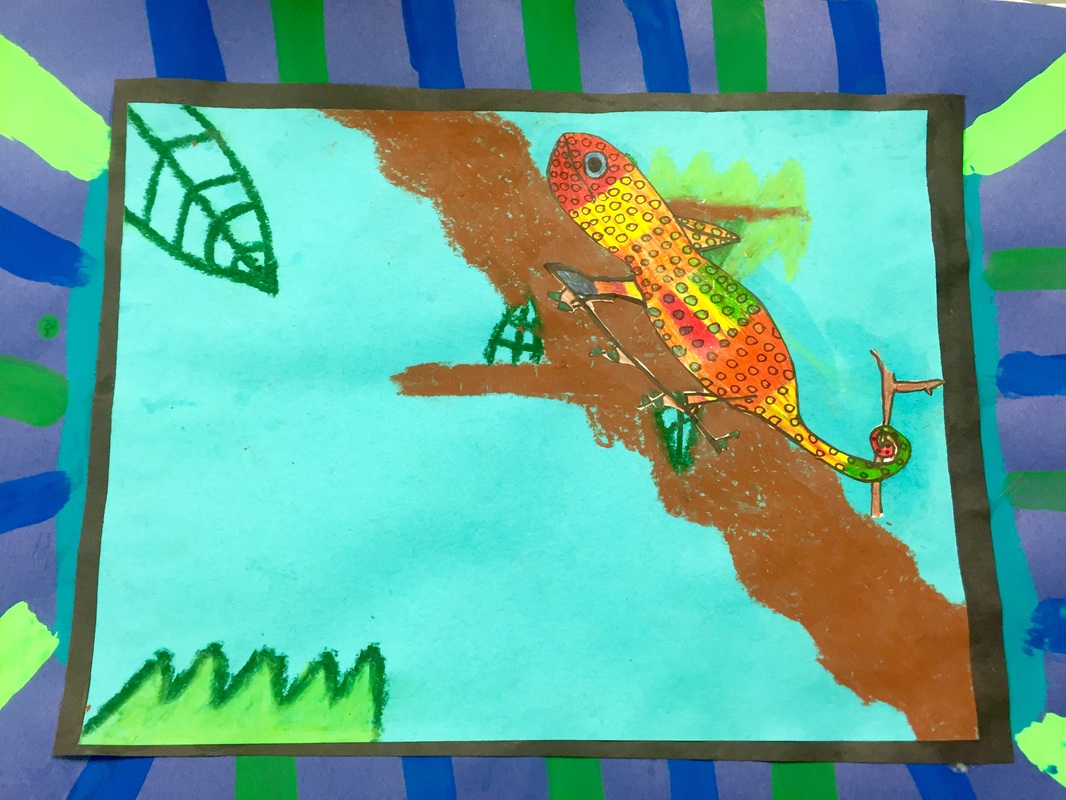
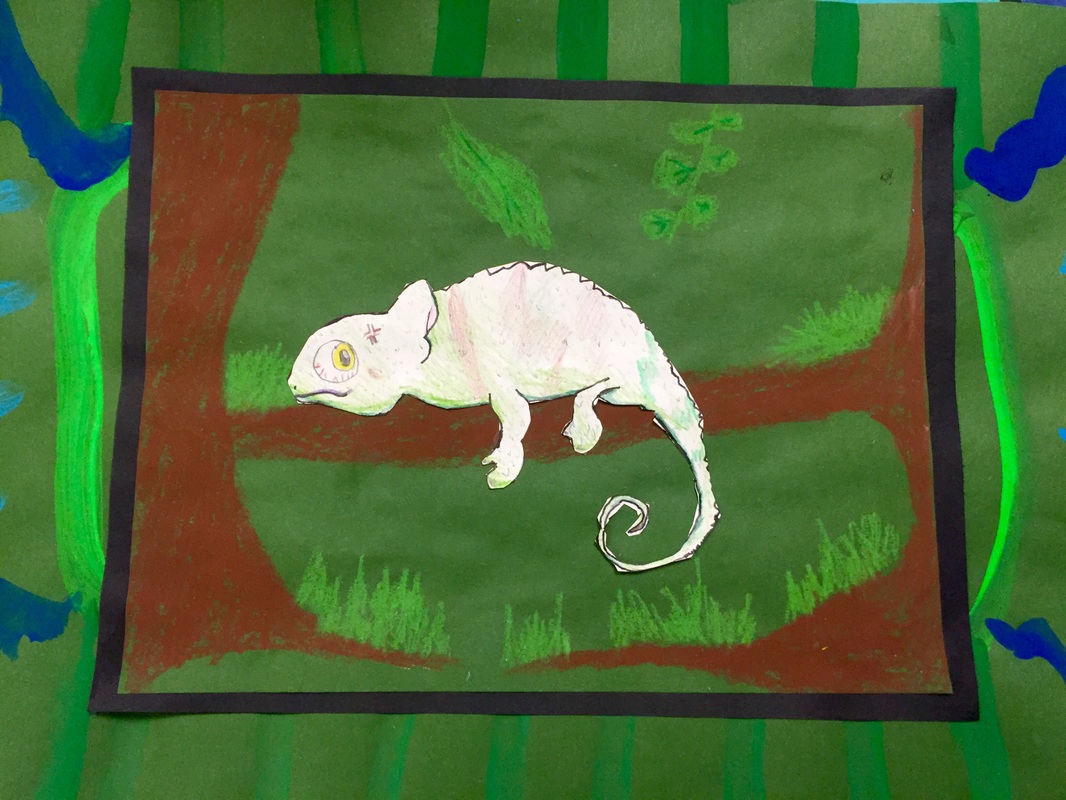
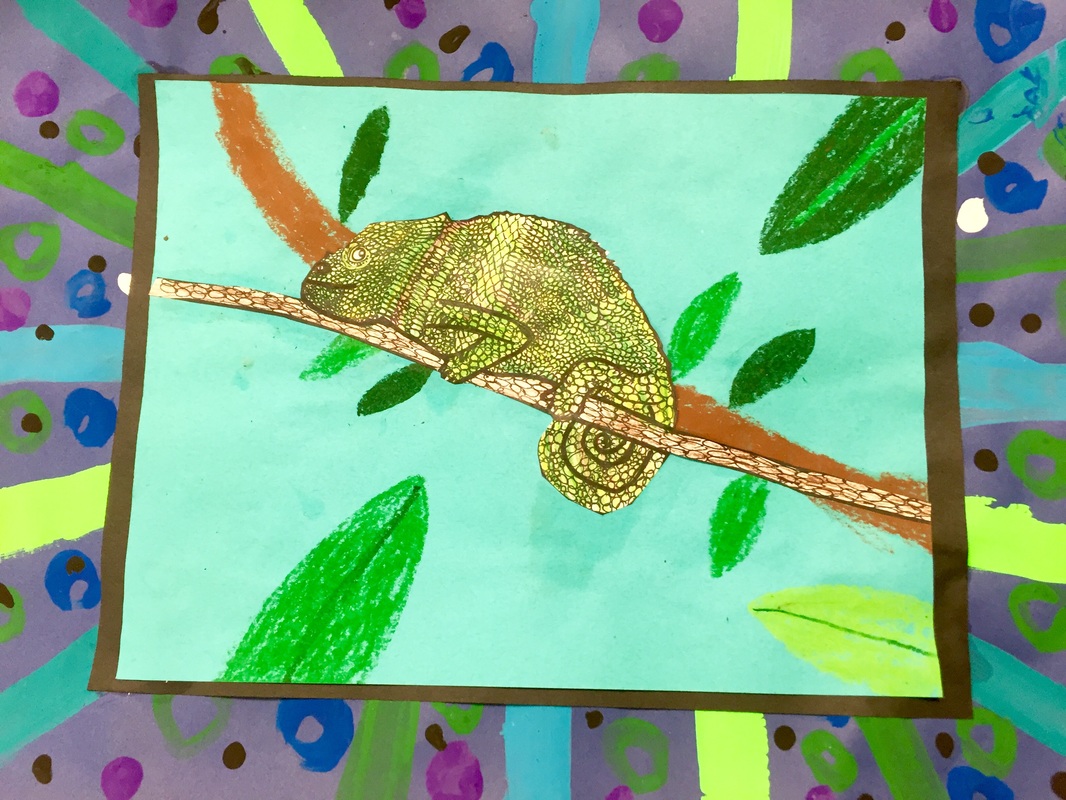
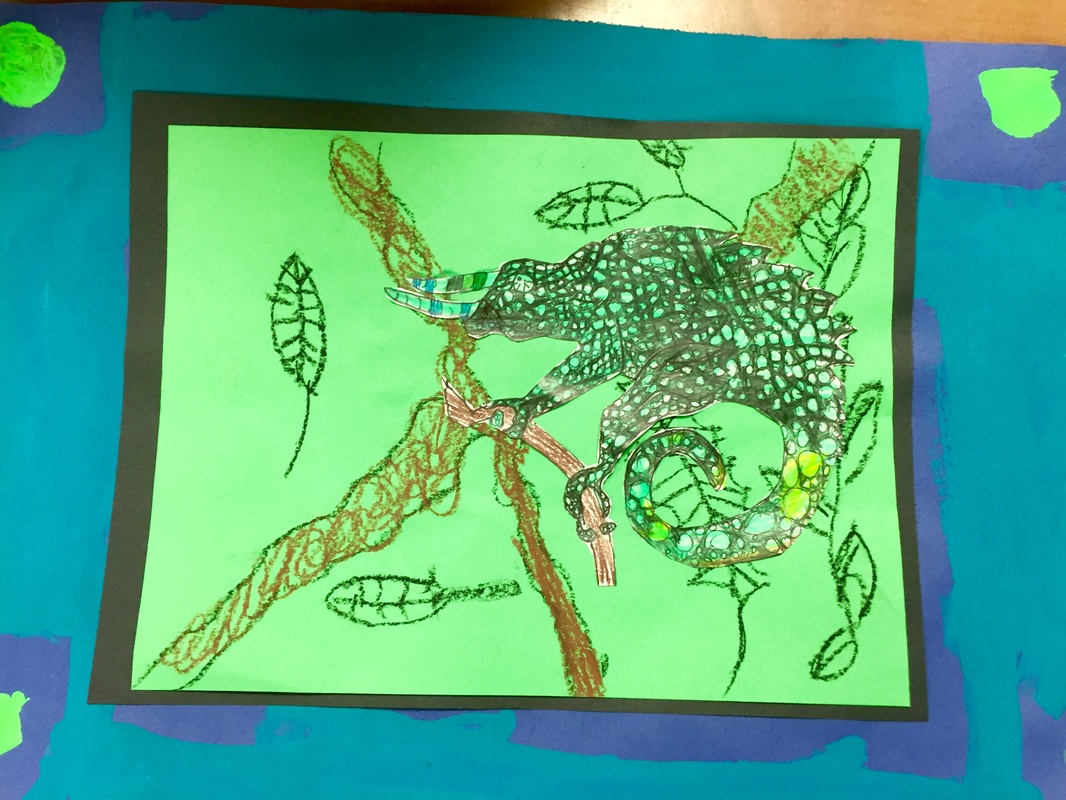
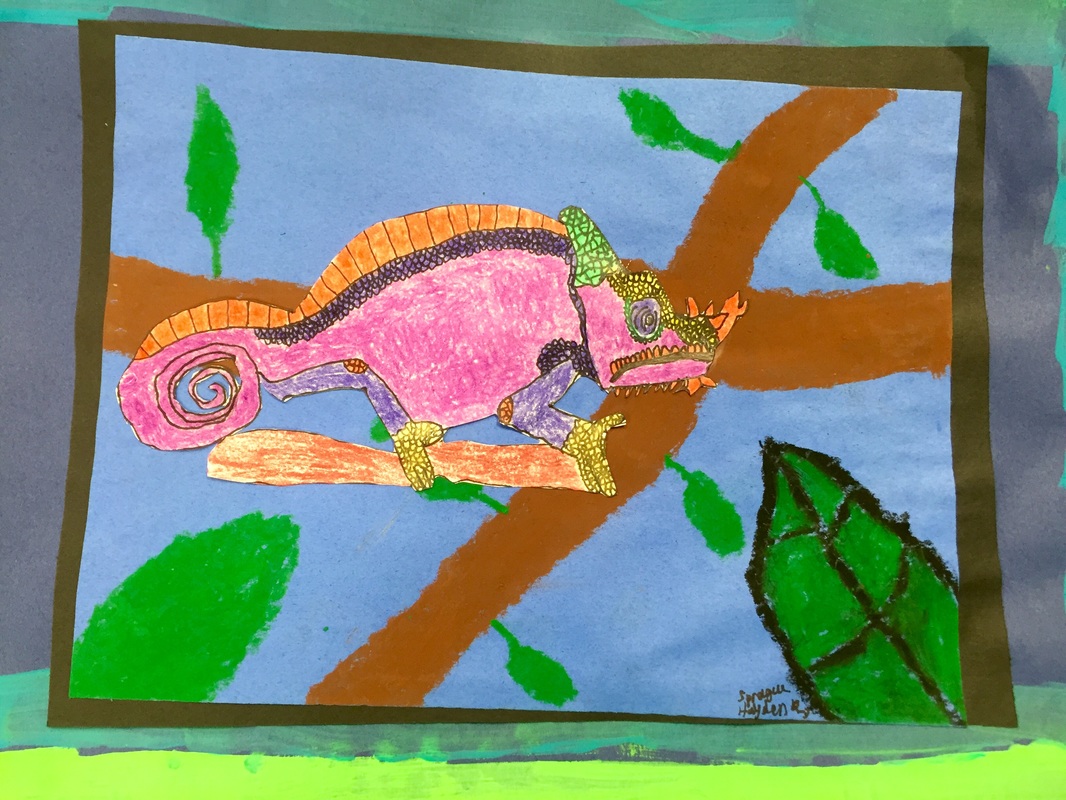
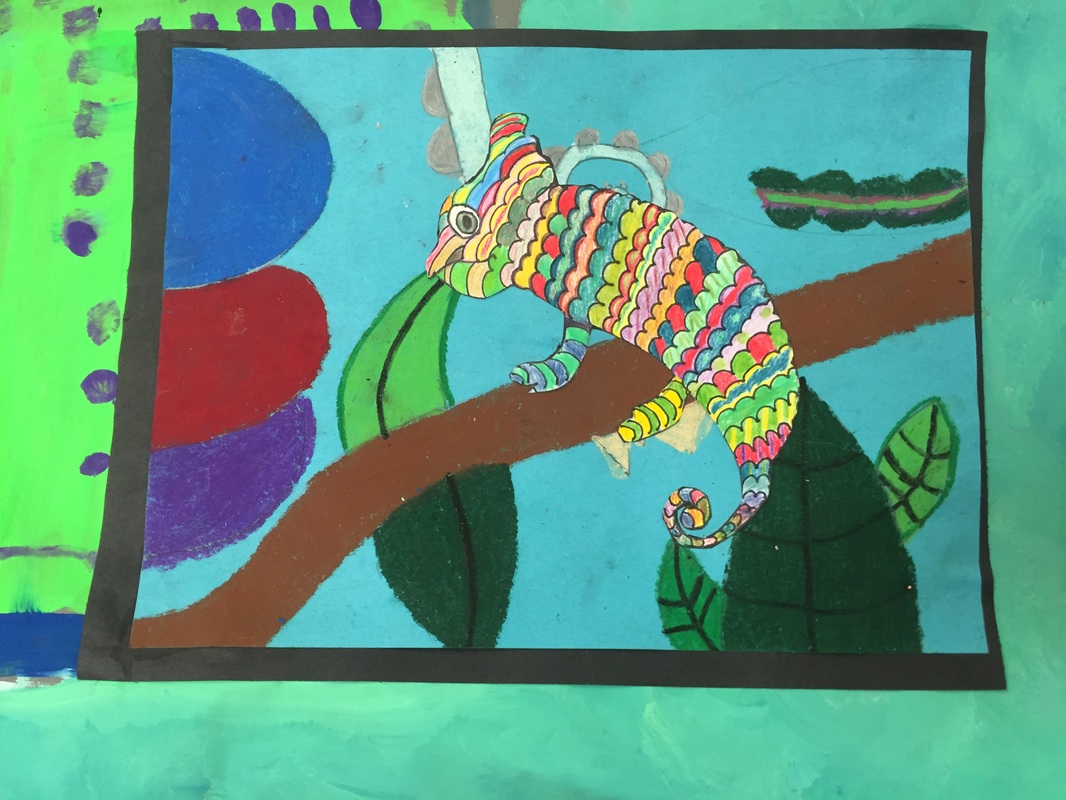
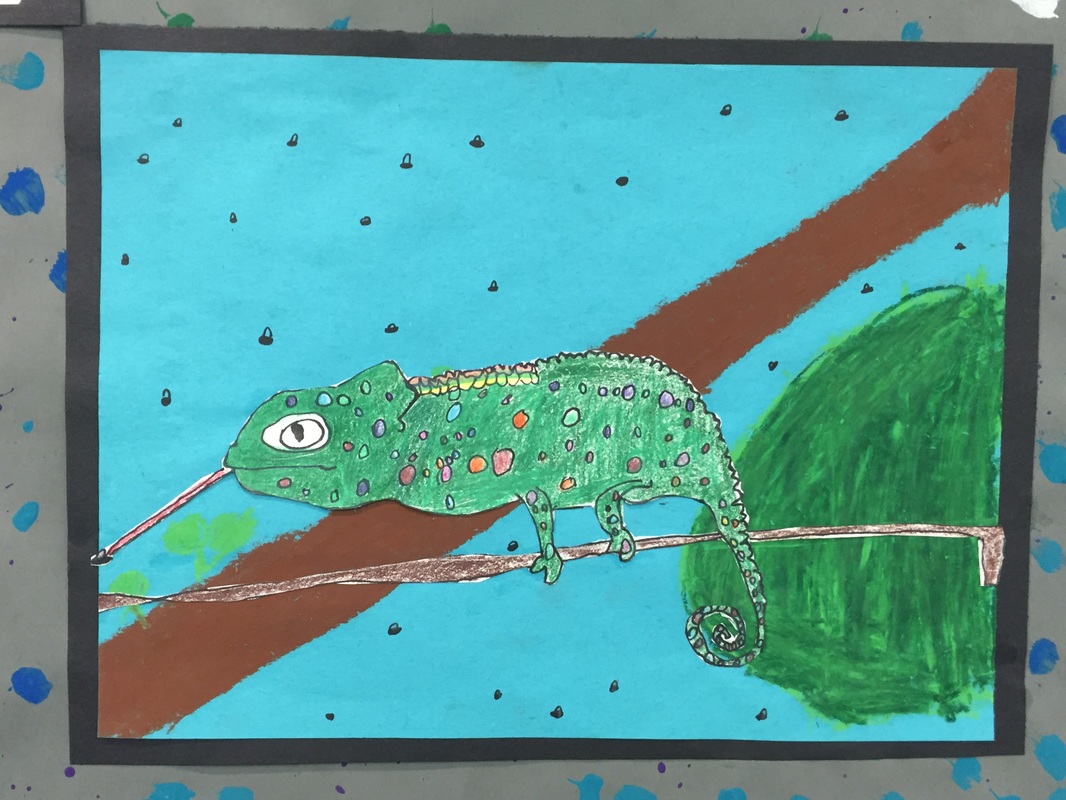
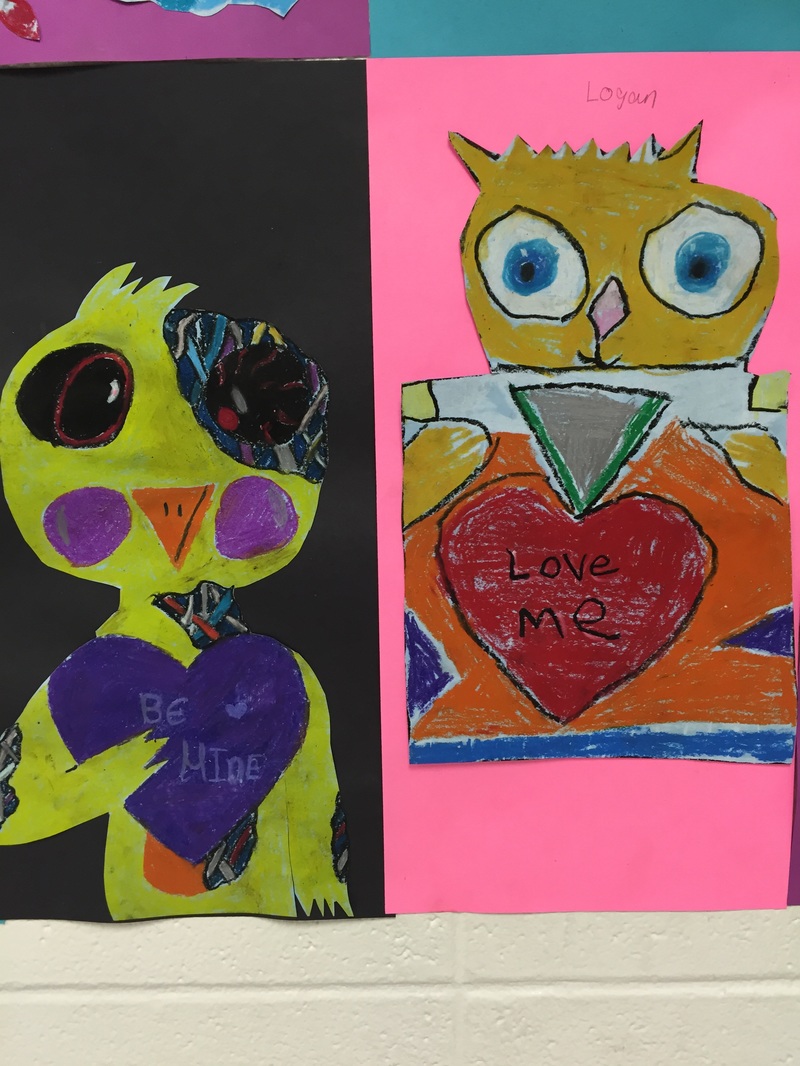
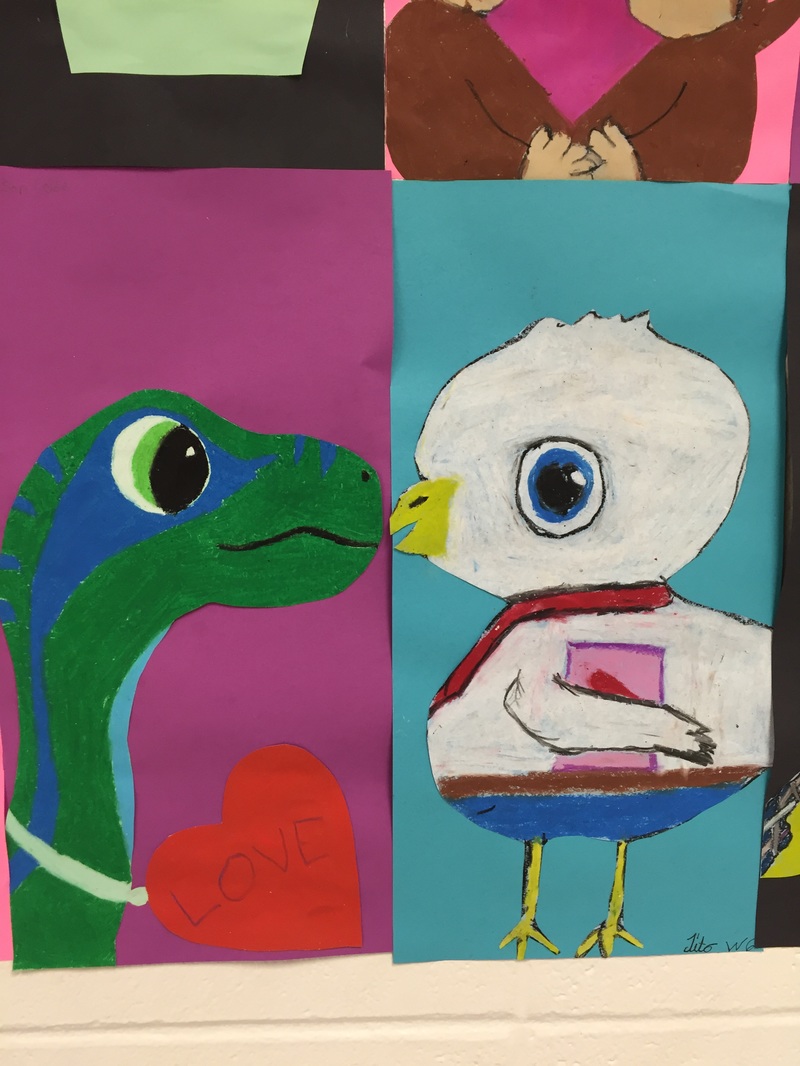
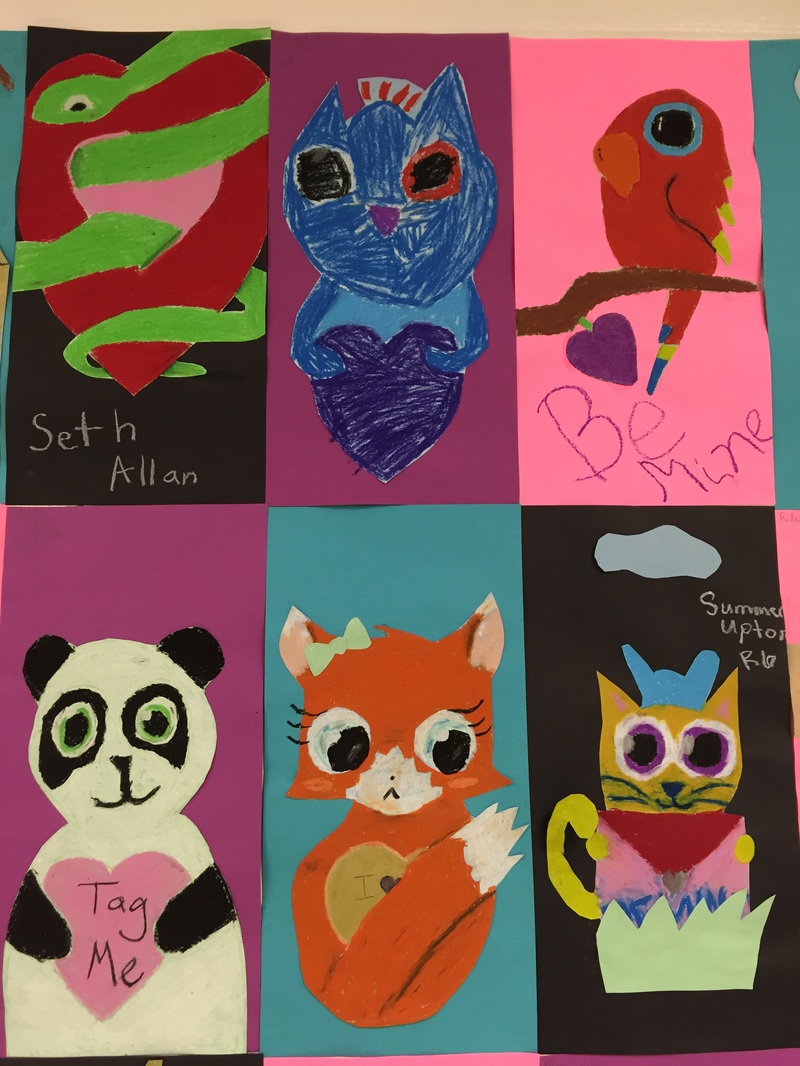
My students really enjoyed this project and I did too because it wasn't crazy messy....and it involved a lot of different media we don't use very often....also, MANY students were highly successful. I was sick throughout the entire process so I didn't take any 'in progress' photos, I only have finished products to share, but I hope you find some inspiration here. 
Day 1
We started by practicing some bug sketches. I made up a packet of visuals for each student (4 packets per table, shared amongst all the classes). Students could pick a bug from the packet, but they needed to choose something a little harder than a lady bug, because some of the bugs are pretty simple. They needed to practice on a dry erase board and then they could start on the real paper which was 6X9. 

I had cut the aluminum metal roll into roughly 6X9 sheets. Some were a little bigger, some a little smaller. I encouraged students to draw the insect as big as possible on their paper so they would not waste too much of their aluminum. They did not need to draw thin little antennae or skinny little leg segments, as we would add those later with wire, but they did need to study the bug enough to remember those parts. 

Once they had a good sketch, they brought it to me so I could tape their sketch to a piece of metal. I tried to match up the sketch with the right size piece of metal. If they drew their bug too little, I made them try again. A few kids had the idea to draw the body and the wings separately, like with dragon flies and butterflies, and those turned out great. 

Some classes were not giving me much detail in their insects so I showed them Austin's butterfly and it helped inspire some kids to try again when I gave them a little more specific feedback. 

To transfer the bug to the metal, students followed the directions in Nichole's video. We only watched part of it, as they would not be cutting it out or coloring it today. 

​Supplies:
6x9 paper
dry erase boards and markers
pencils
colored pencils (to transfer to aluminum)
thick sheets of aluminum (I buy from school specialty)
felt
plastic metal tool (i tried to find a link to this but I can't figure out what to search for)

Picture
Day 2
I was absent for day 2 of this project. So I had to leave a sub plan. Here are the instructions that I left for the sub. 
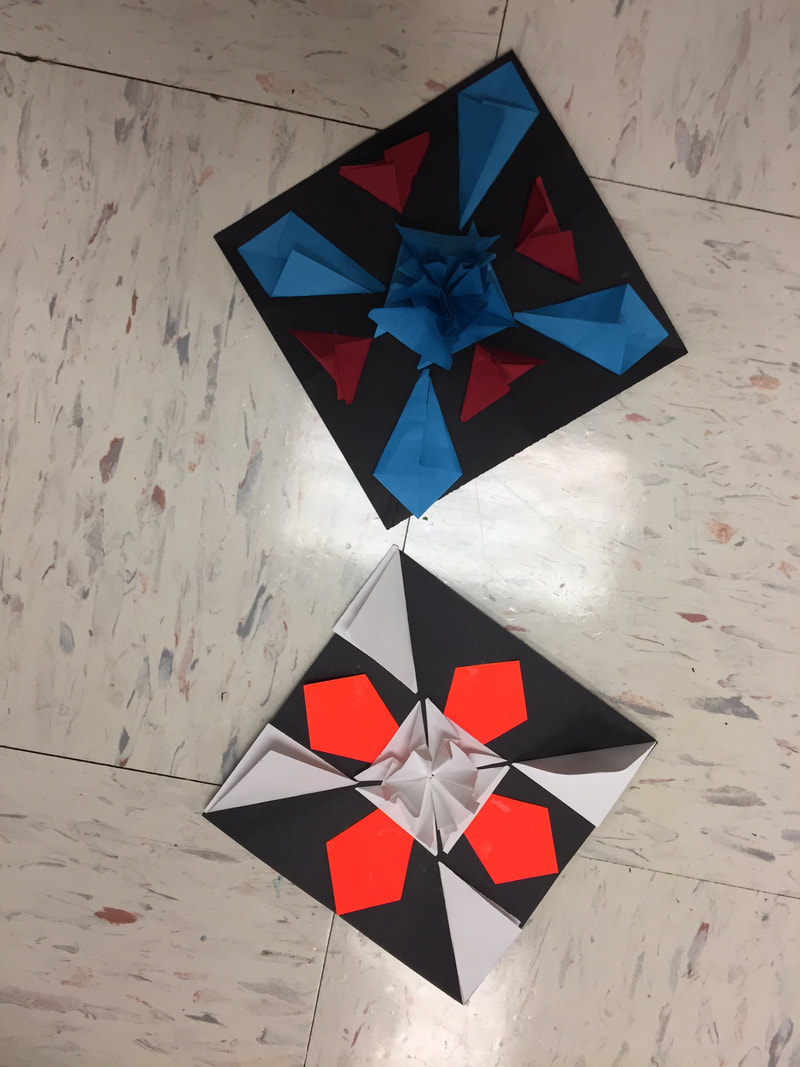
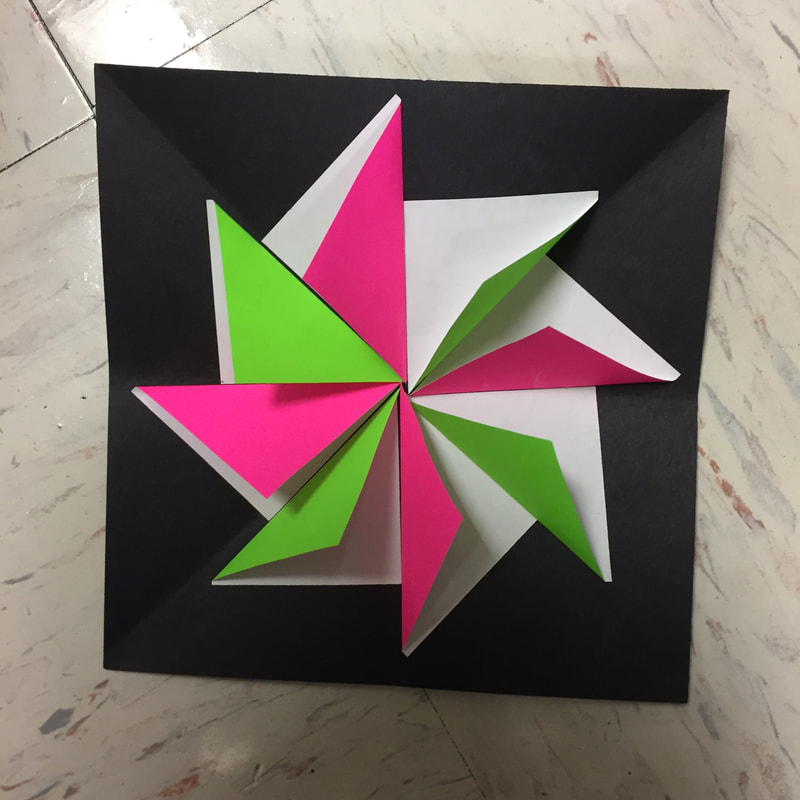
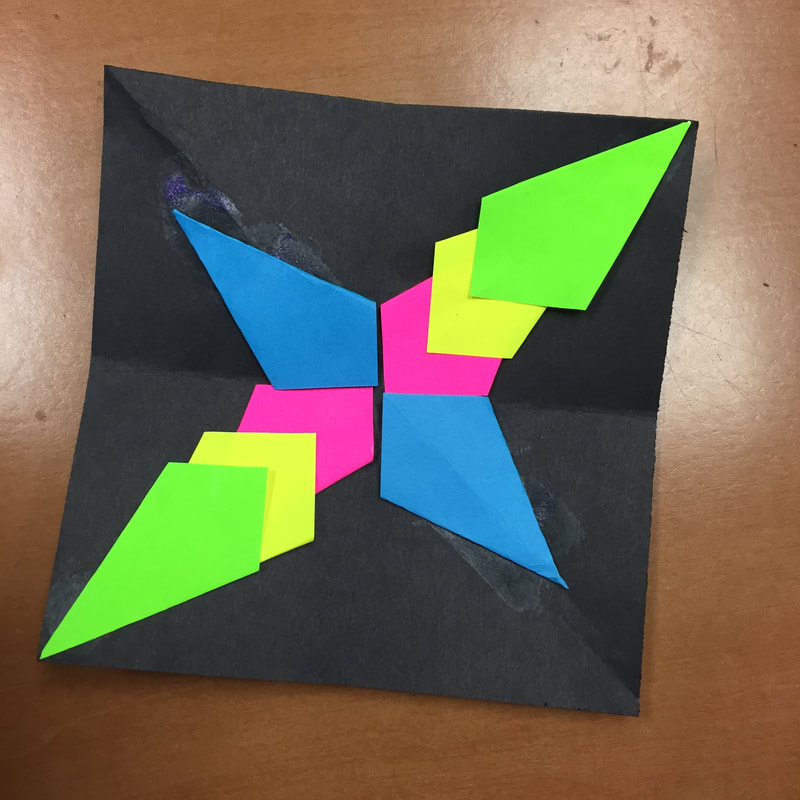
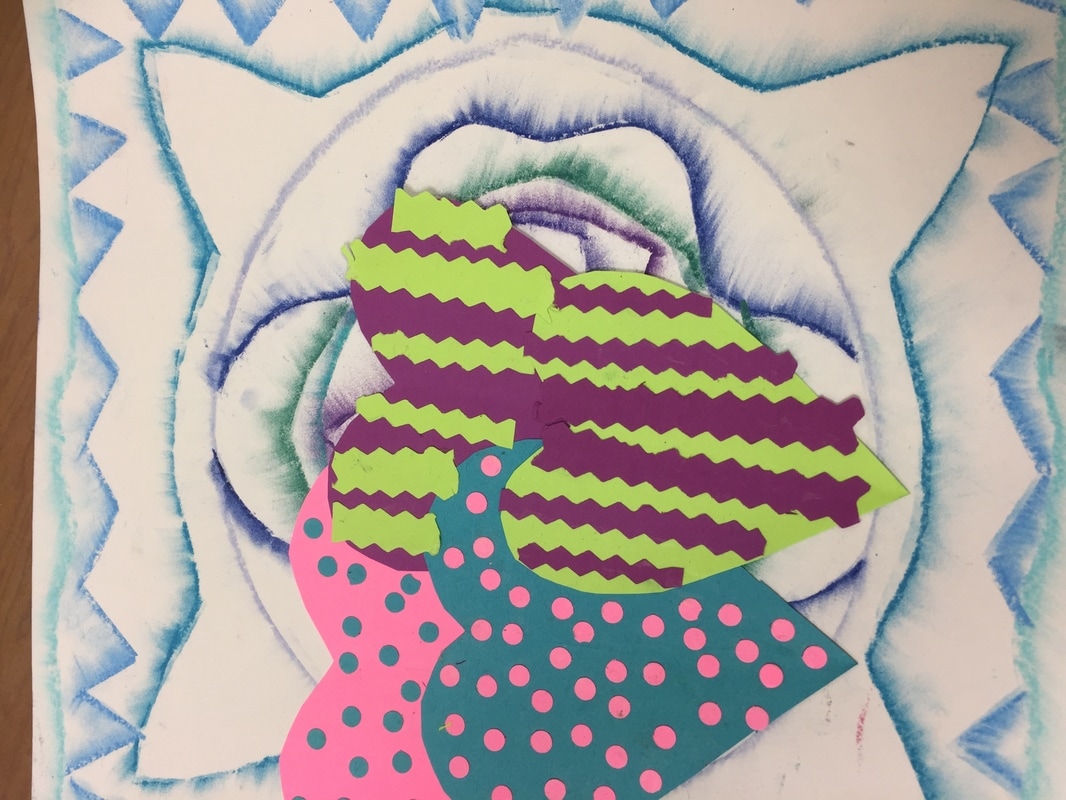
Today’s lesson involves making a paper collage, which will be the frame for the insects we started last time. Students will need to use a color scheme for their frame. The possible color schemes are listed on the board on the west wall and we have been discussing color schemes for a while so they should be able to pick one quickly and easily.
Project Steps

  1. Explain that students will be making a collage. A collage is a design made by cutting and gluing shapes to a paper.
  2. Students will use scissors and glue sticks to complete their designs and if they need extra glue sticks, they can get more from the container at the front of the room. If they want to some of the papers, that is fine as I taught them some easy folds at the beginning of the year like the kite, hat and samurai fold.
  3. As they cut out shapes, they need to put their scraps in the paper pal or in the paper store tub for others to use. The paper store tubs are labeled and the big background papers are spread out on the table at the front.
  4. Don’t leave the scraps in the table top tubs as those are filled with small ‘good squares’ that we will be using all day. You will need to point out where the paper is for the paper store and send them up 1-2 tables at a time to go shopping for paper for their background. While some are shopping, the others can go through the tubs on their table to pick out colors for the collage. Some of the table top tubs may not have all the colors they need for their collage, it is up to you if you want to let them go to other tables, I would probably let them if they ask but not if they just want to wander around.
  5. When students have finished their collages, they will put them in the drying wrack, but students need to make sure their NAMES ARE ON THE BACK. I put pencils on the tables for this purpose.
  6. If their collage is really simple, encourage them to go back and add more small shapes and details so that it will look interesting with their insect on top. They can’t just glue 3 small squares and call it finished. Encourage them to use patterns and they can overlap various shapes if it looks interesting. If they want to cut out a leaf shape, they might want to fold the paper so that it is symmetrical and lightly draw it with a pencil before cutting it out.
  7. If they finish early, they may get a coloring sheet or a free sheet or origami, but they must stay busy while others are finishing.
  8. I left a sweet book on my desk if you find that the classes are finishing quickly and you want to read it either at the beginning or the end. Please try to maintain the schedule, there are only 2 minutes between classes so if you get off track it throws the whole day off.

Tips about the drying wrack for the sub:
  • Try to only put one class on each side of the drying wracks.
  • When the class leaves, put a note on top so that it is labeled with the teachers name or the class code so I will know which class it is when I take them out.
  • You will have to turn the drying wrack around after each class leaves so the next class will have an easily accessible side to put their papers in.
  • Always start filling the drying wrack from the bottom so that everyone’s paper will fit.
  • After two classes, trade out an the full drying wrack by setting it on the floor and put an empty one on that table so it is easy to fill up again with the next two classes.
  • All six sides will be completely full by the end of the day and with the biggest classes, you might have to double up some shelves so they will all fit.

​Supplies
2X2 squares of construction paper and other specialty paper like scrapbook paper
12X12 and 9X12 background paper
glue sticks
scissors
pencils

Day 3 
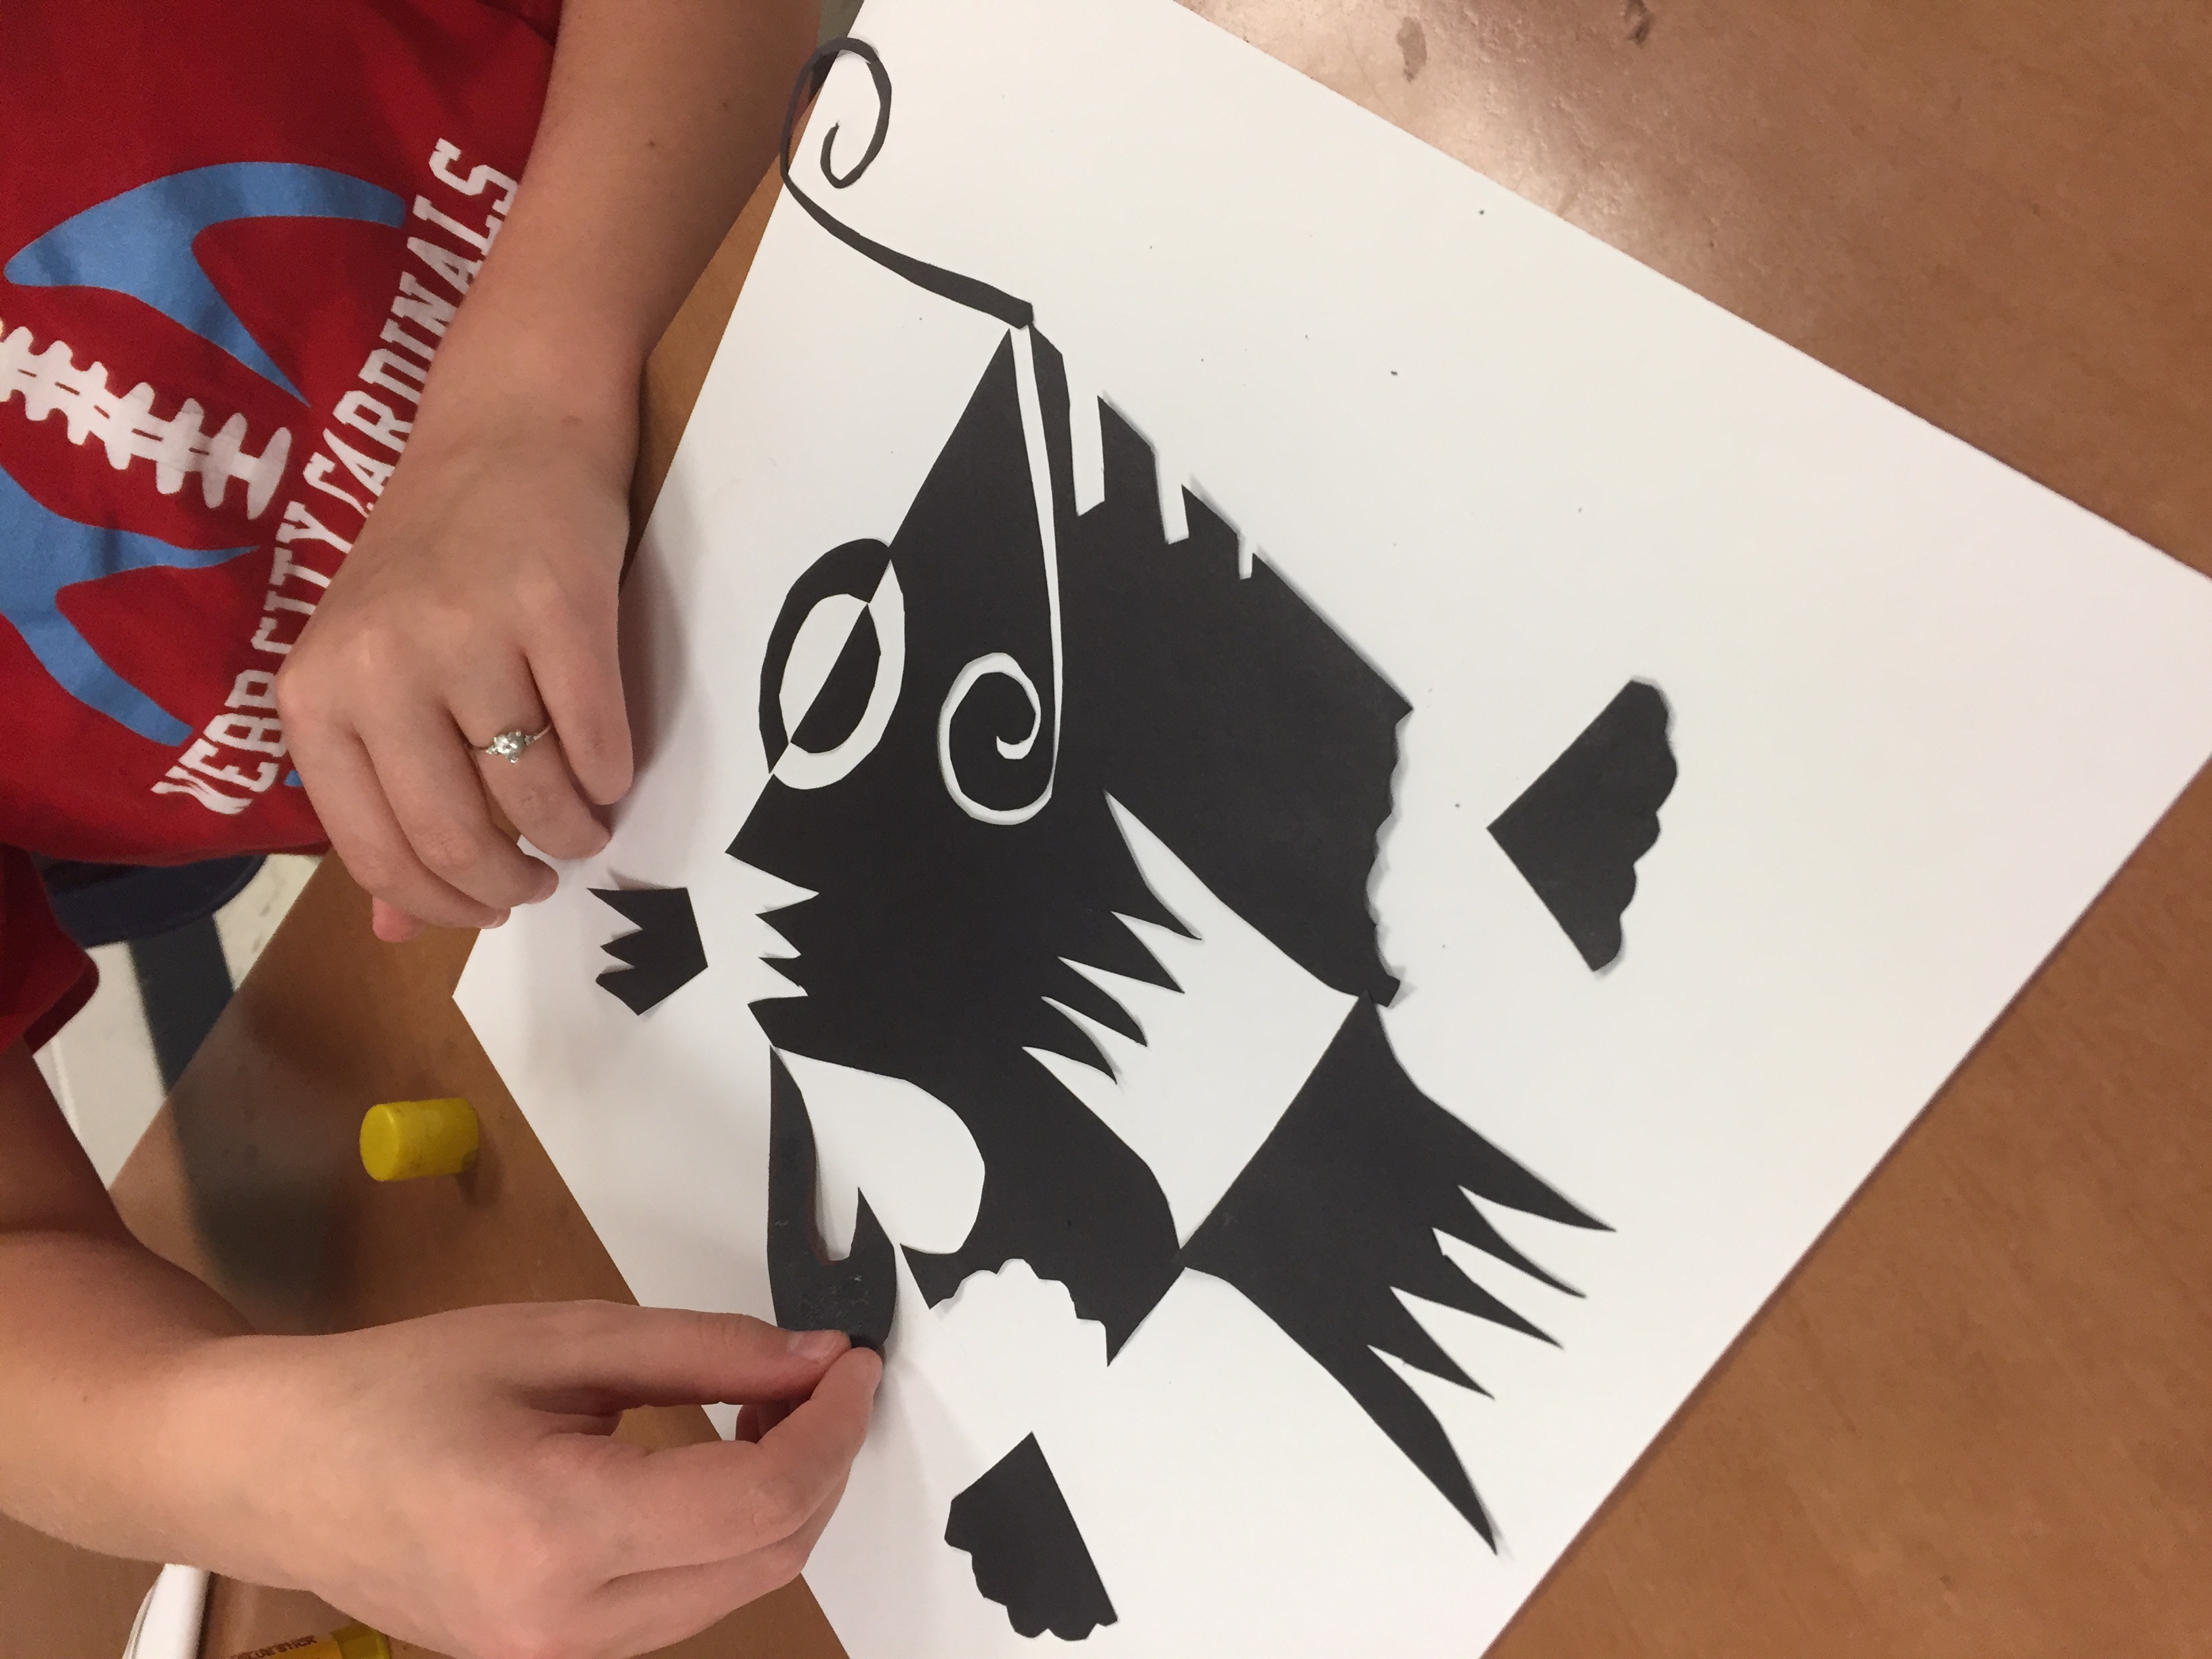
After being gone and very sick, I was finally back to finish up the project. Today, I demonstrated how to cut out the insects, how to add wire or pipe cleaners and how I would hot glue their bugs to their background. 

Students used skewers and chop sticks to wrap wire, like is shown in the video. They used permanent markers to color their bugs and scissors to cut them out. I had students save their metal scraps by wrapping them up in their old bug sketch, which still had a little tape on the edges, they made a little envelope so save it for later. Then they used glue dots to attach the wire. When they had everything ready, they brought the bugs up to the front where I was waiting with my glue gun to attach their insects. 

I was still not feeling great so I made a little video to help explain the process for getting wire and using glue dots. I think I had another video but I can't find it so I think I deleted it.....

Supplies
permanent markers
scissors
glue dots (I needed about 4X this many)
​wire (twisteeze, pipe cleaners, stovepipe wire)
hot glue gun and hot glue
​chopsticks for wrapping wire
Picture
Picture
Picture
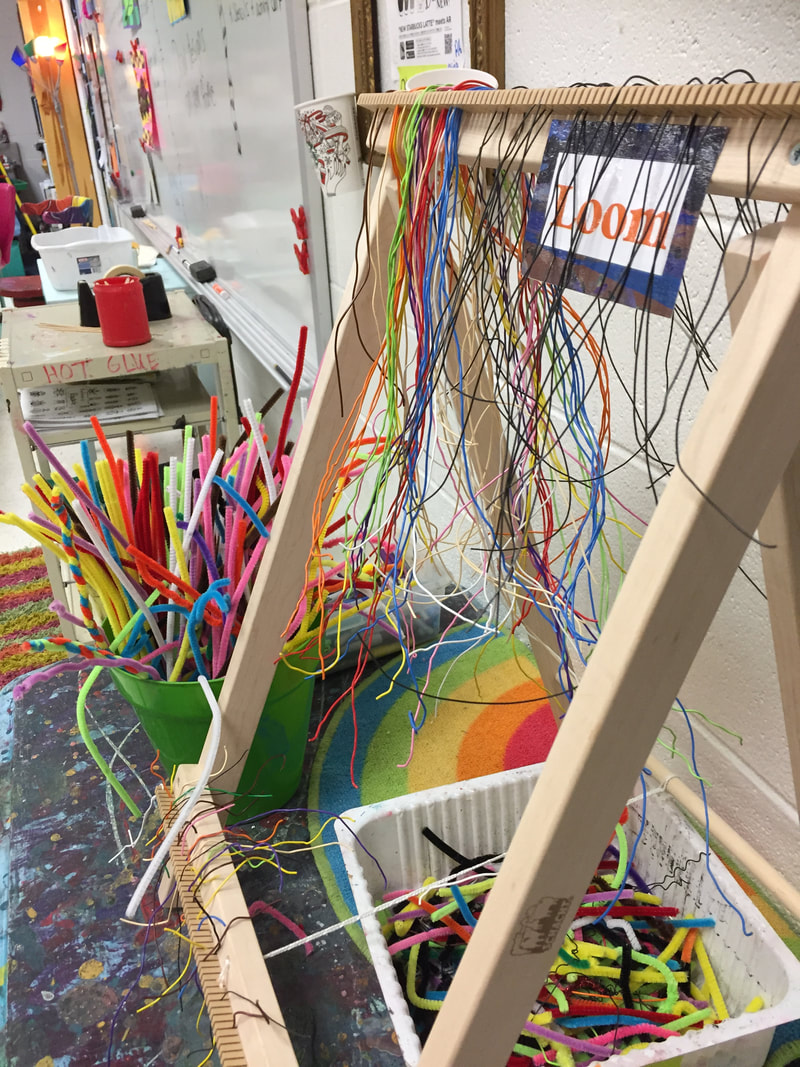
I draped twisteeze wire over my loom so that it would be displayed easily! Worked like a charm.
0 Comments

Symmetrical Halloween Collages

1/14/2018

0 Comments

 
I Last spring, we made Chris Uphues Happy Collages for Valentines day. Students made individual 12X12 collages, and created an additional 'character' for a collaborative mural. For their individual collages, we used the chalk stencil design method to create a background. This year, I wanted to use the same idea to make collages for halloween. I think I like them even more! 

We focused on symmetry and I had a few specialty papers available for students to use like halloween scrapbook paper and white sheet music.  I showed them a couple of examples of Target 'cute' halloween stuff and encouraged them to make something 'cute' as opposed to gory, bloody, scary. I had a few try to argue that Halloween was supposed to scary, and I said listen, "You are making these things to display in a children's school, not a haunted house." Most of them could agree with me after that. 

I did show how how they could cut the eyes out of a skull or they could just cut black paper and glue it down for the eyes. Also, I demonstrated how to draw half of a pumpkin along the fold and then cut it out so it would be symmetrical. Most of them 'got it'. The candy corn was the hardest thing to make symmetrical! 

I had an inspiration board that had some basic fall and halloween symmetrical shapes. A few of my students do not celebrate halloween, so I encouraged them to do a leaf or an apple since those things are symmetrical and seasonal during autumn. 
Picture
Picture
Picture
Picture
Picture
Picture
Picture
Basic symmetrical shapes idea board
Picture
Picture
How amazing is this 5th grader's Jack Skellington?!
Picture
'Cute' Target skeleton
Picture
Cute Target Pumpkin
Picture
Cute Target Black Cat
Picture
Cute Target Vampire
Picture
Supplies
Day 1
(We made the chalk stencil background this day, I told them if they wanted to make a black figure like a cat or a bat, they might want to use gray for the background)
12X12 Paper (we used gray or black)
Chalk
12X12 paper for the stencil (again, gray or black)
Pencils for name
Scissors

Day 2
Chalk Stencil Backgrounds finished and ready for collages to be added on top
Scissors
Glue Sicks
Markers
Pencils
Colored Paper in all shapes and sizes and colors (Lots of orange and white)
​Trash Tubs for each table
Mural Paper
Hot glue gun to hot glue each figure to the mural

Overall, I would say that this project was very successful for every student! I enjoyed watching them use symmetry and plan their designs. I told them that LOTS of kids were making pumpkins and skulls, so if they chose something like that, they should think of a way to customize it and make it unique, or else choose something that NO one else is probably attempting like an owl or a witch or a spider......I really wanted them to cut out as many elements as possible, but many of them drew stuff on which was okay too. 
Picture
My Teacher Example
0 Comments

3D Tumbling Block Mural Challenge

1/14/2018

0 Comments

 
Picture
After seeing someone post about ThankYouX on Pinterest via Artsonia, I knew I really wanted to develop a project that would allow my students to make some murals, but I didn't want to have to do all the assembly work myself. We had just finished optical illusions and we needed a one-day challenge that wasn't too messy. 

We used Crayola Supertip makers to add designs to our murals. Each block was individually colored based on a color scheme and then assembled with tape on the back. I had a tape dispenser at each table for each group, some groups using clear tape, and others using masking tape. My students had to work in groups which is always challenging, but a FANTASTIC experience for them. 
Picture
Picture
For this project, I copied about 400 (but quickly realized I needed about 800 for my 370ish students) 3-D squares on regular copy paper. When each class arrived, I numbered them off. As they walked into the room, each table had a number 1-6. Each group was comprised of 4-6 students.

​The students had to work as a team to select a color scheme and design their mural. ​Because I let the teams have some autonomy, all of the murals ended up quite different. Each student had to create at least one block, but then they could take over the job of cutting or taping if someone else really wanted to color more. I wish I would've made them do more intricate designs, but it was a one-day challenge so I was happy with the overall finished product. I posted a couple of design idea sheets in the room to inspire those 'design' challenged kids. 

I have a problem with students who grab one piece of paper, mess up a tiny bit and then want to throw it away. I did not let students throw away their squares. If they had an 'oops' then I would try to pawn it off on a really motivated kid later in the day to finish or fix. 
​
TEAM Collage Optical Illusion
This team challenge MUST involve everyone in the group. As a team you will need to decide on a color scheme. Everyone MUST color ONE piece, but some people may color more than one.

Assign a job to each member of the team: pick up trash, organize supplies, taping shapes together, cutting out shapes, team leader--this person helps everyone else and oversees the design

  1. As a team decide on a color scheme: cool, warm, primary, secondary.
  2. Decide which side will remain uncolored with markers. Everyone must abide by the plan and leave ONE side blank.
  3. Use markers to design two sides of the 3-D cube shape.
  4. Cut out shape, leave the black lines attached.
  5. Lay all the pieces out to make a cool design.
  6. Assemble with tape on the BACK of the shapes.
  7. Write teacher's name on the back of mural in pencil.
  8. Draw an arrow on the back that points to the top of the mural in pencil. 

PictureThe students loved the 'tumbling block' design, so I printed off some coloring sheets from this site for them to have their own to color.


​

​


Picture
I reconfigured the cubes to fit 2 per page this semester so that I don't use up quite as much paper.
Link to tumbling block coloring sheet.
​Link to 3-D Cube printable. 
Picture
Picture
Picture

​Overall, this was a fun one-day challenge for my 5th and 6th graders. We have about 47 minutes for art. 

Supplies:
Copies of 3-D cube (at least 1 per kid, plus many extras for motivated groups
Markers (we used Crayola Super Tips so that there would be tons of options for color schemes)
Scissors
Tape
Design idea sheets
Trash bins at each table (optional)
Pencils (for names on the back)


BONUS: Paintbrush rocket's Tints and Shades tumbling block paintings
​
Picture
Picture
0 Comments

Radial Symmetry Paper Relief Project

9/3/2017

2 Comments

 
Picture
 While it was a little challenging to teach ORIGAMI folds at the end of the day on a Friday (the Friday at the end of the first full week is hard for kids and teachers because we are all just done by the end of the day). Once the kids got back from the weekend, they were much more able to grasp the basic folds.

First, I used the Power Point from Art with Mrs. Nguyen to help explain the difference between RADIAL Symmetry and Linear Symmetry which has only one line of symmetry, like a butterfly. Then, we used her youtube video (and I demonstrated while holding up a 12X12 piece of paper) how to fold each of the 3 folds that are used in the Powerpoint: hat fold, kite fold, and samuri fold. Students practiced with 6X6 squares of newsprint.

I polled the class to see who was an 'expert' who had done a little origami and who was a complete newbie. Since I have never taught any origami folding to my students, many of them were complete newbies. I explained that the three folds we were practicing would help them to create many basic origami things using the books later---but if learning the process by watching me felt hard---don't despair because I actually think it is easier to use the books (I pointed to a bunch of books that I checked out from the library) because they have photos of each step and arrows that show which direction to fold the paper. Also, if they couldn't see how to fold the paper, they could always ask an expert sitting nearby and that might help too!

Some kids got the folds right away, while others really struggled. I think I even had a few kids cry....I hate crying the first week...it sets a bad tone for the rest of the year. I told them that as a teacher, I think origami is hard to teach---it is like tying your shoe, until you 'get' it, it is so hard, but once you get it, it is much easier and you can do it without even thinking. For students, this is really challenging, and frustrating and eventually, they can get it, but it takes practice. 

After practicing the basic folds with the newsprint, I gave everyone a 12X12 black square and had them fold it in half both ways like a card and diagonally both ways (like the beginning of the samurai), to show all the lines of symmetry so that they could start to plan out their designs. Then we wrote our names on the back. 

Students had about 5-8 minutes to start their designs, many of them chose to glue some flat pieces to the background to get it started. I gave them a big tub of 2X2 squares, a mixture of neon origami paper cut down, scrap construction paper and other scrap paper. This is the tough part about this project....you need a LOT of 2X2 paper. I had actually started cutting the squares last year in anticipation of the project and probably spent a good 3 hours cutting more throughout the week so that students would have enough of each color to make their designs balanced. In the TpT lesson plan I bought, she used 3X3 squares, which would probably go a lot farther---we used the smaller ones so it took a little more for each design. 

We used glue sticks to glue the paper down. 

***NOTE: I have taught this lesson in the past in one day....I did not teach the origami folds and I did not use a powerpoint. We focused more on making it balanced with the colors and we used really simple 3D shapes. When I handed out the background paper, I had pre-folded it into 4 even quadrants and I told them to make it balanced---whatever you do in one quadrant, you do in all the quadrants. Sort of like a quilt square. Students were highly successful---but it was a ONE DAY lesson.....I let them take it home the same day and I did not grade it. Here is a blog post with examples (I can't find my images anywhere)

Picture

Day 2

​I reviewed the folds quickly by pointing out the big 12X12 versions I had tacked to the whiteboard. I also printed out the handouts that came with the TpT lesson---and had those available for students to refer to if they forgot one of the folds. I gave them the entire day to work on creating a symmetrical design. I showed them a couple of examples as a reminder that the design had to be balanced and it had to be 3D. I also mentioned that they could use other types of folds to make it 3-D, not just the ones that I taught them.

Since these had to be put in the drying wrack, I encouraged them not to make them too tall as things could get ripped off pretty easily. Also, students needed to give their designs the SHAKE test. Pick it up and shake it to make sure nothing falls off before taking it to the drying wrack. 

If students could not find the right paper color to finish their design, they were allowed to go to other tables, but they were not allowed to fight over the paper (I had paper wars in a couple of classes with kids hoarding the neons and not sharing) and they weren't allowed to go to another table just to talk to a friend, they could only grab what they needed and get back to their spot. They liked the freedom and independence to move around the room! I would rather them get the right colors than just glue random stuff down in order to hurry and be done quickly. 

Early finishers were allowed to help a friend or try out the origami books. I always have origami for early finishers, but I hope that by showing them a few basic moves, they will be more willing to try it on their own as they will have a little confidence and some background knowledge. I explained the difference between the practice newsprint paper and the REAL origami paper--mine is white on the back---and it can be very expensive so don't waste it!! 

I noticed lots of kids naturally spinning their big 12X12 papers and noticing the optical illusion effects. Certain colors and the neon papers on the black background were tricking their eyes in really neat ways. 
Picture
Picture
Picture
Picture
This one wasn't really radial design, but I loved it so much!!

Day 3 Spinners 

​Day 3
Most kids were ready to put the finishing touches on their designs---some needed an entire third day for the project, while others just needed a minute or two to finish or fix pieces that had fallen off. This was the day I mentioned that I would be sending them home at the end---rather than stuff them back into the drying wrack and wait for me to grade them, I was worried they would fall apart if they were all stuffed into my cabinet over Labor Day, it would be better for them to take them the same day. I explained the grading---if the design was balanced and used all three of the folds I taught them they get a 3, if it isn't balanced or they don't use any 3D paper techniques it is a 2 or 1. Most kids got a 3, but a few got a 2.5 or a 2 if they didn't use any of the folds I taught them.

I also explained how I pick artwork for my art displays. I pick a few from each class for each project and hang a big display in the cafeteria. I try to pick something from every student between now and Christmas. And if I pick theirs, they get it back later. Everyone else gets to take theirs home today. I told them please don't have their feelings hurt if I don't pick theirs this time, I can't pick them all, sometimes I already have another design similar to the one they made and I have to pass over theirs.

Okay, I really didn't want to start a whole new project for the ones that were done, but in most classes, about half were completely done or only needed 5-10 minutes. So, I made 6X6 black squares so the kids could use their origami and design balancing skills to make a MINI radial spinner to take home. Very first class, a kid asked, "do we HAVE to make one?" YES!! You have to make one if you finish with the big one. The big one is graded, so it is a priority, I need it first. The same kid was the one that exclaimed, 'THIS IS AWESOME!" about his mini spinner. 

To make the mini spinner, you fold it in half like a card both ways and diagonally both ways, just like we did the big one and the samurai fold. Don't forget to fold it, because a couple of kids forgot and theirs would not spin without the center point on the bottom from the folds, it is like the point on a top, it helps it spin. Also, if anyone had trouble with their spinning, it was because they had glued paper on the bottom of the design and it was like a brake---it created too much drag and theirs would not spin.

After folding the black paper, use the origami folds to make it balanced and symmetrical. I gave them a mini lesson about the color wheel. Opposites like blue-orange, red-green, and purple-yellow (also pink+green) give off a more powerful visual effect when spinning, if you put them side-by-side on your design. Also, if you use white paper (with the black background), it is the opposite of black and it looks really cool. A girl used orange on black and we could see a blue dot that wasn't actually there! When the designs spin, you see shapes that aren't actually there. Our next project will be an optical illusion, so this is a great intro!

Students loved making the spinners. IF they had time, they could even make two! 4 samauri folds in the middle made a great handle. When they were finished, they spent time practicing their spinning on the floor or the table. The fidget-spinner obsessed kids were in heaven. Let's be honest, the neon paper looked amazing...I wish I would've had a blacklight because it practically glowed in the dark. Next time I do this project, I will definitely bring a blacklight and buy a LOT more neon paper. 

Update: I had a 500 pack of FLUORESCENT ORIGAMI paper from School Specialty. I cut it down to 2X2 so it would stretch amongst all of my students for this project. It is kind of expensive but really, really vibrant.
Picture
Picture
If you wanted to simplify for younger students, and do this project with everyone, THIS would be a highly successful design. Make a pattern of diagonally folded papers.
Picture
Picture
2 Comments

Magazines

5/23/2017

0 Comments

 
Picture
Every time I do this project, I am a little disappointed with the results.

Students can learn a lot about perspective, texture, color and drawing by selecting a magazine image and attempting to draw the other half. For this project, they had to choose an image that was a half page or full page, and then I used my paper cutter to cut it in half.

They saved the other half with a paper clip clipped to their drawing paper and used a glue stick to attach the main half to their paper. They always have trouble 'finishing' the drawing so that it fills up the page. 

After lightly sketching out the rest of the image and adding other things to fill up the paper, we used colored pencils to color, attempting to match the colors as closely as possible by layering. This colored pencil technique video was very helpful in explaining how to layer color. 

Picture
Picture
Picture
Picture
Picture
Picture
Picture
Picture
Picture
Picture
Picture
Picture
Picture
Picture
Picture
Picture
0 Comments

Chris Uphues Happy Collages

3/4/2017

0 Comments

 
After creating the Chalk Stencil designs as a way to introduce chalk, messy procedures and cutting to my 5th and 6th graders, I couldn't shake the idea that they would make a great background for a collage. 

So for the students having art 2nd semester, we looked at the artwork of Chris Uphues. I created a slideshow with examples and talked about how he is a current, working artist. I explained how he sells his designs, creates murals, and also sells paintings and small items like patches. We started they day by watching this catchy, sweet little youtube video and then looked at the slide show. 

I was afraid students would find his work too babyish, but for the most part everyone was on board. Especially since they could make 'cute' food or hearts. I spent time teaching them how to fold a piece of paper in half to make a symmetrical heart. It is incredible how many students have never learned that technique. I'm hoping it will pay off when we start a big mask project later this year. 

Students could make any design they wanted, it just couldn't be too simple. Ex. one heart with a smiley face. I showed them how to draw two eyes, fold the paper and cut the exact same shape out that would match. Sometimes students get frustrated that they can't make the same shape again. 

We used glue sticks to attach the various pieces. If they finished with their main collage, they were also required to make one for a mural. The purpose of the mural: to make people happy. 

Once they made their shape/food/face, they had to show it to me for 'quality control'. I would not let anything that was sloppy or messy go on the mural, they had to erase pencil lines, draw things in sharpie and make sure stuff was glued on well. They would not be getting their pieces back, but everyone's would be hung up. 

I hung the murals and a few selected collages together around the building. They make me so happy to look at. 


Picture
We had a little fun with photography. Early finishers could cut out faces for some of my fake food and tape it on. Okay, the apple is real. We couldn't resist making it 'cute'.
Picture
It wouldn't be 2017 if there wasn't a poop emoji and a slenderman on the mural, now would it?
Picture
This katana is one of my favorites!!
Picture
This pizza makes me incredibly happy!!!
Picture
Mini cute art supplies.....be still my heart!!!
Picture
Picture
Picture
We used 3 big huge pieces of bulletin board paper as the background for our murals. I put a little hot glue on the back of the shape, and the kids stuck it wherever they wanted on the mural.
0 Comments

Notan

12/6/2016

1 Comment

 
This project had a very high success rate and the majority of my students could finish in one class period. 

First, I handed each of them a handout (free on teachers pay teachers!) and had them read about the Japanese paper cutting.

Nōtan is a Japanese design concept involving the play and placement of light and dark elements as they are placed next to the other in the composition of art and imagery. I think I remember doing something like this in my Basic Design class in college. 

(My art teachers and I have been complaining about how hard it is for students to follow basic instructions when it comes to cutting and gluing, as the 'crafty' stuff has been phased out of regular classroom curriculum in recent years, they have less and less exposure to the basics).

This project helps them to visuals how to cut something and then flip 'half' of the shape, exposing the negative space. I also like it because they don't have any scraps, they use everything that they cut out. And it isn't seasonal, it can be done any time of year. 

Supplies:
12X12 white background paper (I also had red/green)
6X6 black paper (I also had red/green)
scissors
colored pencil for drawing
glue sticks
After reading and discussing the handout, we watched a little video which really helped them understand how to do this. The artist in the video is using some sort of weird glue, so they were a little baffled by that. I told them to make sure they use glue sticks so they don't have a gluey mess on their tiny little cut outs. I also had a few envelopes so they could save tiny things for next time if they didn't get everything glued down. 

In the future, I could combine this with a lesson about Matisse. 
Picture
Picture
Picture
Picture
Picture
Picture
Picture
1 Comment

Chameleons

9/21/2016

0 Comments

 
Picture
While searching for one final BIG unit to wrap up the year, I really wanted my 5th and 6th students to focus on texture and detail. The chameleon project was very successful for many of my students. 

Day OnE

I had hidden a bunch of chameleons around my room years ago for a substitute and one day my students pointed them out and asked what they were for. Well, they were just for fun. 

For this unit, I started by gathering books about chameleons from the library. I hung up several pictures of chameleons around the room and I created a packet of visuals with images of chameleons for students to use as reference while practicing in their sketchbooks. 

We started learning about chameleons by looking at this video. Then we practiced drawing chameleons in our sketchbooks. Once we had practiced, it was time to draw the chameleon on white paper. I encouraged students  to crop and enlarge the chameleon. 

Day Two

Picture

After drawing the chameleon on white paper, we used skinny sharpies to draw LOTS of texture. Chameleons are covered in scales so students had to draw the texture. Also, if their chameleon needed to be grasping on to a branch, I encouraged them to draw the branch and outline it with the skinny sharpie. 

Once students had everything outlined, we used colored pencils to color the chameleons. Students could make their chameleons as realistic or wild colored as they wanted. I showed them a video of a time lapse of an iguana drawing as an example of how much time and layering it takes to color something hyper realistic with colored pencils. 

While students were coloring, I pulled them over to a painting station to paint a frame for the project. Students could choose between green, blue, or gray paper. At the painting station, they could use cool colors to make a design around the edges of the paper. 

Day 3

Picture
Now, before getting out the chameleons in order to finish coloring, I explained that first, we were going to use oil pastels to create a background. I explained that if we were taking a photo of a chameleon, and we were using a special lens with our camera, most likely the camera would zoom in on the texture of the chameleon's scales, which would make them really in focus, leaving the background out of focus.

Today, students chose a background color of 8X10 construction paper and used oil pastels to draw and color the background. It could be a dessert, a leafy jungle, or something else, but the important thing is that they do not draw it with pencil first, as the pencil will make it too small to color with oil pastels....they can draw it with chalk first if they are afraid they will mess up. The chalk is erasable. Which makes it nice. 

If anyone did not paint the frame last time, today is the day to paint the frame.  
Picture
I saved the chameleons over the summer and used them to make a big back to school display in the cafeteria for open house. 

Day 4

If students need to color the background with oil pastels, or paint a frame, they need to do that today. Also, if they need colored pencils to finish coloring the chameleon, they can use those to do that. Finally, if they are done with everything else, they are ready to cut out the chameleon and glue it to the background. I brought in my very small detail scrapbooking scissors for students to borrow if they needed them. Once they used a glue stick to glue the chameleon to the background, they used regular white glue to attach it to a matte, and then to the frame we painted a while back. I encouraged them to add details on top of the paint on the frame with oil pastels, but most of them did not do that. 
Picture
Picture
Picture
Picture
Picture
Picture
Picture
0 Comments

Valentine's Day Pets in Oil Pastel

3/10/2016

1 Comment

 
Picture
Following the plan I had used for the Christmas Pets in Oil pastel, I designed  a project to use basically the same ideas for my 2nd semester students, but we themed the animals to go with Valentine's day. 

The main differences, were that instead of just black background, I offered turquoise, purple, pink and black. Also, I had foam heart tracers students could use if they could not free-hand the heart. I also printed out several extra cartoonish images of animals holding hearts so we could reference those.  Several surprised me with their way of figuring out how to make a 3-D box for their pet to peek out of. I also told them they could make it for a family member if they weren't sure what they would want as a pet. 


Picture
This was a very successful project because most students were engaged in the process and happy to follow the directions. One student, chose not to color the entire dog, and did not even try to finish the eyes---so he cut it out just like this and glued it to the background. This would be an example of a '1' on a scale of 1-3. He made an attempt, and drew the dog nicely, but did not follow through or finish the project using the steps provided. 

1 Comment

3-D Structures with Painted Paper

12/7/2015

1 Comment

 
Picture
Picture
Full disclosure. I've never actually taught anyone how to use perspective. I rarely use perspective. By teaching 300+ students how to use perspective, I've gotten a lot better at it myself and I can now figure out what they are getting or not getting and I've also learned how to show it one-on-one with some of them, when the whole group instruction wasn't making sense. I watched several youtube videos on how to do it, and it really helped me to simplify the instructions for my demonstration. 

For some reason, I decided this would be the year that I finally teach my students how to make things (besides spheres) how to appear 3-D. 

We started by drawing 3-D cubes in our sketchbooks. Some groups struggled with this----5th graders aren't ready in October. 6th graders did okay. 

Then, I had them get into pairs.....they loved working with a partner!

With their partner, they used the planning sheet to design a structure using perspective. They could use 1 point or 2 point perspective, and it could be spooky or not...since it was close to Halloween, I always like to do something with spooky architecture if I can. I have many visuals of Victorian houses, barns, pagodas, etc. for reference. Some of them are on this Smore flyer and I let my students access them digitally for this project. I also put 2 QR codes on the sheet, and let them watch the perspective videos we watched in class again, if they really struggled with the concept. (Flyer on Haunted houses and on Perspective)

After they had a plan, they drew the structure on bigger paper---brown, gray or white paper. They outlined with a sharpie and could color with either colored pencils or construction paper crayons. 

While they were working on drawing and coloring, I called them over to a special art station to make painted paper. It took 2 art times to get every over to the center---which is about what it took for them to finish drawing/coloring. 

Picture
Picture
At the special art station, students smeared shaving cream+acrylic paint onto paper with a pallete knife. One student in each group did a paper for them to use as their sky (had to pick between red+yellow OR blue+purple OR white, for a hazy smoky sky). The other person in the group created a textured paper using the same process, but their paper went into a community pile for everyone to use. The community pile had lots of shades of green, blue, purple, grey, brown, and tan. I did different variations for each class depending on what I thought we might need for the finished collages. 

All of the 'sky' pages were created on black construction paper. The combination of the acrylic and the shaving foam gave the paint a thickness that we don't normally find in school grade paint. The pallet knife technique was very fun for some of the students, I stood right by as they created the textured papers. The other colors were made on dark green, purple, grey and light green construction paper. I don't have a photo of the station with students using the plastic palette knives and shaving foam, but we scraped the excess off the knife and onto a cookie sheet, so that it could be reused over and over. I let the students spray the shaving cream and squirted the paint. It was sort of like an assembly line. 
Picture
Picture
Picture
Once all of the textured papers were created, it was time to put everything together. I encouraged students to think about the foreground, as well as the middle ground and the background for their collages.

​Small details could either be drawn with black crayons (sharpies would not work on the texture paper) onto the background, or they could be drawn/colored around the edges of their structures, since we were planning to cut those out and adhere them to the sky paper. 

I also had to stress to them, DON'T cut the the 'sky' paper that is the 'canvas' we will be gluing everything to! 

I was very proud of the variety of structures----there were tree houses, bird houses, stadiums, churches, schools, mansions, pagodas, and one group even re-created Alcatraz! 

Picture
Picture
Picture
Picture
Picture
Picture
Picture
Picture
Picture
Picture
Picture
Picture
Picture
The spooky texture on the house above was made with a slightly dried out marker---a cool idea from one of my students!! 

We did spend at least one day practicing trees, before the final day of the project--it really helped them to get the hang of creating realistic looking branches. 
Picture
For my professional growth plan this year, I am trying to improve my use of student reflections in order to build rigor in the classroom. In our building the focus is on Quality Indicator 2.5 (Prior experiences, multiple intelligences, strengths and needs).

The research-based strategy to help me accomplish my goal: 

MDQ 2.13 The teacher engages students in activities that help them reflect on their learning and the learning process. 

This activity added rigor by providing reflective thinking, adding a writing element, and also a peer critique.

Students collaborated on this project and they reflected on their collaborative experience---some struggled to compromise with each other, which is a very good life skill. 

By critiquing another group, and their own group's work, students actually had to get opinions from someone other than myself. It is good for students at this age to reflect on their own work.


Also, the opinions from peers hold a lot more value than what I say so sometimes they get really strong feedback and critiques from each other because other students tend to tell the truth in harsher terms and their words are more powerful coming from each other. 
​
Below, I have included a few samples of the student reflections. 


Picture
Picture
Picture
Picture
1 Comment
<<Previous
    PictureWelcome!

    Mrs. Mitchell

    Art teacher from Missouri. 

    Instagram
    Add to Flipboard Magazine.

    Archives

    March 2021
    April 2020
    November 2019
    July 2019
    April 2019
    January 2019
    October 2018
    July 2018
    June 2018
    May 2018
    April 2018
    March 2018
    January 2018
    September 2017
    May 2017
    April 2017
    March 2017
    January 2017
    December 2016
    November 2016
    October 2016
    September 2016
    March 2016
    December 2015
    October 2015
    August 2015
    May 2015
    April 2015
    March 2015
    February 2015
    November 2014
    October 2014
    September 2014
    August 2014
    June 2014
    May 2014
    April 2014
    March 2014
    February 2014
    January 2014
    December 2013
    November 2013
    October 2013
    September 2013
    August 2013
    July 2013
    June 2013
    May 2013

    Categories

    All
    1st Day Of School
    1st Grade
    3d
    Abstract Art
    Alcohol Ink Tiles
    Alpacas
    Animal Art
    Animation
    Architecture
    Art Centers
    Art For Kids Hub
    Art History
    Art Hub For Kids
    Art Room
    Art Show
    Art Teacher Conference
    Bell Ringer
    Birds
    Blending
    Bunnies
    Cardboard
    Chalk Pastels
    Chalk Stencil
    Charcoal
    Choice Based
    Christmas
    Chuck Close
    Classroom
    Clay
    Club Day
    Collage
    Color Diffusing Paper
    Colored Pencil
    Colored Pencils
    Construction Paper Crayons
    Contest Art
    Creatures
    Crystal Bridges
    Design
    Dice Games
    Document Camera
    Dot Day
    Drawing
    Early Finishers
    Easter
    Emojis
    Fall
    Field Trip
    Food Art
    Foxes
    Green Screen
    Grid Drawing
    Group Challenge
    Halloween
    Haunted Houses
    Hearts
    Hermit Crab
    High School
    Human Form
    Ice Breaker
    Inspirational Posters
    Ipads
    Jim Dine
    Justand
    Killer Whales
    Kindergarten
    Landscape
    Lesson Plans
    Lettering
    Llamas
    Magazines
    Mandala
    Maori
    Markers
    Masks
    Matisse
    Metal
    Model Magic
    Mona Lisa
    Monster Trucks
    Mother's Day
    Mother's Day Card
    Mummies
    Mural
    Newspaper
    New Zealand
    Notan
    Observational Drawing
    Ocean Art
    Oil Pastel
    Oil Pastels
    Optical Illusions
    Origami
    Owls
    Painting
    Paper Weaving
    Pd
    Pencil Topper
    Perspective
    Pete The Cat
    Picasso
    Polar Bears
    Pop Art
    Portraits
    Printmaking
    Product Review
    Professional Development
    Quiver
    Reflection
    Reflective Teaching
    Room Tour
    Rooster
    Sea Horse
    Seals
    Sea Turtle
    Self Portrait
    Shading
    Shaving Cream Prints
    Shoes
    Sketchbooks
    Sloth
    Solar Eclipse
    Spinners
    Spring Conference
    Star Wars
    Statue Of Liberty
    Step-by-step
    Step By Step Drawing
    Step-by-step Drawing
    Still Life
    Stop Motion
    Story Board
    Sub Plans
    Summer School
    Symmetry
    Tab
    Teacher Appreciation Cards
    Technology
    Tempera Paint
    Tiny Food
    Tissue Paper
    Trees
    Tumbling Blocks
    Valentine's Day
    Warm Ups
    Watercolor
    Wax Resist
    Word Art
    Yellow Submarine
    Zentangle

    RSS Feed

Powered by Create your own unique website with customizable templates.