THIS LITTLE CLASS OF MINE
  • Home
  • Contact Me
  • Lesson Plans

Art App Review Friday

8/23/2013

0 Comments

 
Picture
Have you seen the new augmented reality apps. This is the stuff of the future. 

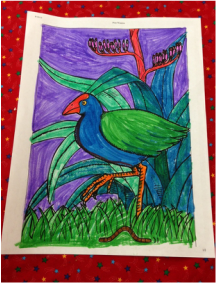
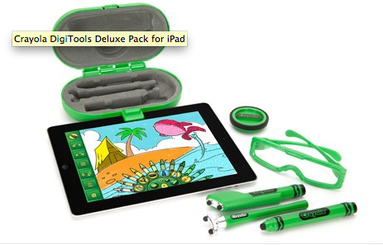
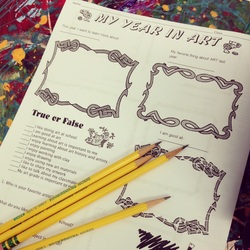
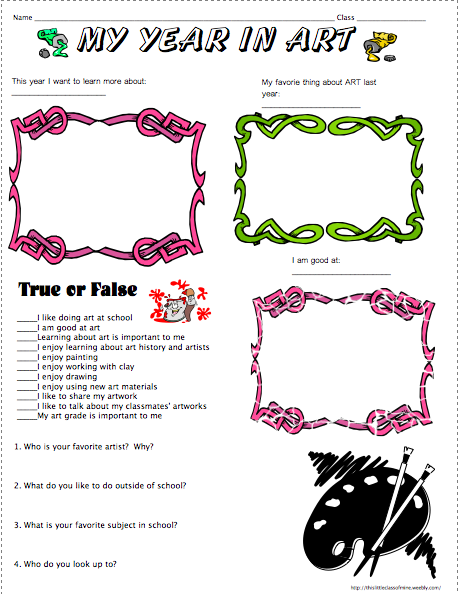
A professor sent me a link to the colAR App. I've had a chance to play around with it and I cannot wait to share it with my students. This app allows you to bring your image to life! By coloring a simple coloring sheet with regular markers, artists can interact with the images in a virtual 3D simulation on an iPad. 

Other augmented reality apps:
iSkull AR (youtube video showing it off)
Spider-Man AR Book HD
Entire pinterest board with tons of AR applications


Picture
Picture
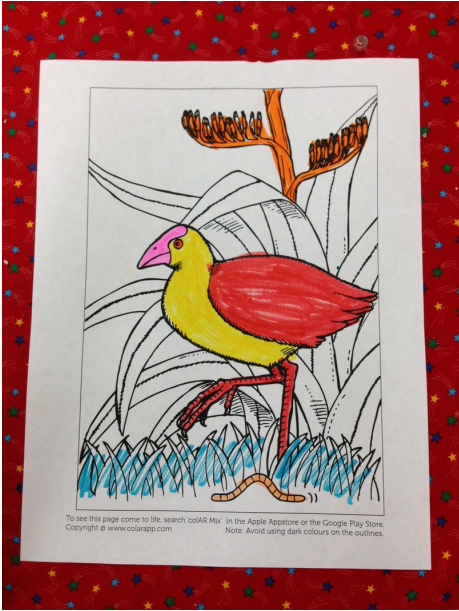
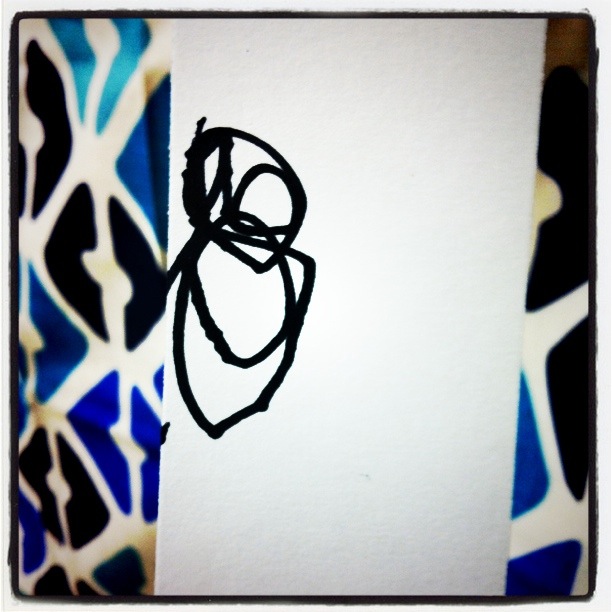
After fully coloring my first image, I realized that the camera would not recognize the picture if I didn't leave some white in the background. Also, the website suggests using light colors and making sure that the border isn't colored. 

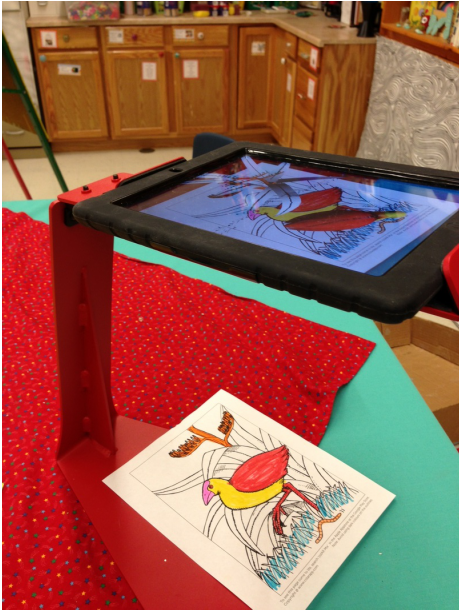
After you color the image, open the app, click on the camera button and the image will turn blue on the screen. After that, it pops up, coming to life!


<<<<<<<<<DON'T color the whole paper
<<<<<<<<<DON'T use dark colors on the background
<<<<<<<<<DON'T cover up the lines around the edges

Picture
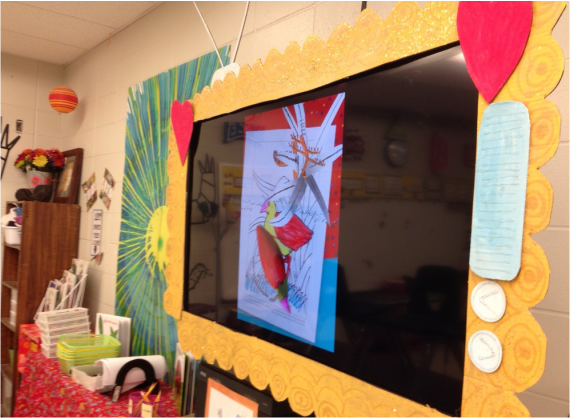
I'm sure my students can figure the process out on their own...they are really intuitive when it comes to technology. But I'm excited to demonstrate it on my Justand with my apple TV mirroring my iPad. 
Picture
Okay so I attempted to make a video of how this works...since it is really hard to describe with words. I uploaded the video to Vimeo. There is a bit of glare from the lights overhead...but hopefully you get the idea!
0 Comments

Favorite Art TEacher blogs

8/20/2013

1 Comment

 
Picture


Cassie Stephens is a Nashville Art teacher that I recently stumbled upon through Pinterest. HOW HAVE I NOT KNOWN ABOUT THIS BLOG BEFORE TODAY? That was my first thought when I saw her art show post. As I browsed through the archives, I kept going, and going....her blog is full of amazing ideas for how to dress like your lesson (Every day of the week!) I am a huge fan. She is so creative and she puts a lot of work into her posts, researching, finding funny photos and adding supplemental information that only an art teacher would get, she is funny too! I'm a huge fan, this is one of my new favorite blogs. This blog has inspired me to get out of my creative rut, and start needle felting, embroidering, and altering outfits in my wardrobe to make them a little more theme-oriented for my lesson planning. This blog is just what I needed to jump-start my creativity for the summer. Thanks Cassie, you rock! Also, you help me to know that it is okay for what I am doing in the classroom to take over every element of my life, let's face it, if Ia m teaching about something, I get a little obsessive about that and I start new collections of things that I never noticed before. 

Picture
Kathy Barbaro at Art Projects for kids has the ability to make anything seem so simple and fun. Where I would type up every minute detail of very single step, she is able explain every post with one photo, and about 4-5 instructions. Wow. You can hardly do a google search with the word 'art project' and NOT find her blog. She is amazing. She also has a PDF store with murals and templates for sale at $5 each. 

Picture
Michelle Fuglestead at Dryden Art is the reason I started using Weebly. In 2012, I saw Michelle win Illinois Art Educator of the Year at the National Convention in NYC, and one glance at her blog, and you will see why! She is one of the most innovative art teachers, and one of the first bloggers I've noticed using technology in the art room. She creates tons of how-to videos for teachers. If you ever have a chance to watch one of her presentations at a conference, make sure you see her in person!

Picture
The Crafty Crow is amazing because it pulls together ideas from ALL around the internet, not just from art teachers, but from bloggers everywhere (Sometimes google translater is necessary). It is great for not only crafts, but supplemental activities that go along with basic art lessons. It is a great resource. 

Picture
Deep Space Sparkle has some of my MOST favorite lesson and ideas. Patty has an incredible way of presenting USABLE information about each lesson. She has a PDF store and I have downloaded several of her bundleded art lessons. Her website is BEAUTIFUL, absolutely inspiring in every way! Her blog posts are insightful, and many of her ideas have completely transformed my approach in the classroom because she helps me realize that much of what I do can be simplified to enrich the experience for my students. Some of my favorite recent posts: Crying in the Art room,  Painted Paper Butterflies (which I did with kindergarten this year, wow! So succesful!), Chalk and Tempera Primary Portraits: best portrait lesson on the web for young kids. Lots of prep for the teacher getting all the various hair/skin colors pre-mixed, but SO beautiful! 

I follow many more blogs on Bloglovin'. I like to gather inspiration from fashion, contemporary art sources, and of course Art Teachers!

If you use Bloglovin' to organize your favorite blogs, you can follow me on Bloglovin' too!
Follow on Bloglovin
1 Comment

Favorite Mindware Art Centers

8/19/2013

2 Comments

 
Picture
Mindware has been sending me catalogs forever. My classroom had a few products for 'brainy kids' when I aquired it, but over the years, I have added to my collection of free-choice activities. 

Last year, I asked my PTO to buy several new products from Mindware, around $150 worth of new things.
 The games I requested were a great investment, and will last many years. I am in the process of setting up art centers, at the end of last year I piloted it with one class and WOW! it changed my life. The additional games will help to keep the centers interesting and give a wide variety of options to students. Students were able to select an activity (after we completed one group project). These products are along side of traditional activities including play dough, crazy scissors, markers+coloring sheet, magazines+scissors, puzzles, bingo dobbers, beading and wire for necklaces, stencils, stamps, scrap paper with punches, and games like Connect 4 and Guess Who?. 

Pic Wits! WOW! What a fun game! Students have a caption and then have to find a picture that best matches it. One person judges the photos and selects one, it is just like Apples to Apples, except with a picture! This would be fun to play with the whole class and a document camera. 

Pattern Play is a colorful, math-building puzzle block set. One of my autistic students who is almost completely non-verbal has incredible success using the pattern cards to re-create the puzzles on the wooden board. REALLY GREAT for students with special needs. 

Block Buddies is a small set of colorful blocks with puzzle cards for students to re-create various images using the blocks. Since I have another big set of blocks in my room, this one gets a little lost among the other activities. I really like the puzzle cards and I plan to challenge my students to use this one more often this year. 

BlickBlock is a hit among the boys with its architecture-themed building cards. Students in my room have even put together their own 'marble' run with these blocks. Sometimes I forget how stimulating BLOCKS are to students...even older kids love to construct things with the block, not just kindergarten!

LED Rainbow Projector is a big hit whenever we paint watercolor rainbows. Be sure to buy batteries! I love this little lamp and the kids love it too! I don't let them play with it, but sometimes I pull it out as an 'extra' little something to WOW them at the beginning or the end of a lesson. 

Picture
The Zoob Challenge set is a favorite for boys. It allows them to build things. Its a big investment initially, but the pieces last for years!

Picture
The Straws and Connectors set is a wonderful activity for a group or individual students who love to build things. I allowed my older students to use my step ladder to make a tower all the way to the ceiling. Other groups stretched it all the way across the room. This was a great investment, I wish I would've gotten the biggest set possible though because the little connectors BREAK easily. Within the first week about a dozen of them had broken, it is frustrating because I have no way to replace those parts. 
Picture
Picture
The Imaginets are awesome for fine motor building. Great for younger students! I have a metal cabinet in my room. I hung the laminated cards on a hook and the kids can move the pieces around the cabinet.  The little magnet board is cool too, and I might move them back the board so that they can utilize them while seated. 
Picture
The Mosaic MagnaPictures are awesome for 3rd and 4th grade. Students enjoyed working in groups to put together a 'color-by-number' design. I have both sets: Pictures and Patterns. My only gripe is that the baggies rip open...making it hard to keep all the little pieces secure. I need to find a good way to store the little mosaic pieces....not sure if individual zip locks would be good or if I should throw all the pieces into one big bag...
2 Comments

Art App Review Friday: Crayola Digitools

8/16/2013

0 Comments

 
Picture
Last year, I was able to apply for a classroom technology grant from my school district. The deadline was in January, so I was totally bummed when I walked into Best Buy and saw the amazing Crayola Digital Toolkit for the iPad, just a few days AFTER I had submitted the application. By an incredible stroke of luck, I had a chance to update my application just a week later, and I promptly added 3 of the Deluxe toolkits to my 'wishlist'. 


The toolkit helps to unlock a variety of features on three of the free Crayola Apps. 

Here is my honest assessment of how I would/have used the Crayola apps in the classroom. The apps are free, the tools cost around $30 for a set. I bought three sets, so that I can have a set on three out of my six art tables. My plan is to utilize the iPads for about half the class at any given time, while the other half of the class works independently on a materials-based work of art. If it is the end of a semester or year, the half of the class that isn't using an iPad would be doing a free-choice art center activity (art centers in my room are in tubs that can be used anywhere: just take a basket back to the table, return materials when finished.)

These apps are great because students can use the stylus-crayon tool to color inside the lines, and even though the stylus looks like an over-sized crayon, they can select colored pencils, markers or crayons to 'color' with on the screen. 

The 3-D glasses were really exciting for the kids, because they look cool wearing them, but I'm not sure that they actually help to see in 3-D when using the 3-D app. 

The airbrush tool is cool, but students have to hold it just right in order for it to 'spray'. They could also just do this with their finger, but the tools add another level of interactivity. 

Although these apps+tools are great because of what they do at face value: allow students to use a variety of digital tools to color, and stamp, they fail to go much beyond the most basic skills. Which is really great for young kids, or students who need to work on basic fine motor skills without making a mess. These apps also students a lot of options, students can direct their own decision-making and choose what they want to color or interact with and they can lead their own learning which is great. In terms of higher order thinking, these apps don't allow for a lot of high level decision making. They are sort of like digital coloring pages. The students REALLY loved having the tools as accessories on the iPads. 

0 Comments

Classroom Tour 2013-2014

8/14/2013

6 Comments

 
Welcome to my room! I thought it would be fun to take you on a tour of my classroom. Today is the very first day of school. I took these photos Monday before open house to document the one time of the year when my art room is really clean. When I got to school this morning, there was a cricket. The 'chirping' sound was almost maddening...I couldn't seem to find him, although he was hiding near my desk. Crickets are supposed to be good luck, a sign of a happy, loving home so I'm taking it as a good omen. Even though it made my first class a little crazy....
Picture
The little photo board outside my room gets updated a couple of times each year. The blue and red desk it sits on, has been sitting in my garage for 6 years. I finally made myself finish it this summer. 
Picture
Above, you can see my new rug from World Market and a bookshelf full of books for early finishers. The shelves contain the supplies that I use nearly every day: scissors, glue, crayons etc. 
Picture
This year, I took some time to really think about what I wanted for my 'art center' area. I primarily use this for my basic skills class, a group of students who come to art with a para. I set up these two shelves with tubs and baskets full of manipulatives. I rotate the contents every month or so and put out new things for the students and take away things that don't get used often. Students take the whole container back to their table and put it back when they are finished. It works out really well. Yesterday, I even labeled all of the containers with color pictures (I finished at the end of the day!)
Picture
I don't let my students use my electronic pencil sharpener so I have a pencil exchange available for them to trade out broken pencils for sharp ones during class. 
Picture
Since I painted one wall blue and rearranged my desk and shelving this year, I freed up a lot of plug-ins that were previously covered by shelving. YAY! Also, I decided to hang up some framed pictures and shelves on the concrete walls using Scotch Outdoor mounting tape. So far so good. 
Picture
I brought in all of my old scrapbooking shelving from home...which will now serve as a catch-all behind my desk. The statue of liberty was painted by one of my great friends and former student teacher as a decoration for my New York-themed birthday party this year. The tote below it holds my iPads...I am waiting for a new cart that the district has purchased. 
Picture
I jazzed up my TV with a gold sparkly frame. I am hoping to get some conduit for the cable wires hanging down...but who knows when that will happen...school starts now!
Picture
Picture
Picture
Picture
6 Comments

Art Interest Inventory

8/14/2013

2 Comments

 
Picture
This year I am going to do something a little different for the first week with my older students. I am going to use a survey to help me plan out the first semester. Last year, I did an art history unit so I had everything planned through Christmas when school started, but this year I am going to do more collaborative projects and tailor the subject matter to things that the students choose. I 'googled' art interest inventory for ideas and made this one in publisher. If you want to download it for yourself page 1 and page 2 it is double sided so be sure to print both. The PDF is in color, but I copied it in black and white and it looks fine!

After establishing the seating arrangement, going over basic classroom procedures, this was a great introduction to art. After giving the students time to answer the prompts, I left some time at the end to share their responses. Several of my 4th graders listed ME as their favorite artist...flattering...but now I'm realizing that I didn't cover any specific ARTISTS with my art history theme last year, I focused on time periods and styles of art. So I know I definitely need to reall

Picture
2 Comments

2nd week of art: A kindergarten 'Script'

8/7/2013

0 Comments

 
The past couple of years, I briefly remember how much crying goes on in Kindergarten...and then I quickly forget after the first day of school. Since so many kids are now in preschool, the first day is much easier, without many tears from students (I often see blurry-eyed parents dashing out the door).

But after that first weekend at home, kids realize that school is real and they have to go every day....and I always see way more crying the first Monday after the weekend.

And if their first day of art is on that Monday, I QUICKLY remember how much crying goes on in Kindergarten. This year was no exception.

There was so much crying this year. SO MUCH!

Kids cry because they miss their mommies...they cry because they wanna go home...they cry because they ran out of time to make something they really, really wanted to make...they cry because someone is mean to them....they cry because they can't cut good or their drawing is all scribbly, after they did it that way last week.

It is exhausting and it is hard to make the lesson fun when someone is wailing and refuses to go to the safe spot, refuses to hold the little 'calm down bear' I keep in my room just in case such a situation arises...but with this trusty script, I am able to keep the plan moving and try to barrel forward with lesson regardless of Moaning Mertle Missing her Mommy.

I hope I don't sound hopelessly impatient. I promise, I'm not...but after doing this lesson over 60 times, it is hugely successful for the second week of school, even with a few criers here and there.

When students walk in to art, I remind them to find their chair from last week. If they cannot remember or they were not here, wait at the front and I will help them once I close the door.

To read the first week of art script/lesson plan, click here. 

Once students are seated, I go around the room with the seating chart I wrote down last week. I say, 'I'm going to point to you and say your name...if I get it write, just smile at me, if I get it wrong, help me say it right or if you are in the wrong chair, I can help you find the right one.'

After checking the seating charts, I remind them of my name. Then I point out the color chart at the front of the room and begin writing stars. I take 30 seconds to remind them how they can earn stars by being good listeners at the beginning and by doing a good job of cleaning up at the end. Then, I have them all point with me to each of the three places in the room with the 'hands off' symbol.

I quickly demonstrate how to draw a person on the board, since I showed them last week, they should remember how we did it, but sometimes there are new students in the room who have no clue what is going on.

I explain that I will hand back their drawings with the sharpie markers. If they forgot to trace their name or they forgot to trace their eyes or they wanted to draw a few more details, take just a second to do that with the maker...if they don't need the marker, they can leave it on the table and I will hand them the crayon basket.

I demonstrate how to find a skin color, hair color and shirt color and I literally color each one of those things on the drawing that I made last week. I say, 'Don't just take a green and scribble everything in green, do your very best coloring, making this look just like you.'

In order to demonstrate this step, I drew myself in front of every class and I saved my version in the class boxes so that I could continue the demonstration this week.

I point out my finished examples hanging on the board and explain that I am going to stop coloring mine and show them how to cut it out. I point to a big red bucket and explain that I will put this on their table after they have had a few minutes to color...they can grab a pair of scissors from the bucket and use them to cut out their drawing. This is a good time to remind them about scissor safety: don't cut clothes, skin, hair, only cut your paper.

If someone has a lot of fear about cutting, I demonstrate drawing an oval around one of my sample drawings...and tell them they can cut on the oval. If someone feels confident about cutting, they can cut on the black outline, but I suggest everyone 'shadow' cuts their paper.


Each example of cutting: oval drawn around, shadow cutting, and cutting right on the line

I say, ' Now shadow cutting means you cut it out, but you leave a white outline or 'shadow' around the outside edge of your drawing....last week, a boy wasn't shadow cutting, he was cutting right on the outline and you know what he did? He cut his head right off!....now if you are cutting and you accidentally cut off something important like your head or arm...its okay, don't cry (did I mention that there is a lot of crying in kindergarten?!)....don't cry, just save your arm or head (I am saying all of this as I shadow cut out my example).....and I can fix it. All of your scraps and trash can go into the red scissor bucket on your table.

Now, mine is cut out, I'm also going to snip off this strip that has my name on it. You will grab your drawing, your name and anything you accidentally snipped off and you will bring it to the front.....'

I shuffle across a big red paper taped to the board...."This says 'Mrs. Smith's Class'....when you come up to the front, I am going to ask you, "Keegan, where do you want to go? James, where do you want to go? And you will tell me, near the baby blue cardinal, near the title, or near a friend, and I will glue you on to this big red paper. This paper is a mural, say that with me, MURAL...good!
 kindergarten mural

Now, when your teacher arrives at the end of art, I will surprise her with this beautiful creation and she will LOVE IT! She will say, 'OH, I LOVE IT, IT IS SOOOO BEAUTIFUL!"
first grade 'super' mural

'Now when I get done gluing you to the big red paper, you can go back to your chair," I shuffle back to the other side of the board. 'Since I am keeping the big drawing we did last week for your mural, I want to give you a chance to make something to take home today. I showed you how to draw yourself on a big paper, today you get to draw yourself on a little and small paper. In the red bucket with the scissors, there are some small pieces of paper.

Grab one and draw yourself again, the same way we did last week (I demonstrate as I talk). Head, body, details, you can use a sharpie or a pencil. Then color it, just like the big one, skin, hair clothes colors. Then cut it out. Then in the bottom of the red bucket are some craft sticks. You will be taking your mini-you and gluing it to a craft stick....this way, it becomes a PUPPET! (Lots of oohs and ahs!)

I demonstrate how to put a big dot of glue at the top of the stick, then press the puppet's legs onto the glue dot and hold, counting to 30 (or as high as they can). I do the wiggle test, if the puppet stays, it will be on there for ever, if it falls off, press it to the glue and hold a little longer.

'Now, if you make your puppet like mine...(I show them a really good one I made), you may have time to make a friend. This is my student.' I put on a little puppet show for them using puppet voices: "Hi Mrs. Mitchell, what are you doing today?" "Oh, just getting ready to go make some art." "ooh, can I come, that sound fun!" "Sure, here we go!" "doo do do do do do!"


This is Michael Jackson's ghost...You know, Michael Jackson, he died? This is his ghost.
By this time, the students are so excited to make their puppets, they are dreaming up ideas for their 'friend' puppet...I tell them they can make baby brothers, mom, dad, cat, dog, teacher, whomever they want to put on a show with.


Then I pass out the drawings, sharpies, crayons, scissor buckets...staggering each item so that students have a chance to work with each thing in between otherwise they will just grab the scissors and start hacking it up without coloring it. I go around and help make a big oval for students that might have trouble cutting. Once students start bringing me their picture for the mural, I remind them to go make their puppet.

Then, with less than 15 minutes left, I pass out the glue. I put two glue bottles on every table so kids have to share. I have found that by restricting their time with the glue, I force them to take longer on each puppet, and they make fewer messes (there are still some messes though). Also, I wait until I have every big drawing glued to the mural before I pass out the glue, it helps me keep track of who hasn't gotten theirs on yet.

Just like the first week, I give the 'ONE MINUTE WARNING', flash off the lights and count the stars. When students line up, I have them take their puppets.

"Hold up one puppet, we are going to do a mini puppet show in line....now use your best puppet voice to repeat after me: S-M-I-L-E'. Good. Now on the count of 3, we are going to have a puppet dance party, here we go: '1.2.3.DANCE.DANCE.DANCE.'

'Now stop. On the count of 3, puppet rodeo....on the count of 3...puppet floating in space...puppet swimming...puppet karate...(I do two or three until we are out of time and the teacher is waiting in the  hall.)

'Now, look at your puppet and say 'shhhhh, puppet be quiet in the hall'.....now tuck your puppet in somewhere safe...remember, no puppet shows in the hall, we just had a fun one! When you get to the room, put your puppets somewhere safe, like your cubby, backpack or folder, where ever your teacher tells you and then when you get home, you can put on a puppet show for your mom, dad grandma, cat, dog, baby brother or sister.'

At that time, I quietly open the door, reminding students to show me their smiles...and I hand the teacher their mural where she oohs and ahhhhs......


In between each class, I take all of the trash from the buckets, refill them with more sticks, and puppet papers and I organize the glue, sharpies, and crayon baskets so that they are easy to distribute for the next class. I quickly grab the next 'mural' paper and hang my example for the next class on the board. I determine if anyone was absent in the next class and make sure I am ready to find them a chair, since it will be their first time in art, and I make sure I have an extra paper ready for them. I quickly glance over the seating chart and try to memorize at least a few names so I can call on them during class.


For kindergarten, I get a wide variety of finished outcomes...even though I do a directed drawing the first week. This project teaches me much about my students and where they are developmentally.


I do basically the same lesson for first grade, but first grade classes are 10 minutes longer so I set up my art easel, shut off one row of lights and use it as a puppet stage. The kids love going up to the front to put on a mini show for the class.


Also, I have the 1st graders draw themselves as super heroes for the mural, with magic pens and paintbrushes, capes and masks....it is a fun change for me since I do the lesson so repetitively!

Supplies needed for this lesson: 6X12 drawing paper (from week before), sharpies, crayons, scissors, glue, craft sticks, small white paper for puppets You can see week 1 here!
You can see my 'script' for the 1st week of art here. 
0 Comments

Kindergarten Art: 1st Day of School

8/7/2013

3 Comments


Ah, the first day of school.

Many teachers do some sort of fun project using letters or first names...but since I have eleven classes of kindergarten, I have way too many little five- (and just barely five) year-olds to get away with anything that involves writing names. So many of my students come to school not knowing how to write their name, and some can't even identify any letters, let alone write them.

It is challenging to find the perfect lesson for the first day. My mentor teacher came up with the perfect plan. I'm going to share it with you (Thanks Mrs. Clark!)

I thought it would be helpful for you and for me and any student teachers I may have in the future if I wrote out my 'first day script'. Sometimes it can be daunting to think that you have to go over ALL of your procedures the first week of school....and I definitely don't do that. I go over the main ones: how to line up, what to do when you first walk in, what my expectations are and I save the painting procedures for the first day of painting.

I am a firm believer that my very best lessons are scripted. I am not suggesting that I write an extensive script like the one below for every lesson, but I do spend my drive to work and my morning duty time rehearsing what I am going to say and in what order so that when the kids come in, I know what will work best and I can be confident in my delivery.

Be advised, I've done the lesson plan you are about to read over 60 times....and over a hundred if you count the number of times I have done it with my older classes using a different first day of art project. 

Look for my second day 'script' coming soon.

When students arrive, I show them to their seats. I always request that the teachers kindergarteners to art wearing name tags the very first week. This is tremendously helpful since some kids can't say their 'r's and when I ask their name it sort of sounds like 'raryawa' and I am totally confused. With a name tag, I can call everyone by name.

I point to the chairs and assist each student to their 'new' art seat. I try to put two girls and two boys at every table. If it appears that one might need special assistance (because of behavior issues or special needs, I try to put them a table near the front).

First I tell them my name and then have them repeat it. I say, 'Welcome to art. Look around, this is the art room. We will be doing all kinds of fun things this year, today we are going to do a drawing but sometimes we will paint, color, fingerpaint, use clay, markers, we will cut and glue and do all sorts of fun projects this year.'

"I must tell you, art may seem like you are in here for a long time. That's because you are. Art is 50 minutes (I say, dramatically). Almost an hour, and every minute is important because we have to have plenty of time to clean up any messes we might make when we paint or do messy projects. You will have art every Friday Morning. You get to have p.e. three times, and music two times, but art is only one time each week.'

'When you come to the art room, you will sit in the same seat you are sitting right now, each week. Look at who is sitting beside you, and across from you. These are your new teammates. Because in art, we play a game every week. You are now part of a team...' Pointing to each table color I say, 'You are the red team, you are the yellow team, you are the green team, etc.'

'And if you come in and sit down quietly I will mark a star on the board beside your team color.  I will keep marking stars all the way down until each team has a star. At the beginning of art, you have a chance to earn lots of stars because I am usually giving you instructions or demonstrating what to do or reading a book. I need everyone to be quiet while I am talking so I want to reward you with stars if you are doing a good job. '

'Now, sometimes I may only give one star to one team. Or I may go all the way down marking stars and I might skip your table.....that means I am trying to get your attention.'

'There might be times when I need your attention but marking stars doesn't work. Perhaps someone at your team is talking or messing with the other team members instead of paying attention. I would give that team a 'first warning' by saying 'blue team, Stop talking. This is your warning, you are about to lose a star.'

'Sometimes that works. But sometimes, I have to erase a star from blue team if they keep talking after their official warning. Now, they can always earn that star back by doing what they are supposed to do, but by that time, they will be way behind the other teams.'

'Now, let's say that there is one person who is having a bad day. One person who is talking or messing with the other kids in the room and taking a star away doesn't work. Maybe this person is starting a fight or having a tantrum. Rather than keep him or her at the table, I would send them to timeout.'

At this point I always ask someone to be my volunteer and pretend to be in trouble. I send that volunteer to the timeout table.

'Do you see Johnny, in timeout? Okay now everyone, pretend at your table like we are finger painting...do it, pretend to fingerpaint. Okay, now look over your shoulder and smile at Johnny. Because you get to have fun and fingerpaint, and he does not...he is in time out....does time out look like a fun place to be? NO! You don't want to get sent to timeout in art because you would miss out on fun things and I also send a note home to your mom and dad and you teacher will see it...so you will probably get in trouble again with your teacher and your mom and dad.'

"Now, Johnny, you can go back to your seat, everyone clap for Johnny....you have to be very brave to pretend to be in trouble. I'm giving Johnny's team an extra star. I have had kids who were pretending to be in timeout, that actually started crying because they though they were really in trouble, even though they were my volunteer.'  

'You will earn stars at the beginning of art, and you will earn lots of stars at the end of art. At clean up time, you have a chance to jump ahead of the other teams if you are the first team that is cleaned up and ready. At the end of art, every week, you will hear me say "ONE MINUTE WARNING". Once I give the one minute warning, I will be watching the clock, and backing over towards the lights. Once one minute is up, that is when I will flip of the lights. When the lights go out, you need to be in your seat, the supplies slid into the middle and your head goes down. Let's practice.'

'I want you all to pretend like you are cutting something out. When I say 'one minute warning', pretend to cut really fast, or stop cutting and slide your scissors in the middle. When I get over to the lights, you have to put your 'pretend scissors' down and put your head down. Let's do it. ONE MINUTE WARNING. '

'After the lights go out, put your heads down, and I will rush to the board to mark stars for the teams that are ready. Ooh, red team is totally ready...green team has some trash on the floor, pick it up!....blue team, sit down....Sally, hurry back to your chair from the trash can, time is up!! I will be quickly marking stars on the board.'

'The team with the most stars at the end of art will win a prize. Today, you may pick one high five sticker. Sometimes I may have glitter stickers...or rainbows, or footballs, or dinosaurs. Hold up one finger. If your team wins, you get ONE sticker. Only ONE team can win...so you won't get a sticker every week, only one table...the best table gets a prize, so you DO want to earn stars by sitting quietly and cleaning up.'

At this time, I cross to the expectation posters I have in the room.

'In art, I expect you to be 'polite listeners,' I say, pointing to the poster that says BE A POLITE LISTENER.  'Being a good listener means you are looking at the teacher, keeping your hands and feet quiet. Give yourselves a pat on the back, you are all doing that now!'

Pointing to the other posters I explain what each one means: USE ART MATERIALS WISELY (do not cut your clothes, do not paint your hand, BE A GOOD TEAMMATE (sharing, using manners), SHOW RESPECT TO OTHERS (don't say mean things about other people's artwork).

'In art, I want you to learn, have fun, but I also want you to stay safe. Take a look over here,' I say, pointing to the sink. 'In art, students do not use the sink. See how there is a 'hands-off' symbol posted near the sink? That means DO NOT TOUCH HANDS OFF.' I turn on the water, 'the sink is dangerous because the water at the school gets very hot in the art room...I don't know why but I have scalded my hands in the water because I forgot and turned it on hot...it is dangerous...and it is loud when the water is running!'

'Right here we have the drying wracks...say that 'drying wracks'.....'Do not bang on the drying racks, they make lots of noise and it is loud and annoying.'

'Perhaps the most dangerous thing in the artroom is the paper cutter,' I say, pointing to the paper cutter. Sliding a sheet of paper under the blade, I pull it down, making a loud SLAMMING noise...'Never, ever touch the paper cutter...don't even joke about touching it. DANGER!'

I make my way over by the smartboard. 'This is the smart board, say that smartboard. This like an awesome big screen t.v. that hooks up to my computer, I can show you all sorts of things on my computer using this camera (pointing to the projector)....but please do not touch it. Do not touch the pens at the bottom because you could tear them up...do not use art supplies over here and do not touch it with your messy art fingers...this is very expensive and if you tear it up, your parents would have to buy me a new one and it would be more expensive than any big screen t.v. you might have at home.'

 'The last thing I want to show you is how we line up. In art, we line up here. We make a boy line and a girl line,' I say pointing and standing in the spot where we line up.  Sometimes the line leader does not line up first because the line leader might be getting a sticker...if you are the first girl or the first boy over here, save a spot for the line leader so they may come to the front when they get to the line'.

'Now, does anyone remember my name?'....crickets.....

'My name is Mrs. Mitchell. Say that with me: Mrs. Mitchell'.

'Now, I just showed you three spots in the room with a hands-off symbol: everyone point with me to the SMART BOARD, very good....now point to the SINK.....very good...now the PAPER CUTTER....never touch the paper cutter, very good."

'We are about to get started with our project for today, but first, I need to see how big you are...and tall you are...everyone STAND UP.'

We have been sitting for way too long at this point, and the kids need to move a bit before we start the project. 

'Very good....wow, you are tall....you are big....now, raise your hand if you are 5....good...now raise your hand if you are 6.....very good....now raise your hand if you are 7? 4? Okay great, everyone in this room is either 5 or 6 or 28! Now, show me your muscles! Wow, you are big and tall and strong, very strong!"

'Now, sit down.'

'Today, we are going to be drawing ourselves on a piece of paper to be as big and tall as the paper. I know that some of you might think that you already know how to draw people, but I want you to draw what I draw....because I want to see if you can do that. So here is what I want you to draw....'

'First, draw a circle for your head. Give me a thumbs up if this looks easy and a thumbs down if this looks hard. Easy or hard? Easy, okay...now, draw two lines down for the neck. Easy or hard? Easy, okay...now draw a box, or a square or a rectangle shape for the shirt area....easy or hard? Easy...okay, some of you are saying hard. So here is what we will do, if you think you can do this, I want you to draw these three things and then stop and hold up your paper.


Once I look at it, I will give you a thumbs up...you can put your paper down...and then wait for me to check everyone else's...if you think this is hard, draw the head and hold up your hand and I will try to help you with the rest. If you see me give you a thumbs up, put your paper down....and wait....if I say 'make it bigger, draw another line' or whatever, make the changes and then you will be ready for the next step. I'm going to give you paper, and a pencil tray. There are 4 pencils on every tray. Please try not to bite off the erasers....on Friday, I picked up a tray and all 4 erasers were bitten off----EW! gross!'

This is one of my favorite drawings ever!!
Pass out supplies. Assist as necessary. Sometimes I get them started with the head...sometimes I try to draw all three and have them just add legs and arms...Depending on where they are developmentally, some students are incapable of drawing a human with a neck, a body and arms and legs...especially if they still see humans as a circle with arms and legs.

This project gives me an indication of where they are developmentally. If they can add lots of details, they are advanced...if they can't even finish when I draw the first three things, then they are way behind.

Draw remaining steps: legs and arms, hair, and face details. Have everyone go step-by-step with me. Have students point to the shirt, then draw something they like on the shirt, whether that is spongebob or a football or hearts....Now if students know how to write their name, I have them write their name on the front.


 Demonstrate how to trace over lines with a sharpie marker. Explain that sharpies can ruin a perfectly good drawing. Never draw with the sharpie on the back! Never scribble over the whole paper, it will be ruined. Show them an example of one that IS ruined!


'Now sharpies can stain your clothes and skin so be careful!' While students are tracing their drawings, I go around the room and help the ones that can't write their names.This is also when I go to each student and write their name down in my seating chart book....if teachers send them with name tags, it helps tremendously. I always request name tags!

If time allows, give students erasers to erase any pencil lines that still show through.

By this time, we only have about 5 minutes left.  I announce the 'ONE minute warning'...and watch to see that they are nearly ready....then I have them put their papers in the middle, start putting their heads down as I flash off the lights. I rush to the board and mark stars for teams that are ready. I give stickers to the team with the most stars, and then line up the the other tables by the door. I remind them to save a spot for the line leader as they line up.

At the door, I have them repeat after me: "S-M-I-L-E'...emphasizing the 'eeeeee' so that it makes them smile....I say, Smiles on, voices off, we are going in the hall....just as I open the door and greet their teacher. I try to remember to ask if anyone was absent when they arrive, but sometimes I ask at the end, so that I can write their name on a sheet of paper so that they will have a paper to draw on the very next week.


And that is how I do it. It may seem like I talk a lot...and I do...but I try to move around...it is probably the longest lecture I give the entire year to kindergarteners...and it is only between 15-17 minutes at the most.

***This post was originally created for another blog that I used to have. I printed it out in color, and I now refer to this to help 'prep' myself for the 1st day of school. I'm thinking of recording myself doing this whole thing so that I only have to do it once this year......
3 Comments
    PictureWelcome!

    Mrs. Mitchell

    Art teacher from Missouri. 

    Instagram
    Add to Flipboard Magazine.

    Archives

    March 2021
    April 2020
    November 2019
    July 2019
    April 2019
    January 2019
    October 2018
    July 2018
    June 2018
    May 2018
    April 2018
    March 2018
    January 2018
    September 2017
    May 2017
    April 2017
    March 2017
    January 2017
    December 2016
    November 2016
    October 2016
    September 2016
    March 2016
    December 2015
    October 2015
    August 2015
    May 2015
    April 2015
    March 2015
    February 2015
    November 2014
    October 2014
    September 2014
    August 2014
    June 2014
    May 2014
    April 2014
    March 2014
    February 2014
    January 2014
    December 2013
    November 2013
    October 2013
    September 2013
    August 2013
    July 2013
    June 2013
    May 2013

    Categories

    All
    1st Day Of School
    1st Grade
    3d
    Abstract Art
    Alcohol Ink Tiles
    Alpacas
    Animal Art
    Animation
    Architecture
    Art Centers
    Art For Kids Hub
    Art History
    Art Hub For Kids
    Art Room
    Art Show
    Art Teacher Conference
    Bell Ringer
    Birds
    Blending
    Bunnies
    Cardboard
    Chalk Pastels
    Chalk Stencil
    Charcoal
    Choice Based
    Christmas
    Chuck Close
    Classroom
    Clay
    Club Day
    Collage
    Color Diffusing Paper
    Colored Pencil
    Colored Pencils
    Construction Paper Crayons
    Contest Art
    Creatures
    Crystal Bridges
    Design
    Dice Games
    Document Camera
    Dot Day
    Drawing
    Early Finishers
    Easter
    Emojis
    Fall
    Field Trip
    Food Art
    Foxes
    Green Screen
    Grid Drawing
    Group Challenge
    Halloween
    Haunted Houses
    Hearts
    Hermit Crab
    High School
    Human Form
    Ice Breaker
    Inspirational Posters
    Ipads
    Jim Dine
    Justand
    Killer Whales
    Kindergarten
    Landscape
    Lesson Plans
    Lettering
    Llamas
    Magazines
    Mandala
    Maori
    Markers
    Masks
    Matisse
    Metal
    Model Magic
    Mona Lisa
    Monster Trucks
    Mother's Day
    Mother's Day Card
    Mummies
    Mural
    Newspaper
    New Zealand
    Notan
    Observational Drawing
    Ocean Art
    Oil Pastel
    Oil Pastels
    Optical Illusions
    Origami
    Owls
    Painting
    Paper Weaving
    Pd
    Pencil Topper
    Perspective
    Pete The Cat
    Picasso
    Polar Bears
    Pop Art
    Portraits
    Printmaking
    Product Review
    Professional Development
    Quiver
    Reflection
    Reflective Teaching
    Room Tour
    Rooster
    Sea Horse
    Seals
    Sea Turtle
    Self Portrait
    Shading
    Shaving Cream Prints
    Shoes
    Sketchbooks
    Sloth
    Solar Eclipse
    Spinners
    Spring Conference
    Star Wars
    Statue Of Liberty
    Step-by-step
    Step By Step Drawing
    Step-by-step Drawing
    Still Life
    Stop Motion
    Story Board
    Sub Plans
    Summer School
    Symmetry
    Tab
    Teacher Appreciation Cards
    Technology
    Tempera Paint
    Tiny Food
    Tissue Paper
    Trees
    Tumbling Blocks
    Valentine's Day
    Warm Ups
    Watercolor
    Wax Resist
    Word Art
    Yellow Submarine
    Zentangle

    RSS Feed

Powered by Create your own unique website with customizable templates.