My school implemented club day last year. When I first began hosting my Animation Club, I went all out and made membership cards, a packet for students to take home and planned a different animation activity each month of the club. I quickly realized that I was causing more stress and headache for myself than was necessary.
The way our school handles club day is really neat. Students sign up for a club they are interested in and the club meets once a month for the fall semester. In January, students can sign up for the same club or they can sign up for a new club for the spring semester. The club days are on the 3rd Monday of the month during 'Cardinal Time'. I like that the clubs are during the school day, because it means every student has the opportunity to participate. I don't like that the clubs are during my only planning period/break of the day, which means I end up teaching 7 classes in a row with no time off....but once I started simplifying my club experience, things got a lot easier for me to facilitate.
For the first club day of each session, I show the Brain Pop video about animation. There are two....so I usually show the one about traditional animation, as opposed to the one that is mostly CGI. I show several examples of stop motion animation on youtube and I give my students an overview of what to expect the next few months.
Since the club is a mixture of 5th and 6th grade students---and there are 25 of them---I encourage them to sit with a friend or a group that they can work with the entire time. Students have to work in groups to make movies so it is important to sit with people that they feel comfortable working with. We spent a little time with introductions that first day. I played an icebreaker game they had to stand up or sit down after I made a statement. This also helped me get to know the students and helped them quickly learn a few facts about each other. (I posted the game below).
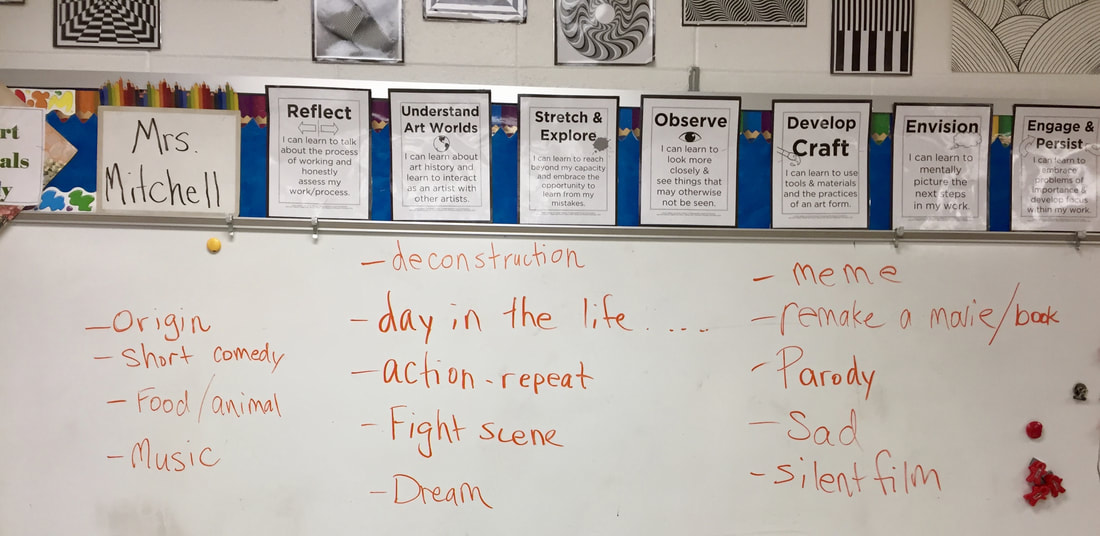
Finally, the very first club day, we spent the last few minutes creating a list on the board of possible short film topics. I was blown away by the list of ideas my students came up with.
The way our school handles club day is really neat. Students sign up for a club they are interested in and the club meets once a month for the fall semester. In January, students can sign up for the same club or they can sign up for a new club for the spring semester. The club days are on the 3rd Monday of the month during 'Cardinal Time'. I like that the clubs are during the school day, because it means every student has the opportunity to participate. I don't like that the clubs are during my only planning period/break of the day, which means I end up teaching 7 classes in a row with no time off....but once I started simplifying my club experience, things got a lot easier for me to facilitate.
For the first club day of each session, I show the Brain Pop video about animation. There are two....so I usually show the one about traditional animation, as opposed to the one that is mostly CGI. I show several examples of stop motion animation on youtube and I give my students an overview of what to expect the next few months.
Since the club is a mixture of 5th and 6th grade students---and there are 25 of them---I encourage them to sit with a friend or a group that they can work with the entire time. Students have to work in groups to make movies so it is important to sit with people that they feel comfortable working with. We spent a little time with introductions that first day. I played an icebreaker game they had to stand up or sit down after I made a statement. This also helped me get to know the students and helped them quickly learn a few facts about each other. (I posted the game below).
Finally, the very first club day, we spent the last few minutes creating a list on the board of possible short film topics. I was blown away by the list of ideas my students came up with.
Stand UP or SIT down ICEBREAKER
Stand up if you can say YES to the following statements. Sit down if your answer is NO.
Are you in 5th grade?
Are you in 6th grade?
Are you a girl?
Are you a boy?
Have you ever made a stop-motion animation?
Do you own an iPad?
Do you consider yourself ADVANCED in the art of animation?
Do you consider yourself a BEGINNER in the art of animation?
Do you have a brother?
Do you have a sister?
Do you have a sibling at the middle school currently?
Do you like animated movies?
Do you like stop motion movies?
Were you in this club last year?
Do you like to work in groups with other kids?
Would you enjoy making an action movie?
Would you enjoy making a comedy?
Would you enjoy making a movie using technology?
Do you like using modeling clay?
Do you like to take photographs?
Do you have a computer or other device for movies at home?
Do you have a cell phone?
Have you ever made a flip book?
Have you ever used an app on a device to make a movie?
Have you ever used iMovie?
Would you enjoy watching a tutorial to learn a new skill for animation?
Do you have braces?
Are you afraid of spiders?
Are you in band?
Do you have a pet?
Were you born in April?
Do you have curly hair?
Are you an only child?
Do you like cheese?
Are you left handed?
When I asked my students this year if they would prefer that I provided an in-depth tutorial each time, where every group would be working on the same thing or if they would rather I just let them make movies, with very little structure. The feedback I received told me they really wanted to just go for it without the in-depth tutorials or if I did show them something, it could be optional.
Last year, during one of our sessions, we watched the animation chef tutorial on how to make a 'furious' character. The were amazing, but we were really RUSHED to get the characters made and the video made in our short 45 minute session. Some groups did not get done and other groups were not interested so they only worked a few minutes and their videos were not great. It was very stressful to prep the materials for them in advance so I was happy when they said they did not want the clubs to be so structured.
For another session last year, we learned how to make animated ghosts using the DOINK app. Patricia Fuglestad has a great tutorial and I typed up the instructions for my students. The results were great, but the level of engagement wasn't as high because I only have enough iPads for about half of my students and each kid needed quite a bit of screen time alone with the ipad to edit their film, the other kid was just sitting back watching, being bored or getting in to trouble.
Here is a pic from the Haunted art room club day. My typed instructions on the table and the bored kid watching on the side.
After hosting about 15ish club day sessions, I have finally found a rythm that works pretty well. I have also been asking kids what they like about other clubs and one thing they have said is that they love it when the teacher gives out candy or snacks.
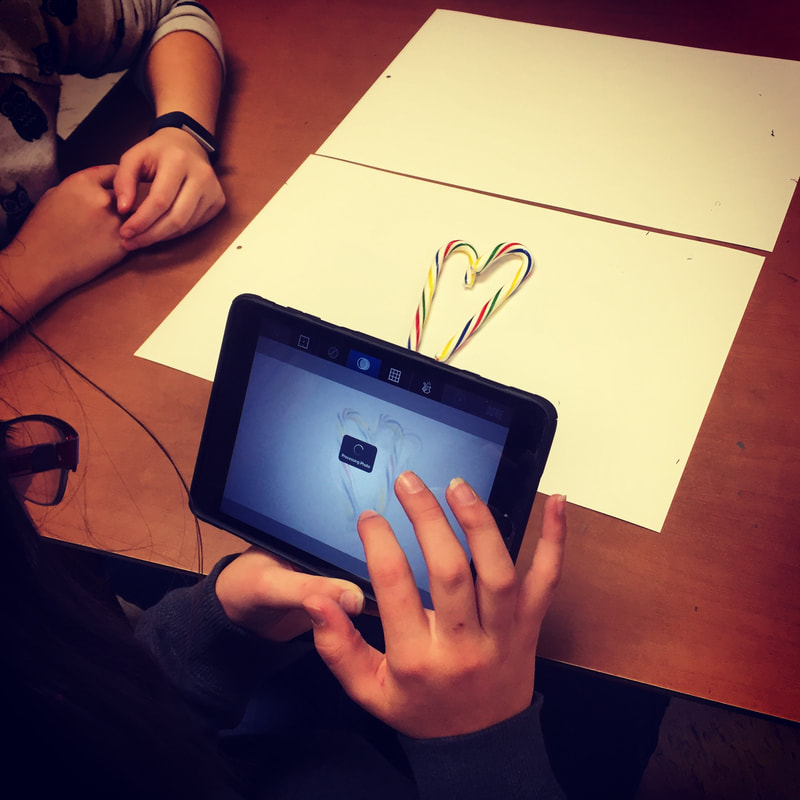
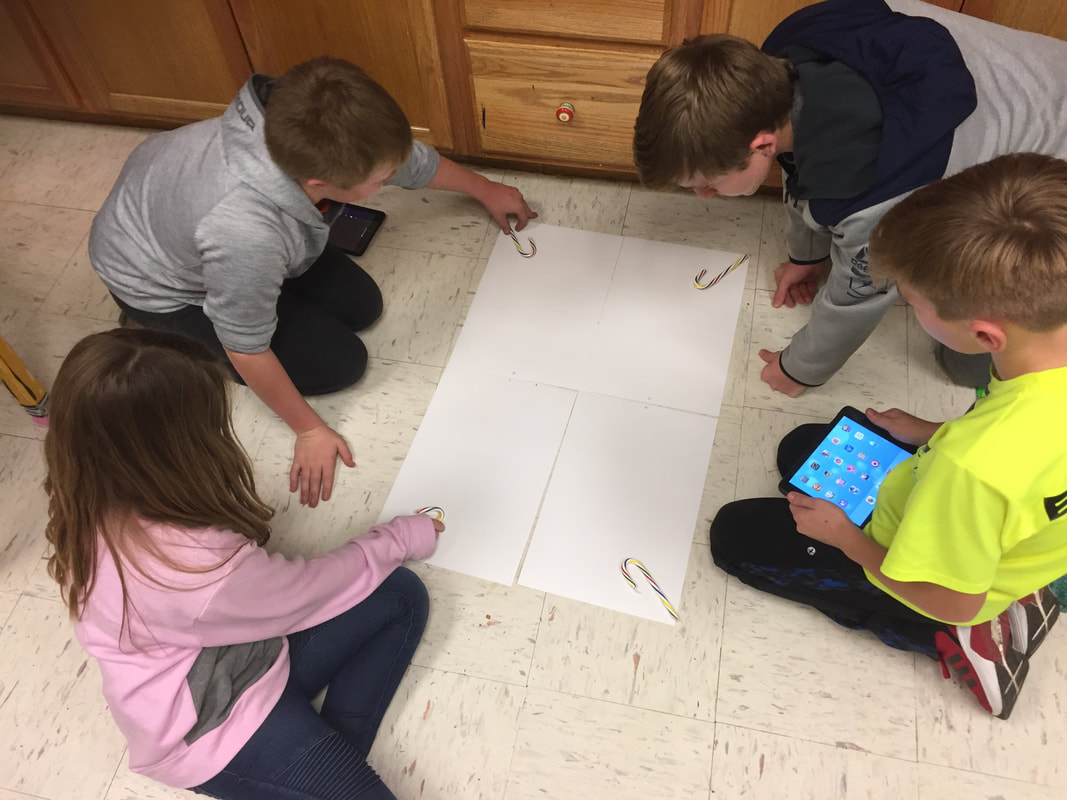
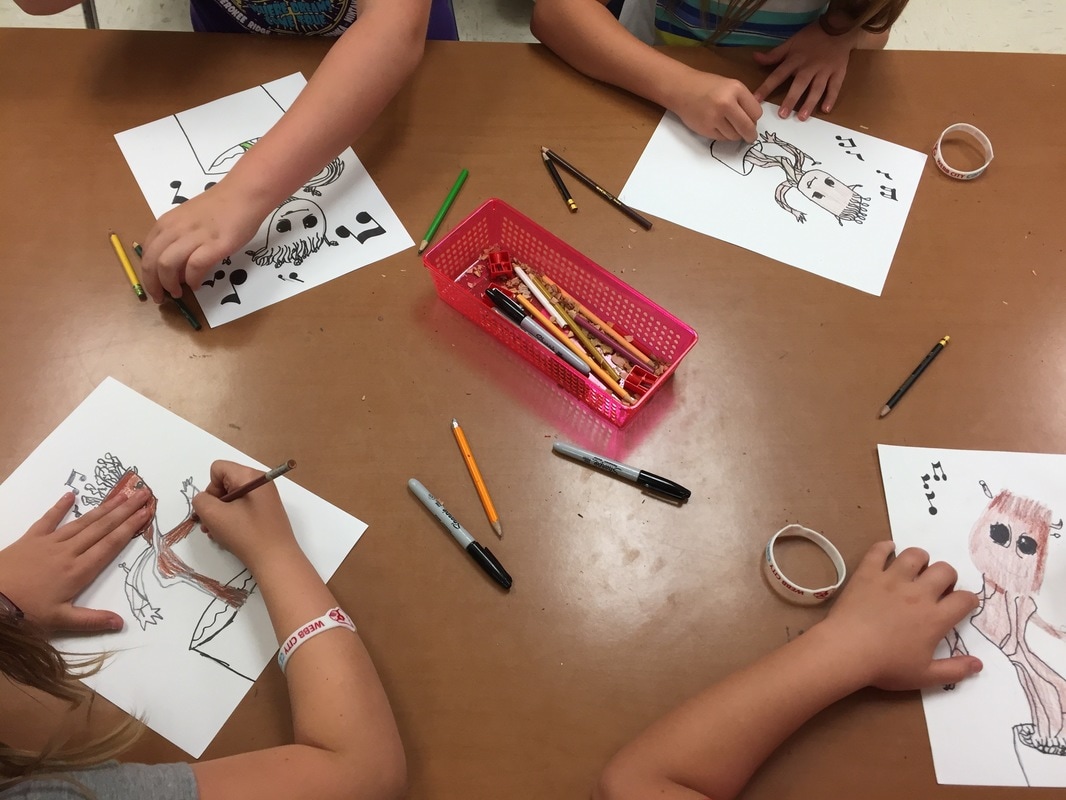
So for our final session in December, I brought each kid a candy cane. They had to work with their group to animate the candy canes, using either the Lego Movie Maker app (currently unavailable in the app store), Stop Motion app or StickBot app. Then, they had to pop their stop motion film into iMovie to add music, export it to the camera roll and share it with me on Google Drive.....all in about 45 minutes. We did our best and most of the videos made it into my compilation movie. The animations aren't perfect, but they are pretty good and the kids were engaged and happy to eat their candy canes after filming. We watched this example to get warmed up.
So for our final session in December, I brought each kid a candy cane. They had to work with their group to animate the candy canes, using either the Lego Movie Maker app (currently unavailable in the app store), Stop Motion app or StickBot app. Then, they had to pop their stop motion film into iMovie to add music, export it to the camera roll and share it with me on Google Drive.....all in about 45 minutes. We did our best and most of the videos made it into my compilation movie. The animations aren't perfect, but they are pretty good and the kids were engaged and happy to eat their candy canes after filming. We watched this example to get warmed up.
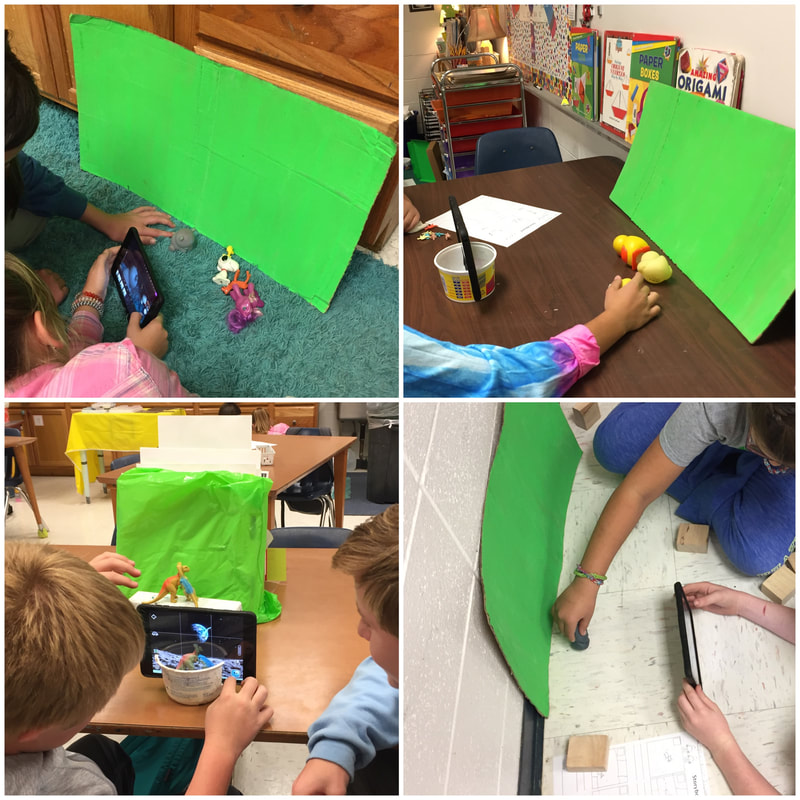
I have a bunch of random stuff kids can use for movie making.
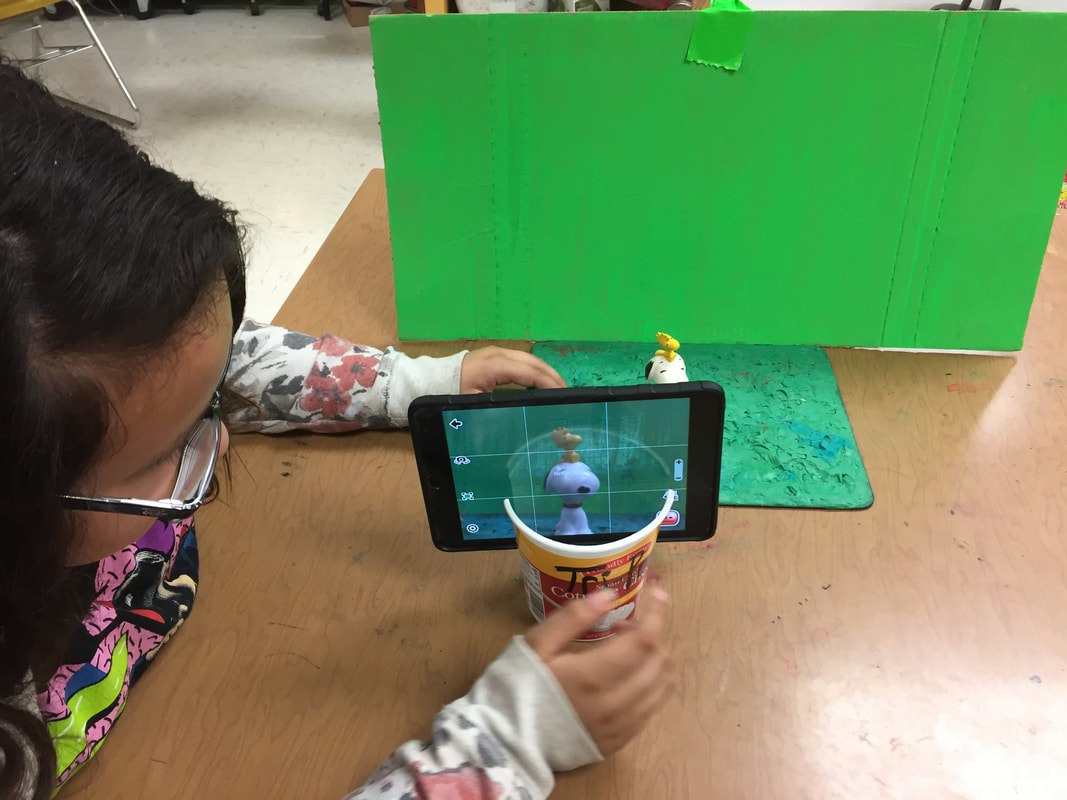
- Cardboard painted chroma green
- pair of green gloves
- green straws (Starbucks!)
- Small reposition-able action figures
- Stationary plastic toys from (goodwill)
- Butter and cool whip bowls with a groove cut out to use as tripods for the iPad minis
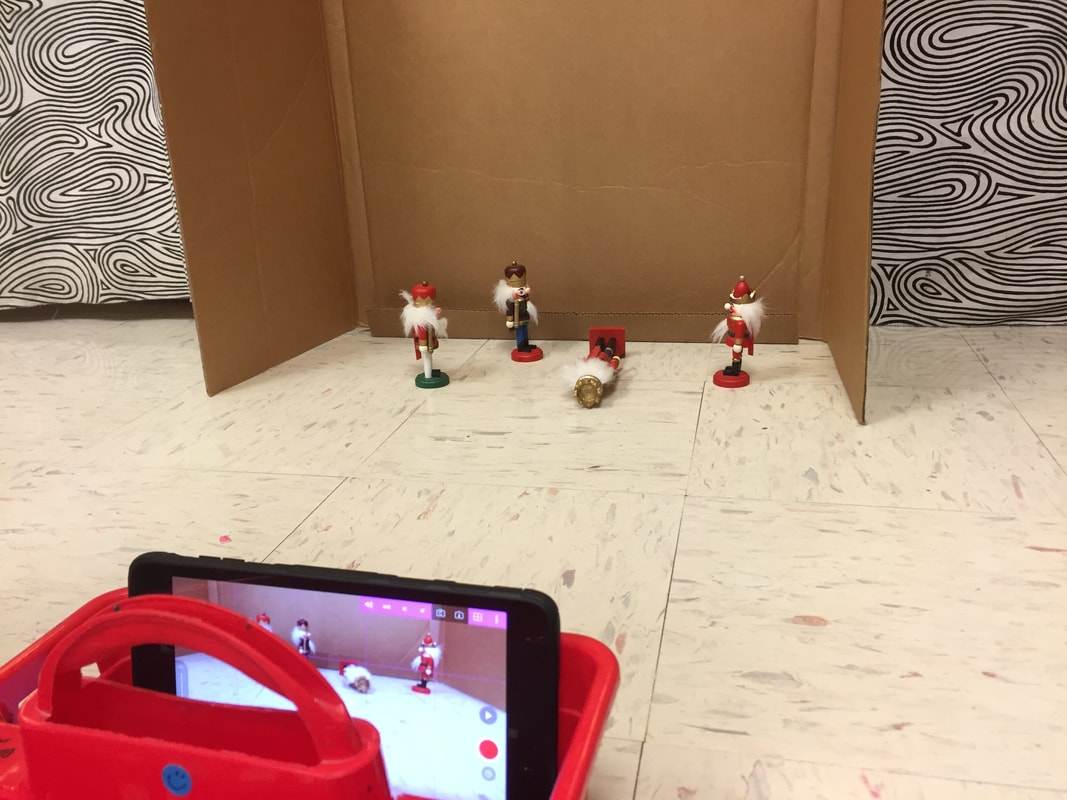
- Wooden nutcrackers from dollar tree (at Christmas)
- Wooden manikins--reposition-able and nice for movies
- Paper, markers and scissors
- Cardboard trifold boards-- I encourage them to set up their movie against wall so that the background does not have a bunch of distracting stuff messing up their movie a cardboard tri-fold is helpful as I don't have a ton of wall space
- Chroma green tape
- Slate boards (old green chalk boards) with modeling clay smooshed to the surface so that figures will stay put
- Chroma Green curtain

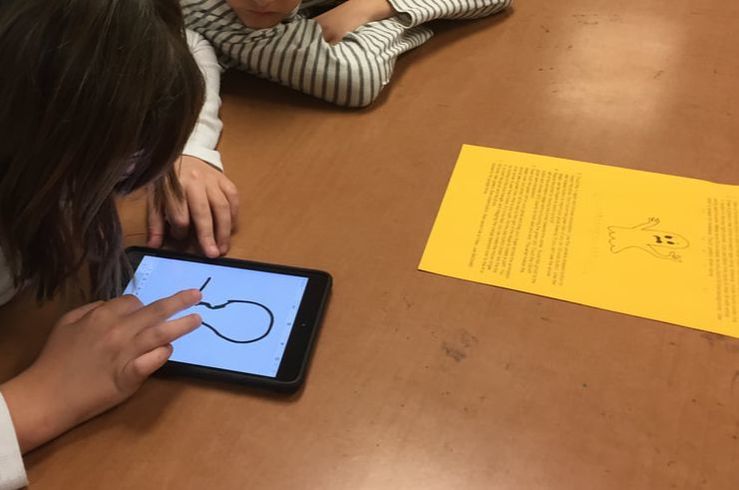
Most of the time at club day, I give my students free range to make whatever type of movie they want. We did talk a little bit about story boarding. The first day of filming, the groups had to discuss their main characters, whether they wanted to use clay, paper or existing toys and whether or not they wanted their films to be green screen or not. I don't require them to create a storyboard each time, but usually the first day of movie making, so they can have a discussion before they start setting everything up.
Here is the storyboarding template I have them use for movie planning.
Here is the storyboarding template I have them use for movie planning.
Here are a few videos my students have made on my youtube channel.
Here are some animation videos I show if we have a few extra minutes after making our movies, before it is time for dismissal.
My club is very popular and I wish I could have more than 25 students in my club but I am limited by the amount of space and I only have 12 iPads so we are maxed out. Follow me on youtube to see a few examples of our films each month!


 RSS Feed
