THIS LITTLE CLASS OF MINE
  • Home
  • Contact Me
  • Lesson Plans

New Room, Who Dis?

7/23/2018

2 Comments

 
I have a new art room and I am so excited for the change!

Here is a link to my old classroom flashback post. 

I have created a new Instagram account in order to share all of my new high school stuff. It is a public account so please follow me @cjhs_art

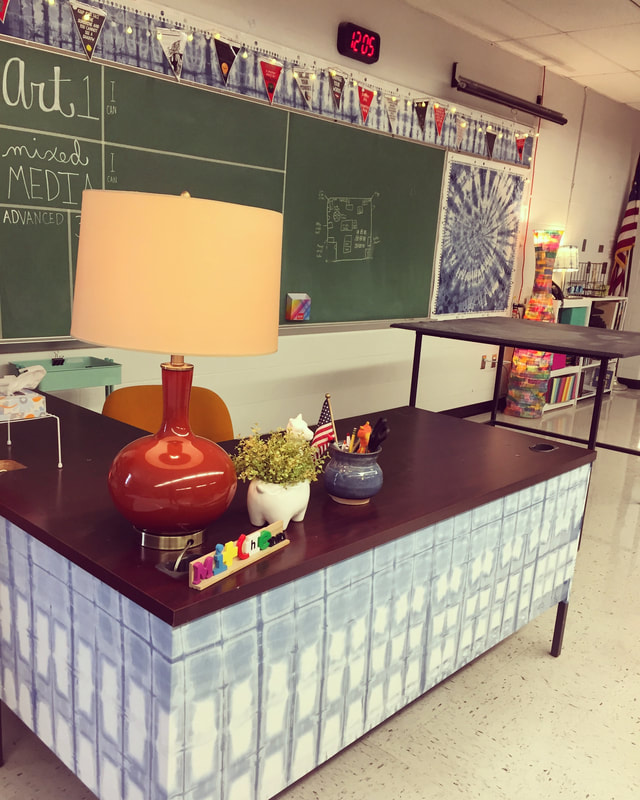
​Now, I would like to give you a little tour of the room along with some links to some of the new items I picked up this summer. Some things I made totally new, like the shibori fabric, that I tie-dyed last spring. And lots of things were 'thrifted' from local places like the DAV, flea markets, and the Habitat for Humanity. 

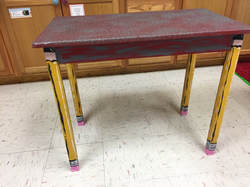
In the past, I've had a painted desk, but this time I wanted something a little quicker than that. I used the good 'ole liquid starch hack. I simply held the hand-dyed fabric up and brushed liquid starch over it. I stretched it and it smoothed out and it dried on the metal desk. Simple as that. 
Picture

​
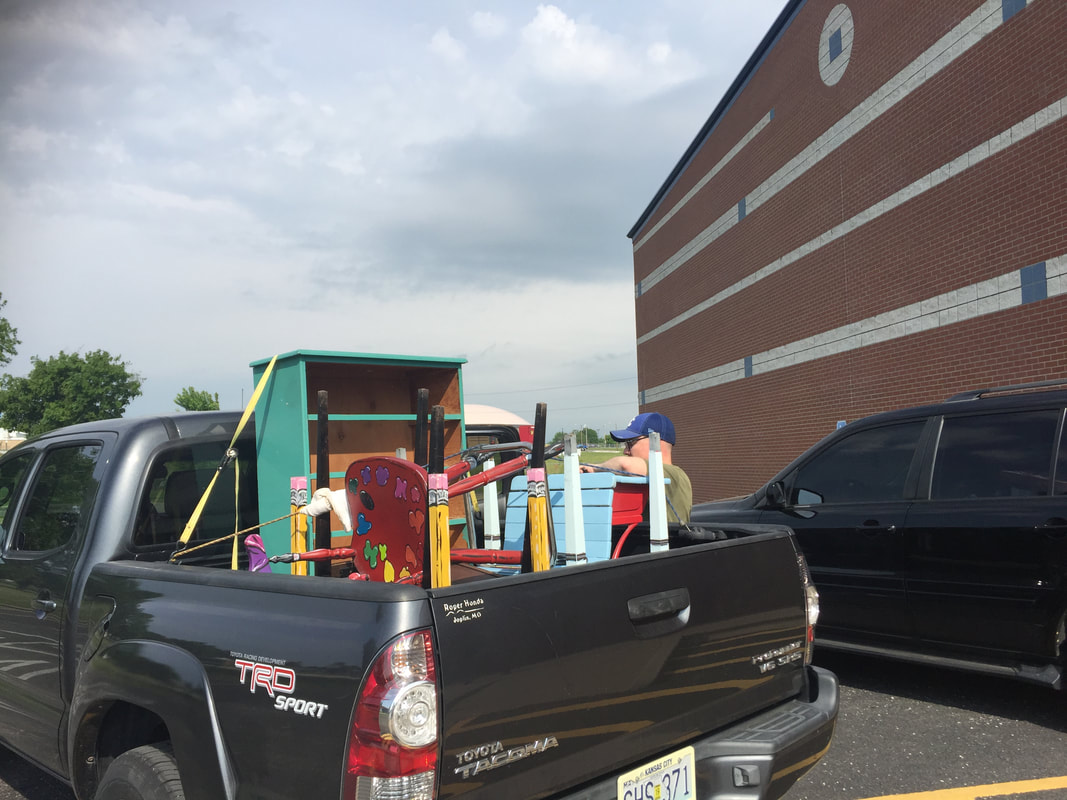
 I had to pack up everything in my old room, move it home, pack it up again and move it to my new room. My husband helped me with one load from my old school home, but the rest of it, I physically moved and loaded up all by myself. 

I've tried to be picky about what to keep and what to retire. And in some cases, I just wanted some fresh new stuff.

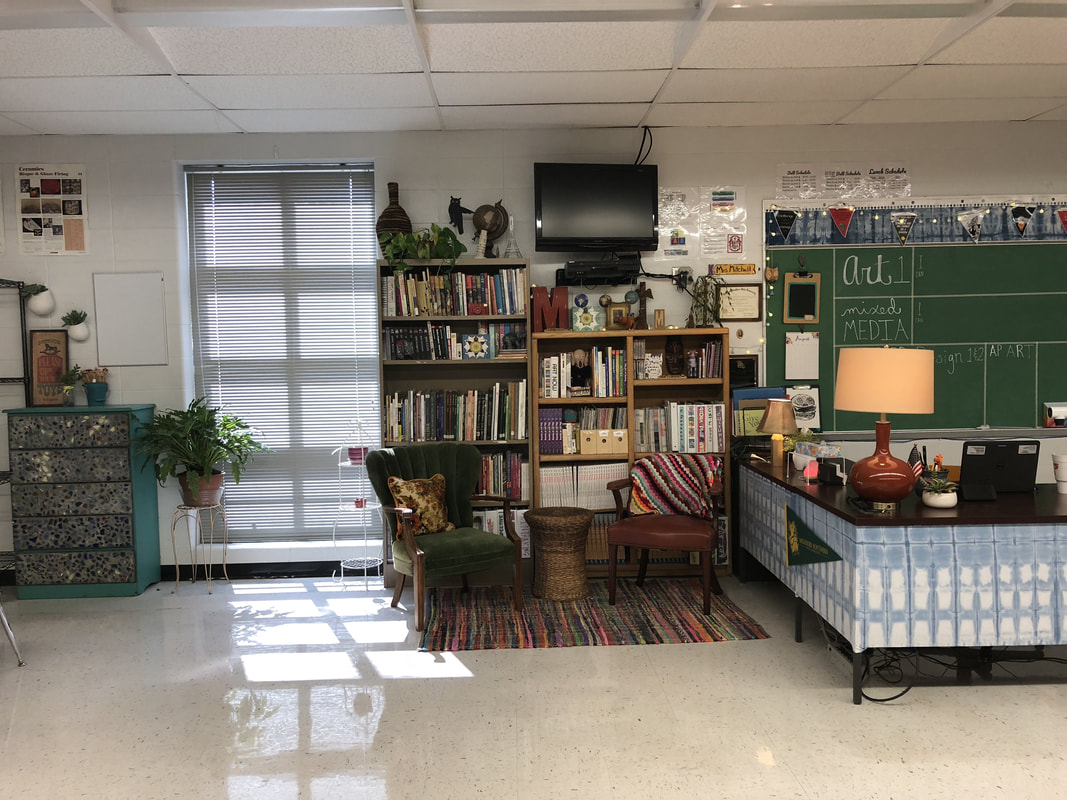
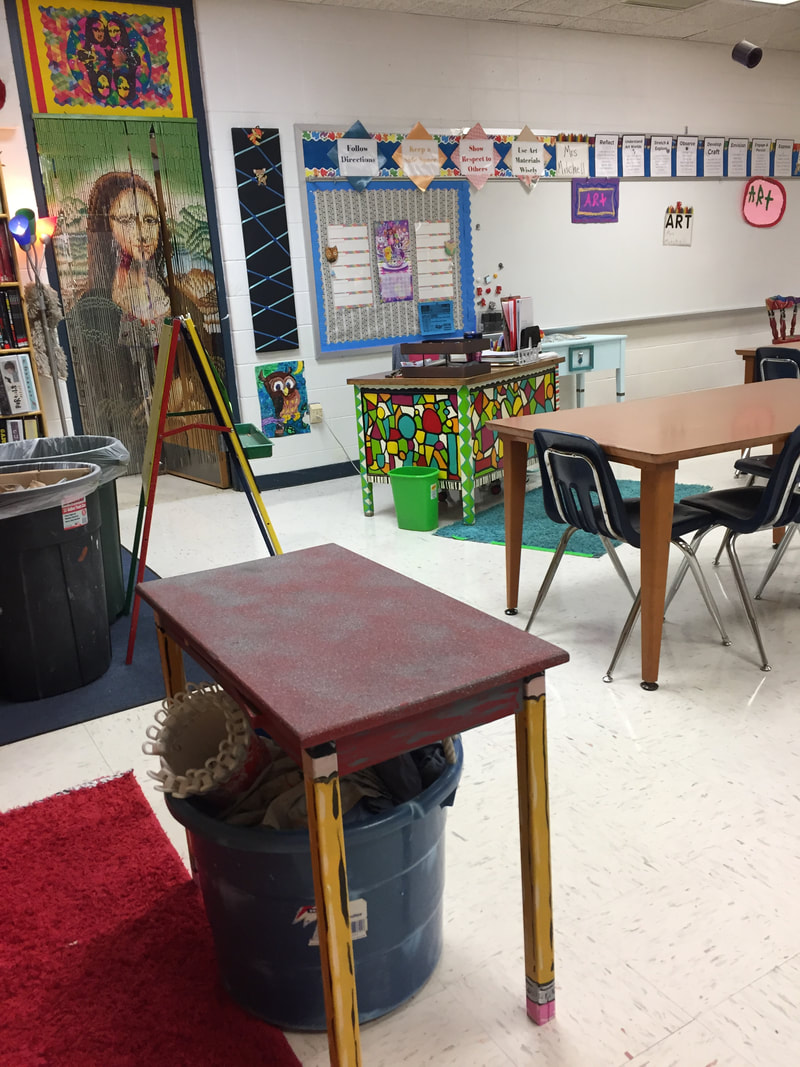
​Once I had the fabric on the desk, I had it in my head that I wanted to go for a bohemian vibe.

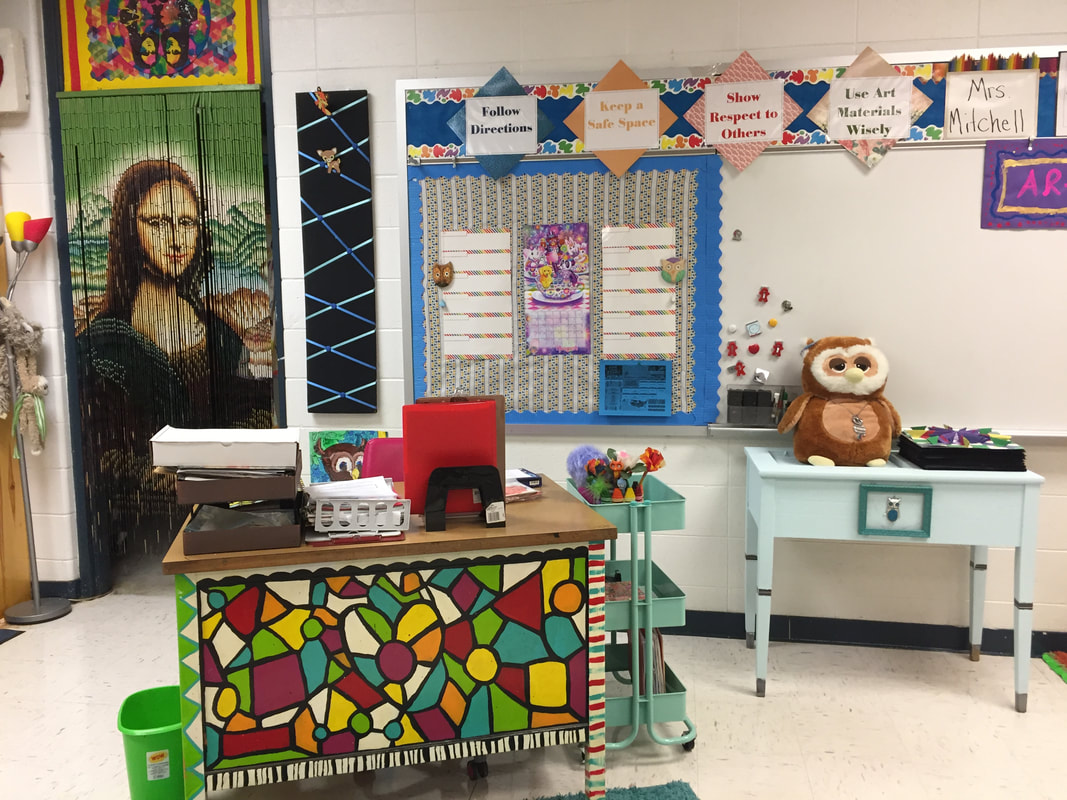
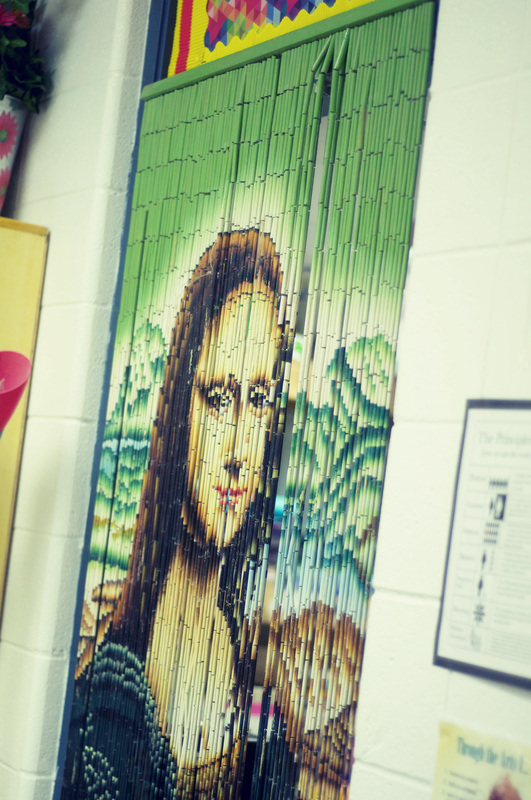
Literally everyone on pinterest is either using rainbows or farmhouse to decorate their rooms, but with my beaded mona lisa curtain, new plants, and with the tie dye stuff, neither of those 'vibes' worked for me. 

​I created a moodboard to kind of narrow down what I liked....because my problem is that I am a maximalist, not a minimalist.

So I like LOTS of stuff. A moodboard is kind of like pinterest, but its a little different. 

My pinterest boards had everything I have ever liked for classroom/home/diy inspiration and I was able to cull in into one quick visual board. 

I've tried to provide links to as many of the products that I purchased new at the bottom of this post as possible. 
Picture
Picture
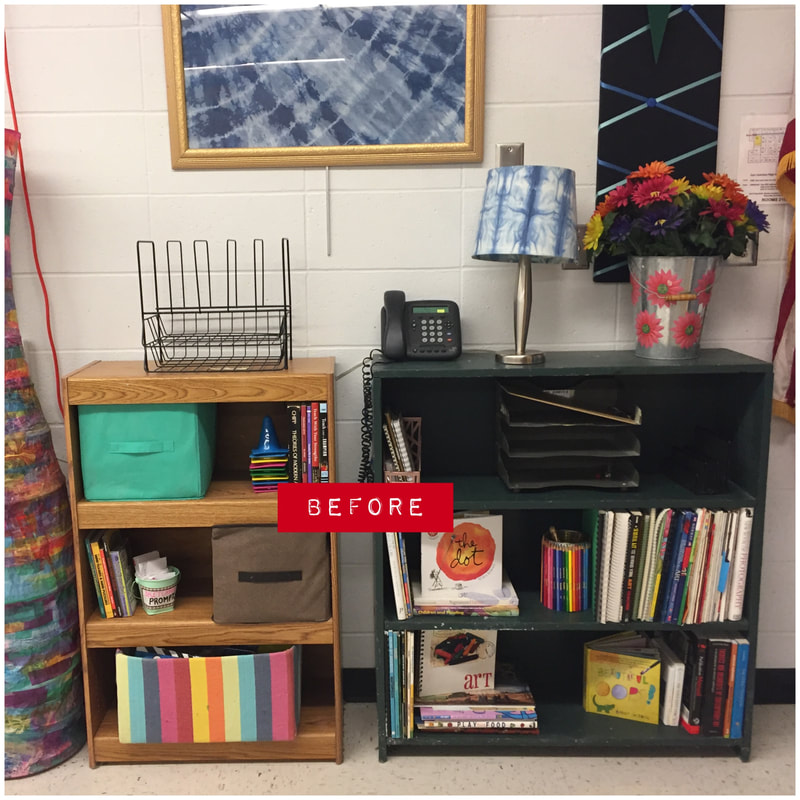
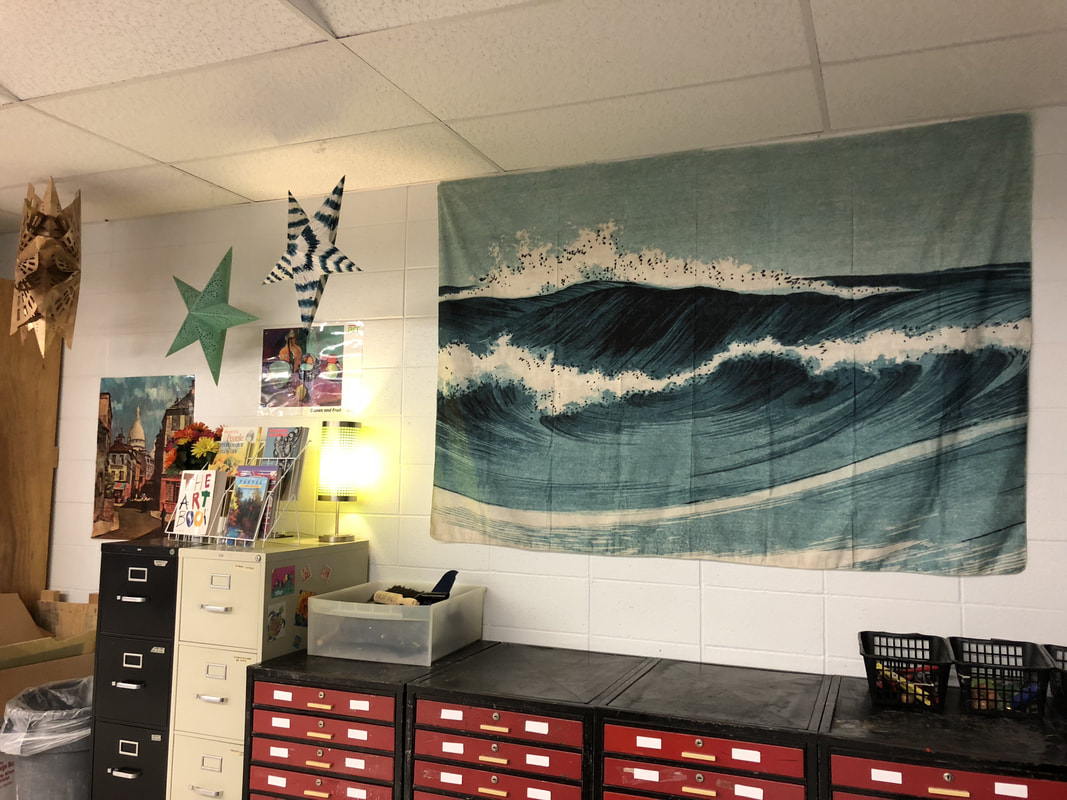
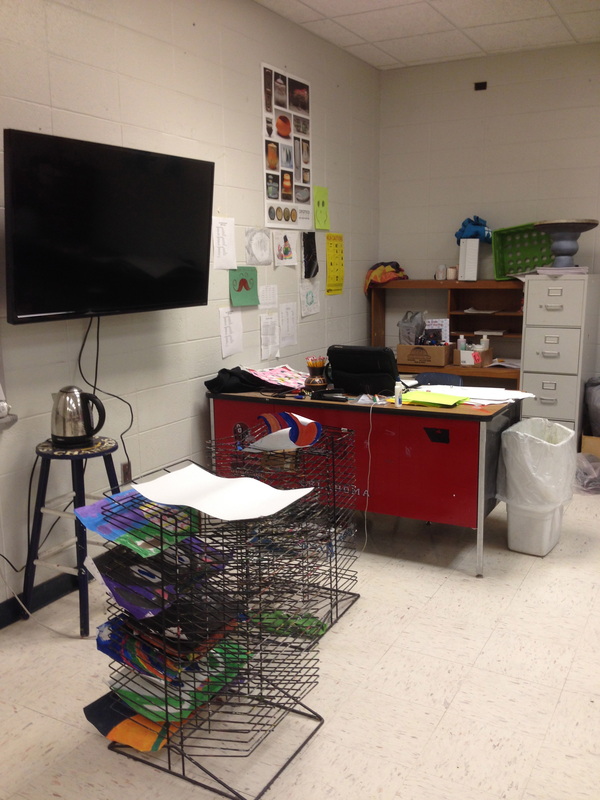
The lamp shade used to be plain white, I just put a little fabric on it to make it match. Simple makeover. I don't know if I will keep the paint pallet table here, since this is where my over head projector pulls down, but for now it hides a bit of the cord vomit. I'm not 100% happy with this area, I still feel like it looks cluttered, but some of this stuff I will use a lot so I'm still trying to figure out what to discard or pack up. 
Picture

​

Picture
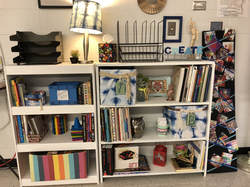
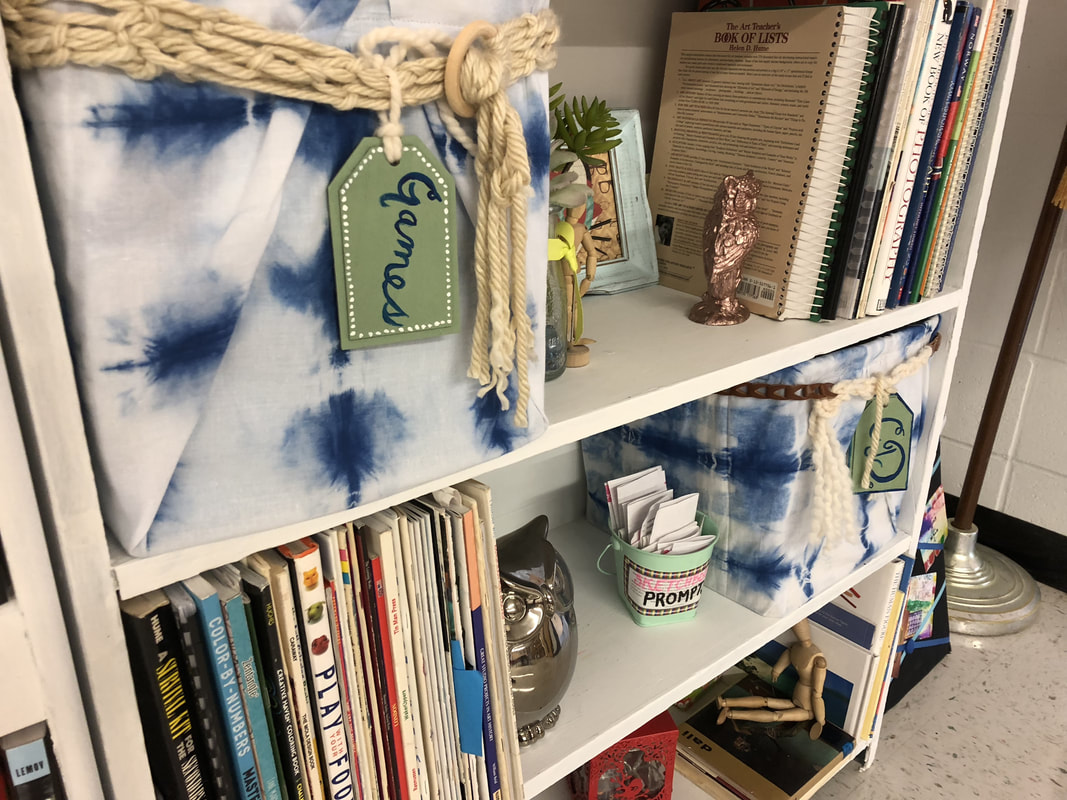
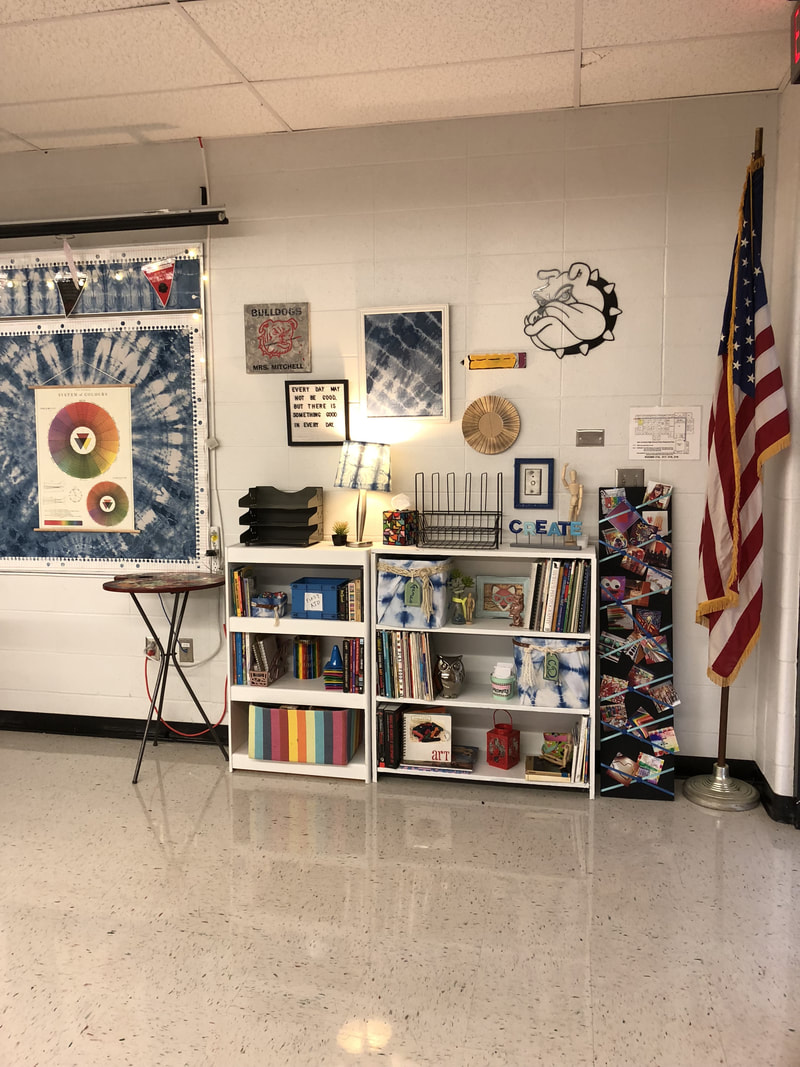
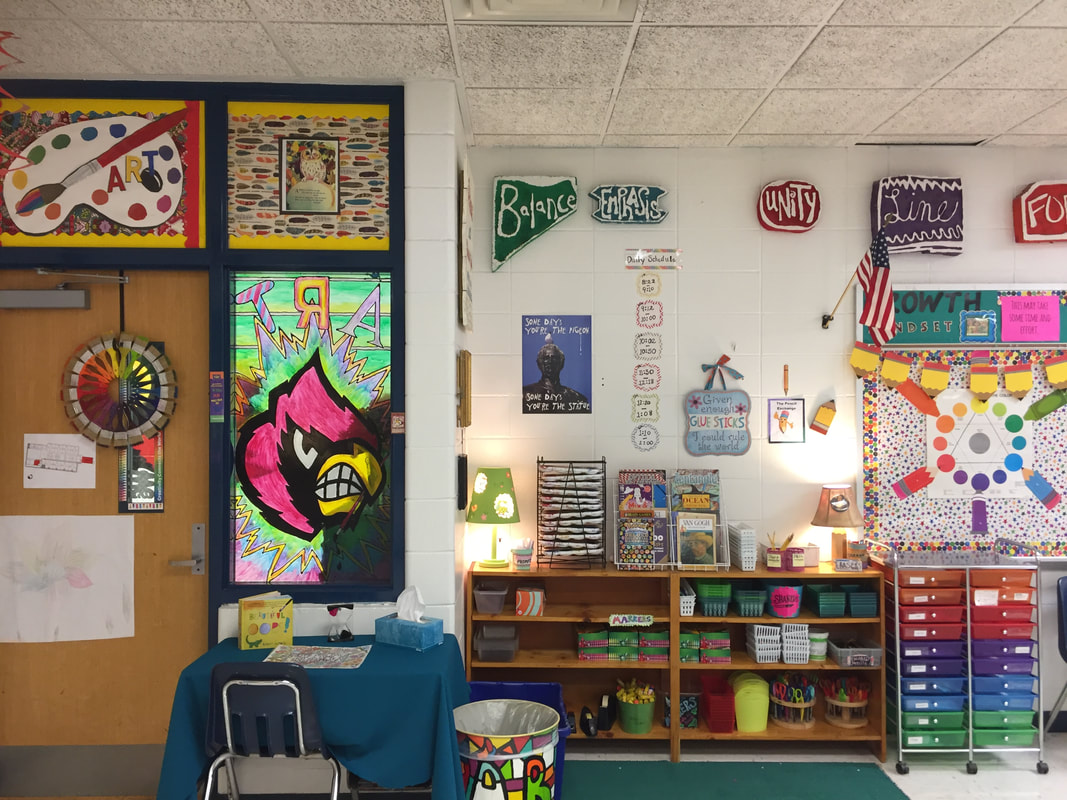
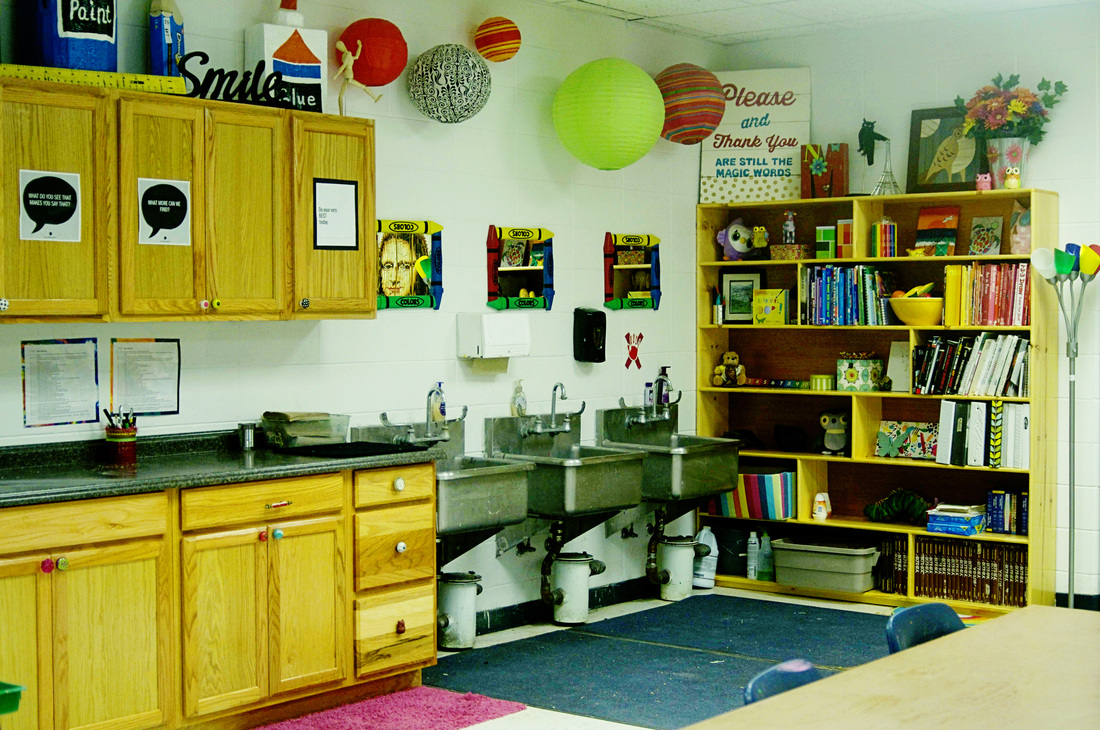
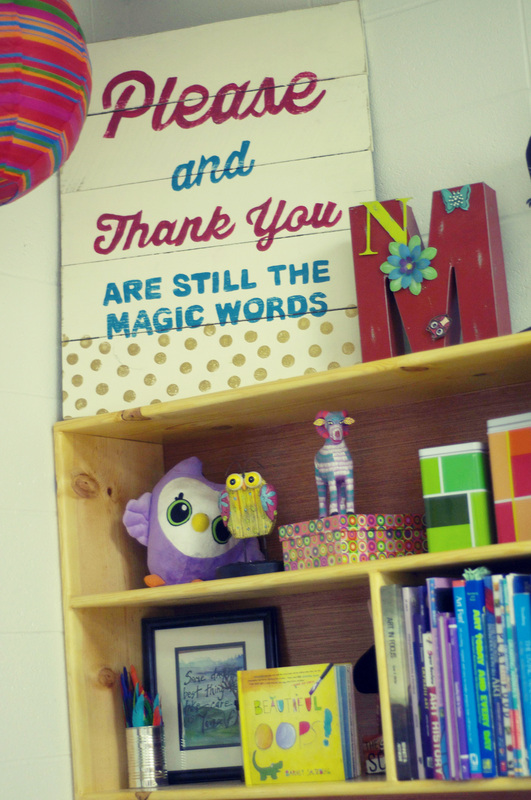
The canvas fabric cubes that I had on the shelves looked too cluttered so I recovered these and added a wood tag and a little macrame. I still think the shelves look cluttered but I have a lot of stuff....so I might still need to edit them a bit. ​Below, you can see the small book shelves before I painted them white. Also, there was an annoying orange extension cord for the overhead projector that I have since covered in conduit. I hate it when cords show! 
Picture
Picture
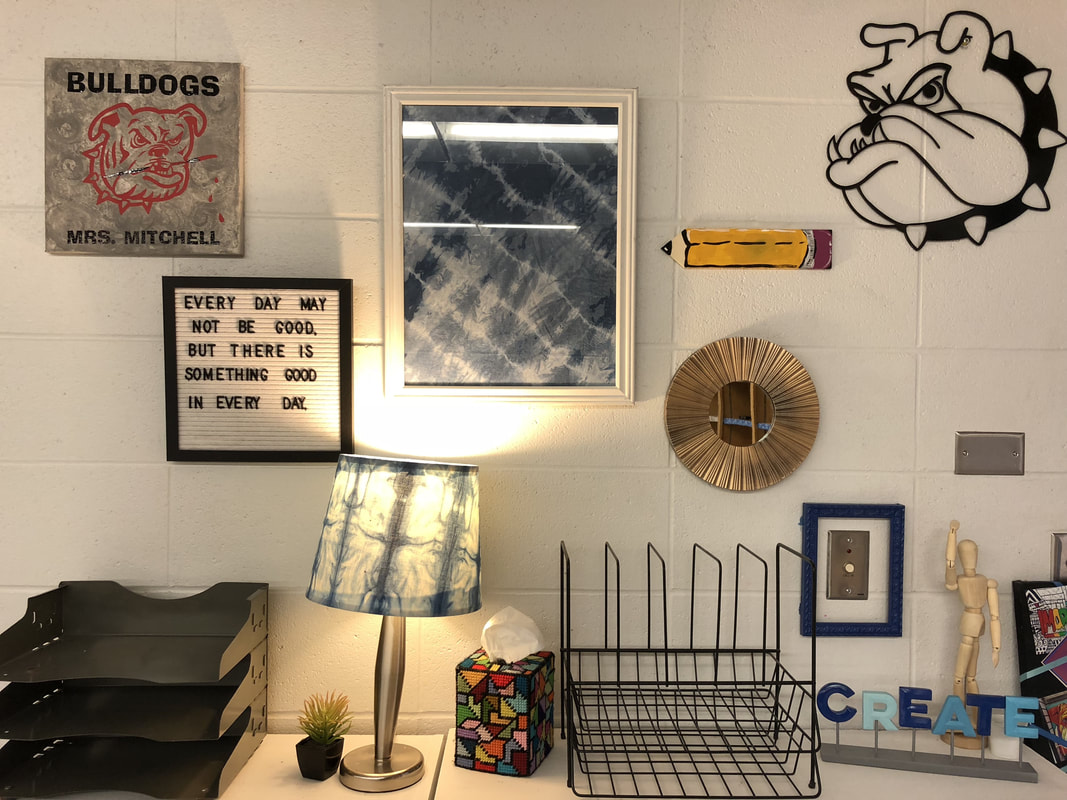
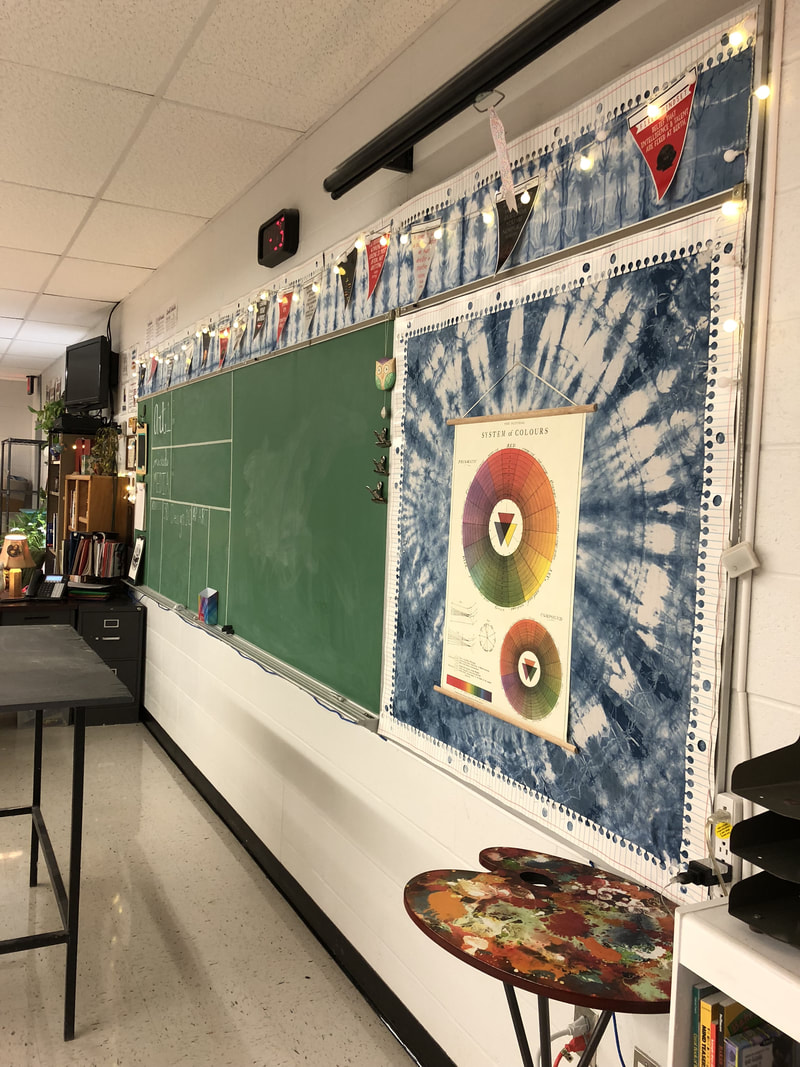
I'm still trying to decide if the framed fabric needs a quote added in vinyl or paint......
Picture
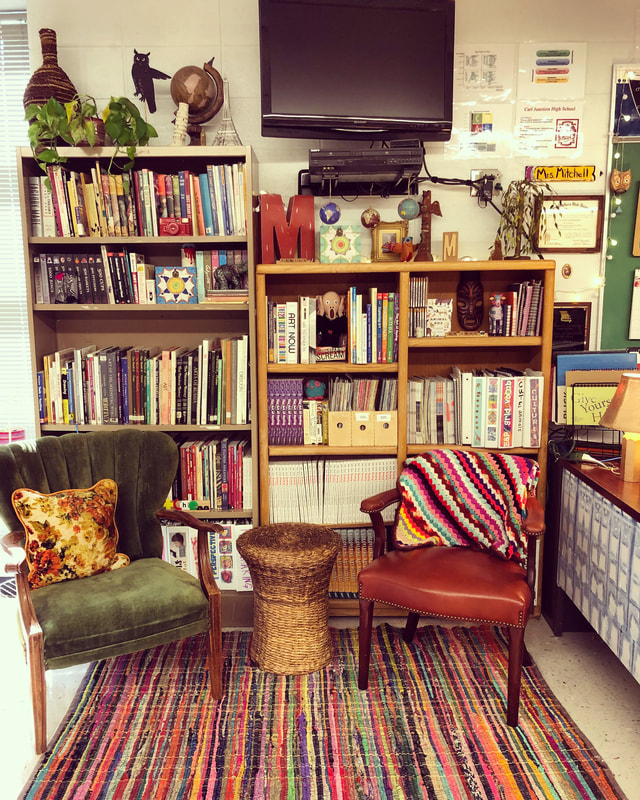
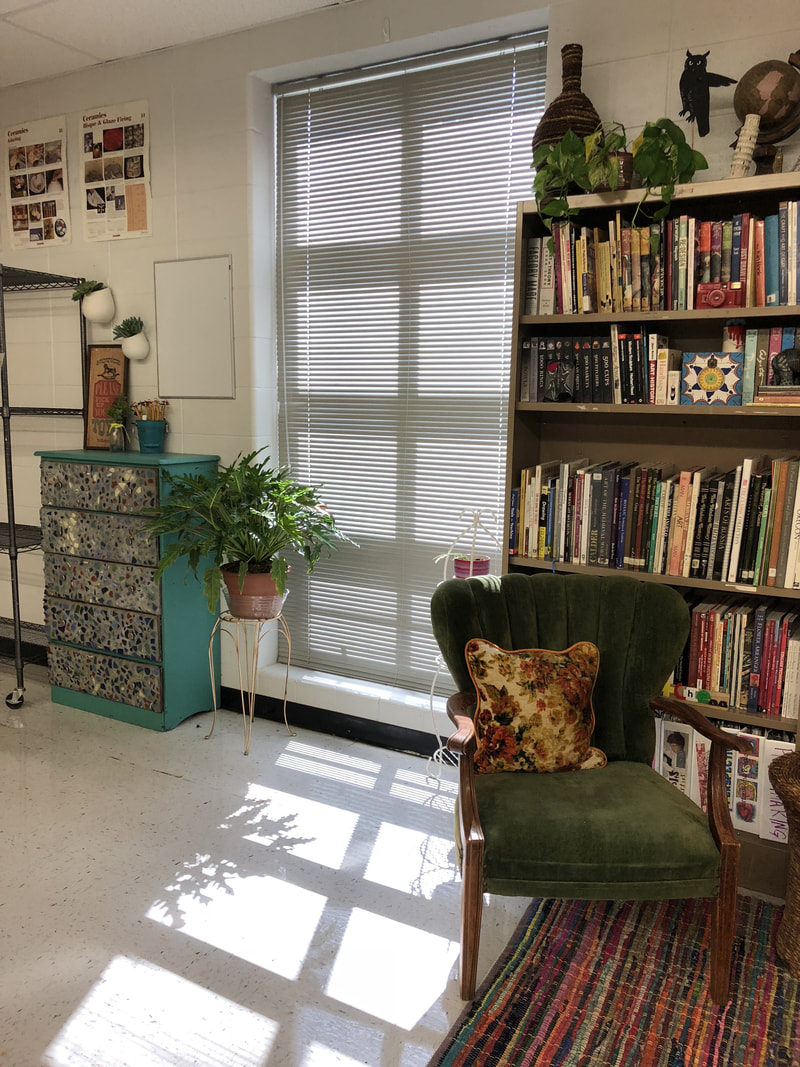
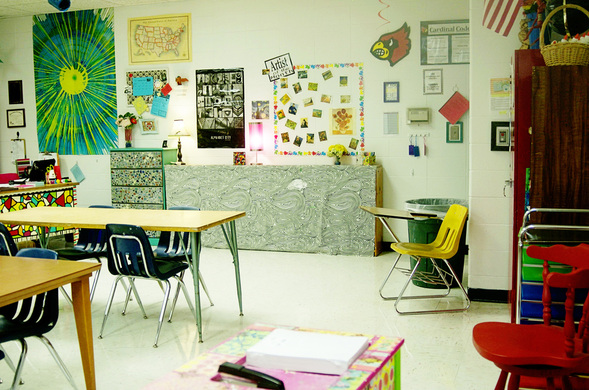
This is my most obvious 'boho' corner. The green chair was at a flea market in Springfield for $23 and the brown was I found at habitat for humanity for $8. They are not in perfect condition, but I always loved it when my teachers had real furniture in the classroom, even if it was a little 'used.' 

The wicker stool was at DAV and I paid like $10 for it. The wicker vase and plant are the only other things I bought in the above picture. I figure all of this stuff will be great for still life drawing so it was worth the investment. 

​Below, you can see the other plant that I bought and the two plant stands I purchased. 
Picture
For the first time in 10 years, I have a window!! 
Picture
Picture
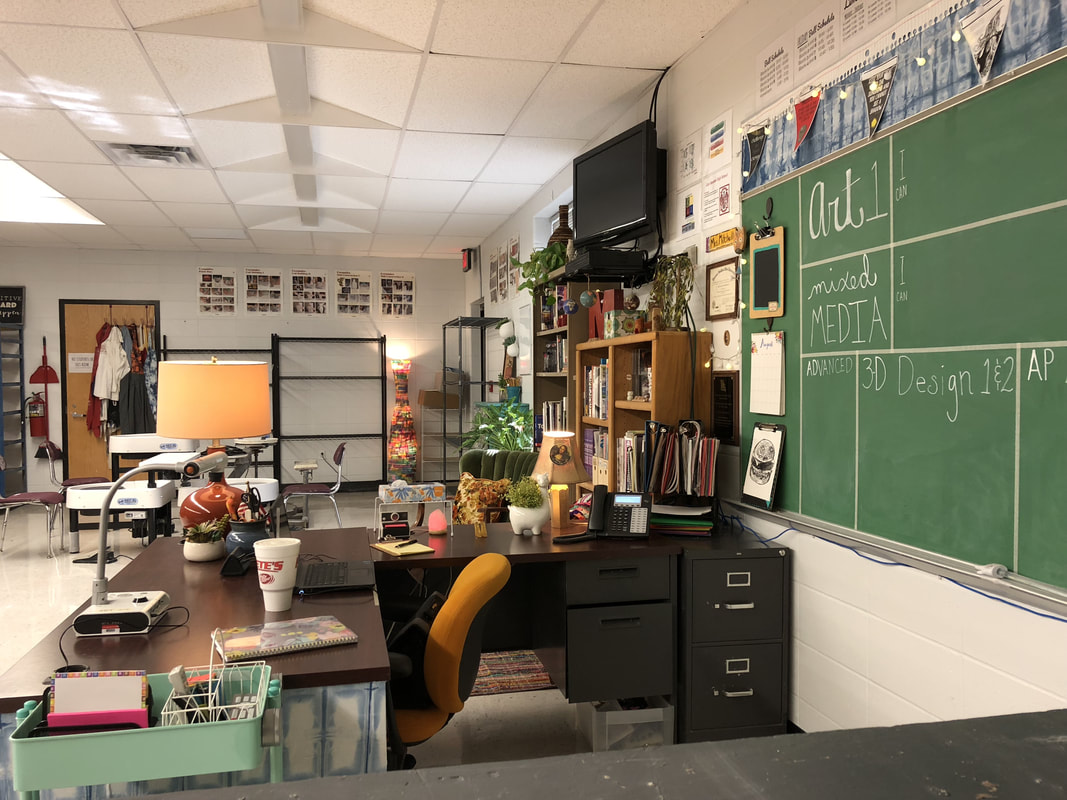
My room has 3 office chairs. I still opted to bring this yellow chair from home because I love it and I don't have a desk at home that it works well with.....
Picture
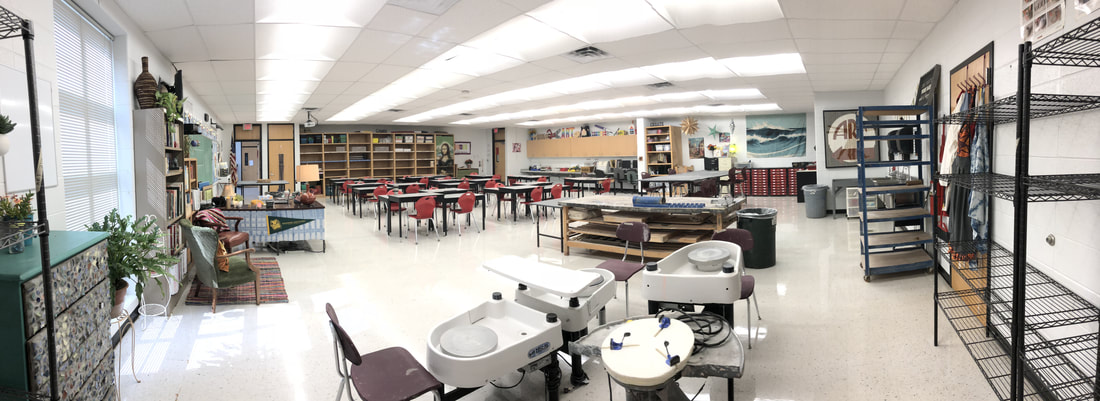
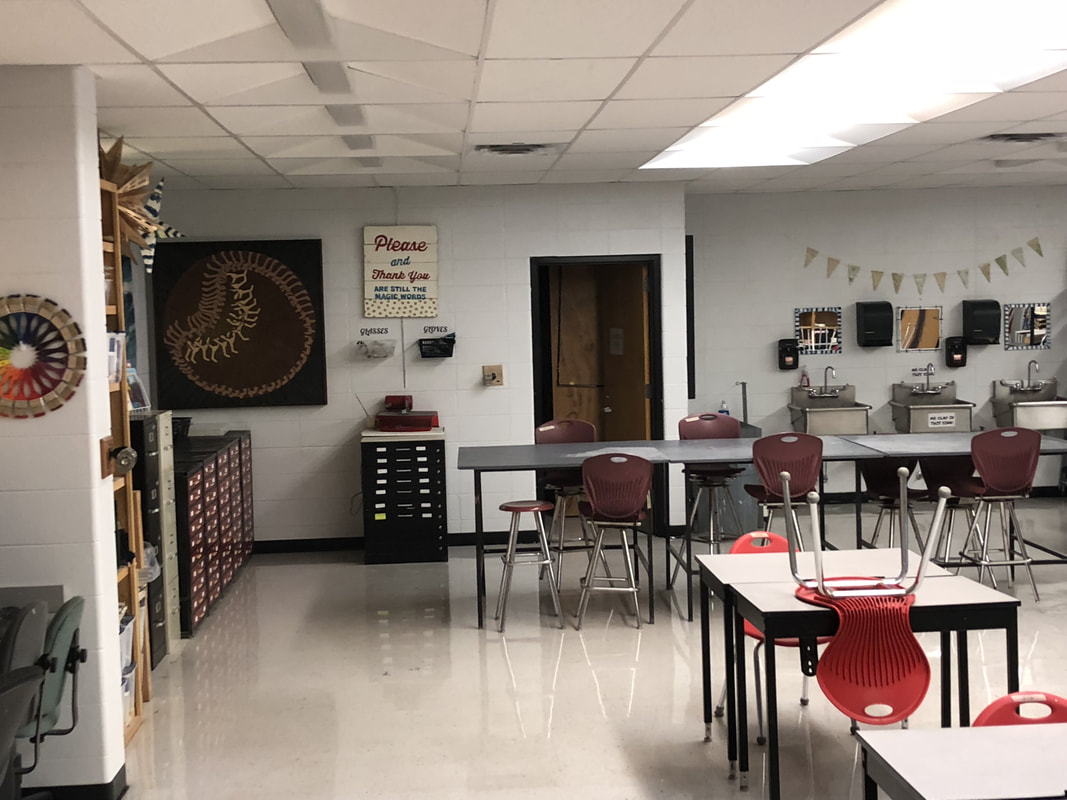
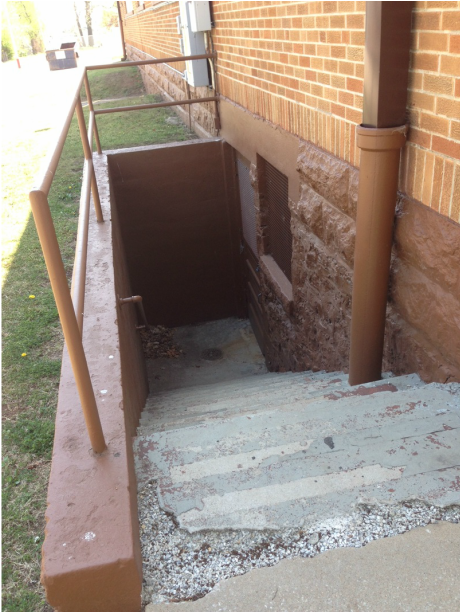
This room also has an exterior door, which has been really nice for moving and unloading stuff. I can pull right up to the door and viola! Unload! This is the view from the exterior doorway. Pottery wheels! And lots of wire shelving for clay. 
Picture
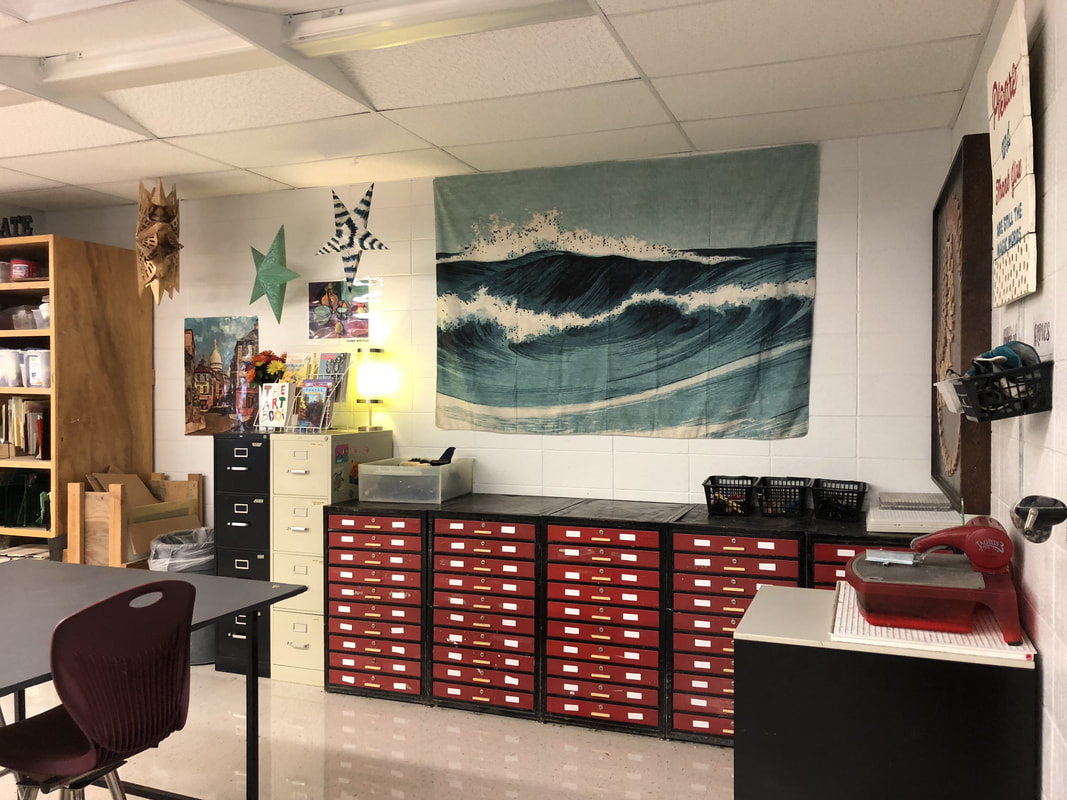
These tapestries are so cool! I seriously could not decide which one to get...but this one was the first one that I fell in love with. I put a link at the bottom of this post to the one I got, but if you have a big blank wall space, you might look at some of the others. I hung it with velcro and hot glue, but I don't know if it will stay because it was the Dollar Tree velcro.....

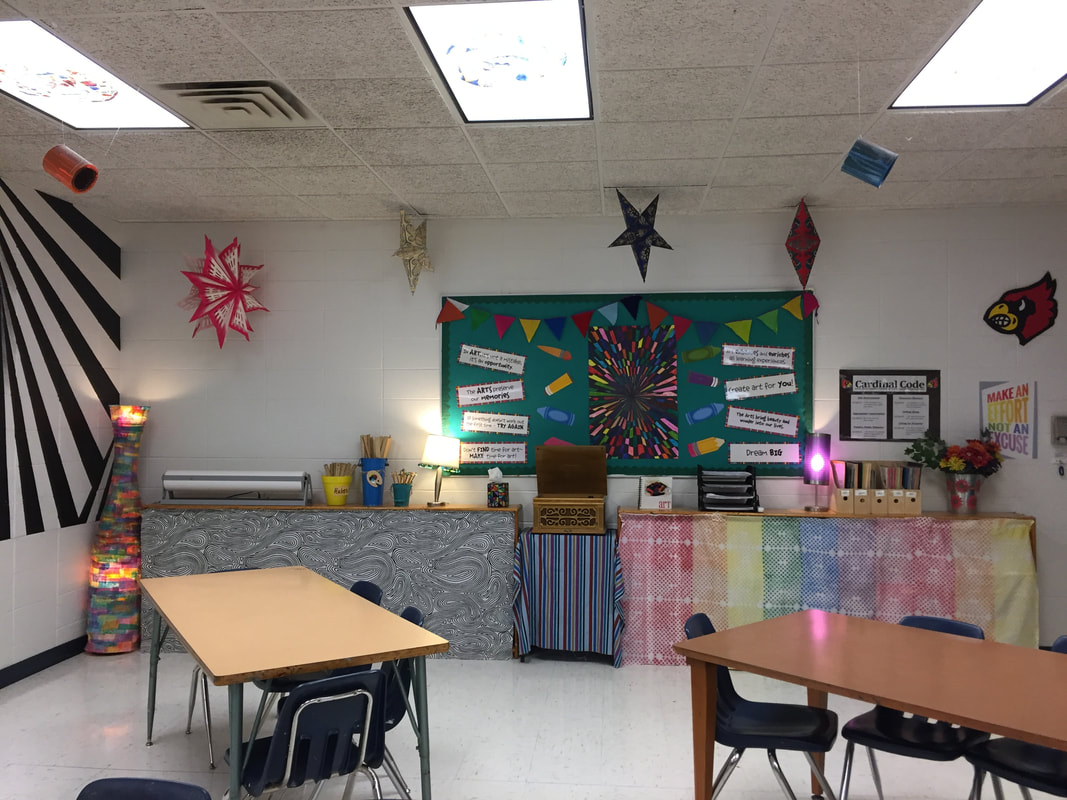
I have had some sort of star or paper lantern in every classroom I've ever had. At first, I wasn't going to have anything hanging from the ceiling but I spray painted the BIG gold one (used to be pink and white), and I had the green one at home. The white one is from home, I just added a little blue paint to make it look sort of tie dyed and now I can't imagine this space without the suspended stars. 

Picture
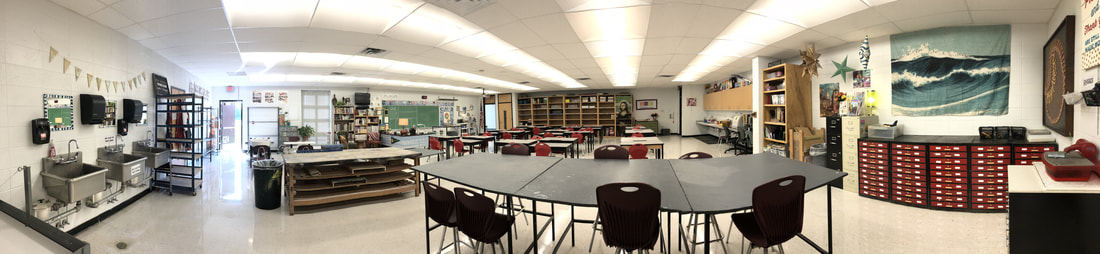
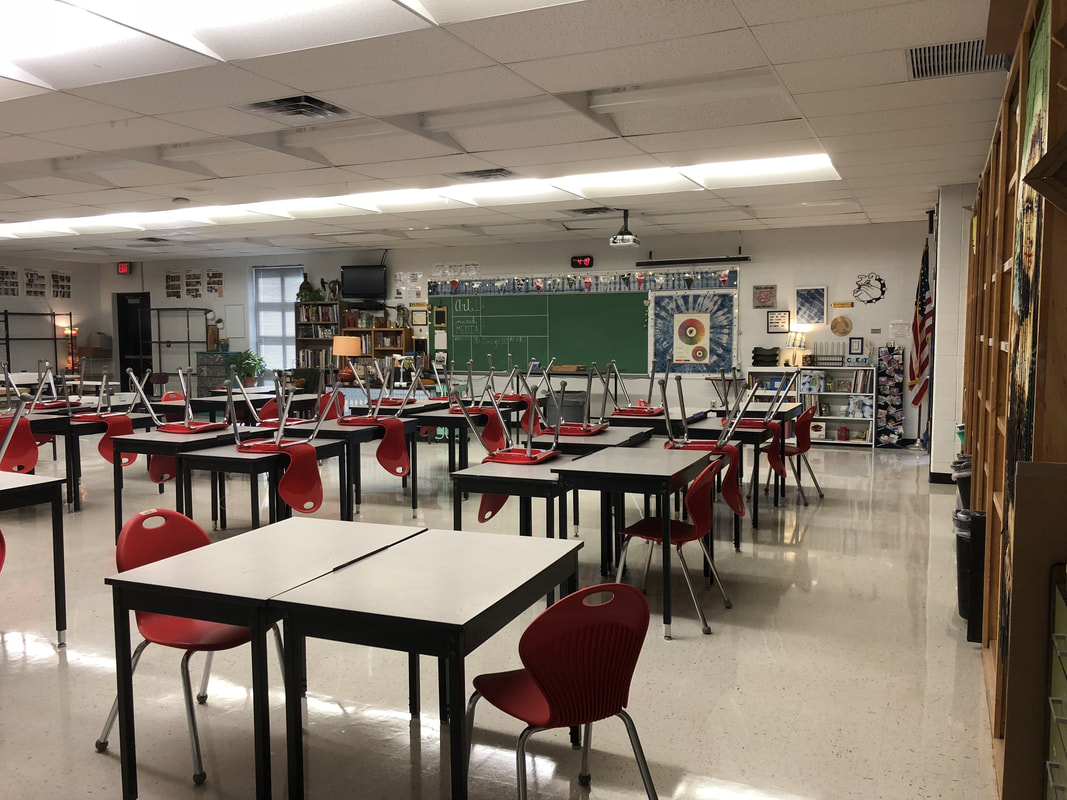
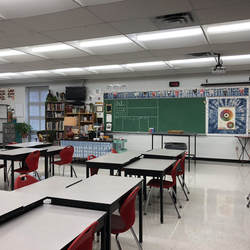
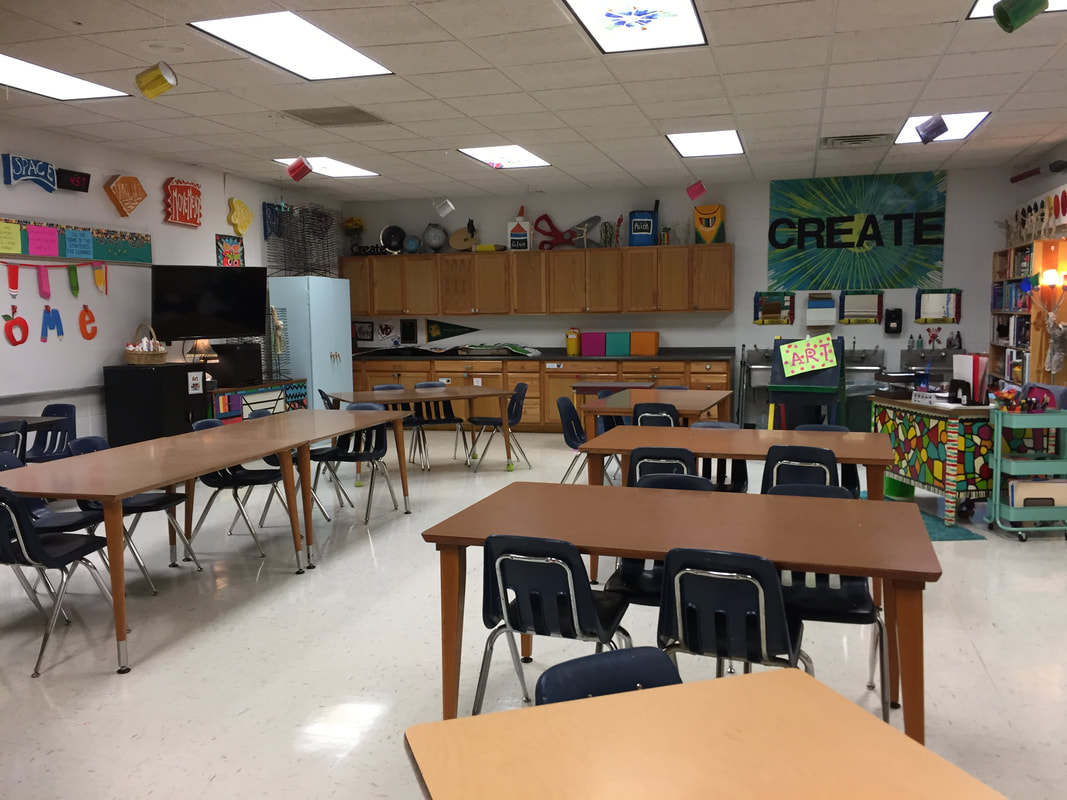
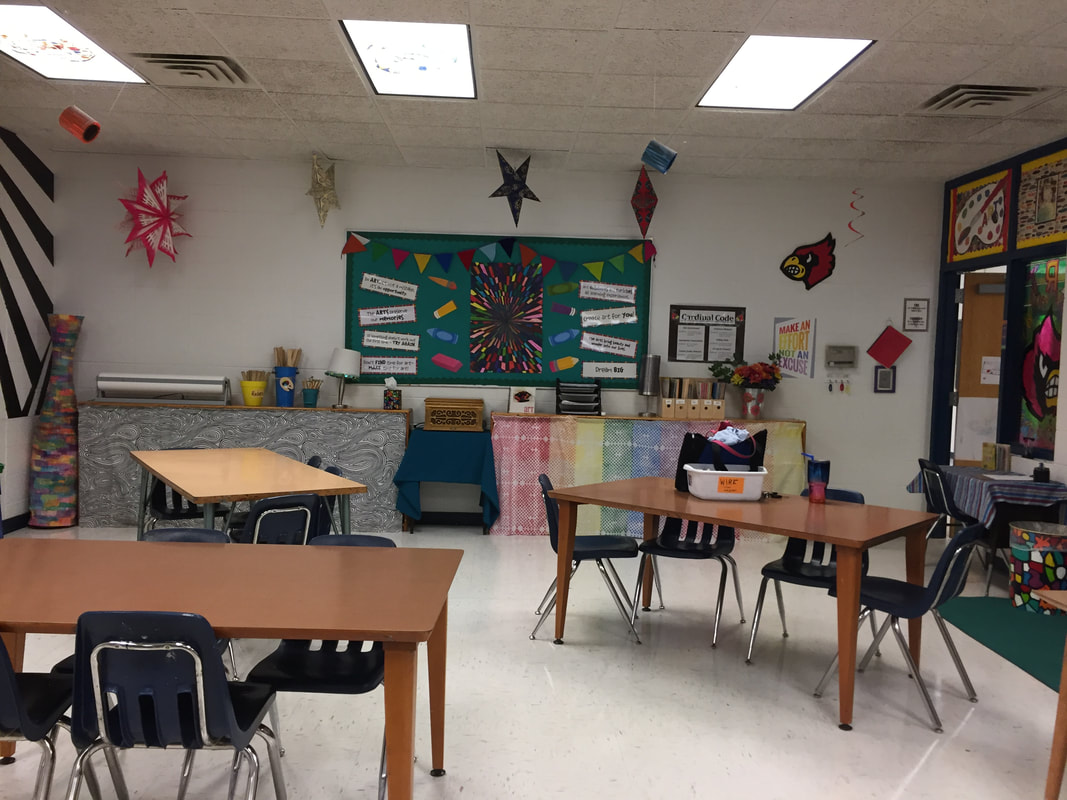
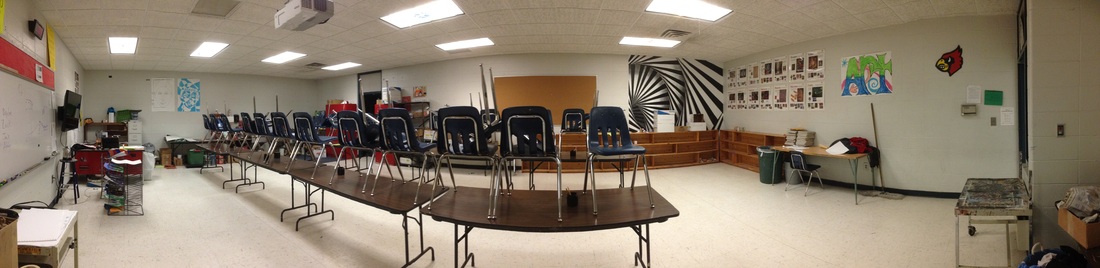
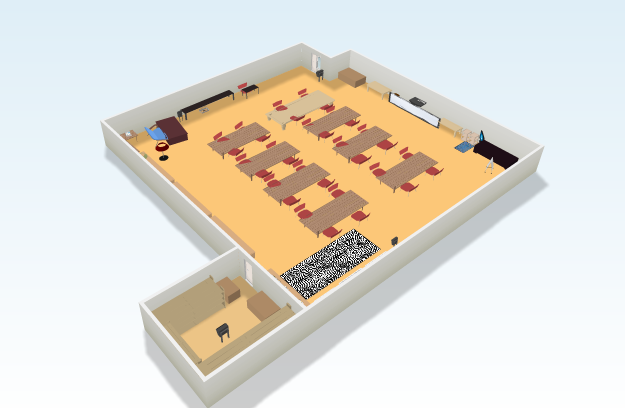
This room really is big, with a couple of different areas. 
Picture
Picture
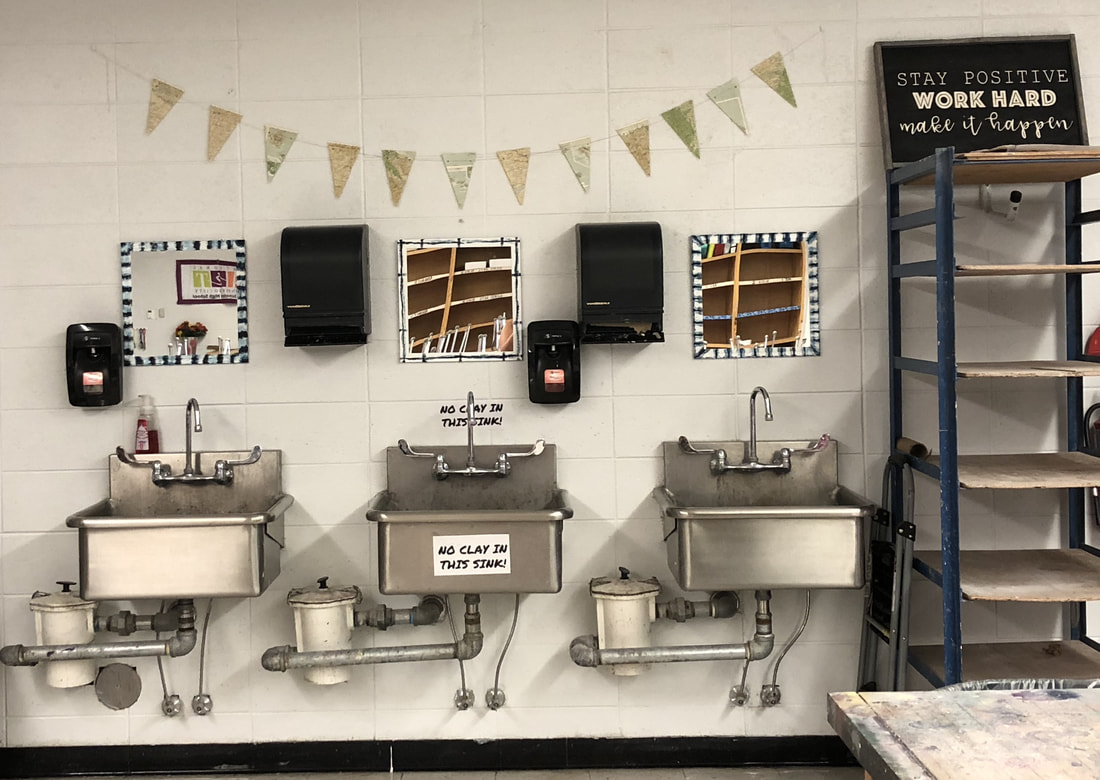
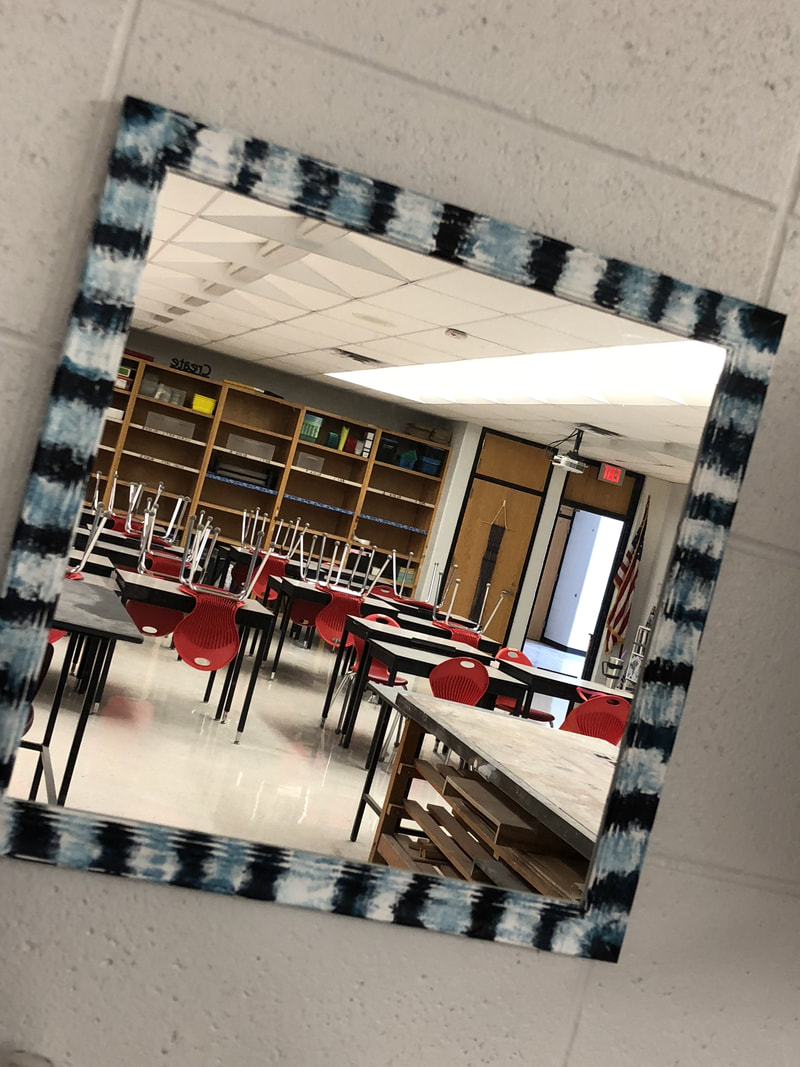
These mirrors were $5 walmart buys. They came white and I just used a little blue acrylic to make a design on the edges. The map bunting I made several years ago from an old atlas. 
Picture
Picture
Picture
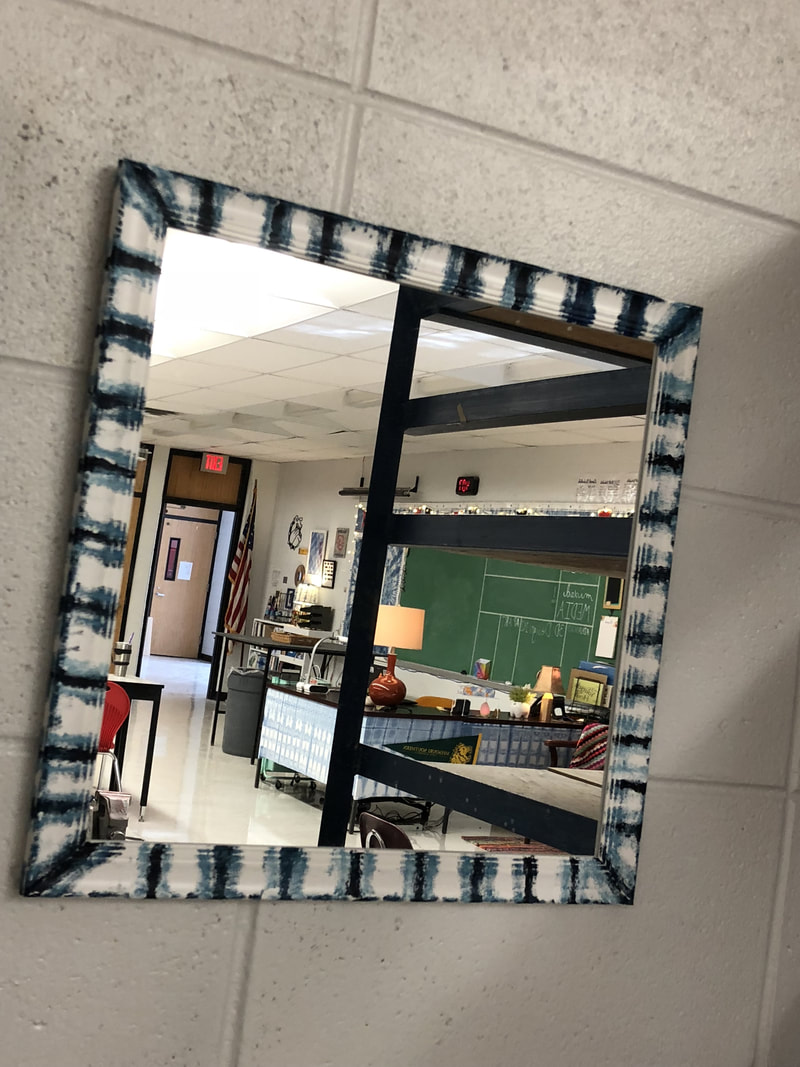
The open storage you can see in the mirror here is still a work in progress. I put a bunch of stuff up in the top that I might try to put elsewhere....Mostly, this will be a place where we store portfolios and 'in-progress' work. We can work on LARGE projects because we have plenty of space!
Picture
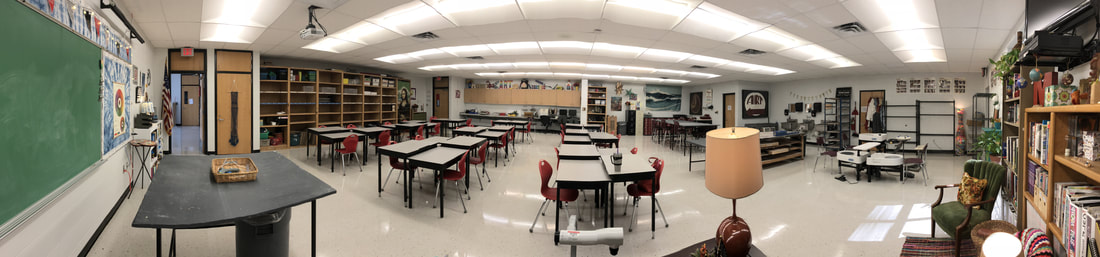
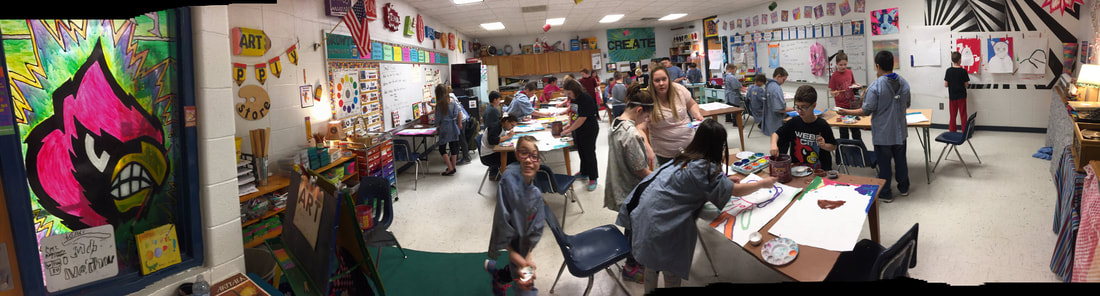
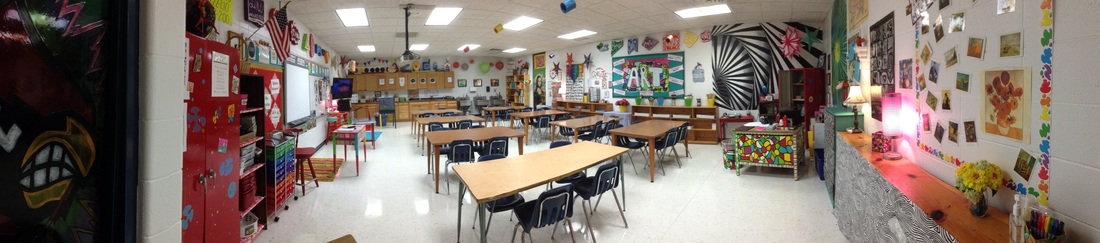
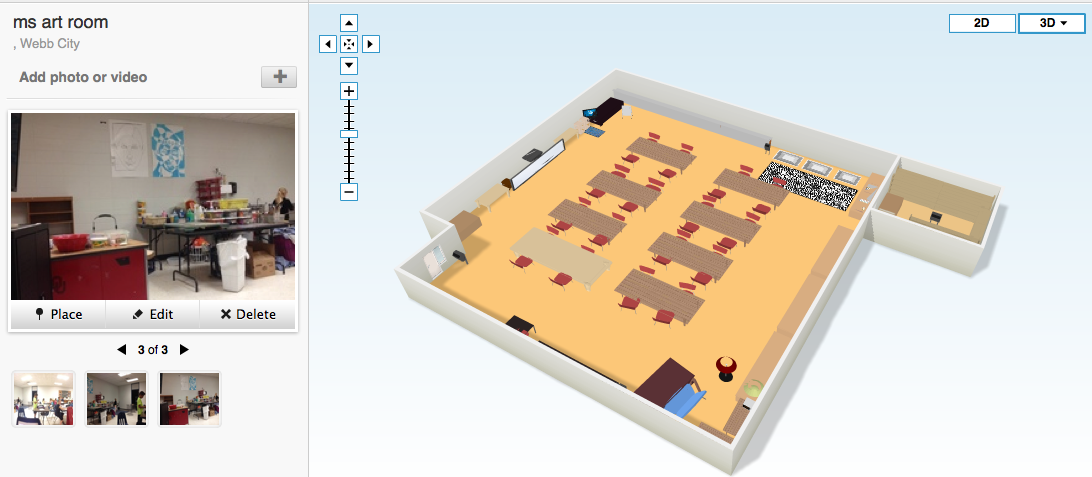
This is the view from behind my desk. These panorama photos are a bit misleading so I made a 360 video. 
Picture
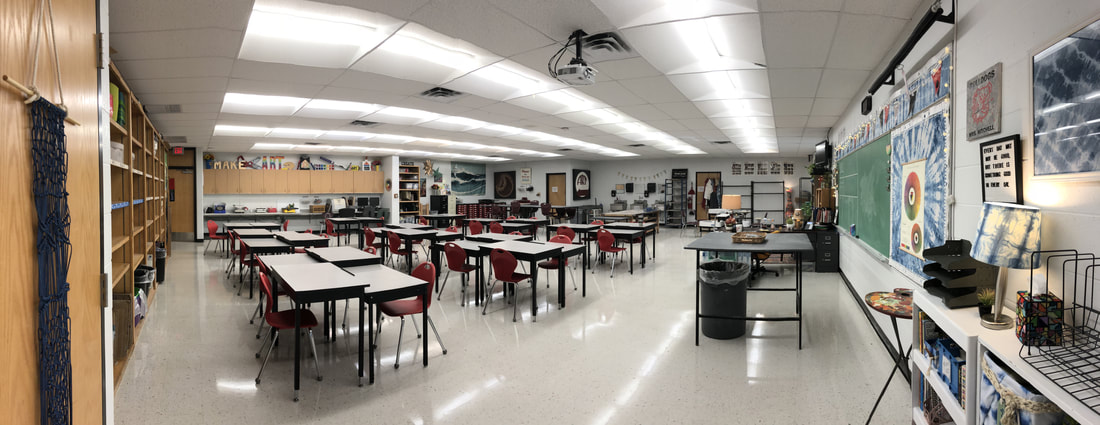
The room has two entrance doors, three closet doors and one exterior door. Above is the view from one of the doors. Below is the view from the other door. 
Picture
Picture


​

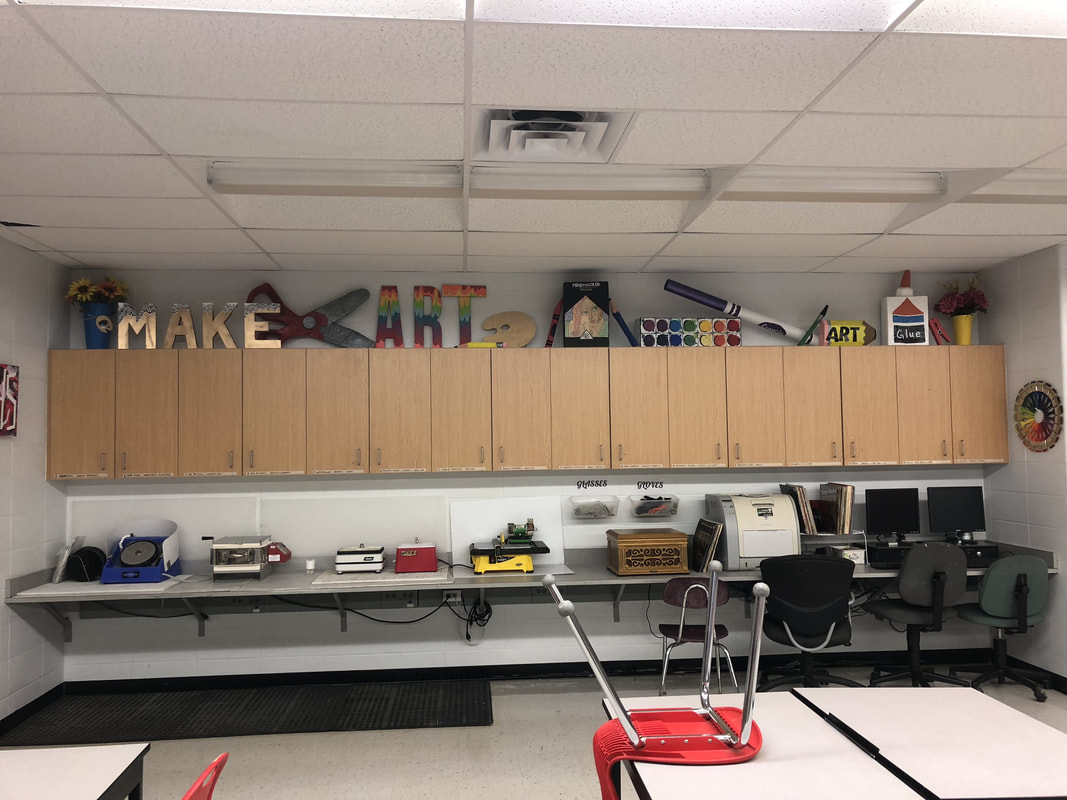
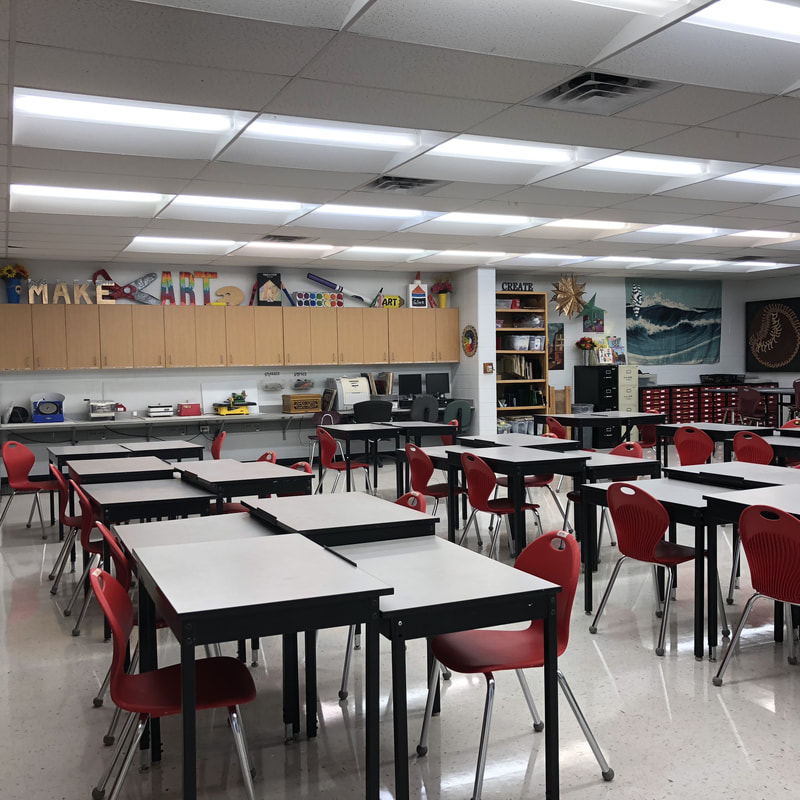
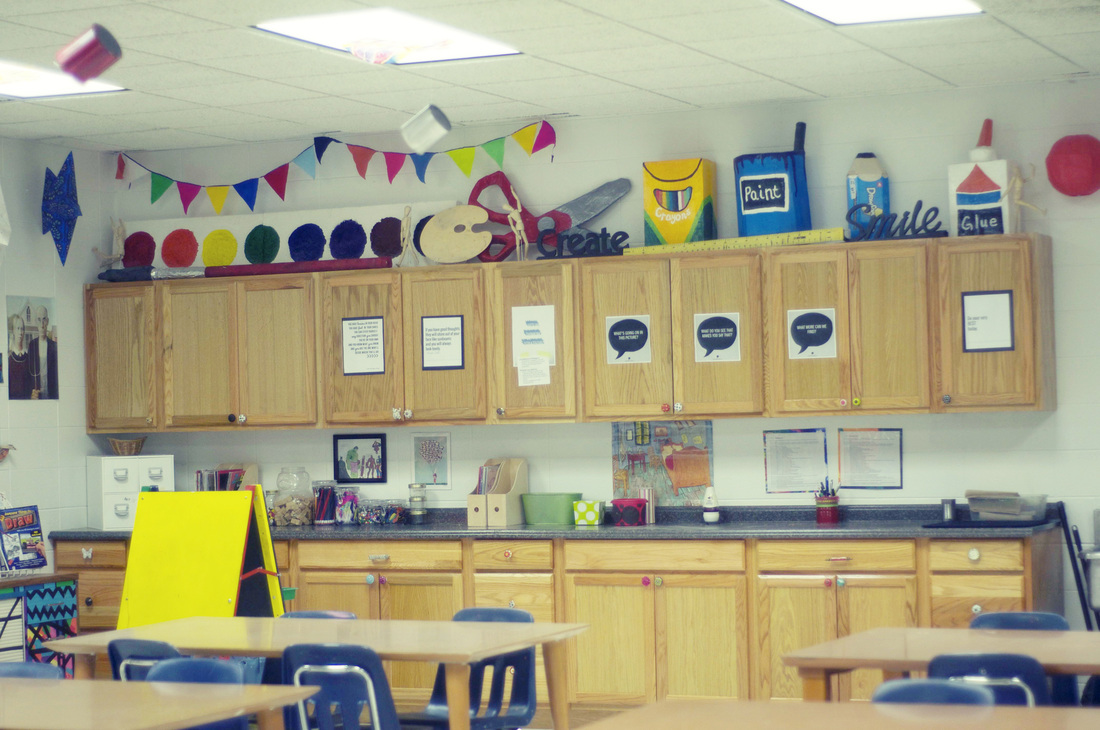
I like that the room has two light switches, I can have half of the lights on at a time, I should've turned them all on for this photo (and taken this single chair down, oops). But above the cabinets is some dead space that I have decorated with some oversized art supplies. Some people like to use that space for storage.....and I might need to do that eventually, but for now, I'm going to try to keep it uncluttered and 'decorative'. 
Picture
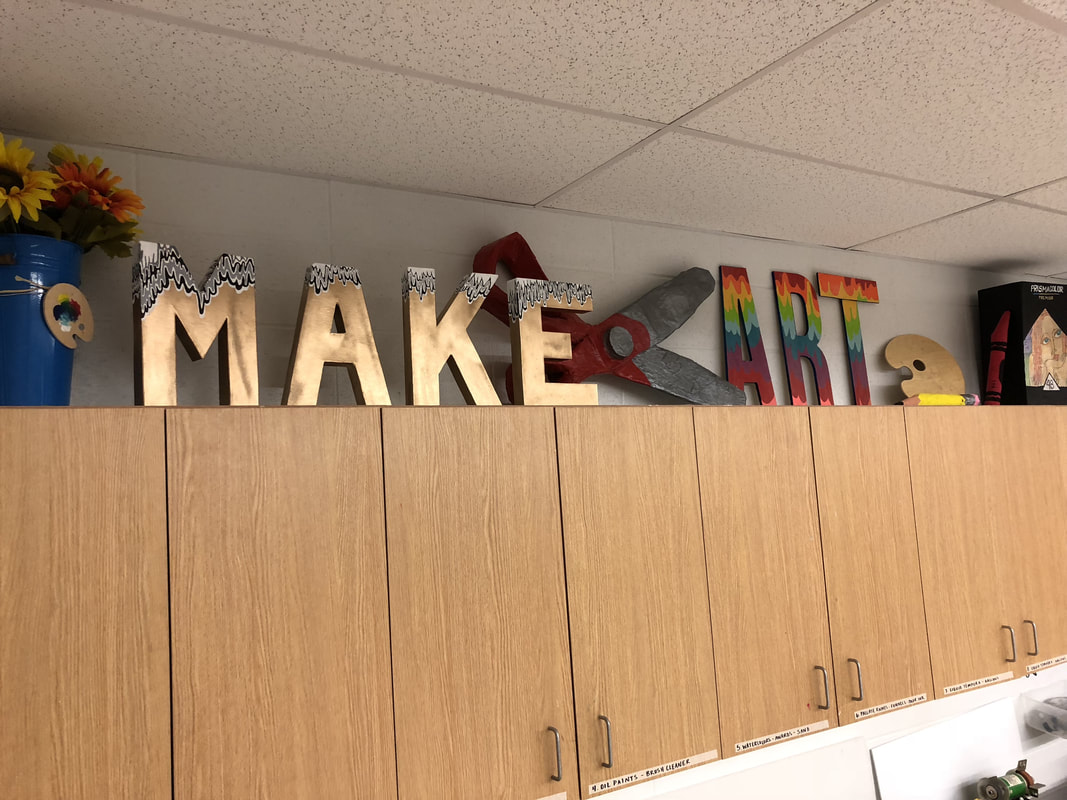
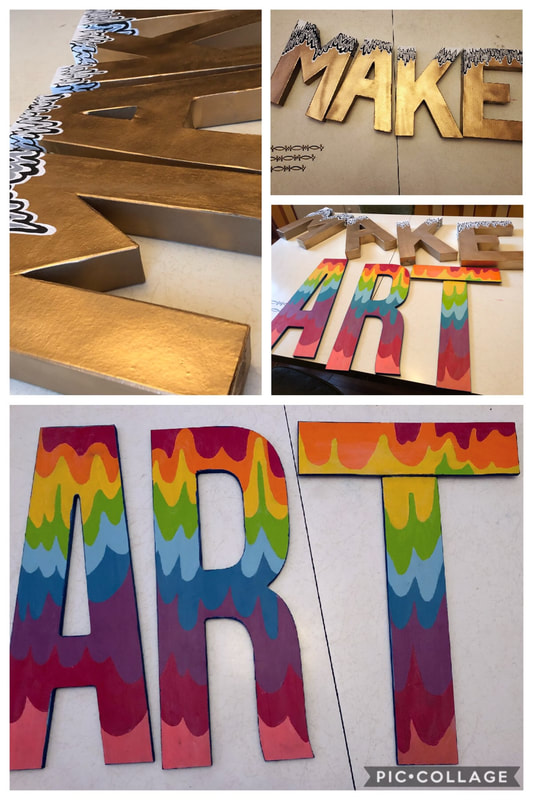
The scissors are paper mache that I made with a student teacher several years ago. They have travelled to most of my art rooms. This year, I added the letters MAKE ART, which I painted in July, inspired by the artist Jen Stark. 
Picture
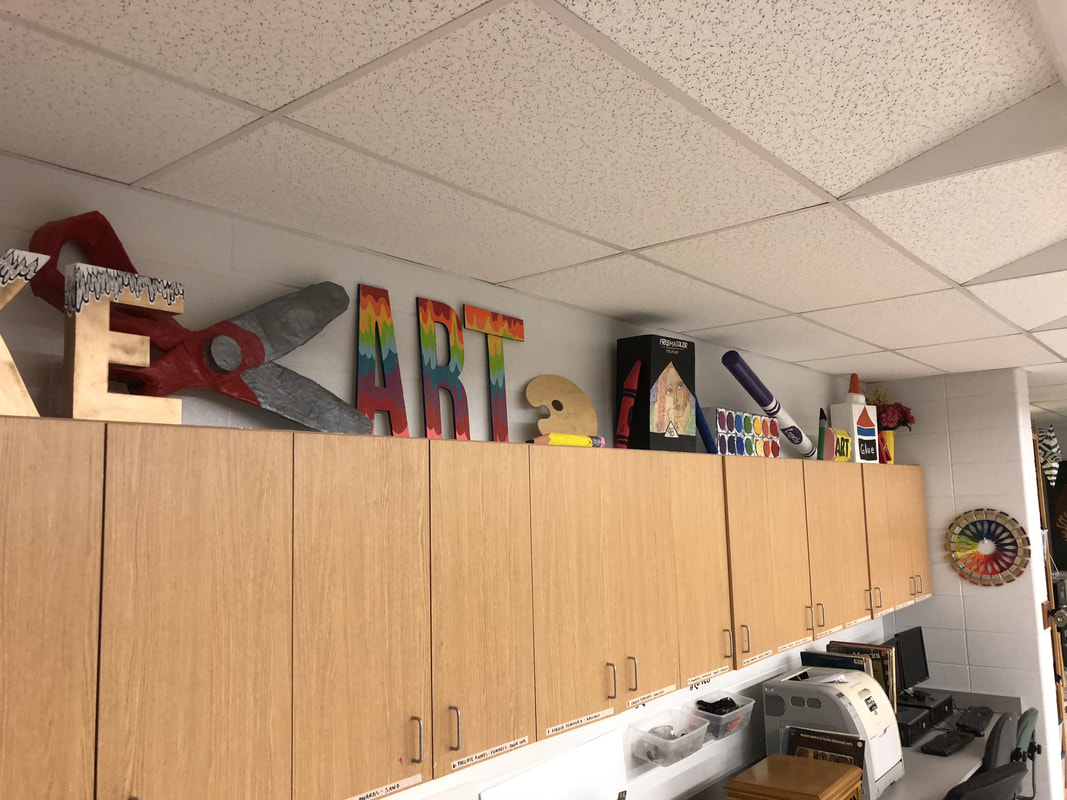
The prisma color box used to be a box of crayons, but I painted over it this year. The 'messy' watercolor box and the big crayola marker are new this year. 
Picture
Picture
Picture


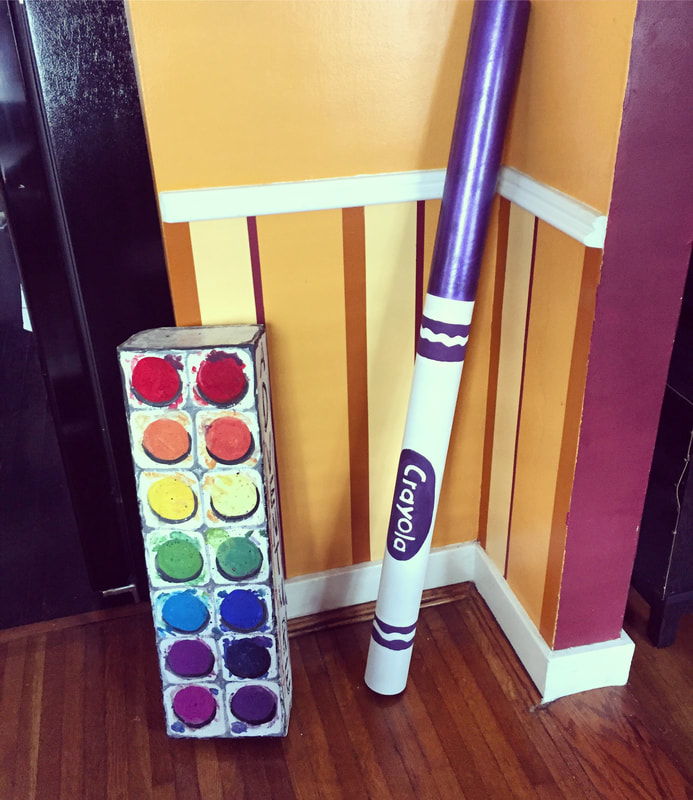
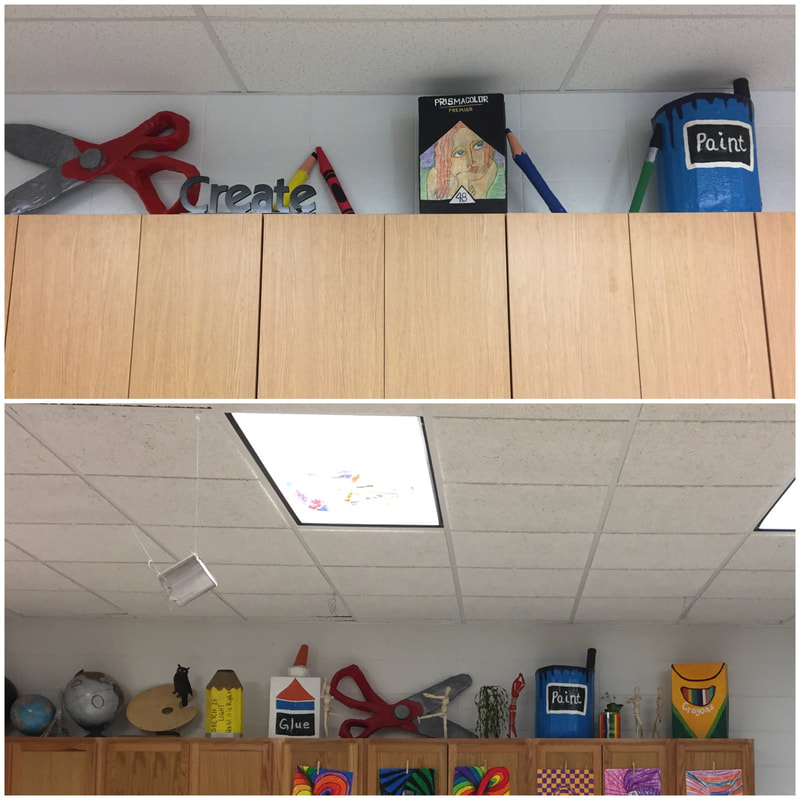
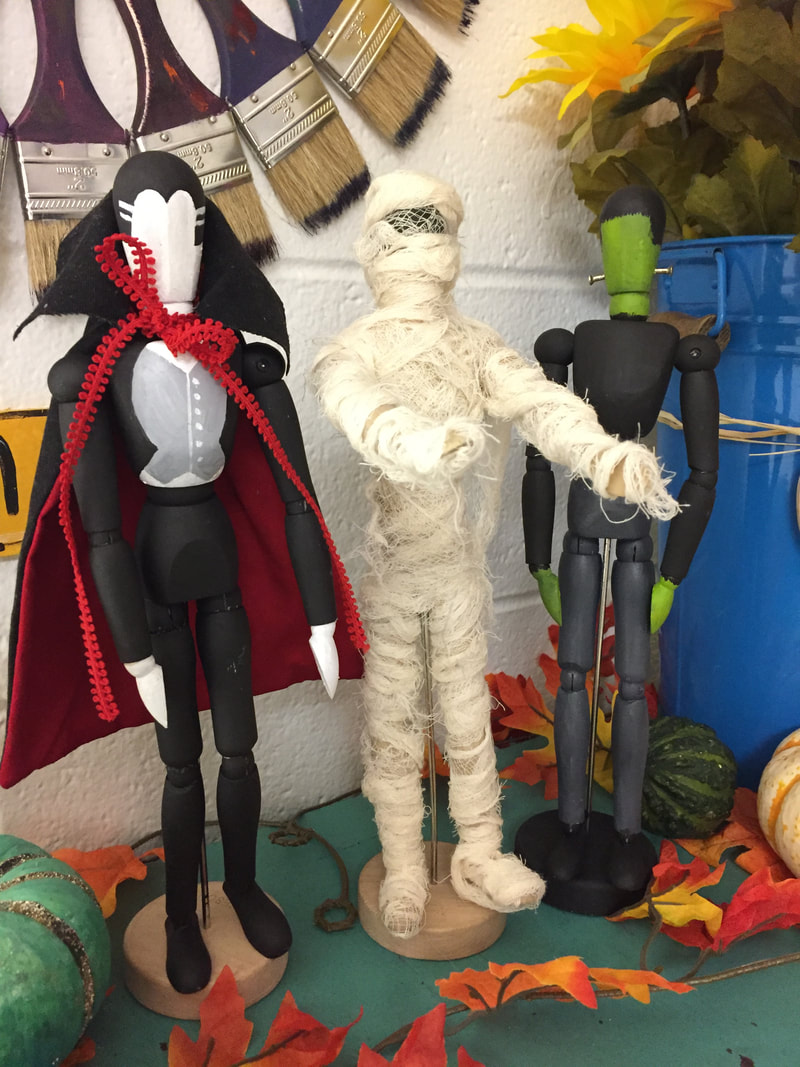
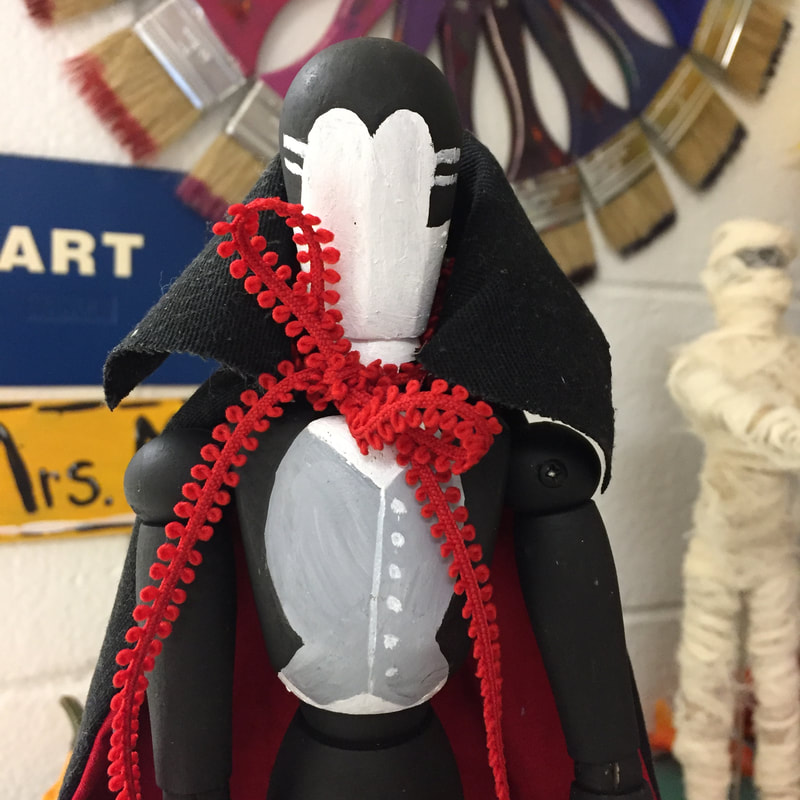
I had a tendency to clutter up the area above my cabinets in the past, you can see the old crayon box, which is now a prismacolor box...I still have the paint jar, but it doesn't look right with the other new stuff so I took it down. The globes I left at my old school and I also left the manikins. 

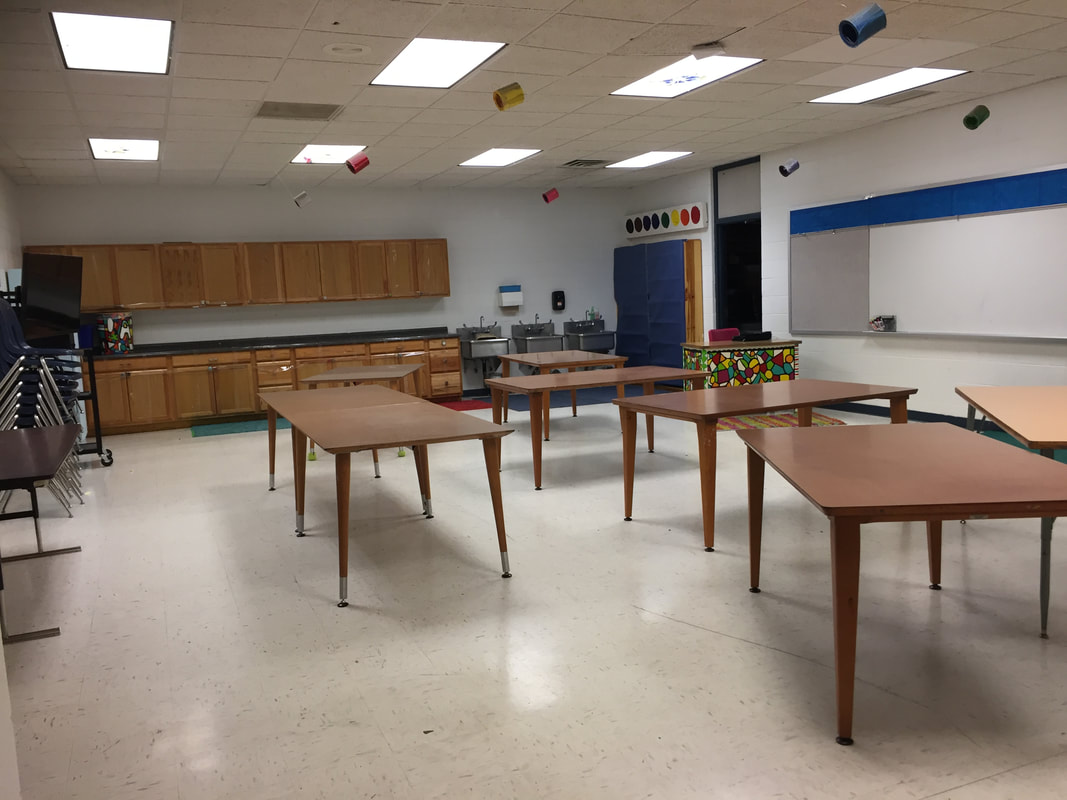
I am so grateful to the last art teacher for leaving such well-labeled and organized art cabinets, so helpful!! Made my job this summer a lot easier. 

Picture
Picture


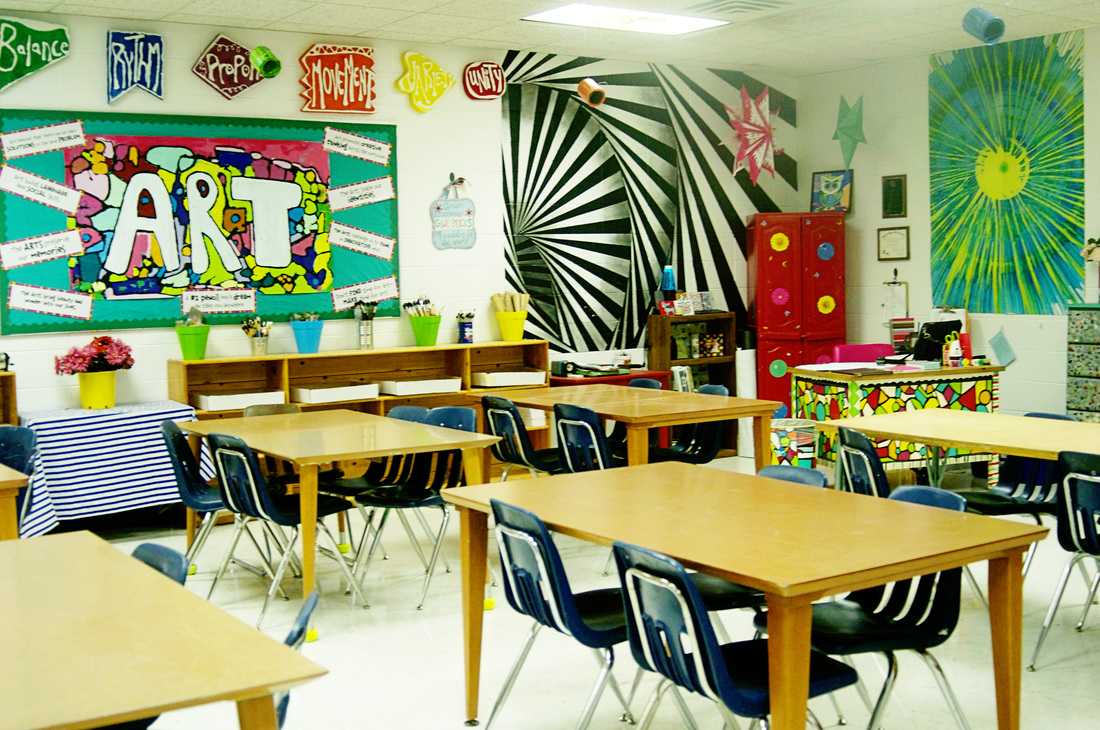
Today, (after I took this picture) the custodian offered to adjust all of the desks so they are the same height, which I think will help when sharing supplies. The desks are like mini drafting tables, but the mechanism inside is a little janky so they don't really work right anymore. 

Picture
As you can see it is a nice big room. In at least one of my classes, I will have more than one 'class' at the same time...so it will be nice to have several learning areas to utilize. My new schedule is block, so I will have 3 long classes and one long planning period each day. I am most excited about the new schedule and the window in my art room. 

School doesn't start for another week, so I have been working on lesson plans and syllabi and new emergency sub plans. It has been a busy summer with moving, changing to a new job and learning all the new ins and outs, but it is also really exciting and I am looking forward to all the changes!
Product Links:
Here is all the stuff I bought. 

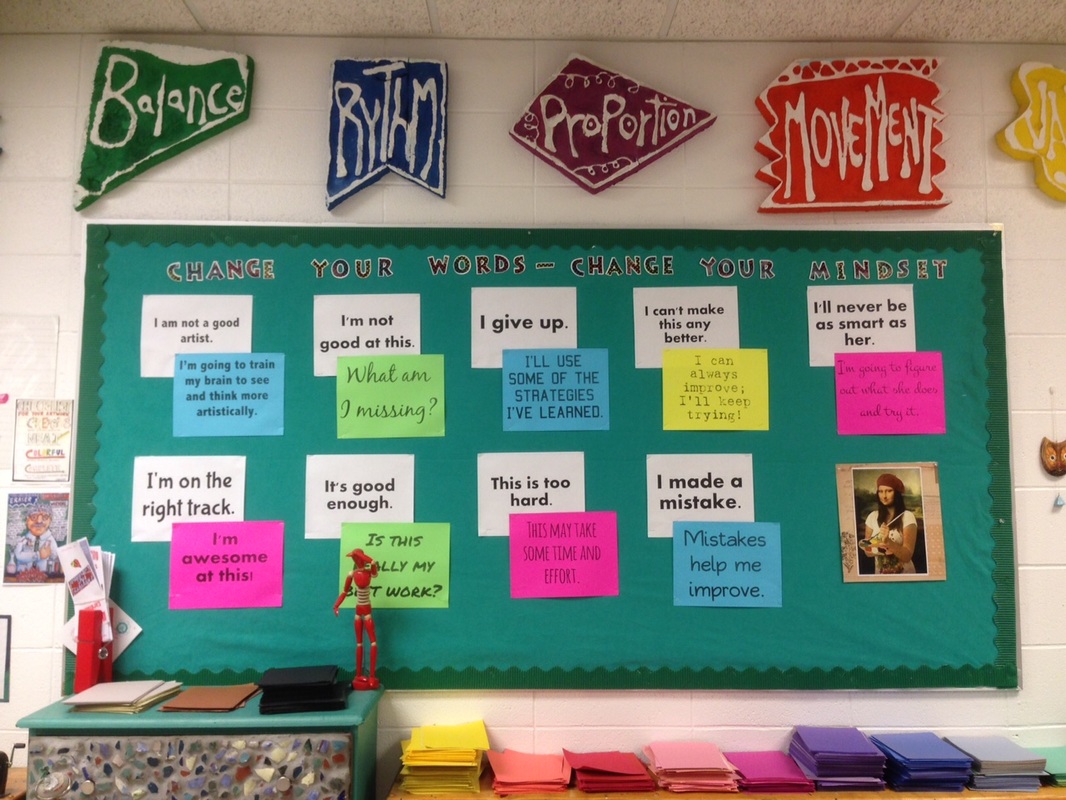
Growth mindset Activities Bunting on TPT, posted above my board. I printed it on a color printer and laminated it. 

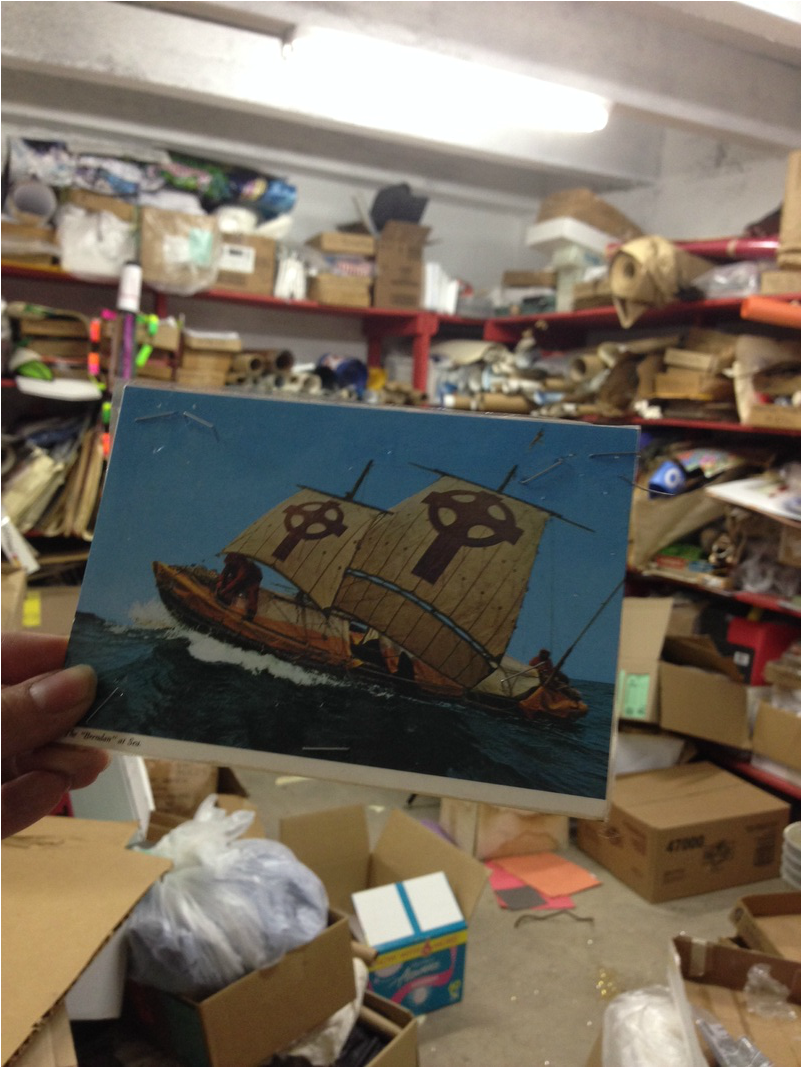
Maritime Wall Tapestry Wall art for only $15.91 !! They have the Great Wave and Starry Night, but this one just felt right. 

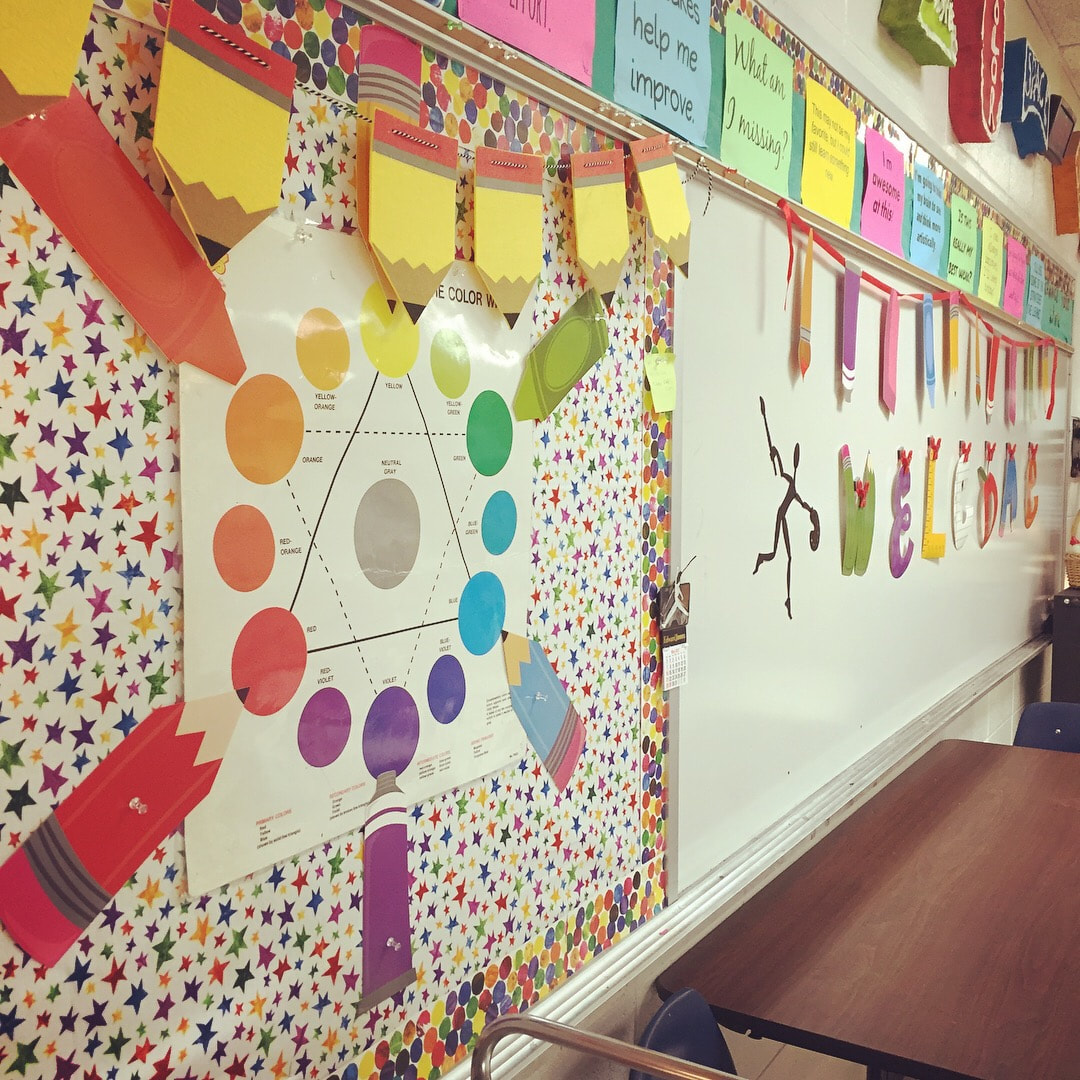
Cavallini Papers Color Wheel Vintage Style I sprung for the one on the wood rod...even thought it was way more expensive than the poster by itself. 

Green Click 34 ft LED Outdoor globe String Lights with Remote Control. I like the warm light ones, and I bought a color string for my porch at home. 

Darice Square Bevel Mirror For $5 each at Walmart. 

Llama ceramic planter. Mine was a gift!

Mint Lexington 3 Tier cart I bought this last year at Michaels. 
Lamp, and chairs and wicker table were thrifted. 

​Paint Palette Wood Table on clearance at Hobby Lobby. 

I dyed most of the fabric myself. Using the Jacquard Mini Indigo Tie Dye kit at Michaels. 

I found the Rag Rug at Ross for $10 so I though it was a good buy. 
​
Joann Fabric had a bunch of Indigo Shibori Decor items like pillows at the start of summer. I went in at the end to see what was left and 70% off, but most was gone, I got the idea to frame a piece of dyed fabric.... and I did buy about 3 yards of a shibori looking design, but I learned that it is so much cheaper to dye your own. The cut I got was like $20 and I used a coupon to make it a little cheaper. They have more fabric, if I need it in a pinch. 

Michaels has a bunch of 'indigo' accessories: duct tape, washi tape, ribbon, garland/banners, but most of it was not on sale and I could not justify spending money on it at full price. Now I need at least 3 more rolls so I will be going back. I couldn't find a link for this. 
Picture
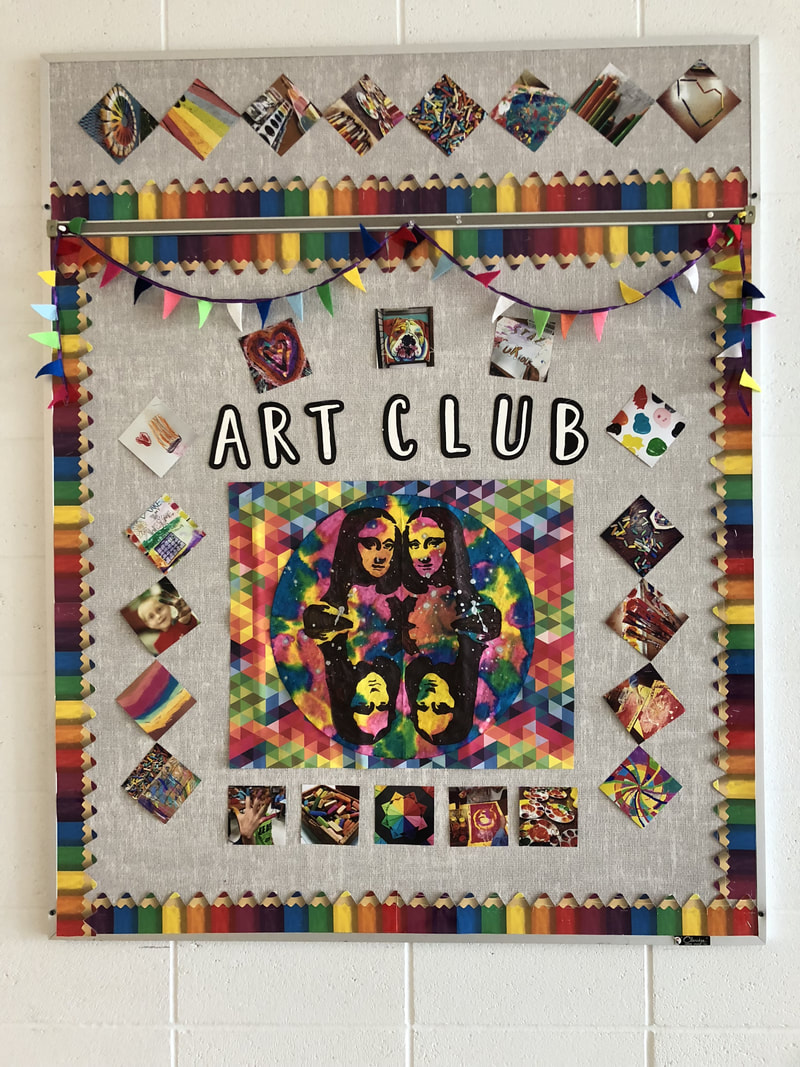
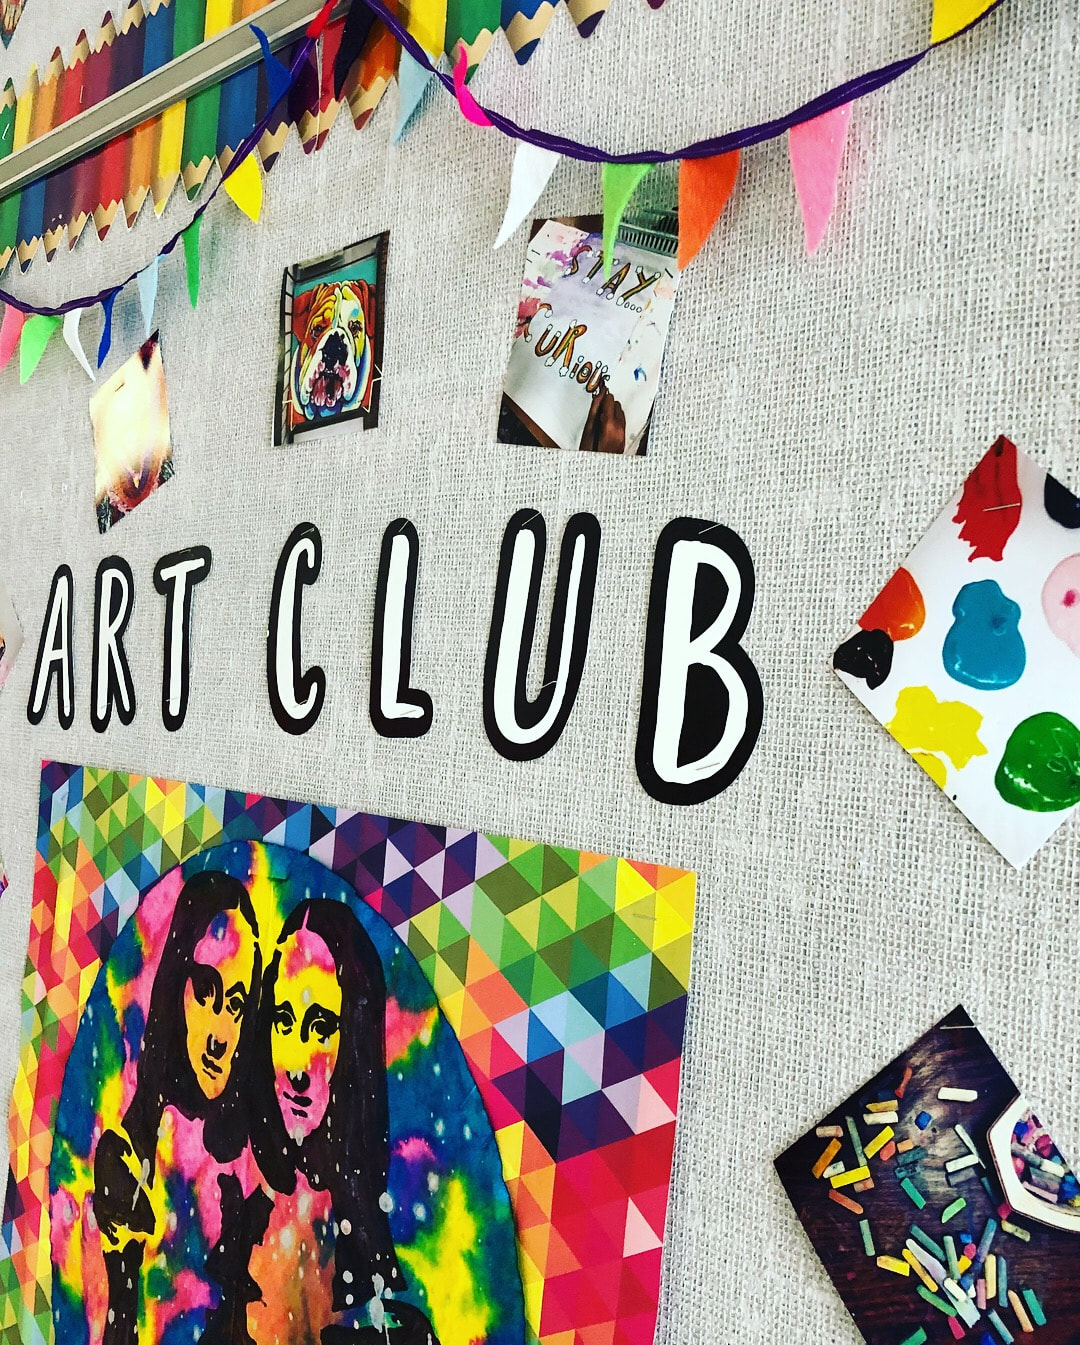
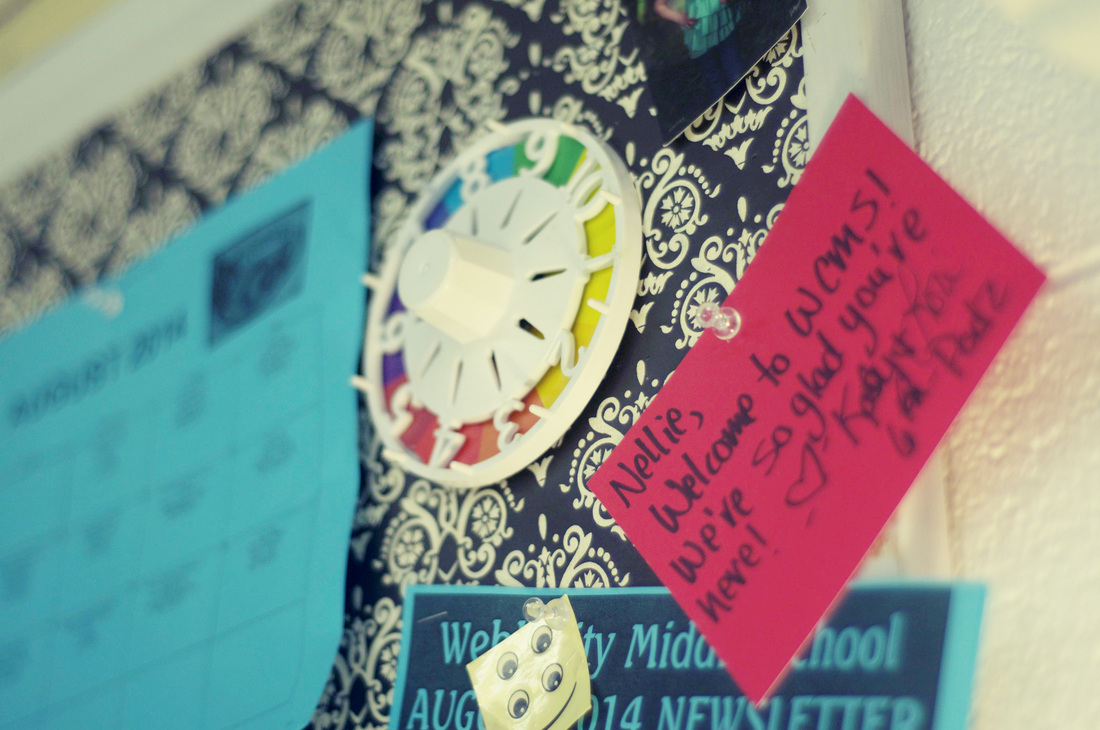
This is a small bulletin board that I have outside my room. I printed a bunch of 4X4 photos but I didn't have a good wall space that looked right to use them as a mural so I ended up using them for this bulletin board instead. 
Picture
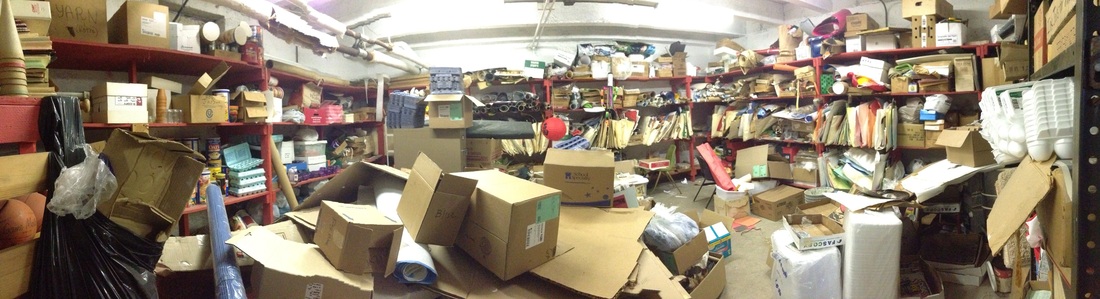
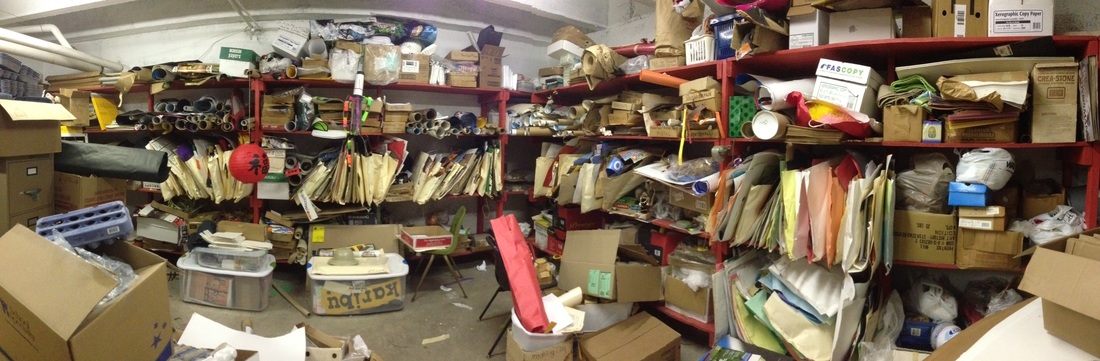
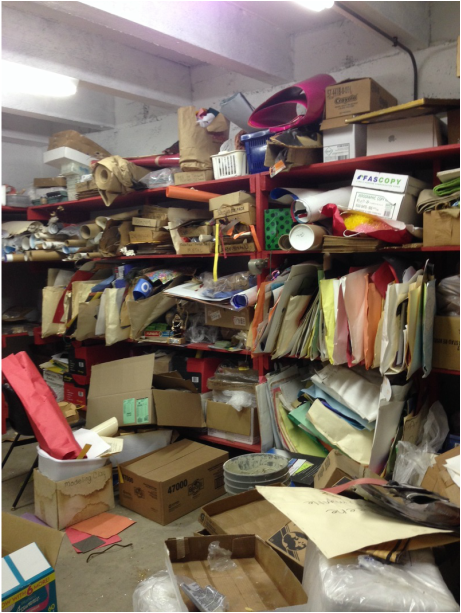
Finally, in case you are an art teacher and you are curious about the state of my closets....have a look here. 
2 Comments

Art Room FlashBack

7/23/2018

0 Comments

 
OMG! I am so excited to show you a new space this year. ​I am moving to a high school art job in a new district and I am thrilled for a new opportunity. 
Before I show you my new art room I want to do an Art Room Flashback, as many teachers are getting their rooms ready right now, I thought it might be helpful to have some inspiration. 

I taught in the middle school room for summer school for a few years before I moved to it in 2014. 
Before I decorated my middle school art room in 2014.
​After I decorated it.
Updated decor and additions in 2018. 
Here is an even farther flashback to my elementary art room 2013-2014 and a few pics here. 

Of course you change a few things every year. Here are a few pics of my room in action so you can see how full it was once the students were in there...a very busy, tight space. I would've really liked to get rid of my teacher's desk to make more room in there, but I always needed a spot for sub plans and it felt like the best place for them. 
Picture
Picture
Picture
The space above the cabinets was a little cluttered with junk.....
Picture
This was a 'bell ringer' type activity. I drew a bunch of types of ever green trees on the board and had them draw as many as they could on dry erase boards. It was a good warm up. I like to change up my room a bit for the holidays.
Picture
Picture
Even with all of the student supplies in the 'store' my middle school students still had trouble finding basic things like pencils.....
Picture
Picture
Picture
I tried to clear up some of the clutter, but with a single small counter (also holding my paper cutter) it was hard to keep it looking uncluttered.
Picture
Thank goodness for that curtain covering the mess of a closet!
Picture
My 'timeout' spot is by the door. We use BIST so sometimes I had someone in the 'buddy seat' and sometimes I had them sit there if they needed to cool off or even just to focus.
Picture
Art Room Tour SPRING 2017
I will tell you that it was much easier to move the first time. Even though I had two art rooms when I taught elementary, when I moved to the middle school across town, I just put everything in the middle of the room and a crew of custodians moved all of my furniture and boxes. This time around, I took a load home almost every day of books, decor items and accumulated junk. Over spring break, I went through several of my totes and condensed as much as I could down, and got rid of a bunch of fabric and junk. I had to have everything out before the last day of school, so my husband went with me, and we got almost everything the weekend before the last day. We put it all in my garage. 

Several days in June/July, I took loads of stuff to my new room and started sorting it an organizing it. I still have a pile in the garage that I hate to get rid of but I probably won't need since I will be teaching high school. 
Picture
My My load of stuff that I brought home. It was kind of a cool looking truck load. The photo below is a pic of my room undecorated. I left a few things for the new art teacher, like the tables, which were a gift from a friend...and the paint cans and my cool painted desk and the rugs and the styrofoam paint pallet that I painted...and the cool knobs on all of the cabinet drawers. Hopefully it is appreciated by a new teacher in the future. 

Picture
For now, I am busy decorating my new room. TRYING to purge old 'babyish' stuff and overall trying not to make my new space look too cluttered. I am not a minimalist. I am a maximalist to the max. 
0 Comments

Monster Squad

1/14/2018

0 Comments

 
Picture
I have over a dozen wooden manikins in my art room. Each year at least 1-2 drop an arm or a leg from regular wear and tear as I let my students reposition them. My students love to set them up into action poses and practice their drawing skills. 

When the first one broke, I worked like a cobbler to try to fix it, but I could not get the screw back under the spring inside the leg joint. So I stuck the wooden leg in my desk and put the manikin out of commission.

This year, I purchased 4 new guys and brought the old ones out of retirement. I hot glued the missing parts back in place, now they aren't as re-positionable, but they are stationary statues that I can use to decorate for Halloween. 

After hot-gluing the missing parts, I just used regular acrylic paint to jazz them up. I used an old scrap of a black canvas apron for the vampire. For the mummy, I tore a cheesecloth into strips and wrapped him up. Franky was made with just paint and a couple of screws. 

I kind of like that they are faceless.....it makes them a little less scary. What do you think, should I paint faces on them? 

Picture
Picture
Picture
0 Comments

New Additions To my Art room This year

1/14/2018

0 Comments

 
Picture
Over the summer, I read a couple of books on Fung Shui (here and here) and a couple of articles about fung shui in the classroom.

As a result, I decided that first, I needed to get rid of some of the red decor elements I had every where in the room. Our school colors are red and columbia blue, so I've always been drawn to red as a decor color but it does cause excitability. Red is an intense color, but I had about 6 pieces of furniture painted red and a bright red rug on the floor. I didn't want to totally repaint everything so I took a little inspiration from Cassie Stephens and turned this stool into a paint pallette and transformed the rungs into brushes.

​I did repaint one red metal cabinet with a very light blue. I'm thinking I will zentangle a design on here or something fun someday, it just hasn't happened yet. 
Picture
Picture
The smaller table in the photo below used to be hot pink and decoupaged with loud craft paper. I toned it down with the a layer of baby blue paint and put it near my desk. I need lots of little tables at the front of the room for each project as I always have tons of visuals and supplies. I put my desk at the front of the room, turned at an angle facing the door. It is not exactly in the center of the front, but it is off to one side and if I compare it to the bagua map, this is the perfect spot for knowledge and self cultivation. 

According to the bagua map (since my classroom door is in the southwest corner of the room, it isn't the ideal layout to work with the map, I am using the place on the chart below where the door icons are, is true North, with the left side being east and the right side being west). This puts my sinks in the perfect spot for career and life path, flowing water, etc. 

I also added a second white board to my room this year so that my students could face east instead of west. My clock is on the west wall, and now I can watch it but they can't really see it if they are facing front. And their backs are to the door, which is nice too, way less distractions. 

I feel like the 'flow' of my room and the energy has been better this year than ever before. Maybe it is just wishful thinking, maybe it is having nicer classes, or maybe there is something to this whole energy thing. 

Picture
Picture
Picture
Picture
Picture
I saw this paintbrush wreath on the facebook group Art Teachers: Beg Borrow and Steal by Vallerie Ivy  and I immediately had to order the paint brushes and make one myself. I worked on this in July, before I went back to school. It hangs in the all outside my room now. My husband helped me drill holes in the paint brushes and, one near the metal and one on the end. I strung some aluminum wire in the holes and it when together quite quickly. I even had some paint brushes left over that I painted to use as hall passes. 

Picture

This table got a makeover. It was solid red, and I painted the legs to look like pencils and added a little texture to the top. I used an old can of textured spray paint that was already in my room. 
Picture

This is a full on Cassie Stephens copycat. I needed a new door wreath that would last all year and this was so cheap and easy to throw together, I could not resist. I got an extra piece of wood and painted a sign for the hall with my name on it (below). 
Picture

0 Comments

Growth Mindset in the Art Room

5/17/2015

1 Comment

 
It is so hard to hear my students say: I can't do it! I am not good at this! I hate this! and other negative language along those lines. I really wanted a way to encourage my middle schoolers to try, even though art maybe isn't their strongest or their favorite subject, it can still be fun and rewarding. I found this blog, which has a set of free printable PDFs to make your own of Growth Mindset Posters. I left off the math one she had in the PDF and typed up my own art version instead. It is a great bulletin board for the end of the year or beginning of the year.
Picture
1 Comment

Tips for Middle School PrintMaking

5/17/2015

2 Comments

 
Picture
Picture
I searched high and low for for the perfect guide to help me set up a printmaking studio for the last week in my classroom. 6 classes a day with a 2 minute passing period does not allow me very much time to regroup or make changes once the train starts moving down the track----the preparations must be done in advance and the flow must make sense if students are moving around the room.

I considered showing a video, or making one to demonstrate the process, and by Friday, when my voice was almost completely gone, I wish I would have (spring colds are weird!)....but it took so long to set up the stations that I did not have time to do both, and some of my instructions changed a bit after working with some of my biggest classes. None of the videos I found online were quite right either.

Through this process I learned what NOT to say and what to really reinforce. Also, since I had wooden spoons on the tables----some classes needed more firm reminders not to spank each other or pound on the table than others.

I came up with a couple of things that really worked for me and a couple of things that I probably won't do again. Also, this post helped me initially.

Due to field trips, interruptions and scheduling conflicts, (since it is the end of the year) it worked out that I only printed with 3 classes each day----wow! That never happens. I was able to stagger the printing so that only the morning or only the afternoon classes were printing. This worked out super well.

In some cases, I stretched the initial carving lesson an extra day, and had students pre-select their paper for printing and write their names on the back the day before we actually printed---and then I clipped their papers together by table so that I could distribute them very quickly the next day. This worked great---gave the students an extra day to finish carving their designs. Some were a little rushed, especially since I did not have time to stretch every class---but since it is the end of the year, we had to push through.

Picture
Before the students came, I set up the printing stations. Also, most classes had already carved their stamps. I will talk about the stamp carving process at the end---yes, I am going in reverse order. Sorry. It is the end of the year.

I used tempera paint for this process--not as sticky as real printing ink and dried really quick---but pretty washable and cheap.

On my long counter by the sink, rolled out some old printer paper--it was the perfect size, easier than using bulletin board paper in this case. I put masking tape on each of the perforations and along the edges. Then I put a red rectangle at each 'stop'. This is where students would put their block before rolling it with ink.

Initially I thought I would use these pink meat trays--but the brayers did not roll in them, something I found out in my early morning trial run at the stations before school.

I ended up removing the meat trays---I don't have any acrylic or plexi---so I just used the table surface itself. I had enough clear packing tape to cover each of my printing stations. It worked WAY better than saran wrap--which I also tried. I literally wrapped the entire counter, an 8-foot table and my wooden work bench with clear packing tape. I probably did not need the white paper underneath, but it helped them to see what color they were using and it was easy to clean up---came right off Friday afternoon at the end of the week. 

Students basically kept their papers at their normal tables, and carried their block to the stations to print it. I had them wipe their block with a dry paper towel in between colors if they wanted to, but reminded them that if the colors mixed, that tended to look cool---and could make the design even more unique---but if their drawings were too 'gunked' up with the thicker paints (like silver and gold) they would definitely want to wipe the foam off and possibly even carve out some of the lines with a pencil. (Wet foam is hard to dry off)

Picture
I tried to wipe the red rectangles with a sponge between classes. This was the very first class. Going well.
Picture
Sixth graders did great---for the most part. I did have to send a couple of kids to time-out for being disruptive during my instructions. That seemed to remind the others to take the lesson seriously and realize that I wasn't putting up with any nonsense. It would be fun--but they still needed to follow directions and pay attention otherwise the process would not work for them.

Since I have some classes of 33, I decided to set up a total of 12 colors at 12 locations around the room. This way, if half the class were rolling inking, the other half, in theory, would be at their seats printing--and at least a few in every class would get a late start because they still needed to finish carving their stamps because of absences or intricate designs which would help with the flow.

I borrowed an 8 ft white table from the custodians for one of my stations. It was nice to have that extra work space to spread the students out---most major issues were during clean up when all 30 needed to wash their hands at the same time.
Picture
Picture
In most cases, I had a little time in between classes (because of lunch or field trips) to wipe off the red rectangle. The entire silver/gold station got quite 'inky' but I was okay with that. I did cover the station with a trash bag to protect it from wandering fingers if the morning classes printed but the afternoon classes did not---this silver and gold table is also right where students line up at the end of class so I had to keep an eye on it.
Picture
Picture
You know that moment, when you have 328 students and they all ask you the exact same question and you KNOW that you already told them the answer and you are so tired of saying it that you think your head is going to explode?

Well, I came up with a solution to: where do I put my stamp/block/thingy when I'm done printing?

I explained that in the printmaking world, usually artists use linoleum, carving rubber or even wood for the printmaking process, those are called blocks. I held up a couple to show how thick real blocks are. But since we are using a thin piece of foam---we are going to call it our cheese----almost so thin its like it was shaved off a big block, it is so thin like a Kraft Single! Everybody say: 'mmmmm, mmmmmm, good!" So we called the 'block' which was so thin and wimpy it didn't even resemble anything looking like a block----the CHEESE. Which helped them remember what to do with it.

Initially, I had every student create 2 designs for their stamp. I folded a 6X9 sheet of paper in half when I handed it out, explaining that they would draw a design on each half-- one of which would fit perfectly on the stamp.

I encouraged them to use lots of textures, pattern, feathers, scales, draw big, etc. I discouraged them from flags, logos, cartoon characters, numbers, letters or words----because they print as a mirror image for this project---those things are really hard to incorporate---so just try to stay away from them.

Many kids wanted to argue that the 'Underarmour' logo would be the same backwards and forwards and that they really could draw the nike symbol in reverse---but alas---I prevailed to enforce the all or nothing policy, infuriating some and inspiring others...many just drew a softball because it was 'easy' and I gently forced them to put a pattern or something in the background in order to make it a better design. Some drew things that were too small, others could not think of anything so I pulled out some visuals----handouts of owls, celtic designs, mola pattern book, and Maori tribal art to help them develop something...anything...that would work. Some were really creative, their mythical creatures or optical illusions were amazing. Others....not so much........

After I approved one of their two designs, I handed them their foam. Otherwise known as their 'cheese'. They could either re-draw the design into the foam with a pencil. OR use the transfer method---lay the drawing on top of the foam and re-draw it by tracing over their old lines with a colored pencil. Using a colored pencil helped them keep track of what they had already done. In most cases, nearly everyone needed to go back over the foam in order to press the lines in a little deeper.

Some of them understood this---some did not. So before we printed, I checked each and everyone of the stamps before I handed them over to the student, and told them one-on-one, man-o-e-mano, face-to-face, CARVE THE LINES A LITTLE DEEPER. Some thought that meant re-tracing with the paper on top again--which ripped the drawing to shreds----so I had to be really clear---just press your pencil into the foam a little harder--but don't tear it up. If the lines are not deep enough, the block won't make a good print.

Note to self:
*Don't call the carved lines 'cracks'....I overheard one boy say, "I'm getting the paint in my buttcracks!"

I only had enough foam for each kid to get one piece so I had to be frugal---no 2nd chances. Some of my students try to sneak extra supplies if I am not paying attention, so I kept the foam on my desk to discourage wasting/stealing it.

After they carved their 'cheese' they had to make me a grilled-cheese sandwich. Huh?

Take the paper with the two sketches, folded like a card----make that the bread....slide the cheese inside...and PUT IT IN THE FRYING PAN! Where is the frying pan? The class box!

I said all of this with great enthusiasm and gusto---even with my sore throat. I had students repeat it and even though it was silly, it helped them remember.

Later, when kids asked me where to put their stamps: I just said, "Make me a grilled cheese!" and that helped jog their memory. My head did not explode when I commanded them to serve me something yummy....at least I wasn't as impatient as I would have been repeating: "THE CLASS BOX!" over and over and over and over and over.

After printing, we followed the same procedure. Printed papers went on the drying wrack, stamps and drawings went into the 'frying pan'. The stamps could've went in the drying wrack but were so small that they would've fallen through the shelves so I decided not to mess with that chaos.

Picture
I rescued a whole bundle of this wide rule notebook paper from the dumpster so I cut it in half and put a big stack on each classroom table. I encouraged students to use it as a 'cover sheet' to keep the table clean, and also as a practice print. Some of their practice prints were the best print they got from the series. I don't really mind the notebook paper---it worked well for this process. Easier than cutting up newspaper, for me anyway.

Note to self:
Don't say: 'Awesome Tardis!' to a student in front of a bunch of non-Dr. Who-loving-students. The kids who are out of the loop thought I was saying something inappropriate about the girl who carved the Tardis.

 But seriously, isn't an awesome Tardis?


Picture
Picture
Above: After 10 classes. The stations were holding up pretty well. I used a scouring pad to remove paint from the red rectangle if it got too dry to wipe off.

Below: Don't put white and black side-by-side unless you want more of a gray. Also, the brown looked like poop. And yes, the kids noticed.
Picture
Picture
Yes, those are my Pampered Chef spoons from home. Yes, they are covered in paint, some of them are stained forever. Yes, I am okay with it. Here they are, before the week of printing. Also, the paper is shaving cream marbled paper that we made in April.

Favorite moment: During the last class, I overheard one shy boy at one of the stations, using his brayer like a steam-roller softly singing, "They see me rollin'....they hatin'....." I decided to make it a meme. Also, do not look up rollin' on Urban Dictionary.
Picture
Tips:

1. Give students a little direction when carving their stamps. My suggestions were too open, and they had trouble thinking of an idea and we ended up with a lot of sports balls....Which is hard to explain to 5th and 6th graders with a straight face---Who's paper is this with all the balls? You forgot your name!?. (Ex. cultures, geometric, optical illusions would be better)
2. Set up the stations in advance, borrow a table if necessary to set up as many stations as you can fit in the room so that everyone can rotate to whichever colors they want without waiting too long.
3. Have students put names on papers before printing---best if it is the class period before---have those sorted and ready to distribute easily.
4. Remember that even though you do a demonstration with the entire class, some individual students will STILL need one-on-one help.
5. Keeping the paint jugs near the station worked well for the best classes, not so well for the worst classes who dumped out WAY too much paint just to make messes. I might've forgotten to say 'Just use a LITTLE bit of paint if it gets too dry'....or they might've just been acting like hooligans.
6. After they ink up the block (or in our case the 'cheese') I told them to put it MAYO SIDE UP on their table---and lay the paper ON top of it----the opposite of rubber stamping where you mash the stamp onto the paper....Dozens of students messed this up and put it face down, and it worked out fine, so maybe I was being a little too picky...it bothered me when they slapped it down onto the paper, but the end result was usually fine.
7. Students need to work quickly otherwise the paint dries before they press the paper to the block.
8. Students might want paint shirts, and need leave jackets, hoodies and sweaters off. I realized this AFTER I dropped a paint-covered block smack on the back of a boy's hoodie, leaving a big, black rectangular imprint. Oopsie.

Overall, this was a great project, that will probably be even better if I do it again with my 6th graders next year, since they did it in 5th grade, it would be easier to implement.  Also, if I can give instructions with the full strength of my voice, that always helps.

​Other posts about printing making: here and here. 

2 Comments

Day 9 Write about one of your biggest accomplishments in Your teaching that no one knows about (or may not care)

9/9/2014

0 Comments

 
Picture
Ah, the Vikings. I love teaching about how the Vikings mastered the sea, navigating vast expanses of open sea without compasses, satellites, or radio communications. Their skillfully crafted wooden ships could take them anywhere. This little Viking ship postcard is just one visual that belongs in a packet of images related to Celtic and Viking art.

It is amazing that I can successfully navigate the makeshift filing system of artifacts and visuals located in the below a little school house in my district. The storage room, to a few art teachers I work with, is known lovingly as THE BASEMENT. It is smelly, damp, buggy, and crammed with boxes, foam trays, egg cartons, posters, you name it, we probably have it in the basement. It doesn't have an electronic filing system and the selves aren't labeled with fancy shelf markers. Quite frankly, it is a haven for cockroaches, the Grand Budapest Hotel for those crunchy critters to hide in the cardboard and foam.
Picture
To access THE BASEMENT, one must first descend a treacherous staircase, arms loaded with boxes and packets and files. It is much better if you can experience this your first time when the stairs are icy. At the very least, you must visit when it is a 110 degrees, as you press your armload of supplies against yourself and fumble with the keys to unlock the padlock. When I go at night, I'm always afraid that the Basilisk from Harry Potter will pop out of that little drain in the ground while my hands are full and I am trying to unlock the lock. At the very least, I am afraid of a black snack, curled up in the leaves in the corner will slither over while I am trying enter the basement, and I will be too afraid of its little army of baby snakes hiding in the leaves to go into the storage room.
Picture
This room has not been cleaned for many years. Another teacher and myself, spent a couple of hours last spring hauling out piles of old boxes and dried up paint that had come to live amongst the clutter. As disorganized and chaotic as this looks to a layperson, I can assure you that Leslie and I can determine exactly where a little postcard of a Viking ship should reside, and we can file it the correct spot, in a matter of just a few seconds. Whenever we go to the basement, it is a quick IN and OUT sort of trip. Grab what you need and bolt.
Picture
Picture
This location is a great place to keep colored sand for sand painting, a box of old shoes for shoe printing, extra plastic buckets for making paper, shells, bubble wrap, all the junk that is helpful once in a while, but you just don't have room to store in a classroom. I can't imagine NOT having a place to put all of these big packets full of visuals and samples. When I traveled between schools, it was so nice having a neutral location for these things so that I didn't not have to wonder which school they were housed, they were at the basement.

To most people, this room probably just looks like a giant junk heap. But I can't imagine teaching art without access to all of the stuff that is stored down here. It might look completely unorganized, but once you learn the system, the room is filled with treasures (ahem, to an art teacher). And you might argue that this room is really Leslie's accomplishment, and I am just her little understudy in the basement of wonders, but I have my own little corner, filled with all kinds of great things too.

Where do you store all of your random supplies? Do you have to scavenge for every project or is there somewhere that you keep stuff like this?

0 Comments

Ch-Ch-Ch-Changes 

9/5/2014

0 Comments

 
Picture
Post a picture of your classroom, and describe what you see--and what you don't see that you'd like to.

Happy Friday everyone!!

This room has some good bones. It is large, but not too big. It has a great storage closet and some decent cabinet space. If I could change anything--WINDOWS! More floor space for big tables where students can move and spread out. More tables for specialized art centers, because when everyone is up and moving, there isn't enough room for a lot of specialty materials.

I'm very lucky to have technology. I was also lucky to get the tables that I do have donated, but sometimes every single
chair is full, so we don't have a lot of space to spread out, for those kiddos that need a special seat or that like to work alone.

This post is part of the 30-Day blog challenge for teachers. #reflectiveteaching


0 Comments

Art Room Tour

8/11/2014

1 Comment

 
Finally! Here is a peek at my new room. See the 'BEFORE' pictures HERE.

Open house was a huge success. Many of the 6th graders were like WOW, it is so clean in here! It is like a completely different room. They were blown away.

I also had several parents offer to volunteer....I've haven't had a lot of that before, but it is very exciting to have those eager parents who are so supportive right out of the gate!!
Picture
Picture
Picture
The black and white mural in the corner was already in the room when I moved in, so I am lucky to have it. A student who helped paint it stopped by with her brother and I got meet her and she wrote her name below it. Cool moment!

The tables were donated by a great friend, champion, and mentor Josie Mai. The shape and dimensions  of the tables allowed me to really rearrange things in the space.
Picture
Picture
Most of the decor was given to me by students, like this awesome metal plaque above. LOVE THIS!!

Or found at garage sales and flea markets. The mona lisa curtain was found at a garage sale several years ago for $15!!
Picture
Picture
You might want to refer to the BEFORE photo here to see the transformation in this corner. Love how the beaded curtain is reflected in one of the mirrors. I've collected those mirrors at flea markets over the years.

I was very lucky to have the chance to get the district wood shop crew into the room over the summer to build the bookcase and the cabinets. 
Picture
Picture
Picture
Picture
Picture
Love those Crystal 'Why We Teach Art' display cards. Perfect for finishing off a board!
Picture
If you are looking for FREE---COOL--COLOR--printable--CLASSROOM--signs, LOOK HERE.
Picture
Picture
To label my tables by color, I spray painted old paint cans, and then dripped paint down the sides. I used glow-in the dark paint, glitter paint, whatever. They are lightweight and look really cool hanging from the ceiling!
Picture
I'm excited for the year to start!

If you are ever at the middle school, stop by and visit!!
Picture
1 Comment

Art Room Transformation (BEFORE)

8/9/2014

0 Comments

 
I've had a great run as a K-4 art teacher, but this year, I'm moving up to our 5th and 6th grade middle school position. I'm excited that all of my students will be able to read....I think it will be a game changer for expectations and learning, since I spent most of my days breaking down basic procedures, this will be a whole new way of experiencing teaching and education.

Part of the move means setting up the new space to make it conducive to learning. I've used the new classroom before, during summer school, and I'm sure I imagined what I would change to make the room better....so I finally had the opportunity to get in there this summer. Luckily, the timing was right and I was able to do several amazing things to improve the room.

In this post, I will show you the BEFORE photos of the room. These were taken during summer school. For the record, the class in the pictures was exceptionally small and did a good job of staying on task so I used them as my 'models'. Future classes in my new job will be MUCH bigger, up to 32 or 33 at times.
Picture
Picture
Picture
Picture
Picture
Picture
I had a lot of time to visualize the room before my furniture/books/supplies were moved on July 7th. I knew that some new tables were to be donated to replace the ones in the photos above, so I could reconfigure the layout a bit. I also knew I was bringing in my own, smaller teacher-desk and having some custom cabinets installed by the district.

So I used a really cool program called Floor Planner to map out the room. It was fun to create this 3-d map of the room before moving everything...it also helped me realize that I have more stuff (since I am moving 2 classrooms worth of stuff), than I needed for this room. It gives you a 2-d representation of the space, as well as a 3-d view to help with positioning and everything.
Picture
Picture
Picture
This classroom also has a storage closet, I'm really excited to have a place to put all the stuff that doesn't need to be visible, but needs to be available. The decor was pretty sparse...one optical illusion mural in the corner, a couple of posters, but not much else.

A lot of elementary teachers I have worked with, feel like every surface should be covered with something. Every visible wall space should be useable in some way, covered with posters, charts, classroom management materials, inspirational quotes. I'm working with a lot of white walls, what do you think? Is an elementary classroom with lots of stuff on the walls 'too busy' or is it necessary? Do you think too much stuff can be a distraction or do you think it helps with the creative process? Is it inspirational or a distraction?

I'd love to hear your thoughts!!
I'll post the AFTER pictures soon!!

Or you could stop by during open house Monday 5:30-7:00 and see for yourself. We will have a collaborative mural going, so you can even do a little painting while you are there.
0 Comments
<<Previous
    PictureWelcome!

    Mrs. Mitchell

    Art teacher from Missouri. 

    Instagram
    Add to Flipboard Magazine.

    Archives

    March 2021
    April 2020
    November 2019
    July 2019
    April 2019
    January 2019
    October 2018
    July 2018
    June 2018
    May 2018
    April 2018
    March 2018
    January 2018
    September 2017
    May 2017
    April 2017
    March 2017
    January 2017
    December 2016
    November 2016
    October 2016
    September 2016
    March 2016
    December 2015
    October 2015
    August 2015
    May 2015
    April 2015
    March 2015
    February 2015
    November 2014
    October 2014
    September 2014
    August 2014
    June 2014
    May 2014
    April 2014
    March 2014
    February 2014
    January 2014
    December 2013
    November 2013
    October 2013
    September 2013
    August 2013
    July 2013
    June 2013
    May 2013

    Categories

    All
    1st Day Of School
    1st Grade
    3d
    Abstract Art
    Alcohol Ink Tiles
    Alpacas
    Animal Art
    Animation
    Architecture
    Art Centers
    Art For Kids Hub
    Art History
    Art Hub For Kids
    Art Room
    Art Show
    Art Teacher Conference
    Bell Ringer
    Birds
    Blending
    Bunnies
    Cardboard
    Chalk Pastels
    Chalk Stencil
    Charcoal
    Choice Based
    Christmas
    Chuck Close
    Classroom
    Clay
    Club Day
    Collage
    Color Diffusing Paper
    Colored Pencil
    Colored Pencils
    Construction Paper Crayons
    Contest Art
    Creatures
    Crystal Bridges
    Design
    Dice Games
    Document Camera
    Dot Day
    Drawing
    Early Finishers
    Easter
    Emojis
    Fall
    Field Trip
    Food Art
    Foxes
    Green Screen
    Grid Drawing
    Group Challenge
    Halloween
    Haunted Houses
    Hearts
    Hermit Crab
    High School
    Human Form
    Ice Breaker
    Inspirational Posters
    Ipads
    Jim Dine
    Justand
    Killer Whales
    Kindergarten
    Landscape
    Lesson Plans
    Lettering
    Llamas
    Magazines
    Mandala
    Maori
    Markers
    Masks
    Matisse
    Metal
    Model Magic
    Mona Lisa
    Monster Trucks
    Mother's Day
    Mother's Day Card
    Mummies
    Mural
    Newspaper
    New Zealand
    Notan
    Observational Drawing
    Ocean Art
    Oil Pastel
    Oil Pastels
    Optical Illusions
    Origami
    Owls
    Painting
    Paper Weaving
    Pd
    Pencil Topper
    Perspective
    Pete The Cat
    Picasso
    Polar Bears
    Pop Art
    Portraits
    Printmaking
    Product Review
    Professional Development
    Quiver
    Reflection
    Reflective Teaching
    Room Tour
    Rooster
    Sea Horse
    Seals
    Sea Turtle
    Self Portrait
    Shading
    Shaving Cream Prints
    Shoes
    Sketchbooks
    Sloth
    Solar Eclipse
    Spinners
    Spring Conference
    Star Wars
    Statue Of Liberty
    Step-by-step
    Step By Step Drawing
    Step-by-step Drawing
    Still Life
    Stop Motion
    Story Board
    Sub Plans
    Summer School
    Symmetry
    Tab
    Teacher Appreciation Cards
    Technology
    Tempera Paint
    Tiny Food
    Tissue Paper
    Trees
    Tumbling Blocks
    Valentine's Day
    Warm Ups
    Watercolor
    Wax Resist
    Word Art
    Yellow Submarine
    Zentangle

    RSS Feed

Powered by Create your own unique website with customizable templates.