THIS LITTLE CLASS OF MINE
  • Home
  • Contact Me
  • Lesson Plans

Optical Illusions

1/17/2018

0 Comments

 
In 2015, I was feeling my way through the whole middle school process. Most kids enjoyed looking at optical illusions and I knew I wanted to create an optical illusion unit for the first time. I was also trying to figure out a good way to incorporate a LITTLE bit of technology into the project. 

So I created a SMORE flyer with tons of step-by-steps and guides on how to make optical illusions that I had collected around the internet, mostly via pinterest. The idea was that students could 'explore' and narrow it down to one that they were interested in making.

In theory, this made tons of sense. But in reality, most kids picked the one that looked 'easiest'. And then wanted to play on the iPads as soon as they were finished. I've phased out using technology as much in this way....because it just didn't yield the best results and I felt like I was trying to control them a little too much, which I was. Also, I only had a dozen ipads so kids still had to have OTHER visuals, books and some printed step-by-steps in order to have access to enough materials for each kids to use. 
Picture
Day 1-3
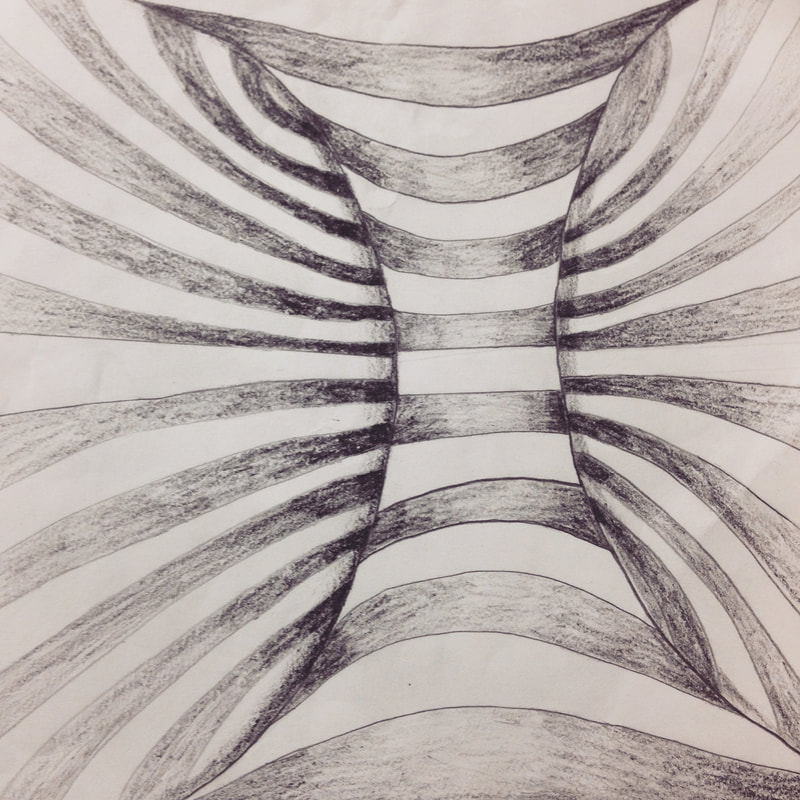
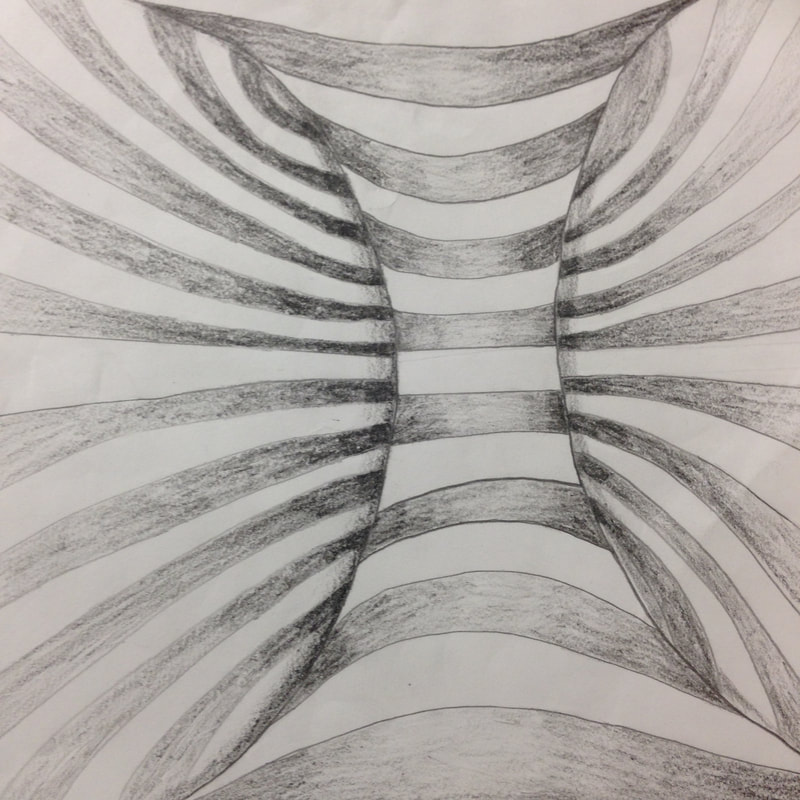
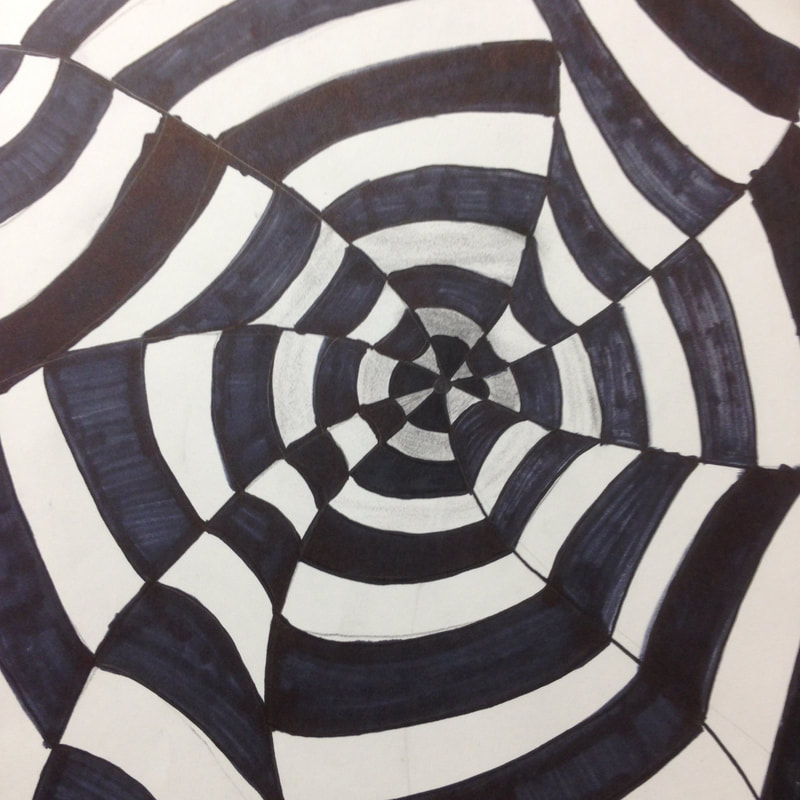
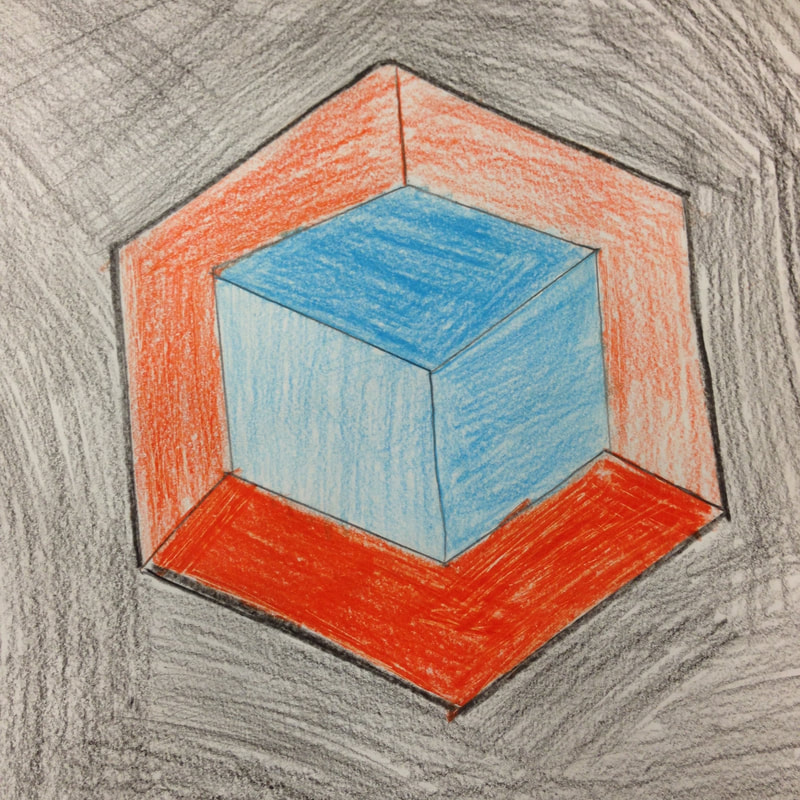
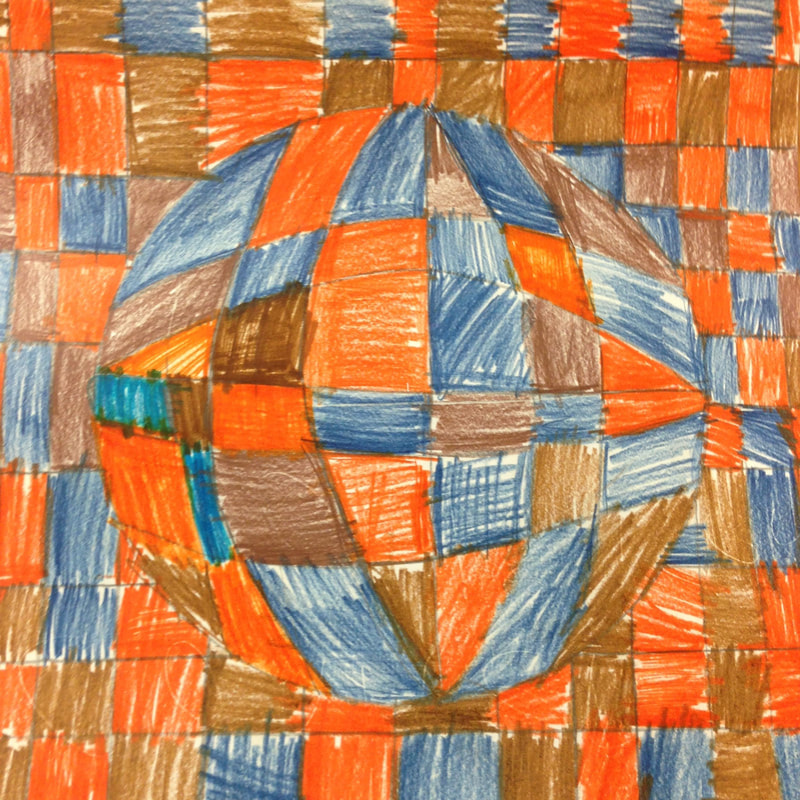
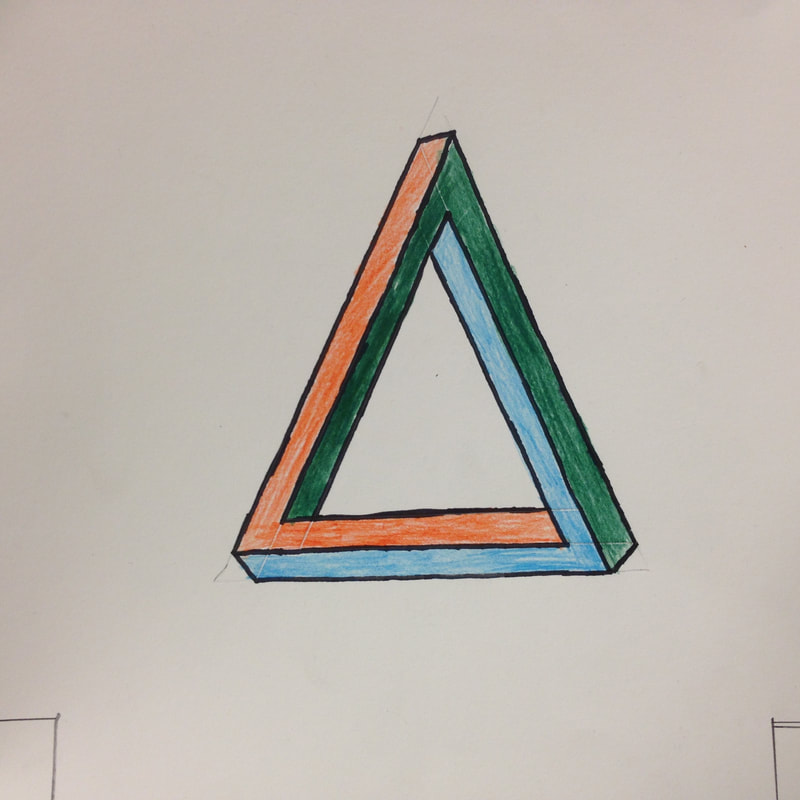
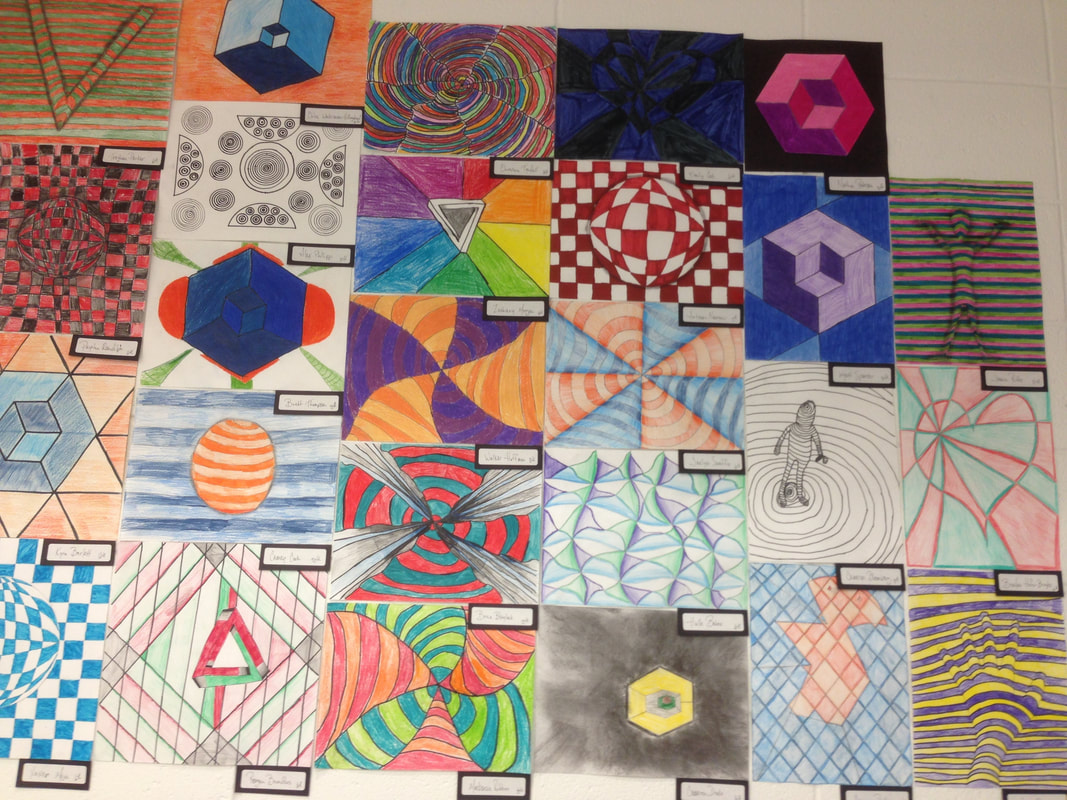
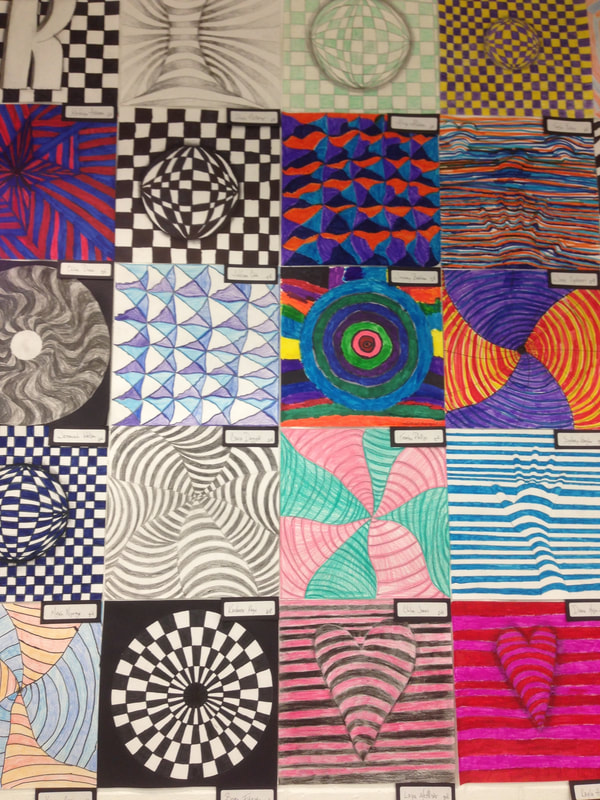
Introduce the idea of optical illusions. Look at examples. Scan QR code which takes you to the smore flyer 
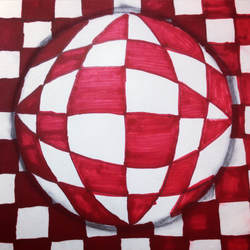
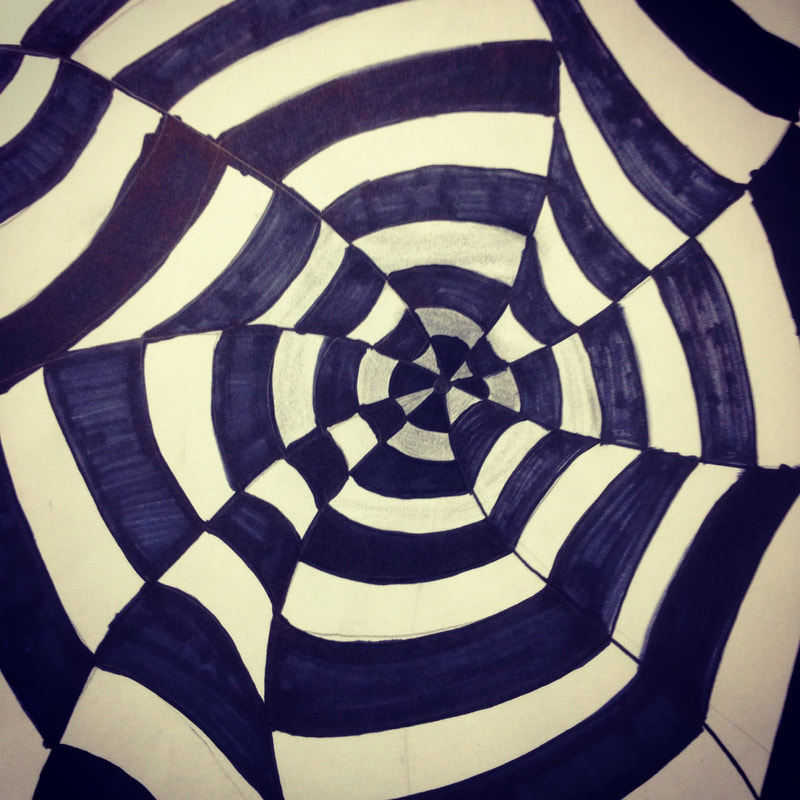
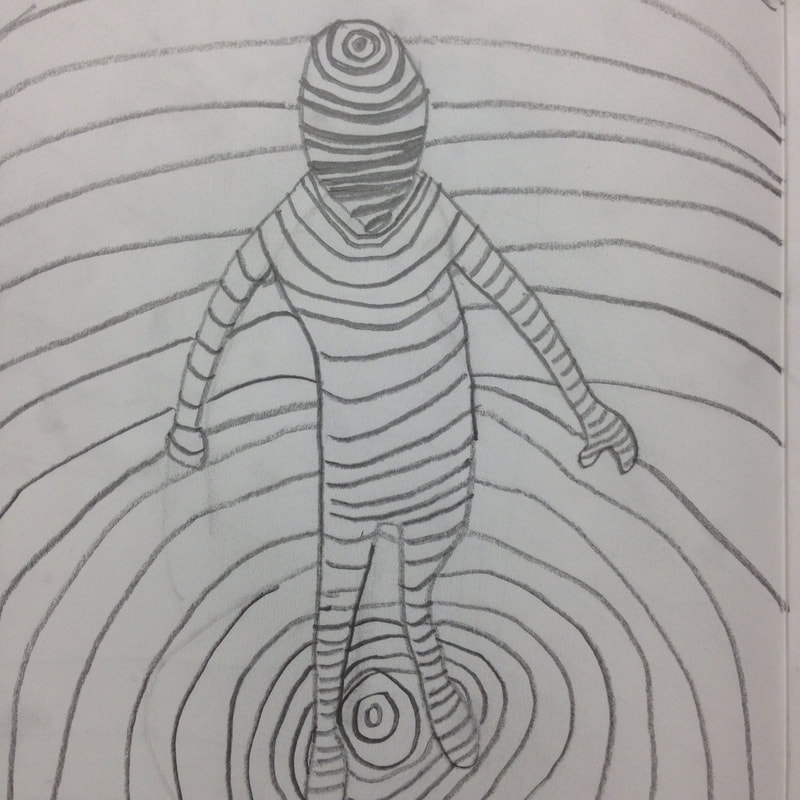
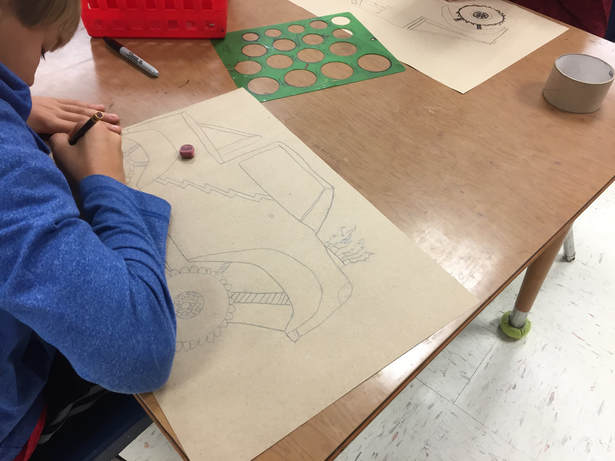
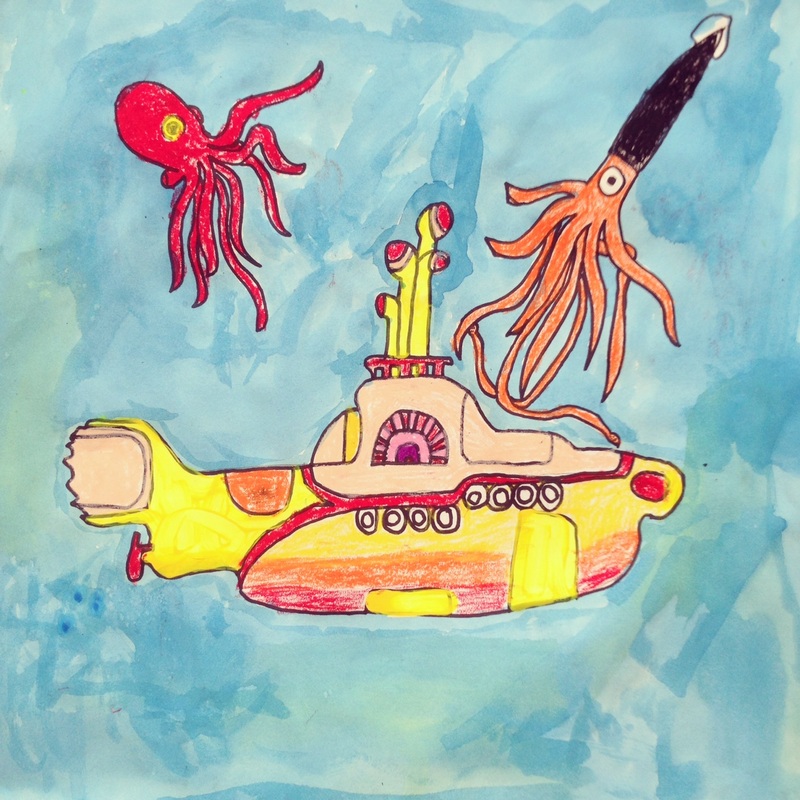
Sketch idea on white drawing #80 paper in pencil. Use 9X12 or 12X12 depending on design. Color with markers, colored pencil or crayon. Use willow chalk to add light shading on marker. 

Supplies
 pencils
rulers/circle templates
erasers
9X12 and 12X12 paper #80
markers
colored pencils
willow vine charcoal

Picture

Picture
Picture
Picture
Picture
0 Comments

Monster Truck Art

1/16/2018

1 Comment

 
Picture
 Last year, I had two really big classes. The classes had so many students that I needed another table. So, I pushed my desk into an unused classroom and asked the custodian to find me a new table that I could use for the year. This year, I am still using that extra table and I got rid of some other furniture and brought back my teacher desk. Since I didn't realize how big the classes were in advance, I moved my desk and acquired the new table on the 1st day of school. I didn't have a lot of time to re-plan my space since I needed to spend every available second crafting seating charts for every class and going over my 1st day of school routine. 

Anyway, in April a boy complained that the extra table was facing a blank wall. He requested some artwork....He was quite specific when I asked him what he thought should go there, he said: "A Cat. Driving a Monster Truck." 

I don't think he expected me to paint one for him, but that is just what I did. It is Pete the Cat driving this monster truck. After I hung it up, we had a couple of days at the very end of the year that were weird---assemblies and stuff---so I found an Art For Kid's Hub video on how to draw a monster truck, and we made it one of our final projects of the year. I don't use art videos very often, but this was perfect and it went with my poster.

Also, kids could customize their monster truck and put whatever they wanted as the driver. They loved it! They could customize the paint job, the background, and it was a hit with boys and girls alike. 

Supplies
12X18 paper (we used brown craft paper)
pencils and erasers
circle tracers for wheels (we used a tape roll for tires)
sharpies
construction paper crayons and regular crayons (for black and red)

Picture
Picture
Picture
1 Comment

Planning an Art Unit for multiple Grades

4/11/2014

0 Comments

 
Picture
For the first time ever, I came back from Spring Break without a carefully crafted schedule of lessons to finish out the year for my kindergarten through 4th grade students. I'll admit I had vaguely written 'Ocean art' on my lesson plans...but that was about as far as I had gotten prior to my week off. When I walked in the building Tuesday morning, I went through everything in my ocean art visual packet, hoping to pull out the perfect lesson plan based on something that I've already taught.

When I wasn't impressed by any of my old lessons, I started to search Pinterest for something to help me figure out a plan for my K-4 classes. I would never condone planning an entire unit for 5 grade levels on such short notice, but between my master's classes, a spring break wedding, and getting caught up from snow days, prepping for art shows and other stuff going on at school, the lesson planning took a backseat. Fortunately, I was able to wave my creative wand and prep an amazing unit--I channeled the pressure to develop something great as my muse. I didn't over think the lessons, I just kept them very basic and it was a very successful unit. I narrowed down the topics and objectives that we have already covered this year, and I was able to hone in on the needs of individual grade levels. Planning for 5 grades requires a lot of prep, especially if every grade is using a different media. This can be a real headache if you are setting up special supplies for each group that comes through the door.

Basically, I selected a different subject matter for each grade, but the process was relatively the same for each. I added a little more emphasis on 'cool colors vs. warm colors' for some grades, while others were introduced to adding salt to the water, or focusing on texture or craftsmanship. The process involved a guided drawing lesson, followed by some painting, and then the following week, we colored and outlined with oil pastels and then used a little more watery paint for the water.

I hung everyone's artwork in the hall, because the entire unit was so successful. Working with 18X18 paper made for a very large colorful installation which makes the entire building look cheerful and happy.


You may have gotten a sneak peak at this unit on my instagram: @nelliemaeii

Picture
Picture
4th- grade-18X18 white paper, draw submarine in pencil, add animals and sand and details. I demonstrated the basic parts, but I had a lot of visuals printed off for students to use as references. Trace everything with sharpie. Paint the sub with neon yellow tempera paint, I made a custom color: a mixture of neon yellow and neon orange. A few did not want a Yellow Submarine, even thought I tried to school them in Beatles trivia, so I encouraged them to at least paint the sand or some element in their picture with the neon paint.

Week 2
Color small details (fish, seaweed, shells, sharks, etc.) with  oil pastels. Outline
the big stuff (painted sub and sand at least) with black oil pastel. Paint the water with watered down tempera paint in cool colors: turquoise, purple, blue and green. I also had a watered-down version of the neon-yellow-orange mixture for students who wanted to paint their sand.


Picture
3rd grade--18X18 white paper, draw sea turtle in pencil, draw lots of texture on the shell. Outline in sharpie. Paint the body of the turtle with neon green tempera paint.

Week 2
Use oil pastels to color the shell. I encouraged mostly 'hot' colors, but some used browns and neutrals which looked nice too. I encouraged lots of patterns when coloring, also reminded them to press down hard. Outline the neon green paint with black oil pastel and draw texture on the 'skin' of the turtle. Paint the water with the same watered down turquoise, purple, blue and green, but add salt in the watery areas for a neat texture. I demonstrated this salt technique at each table.

Picture
2nd grade-- Use a pencil to draw the hermit crab step-by-step. (we did not have time to outline in sharpie because we watched a video of the book House for Hermit Crab. This worked well for me, having them watch a video of the book, but I could just as easily read it aloud to them. Honestly, the idea for this lesson came from this blog. Hers are much better than mine!! Paint the crab with florescent red paint.

Week 2
Find a yellow or orange oil pastel and add texture to the sand. Use oil pastels to color the details of the hermit crab's shell decorations: star fish, anemone, urchin, etc. Outline in black oil pastel (BE CAREFUL NOT TO SMEAR THE BLACK), make sure to trace the leg segments of the crab and the shell. I set up some watered down 'sand' neon paint for the sand at a painting center, and students could go over at any time and paint the sand. On each table, I put a container of watered down purple, blue, green and turquoise paint for them to paint the water and add a little color to the shell.

Picture
1st Grade-- Showed a video about seahorses being super killers. Turned our 18X18 white paper so that it looked more like a diamond or rhombus. Draw seahorse step-by-step: used a modified version of this. Draw a line 'behind' the seahorse for the sand, from corner to corner across the center of the paper, make sure it doesn't go 'through' the seahorse. Add starfish, seaweed, bubbles, etc. Trace over seahorse in sharpie. Paint seahorse with florescent yellow paint.

Week 2 Use oil pastels: add texture to the sand at the bottom with an orange or yellow oil pastel, trace around seahorse with black oil pastel: re-draw the mouth and eye and some texture if it isn't showing up after painting. Be careful NOT TO SMEAR the oil pastel.
I set up some watered down 'sand' yellow/orange combo neon paint at a painting center, and students could go over at any time and paint the sand. On each table, I put a container of watered down purple, blue, green and turquoise paint for them to paint the water, I had to remind them to be careful not to let the 'water' drip onto the neon yellow of the seahorse.

Picture
Kindergarten-- I decided to go with 12X12 for this grade. The classes are very large and I didn't think it would be as successful to work at the 18X18 size. Also, 12X12 looked very small by comparison after working with the larger size for my other grades. The lesson came from this site.

Watch a YouTube Clip from finding Nemo. (In retrospect, this would've been a great clip to show the the 3rd grade!) I showed them a book cover with a clown fish and we discussed how clown fish live in an anemone. Draw the clown fish step-by-step. Add the anemone, and outline in sharpie. Use neon orange paint to paint the stripes on the fish: DON'T PAINT THE WHOLE FISH!

Week 2
Since we only had a little bit to do to finish the fish, I had them cut out some starfish from a tissue paper covered paper that we had created earlier this semester and add some sequins. Once that was done, we used oil pastels to color the anemone, then we outlined the fish with black oil pastel, thickening the edges of the fins a little, and re-drawing the eye and mouth if it was covered last week with paint. Finally, we painted using the turquoise, blue, green and purple that the other classes used.

Picture
Picture
Picture
Picture
Picture
Picture
Picture
Picture
0 Comments

Kindergarten Art: 1st Day of School

8/7/2013

3 Comments


Ah, the first day of school.

Many teachers do some sort of fun project using letters or first names...but since I have eleven classes of kindergarten, I have way too many little five- (and just barely five) year-olds to get away with anything that involves writing names. So many of my students come to school not knowing how to write their name, and some can't even identify any letters, let alone write them.

It is challenging to find the perfect lesson for the first day. My mentor teacher came up with the perfect plan. I'm going to share it with you (Thanks Mrs. Clark!)

I thought it would be helpful for you and for me and any student teachers I may have in the future if I wrote out my 'first day script'. Sometimes it can be daunting to think that you have to go over ALL of your procedures the first week of school....and I definitely don't do that. I go over the main ones: how to line up, what to do when you first walk in, what my expectations are and I save the painting procedures for the first day of painting.

I am a firm believer that my very best lessons are scripted. I am not suggesting that I write an extensive script like the one below for every lesson, but I do spend my drive to work and my morning duty time rehearsing what I am going to say and in what order so that when the kids come in, I know what will work best and I can be confident in my delivery.

Be advised, I've done the lesson plan you are about to read over 60 times....and over a hundred if you count the number of times I have done it with my older classes using a different first day of art project. 

Look for my second day 'script' coming soon.

When students arrive, I show them to their seats. I always request that the teachers kindergarteners to art wearing name tags the very first week. This is tremendously helpful since some kids can't say their 'r's and when I ask their name it sort of sounds like 'raryawa' and I am totally confused. With a name tag, I can call everyone by name.

I point to the chairs and assist each student to their 'new' art seat. I try to put two girls and two boys at every table. If it appears that one might need special assistance (because of behavior issues or special needs, I try to put them a table near the front).

First I tell them my name and then have them repeat it. I say, 'Welcome to art. Look around, this is the art room. We will be doing all kinds of fun things this year, today we are going to do a drawing but sometimes we will paint, color, fingerpaint, use clay, markers, we will cut and glue and do all sorts of fun projects this year.'

"I must tell you, art may seem like you are in here for a long time. That's because you are. Art is 50 minutes (I say, dramatically). Almost an hour, and every minute is important because we have to have plenty of time to clean up any messes we might make when we paint or do messy projects. You will have art every Friday Morning. You get to have p.e. three times, and music two times, but art is only one time each week.'

'When you come to the art room, you will sit in the same seat you are sitting right now, each week. Look at who is sitting beside you, and across from you. These are your new teammates. Because in art, we play a game every week. You are now part of a team...' Pointing to each table color I say, 'You are the red team, you are the yellow team, you are the green team, etc.'

'And if you come in and sit down quietly I will mark a star on the board beside your team color.  I will keep marking stars all the way down until each team has a star. At the beginning of art, you have a chance to earn lots of stars because I am usually giving you instructions or demonstrating what to do or reading a book. I need everyone to be quiet while I am talking so I want to reward you with stars if you are doing a good job. '

'Now, sometimes I may only give one star to one team. Or I may go all the way down marking stars and I might skip your table.....that means I am trying to get your attention.'

'There might be times when I need your attention but marking stars doesn't work. Perhaps someone at your team is talking or messing with the other team members instead of paying attention. I would give that team a 'first warning' by saying 'blue team, Stop talking. This is your warning, you are about to lose a star.'

'Sometimes that works. But sometimes, I have to erase a star from blue team if they keep talking after their official warning. Now, they can always earn that star back by doing what they are supposed to do, but by that time, they will be way behind the other teams.'

'Now, let's say that there is one person who is having a bad day. One person who is talking or messing with the other kids in the room and taking a star away doesn't work. Maybe this person is starting a fight or having a tantrum. Rather than keep him or her at the table, I would send them to timeout.'

At this point I always ask someone to be my volunteer and pretend to be in trouble. I send that volunteer to the timeout table.

'Do you see Johnny, in timeout? Okay now everyone, pretend at your table like we are finger painting...do it, pretend to fingerpaint. Okay, now look over your shoulder and smile at Johnny. Because you get to have fun and fingerpaint, and he does not...he is in time out....does time out look like a fun place to be? NO! You don't want to get sent to timeout in art because you would miss out on fun things and I also send a note home to your mom and dad and you teacher will see it...so you will probably get in trouble again with your teacher and your mom and dad.'

"Now, Johnny, you can go back to your seat, everyone clap for Johnny....you have to be very brave to pretend to be in trouble. I'm giving Johnny's team an extra star. I have had kids who were pretending to be in timeout, that actually started crying because they though they were really in trouble, even though they were my volunteer.'  

'You will earn stars at the beginning of art, and you will earn lots of stars at the end of art. At clean up time, you have a chance to jump ahead of the other teams if you are the first team that is cleaned up and ready. At the end of art, every week, you will hear me say "ONE MINUTE WARNING". Once I give the one minute warning, I will be watching the clock, and backing over towards the lights. Once one minute is up, that is when I will flip of the lights. When the lights go out, you need to be in your seat, the supplies slid into the middle and your head goes down. Let's practice.'

'I want you all to pretend like you are cutting something out. When I say 'one minute warning', pretend to cut really fast, or stop cutting and slide your scissors in the middle. When I get over to the lights, you have to put your 'pretend scissors' down and put your head down. Let's do it. ONE MINUTE WARNING. '

'After the lights go out, put your heads down, and I will rush to the board to mark stars for the teams that are ready. Ooh, red team is totally ready...green team has some trash on the floor, pick it up!....blue team, sit down....Sally, hurry back to your chair from the trash can, time is up!! I will be quickly marking stars on the board.'

'The team with the most stars at the end of art will win a prize. Today, you may pick one high five sticker. Sometimes I may have glitter stickers...or rainbows, or footballs, or dinosaurs. Hold up one finger. If your team wins, you get ONE sticker. Only ONE team can win...so you won't get a sticker every week, only one table...the best table gets a prize, so you DO want to earn stars by sitting quietly and cleaning up.'

At this time, I cross to the expectation posters I have in the room.

'In art, I expect you to be 'polite listeners,' I say, pointing to the poster that says BE A POLITE LISTENER.  'Being a good listener means you are looking at the teacher, keeping your hands and feet quiet. Give yourselves a pat on the back, you are all doing that now!'

Pointing to the other posters I explain what each one means: USE ART MATERIALS WISELY (do not cut your clothes, do not paint your hand, BE A GOOD TEAMMATE (sharing, using manners), SHOW RESPECT TO OTHERS (don't say mean things about other people's artwork).

'In art, I want you to learn, have fun, but I also want you to stay safe. Take a look over here,' I say, pointing to the sink. 'In art, students do not use the sink. See how there is a 'hands-off' symbol posted near the sink? That means DO NOT TOUCH HANDS OFF.' I turn on the water, 'the sink is dangerous because the water at the school gets very hot in the art room...I don't know why but I have scalded my hands in the water because I forgot and turned it on hot...it is dangerous...and it is loud when the water is running!'

'Right here we have the drying wracks...say that 'drying wracks'.....'Do not bang on the drying racks, they make lots of noise and it is loud and annoying.'

'Perhaps the most dangerous thing in the artroom is the paper cutter,' I say, pointing to the paper cutter. Sliding a sheet of paper under the blade, I pull it down, making a loud SLAMMING noise...'Never, ever touch the paper cutter...don't even joke about touching it. DANGER!'

I make my way over by the smartboard. 'This is the smart board, say that smartboard. This like an awesome big screen t.v. that hooks up to my computer, I can show you all sorts of things on my computer using this camera (pointing to the projector)....but please do not touch it. Do not touch the pens at the bottom because you could tear them up...do not use art supplies over here and do not touch it with your messy art fingers...this is very expensive and if you tear it up, your parents would have to buy me a new one and it would be more expensive than any big screen t.v. you might have at home.'

 'The last thing I want to show you is how we line up. In art, we line up here. We make a boy line and a girl line,' I say pointing and standing in the spot where we line up.  Sometimes the line leader does not line up first because the line leader might be getting a sticker...if you are the first girl or the first boy over here, save a spot for the line leader so they may come to the front when they get to the line'.

'Now, does anyone remember my name?'....crickets.....

'My name is Mrs. Mitchell. Say that with me: Mrs. Mitchell'.

'Now, I just showed you three spots in the room with a hands-off symbol: everyone point with me to the SMART BOARD, very good....now point to the SINK.....very good...now the PAPER CUTTER....never touch the paper cutter, very good."

'We are about to get started with our project for today, but first, I need to see how big you are...and tall you are...everyone STAND UP.'

We have been sitting for way too long at this point, and the kids need to move a bit before we start the project. 

'Very good....wow, you are tall....you are big....now, raise your hand if you are 5....good...now raise your hand if you are 6.....very good....now raise your hand if you are 7? 4? Okay great, everyone in this room is either 5 or 6 or 28! Now, show me your muscles! Wow, you are big and tall and strong, very strong!"

'Now, sit down.'

'Today, we are going to be drawing ourselves on a piece of paper to be as big and tall as the paper. I know that some of you might think that you already know how to draw people, but I want you to draw what I draw....because I want to see if you can do that. So here is what I want you to draw....'

'First, draw a circle for your head. Give me a thumbs up if this looks easy and a thumbs down if this looks hard. Easy or hard? Easy, okay...now, draw two lines down for the neck. Easy or hard? Easy, okay...now draw a box, or a square or a rectangle shape for the shirt area....easy or hard? Easy...okay, some of you are saying hard. So here is what we will do, if you think you can do this, I want you to draw these three things and then stop and hold up your paper.


Once I look at it, I will give you a thumbs up...you can put your paper down...and then wait for me to check everyone else's...if you think this is hard, draw the head and hold up your hand and I will try to help you with the rest. If you see me give you a thumbs up, put your paper down....and wait....if I say 'make it bigger, draw another line' or whatever, make the changes and then you will be ready for the next step. I'm going to give you paper, and a pencil tray. There are 4 pencils on every tray. Please try not to bite off the erasers....on Friday, I picked up a tray and all 4 erasers were bitten off----EW! gross!'

This is one of my favorite drawings ever!!
Pass out supplies. Assist as necessary. Sometimes I get them started with the head...sometimes I try to draw all three and have them just add legs and arms...Depending on where they are developmentally, some students are incapable of drawing a human with a neck, a body and arms and legs...especially if they still see humans as a circle with arms and legs.

This project gives me an indication of where they are developmentally. If they can add lots of details, they are advanced...if they can't even finish when I draw the first three things, then they are way behind.

Draw remaining steps: legs and arms, hair, and face details. Have everyone go step-by-step with me. Have students point to the shirt, then draw something they like on the shirt, whether that is spongebob or a football or hearts....Now if students know how to write their name, I have them write their name on the front.


 Demonstrate how to trace over lines with a sharpie marker. Explain that sharpies can ruin a perfectly good drawing. Never draw with the sharpie on the back! Never scribble over the whole paper, it will be ruined. Show them an example of one that IS ruined!


'Now sharpies can stain your clothes and skin so be careful!' While students are tracing their drawings, I go around the room and help the ones that can't write their names.This is also when I go to each student and write their name down in my seating chart book....if teachers send them with name tags, it helps tremendously. I always request name tags!

If time allows, give students erasers to erase any pencil lines that still show through.

By this time, we only have about 5 minutes left.  I announce the 'ONE minute warning'...and watch to see that they are nearly ready....then I have them put their papers in the middle, start putting their heads down as I flash off the lights. I rush to the board and mark stars for teams that are ready. I give stickers to the team with the most stars, and then line up the the other tables by the door. I remind them to save a spot for the line leader as they line up.

At the door, I have them repeat after me: "S-M-I-L-E'...emphasizing the 'eeeeee' so that it makes them smile....I say, Smiles on, voices off, we are going in the hall....just as I open the door and greet their teacher. I try to remember to ask if anyone was absent when they arrive, but sometimes I ask at the end, so that I can write their name on a sheet of paper so that they will have a paper to draw on the very next week.


And that is how I do it. It may seem like I talk a lot...and I do...but I try to move around...it is probably the longest lecture I give the entire year to kindergarteners...and it is only between 15-17 minutes at the most.

***This post was originally created for another blog that I used to have. I printed it out in color, and I now refer to this to help 'prep' myself for the 1st day of school. I'm thinking of recording myself doing this whole thing so that I only have to do it once this year......
3 Comments
    PictureWelcome!

    Mrs. Mitchell

    Art teacher from Missouri. 

    Instagram
    Add to Flipboard Magazine.

    Archives

    March 2021
    April 2020
    November 2019
    July 2019
    April 2019
    January 2019
    October 2018
    July 2018
    June 2018
    May 2018
    April 2018
    March 2018
    January 2018
    September 2017
    May 2017
    April 2017
    March 2017
    January 2017
    December 2016
    November 2016
    October 2016
    September 2016
    March 2016
    December 2015
    October 2015
    August 2015
    May 2015
    April 2015
    March 2015
    February 2015
    November 2014
    October 2014
    September 2014
    August 2014
    June 2014
    May 2014
    April 2014
    March 2014
    February 2014
    January 2014
    December 2013
    November 2013
    October 2013
    September 2013
    August 2013
    July 2013
    June 2013
    May 2013

    Categories

    All
    1st Day Of School
    1st Grade
    3d
    Abstract Art
    Alcohol Ink Tiles
    Alpacas
    Animal Art
    Animation
    Architecture
    Art Centers
    Art For Kids Hub
    Art History
    Art Hub For Kids
    Art Room
    Art Show
    Art Teacher Conference
    Bell Ringer
    Birds
    Blending
    Bunnies
    Cardboard
    Chalk Pastels
    Chalk Stencil
    Charcoal
    Choice Based
    Christmas
    Chuck Close
    Classroom
    Clay
    Club Day
    Collage
    Color Diffusing Paper
    Colored Pencil
    Colored Pencils
    Construction Paper Crayons
    Contest Art
    Creatures
    Crystal Bridges
    Design
    Dice Games
    Document Camera
    Dot Day
    Drawing
    Early Finishers
    Easter
    Emojis
    Fall
    Field Trip
    Food Art
    Foxes
    Green Screen
    Grid Drawing
    Group Challenge
    Halloween
    Haunted Houses
    Hearts
    Hermit Crab
    High School
    Human Form
    Ice Breaker
    Inspirational Posters
    Ipads
    Jim Dine
    Justand
    Killer Whales
    Kindergarten
    Landscape
    Lesson Plans
    Lettering
    Llamas
    Magazines
    Mandala
    Maori
    Markers
    Masks
    Matisse
    Metal
    Model Magic
    Mona Lisa
    Monster Trucks
    Mother's Day
    Mother's Day Card
    Mummies
    Mural
    Newspaper
    New Zealand
    Notan
    Observational Drawing
    Ocean Art
    Oil Pastel
    Oil Pastels
    Optical Illusions
    Origami
    Owls
    Painting
    Paper Weaving
    Pd
    Pencil Topper
    Perspective
    Pete The Cat
    Picasso
    Polar Bears
    Pop Art
    Portraits
    Printmaking
    Product Review
    Professional Development
    Quiver
    Reflection
    Reflective Teaching
    Room Tour
    Rooster
    Sea Horse
    Seals
    Sea Turtle
    Self Portrait
    Shading
    Shaving Cream Prints
    Shoes
    Sketchbooks
    Sloth
    Solar Eclipse
    Spinners
    Spring Conference
    Star Wars
    Statue Of Liberty
    Step-by-step
    Step By Step Drawing
    Step-by-step Drawing
    Still Life
    Stop Motion
    Story Board
    Sub Plans
    Summer School
    Symmetry
    Tab
    Teacher Appreciation Cards
    Technology
    Tempera Paint
    Tiny Food
    Tissue Paper
    Trees
    Tumbling Blocks
    Valentine's Day
    Warm Ups
    Watercolor
    Wax Resist
    Word Art
    Yellow Submarine
    Zentangle

    RSS Feed

Powered by Create your own unique website with customizable templates.