A few months ago, Paper Scissor Cake posted on their instagram a few pictures of a hand lettered sign workshop they were working on. Immediately I realized how important it is to incorporate hand lettering into my curriculum to help support cursive writing.
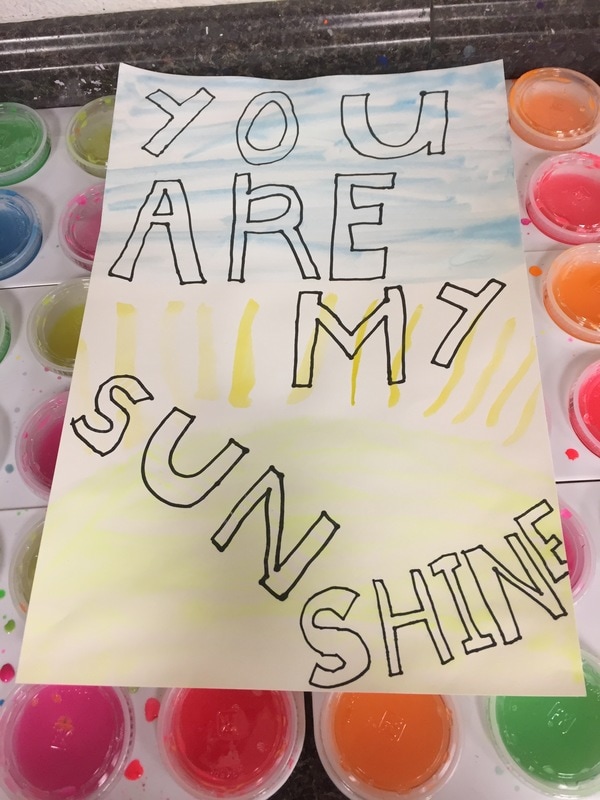
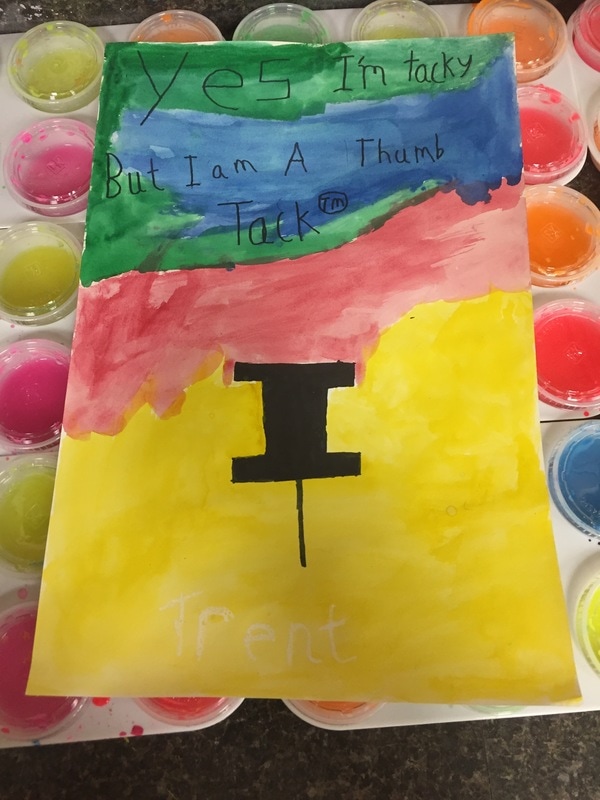
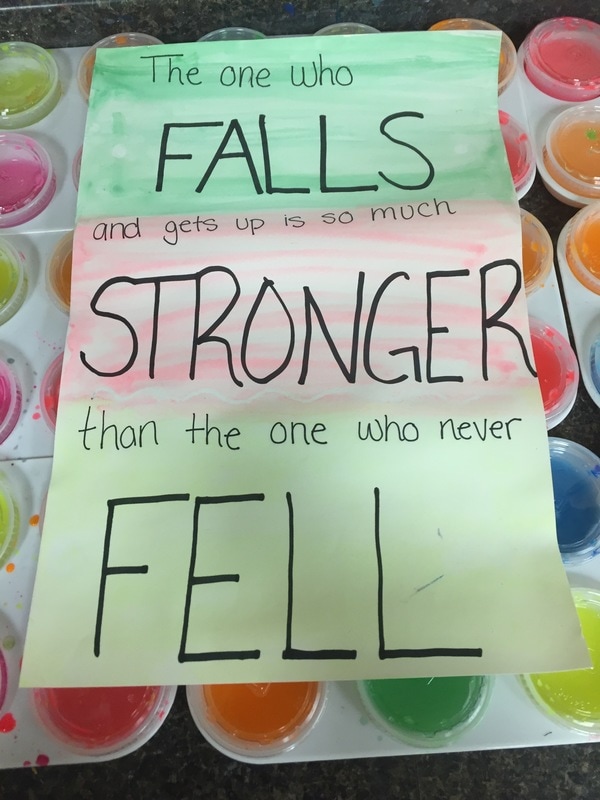
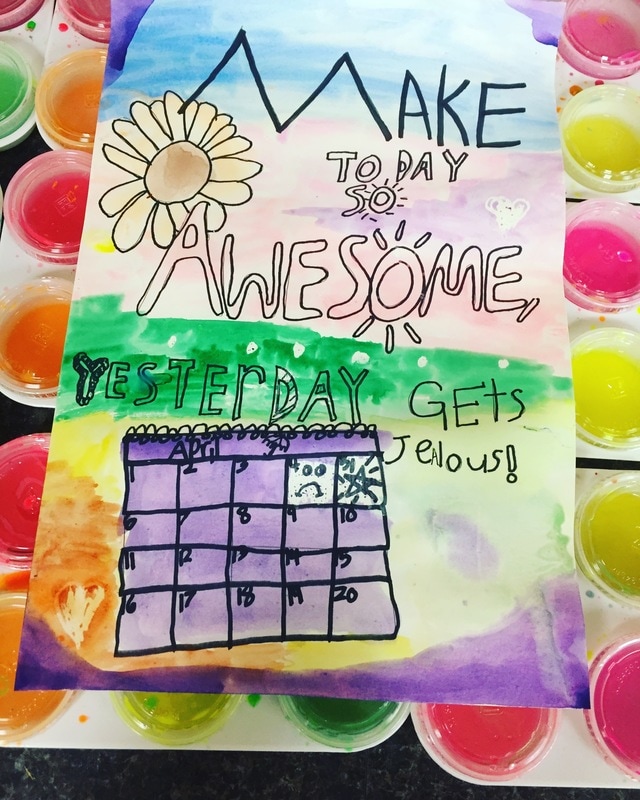
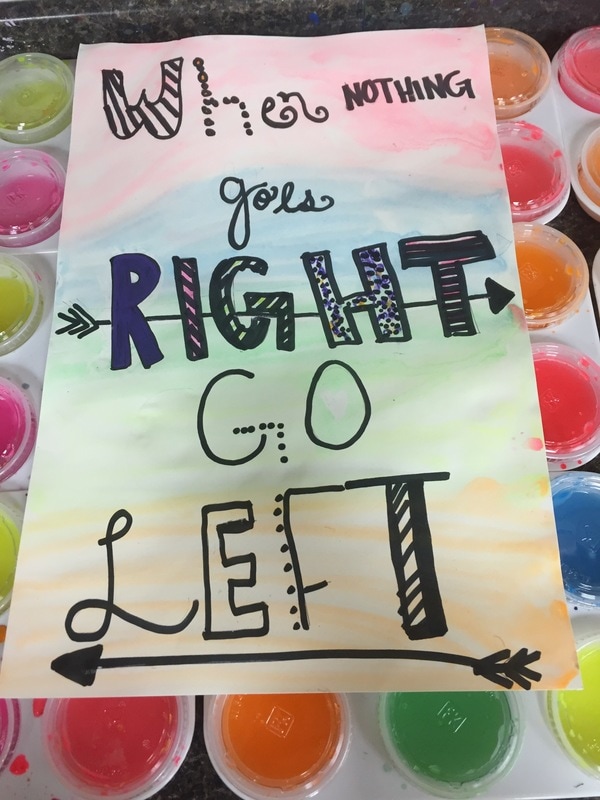
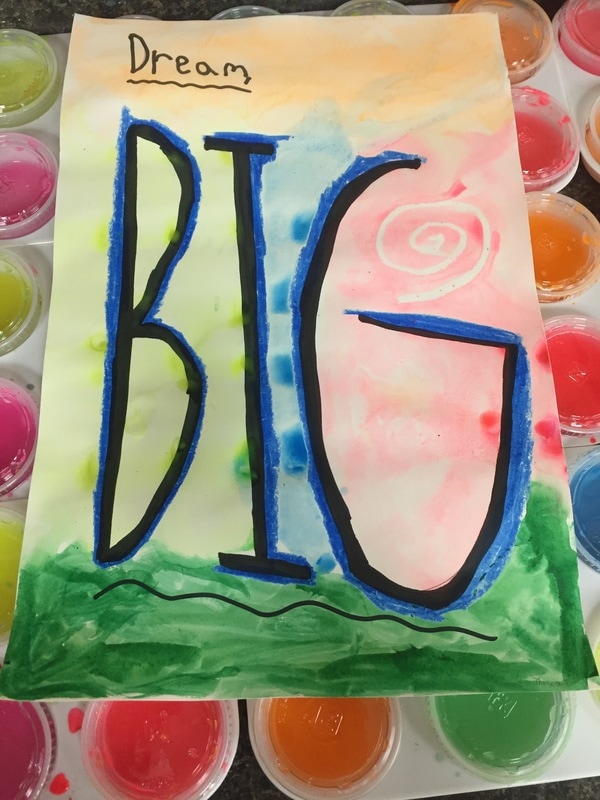
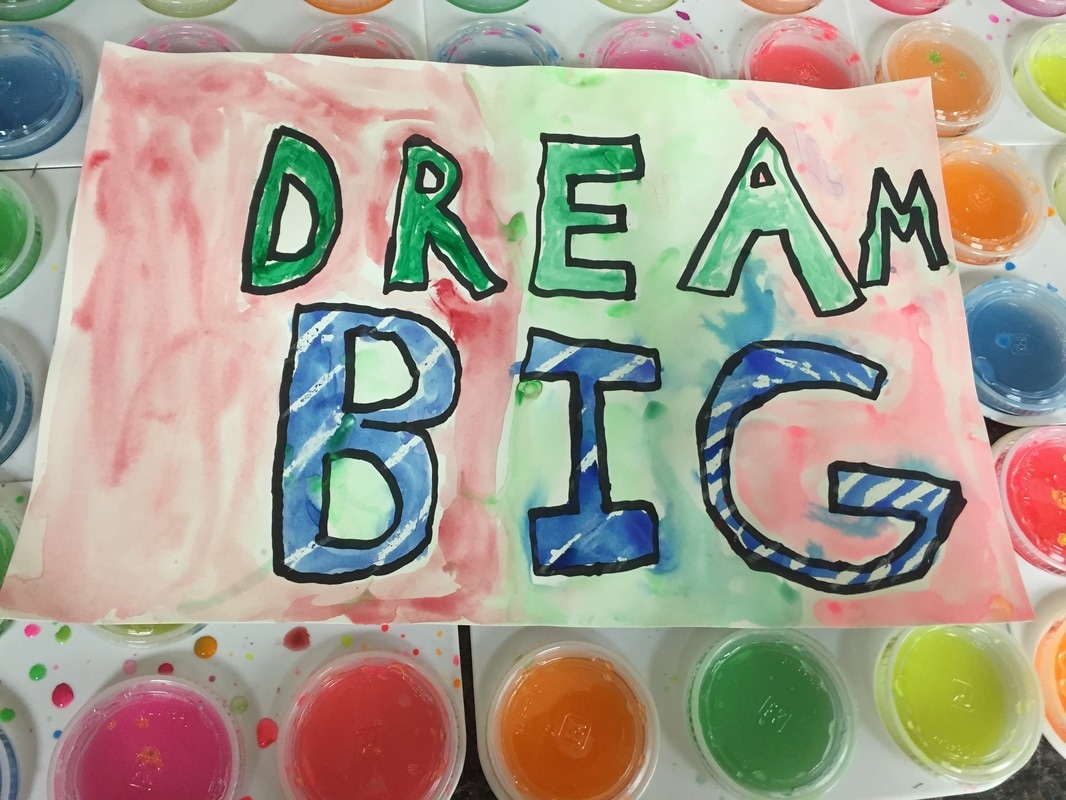
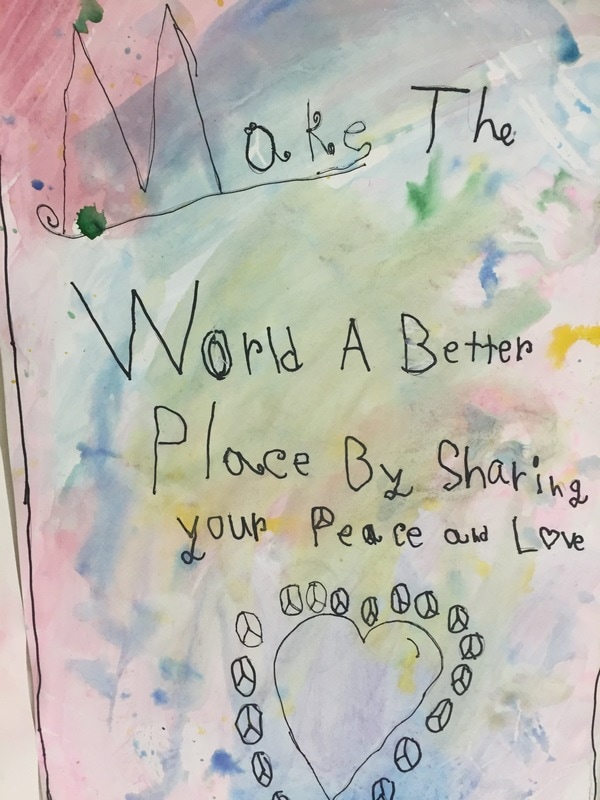
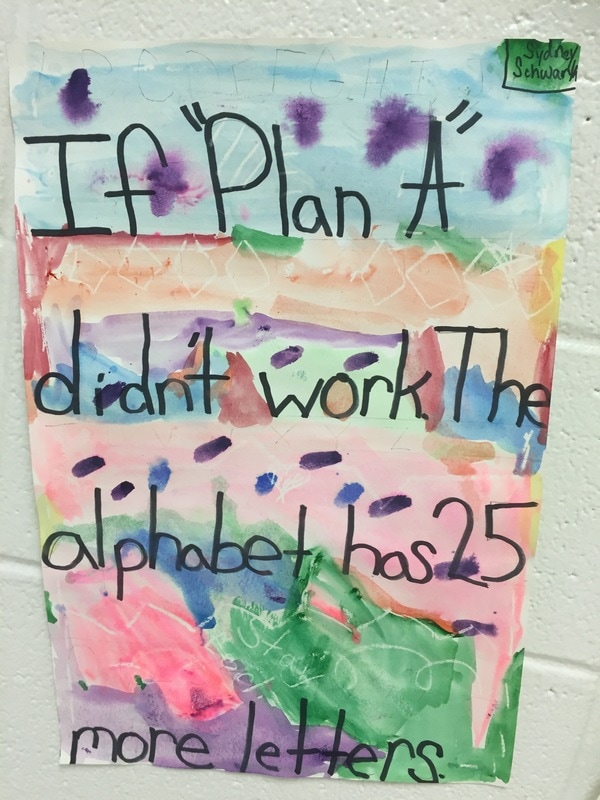
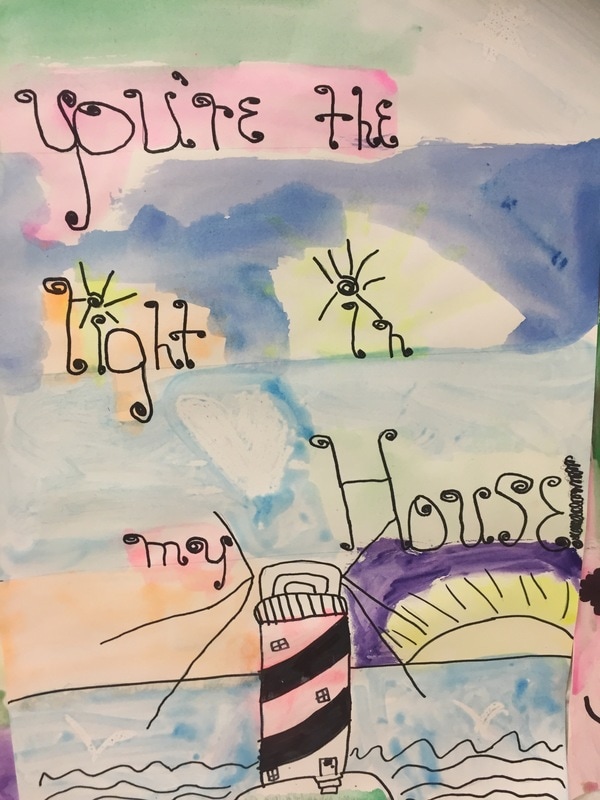
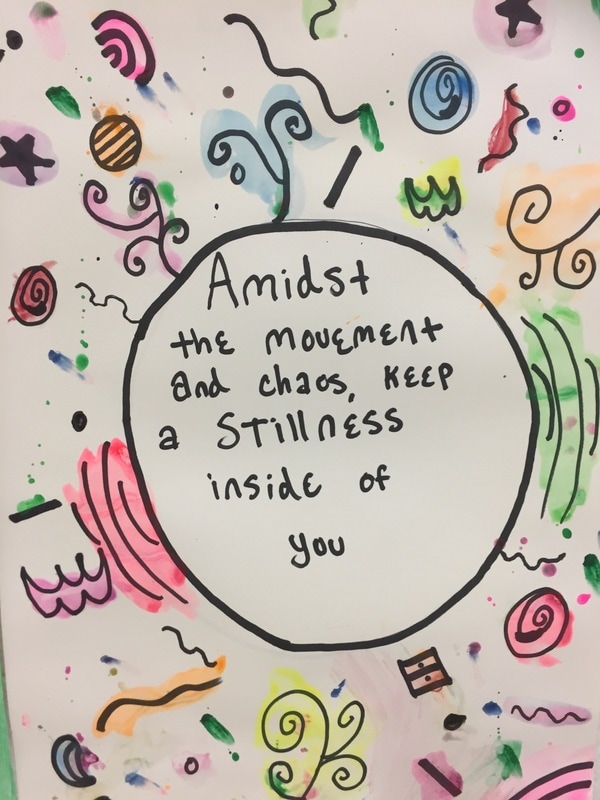
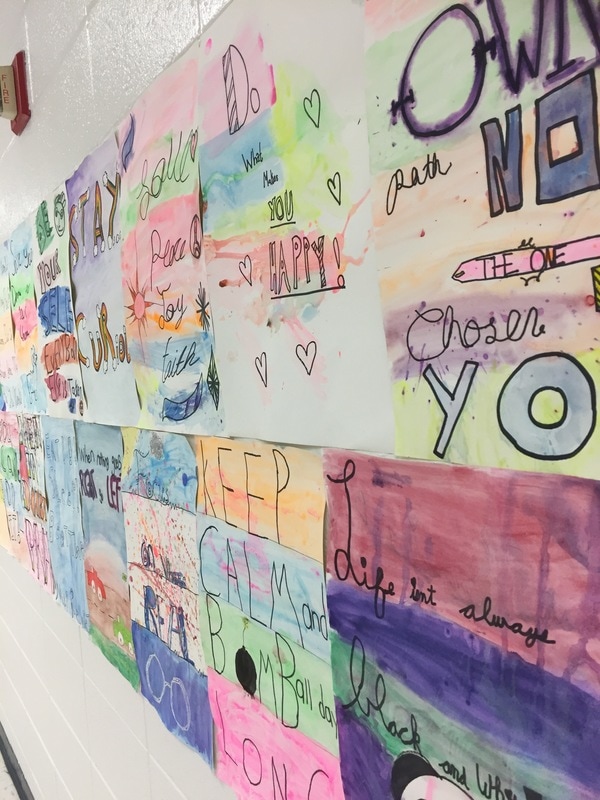
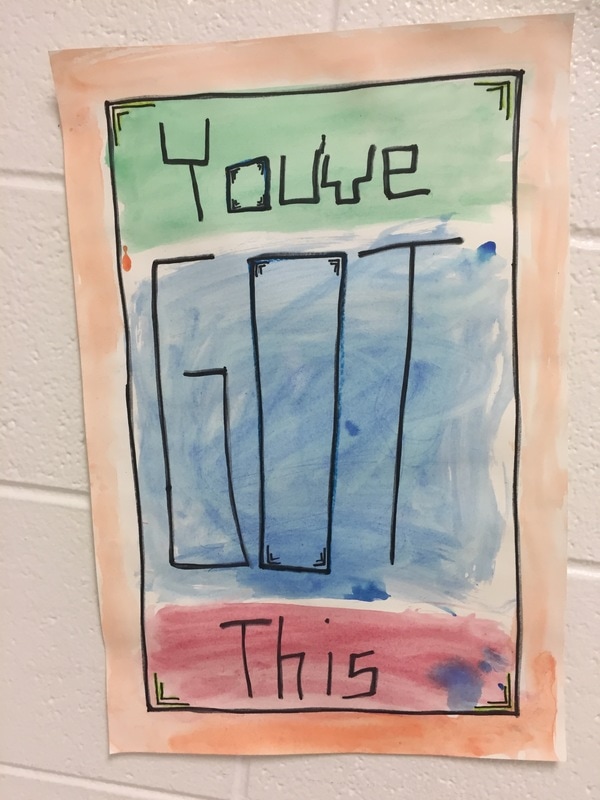
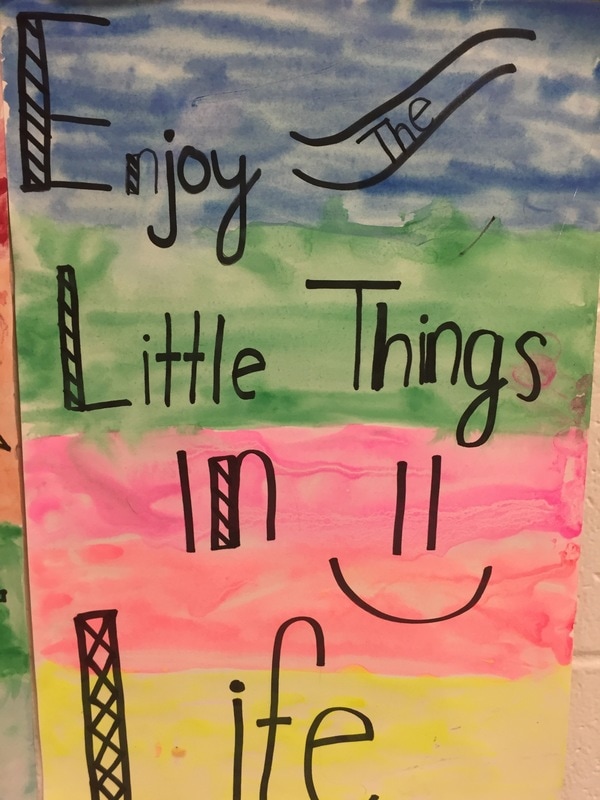
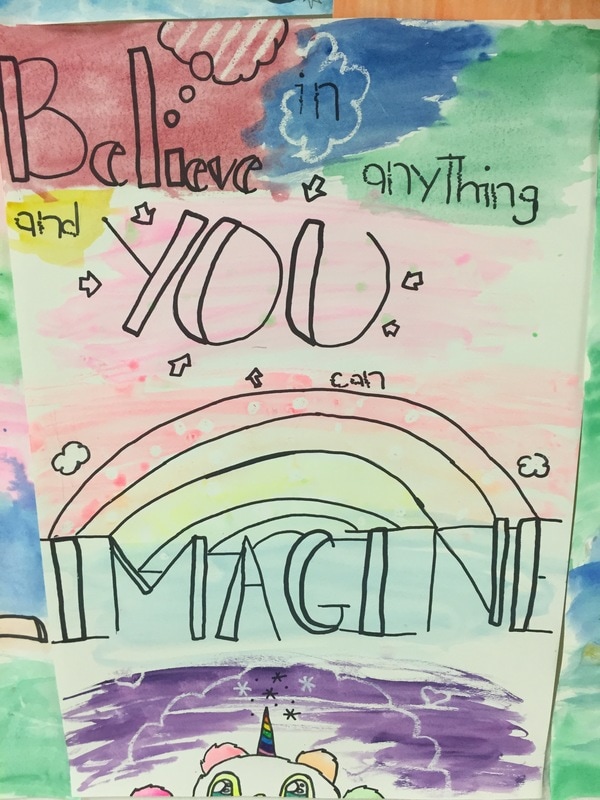
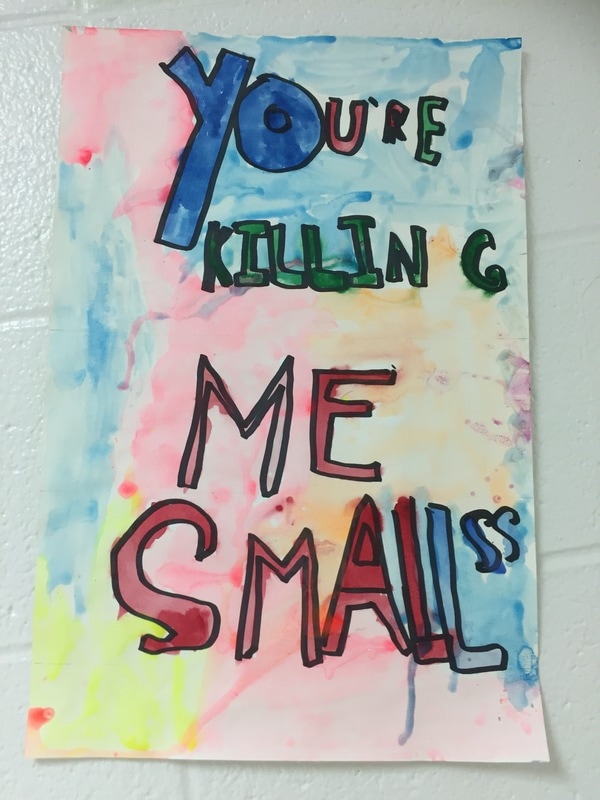
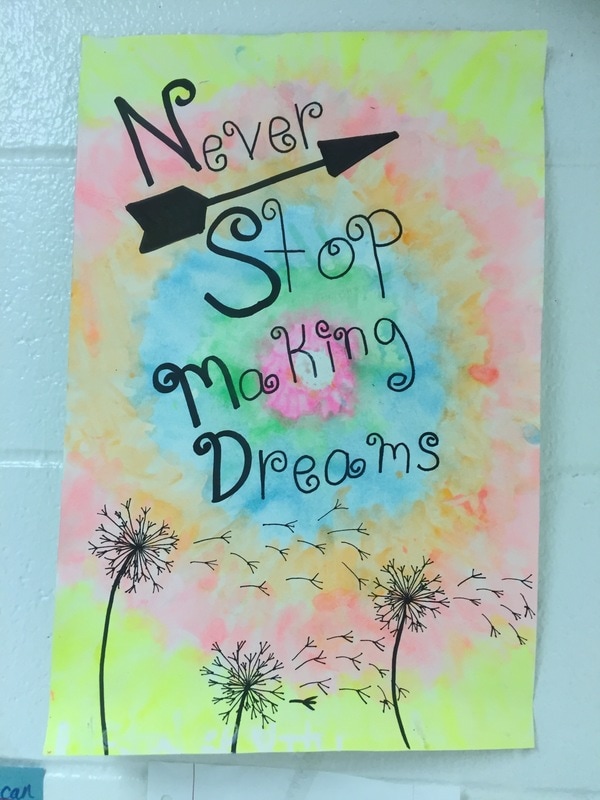
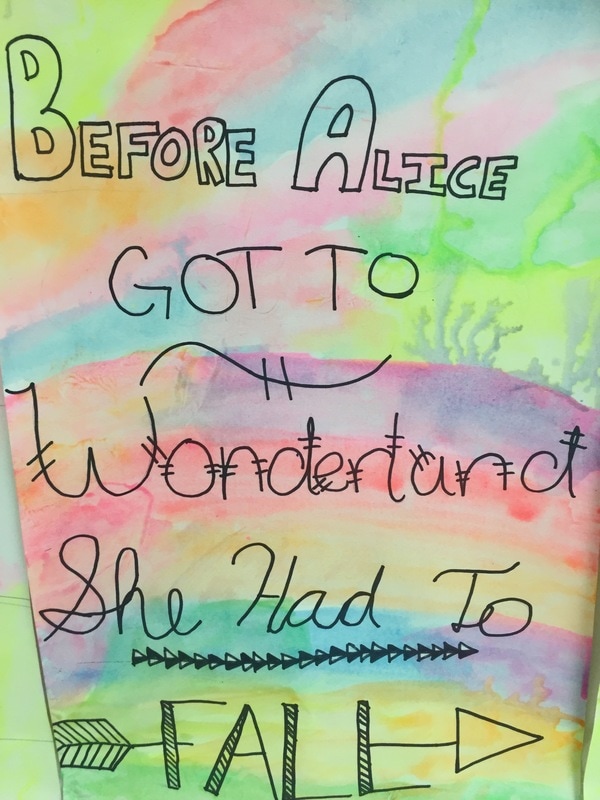
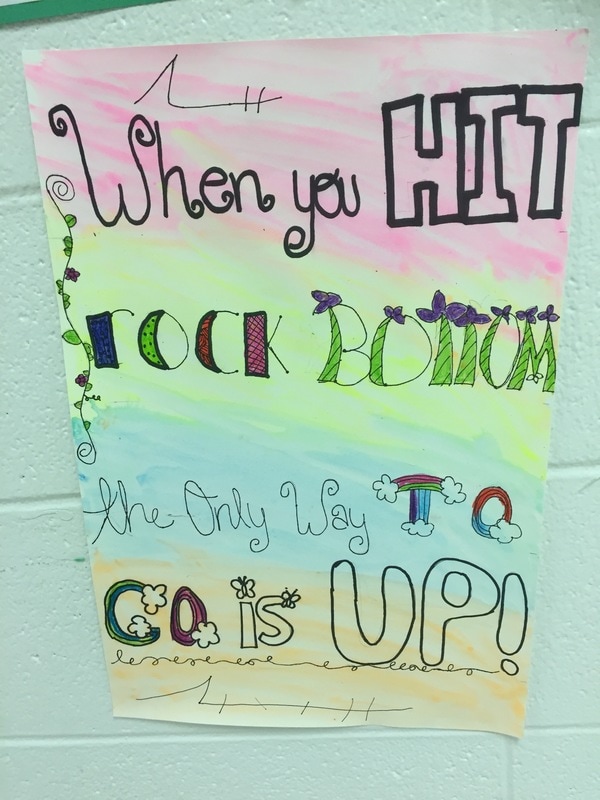
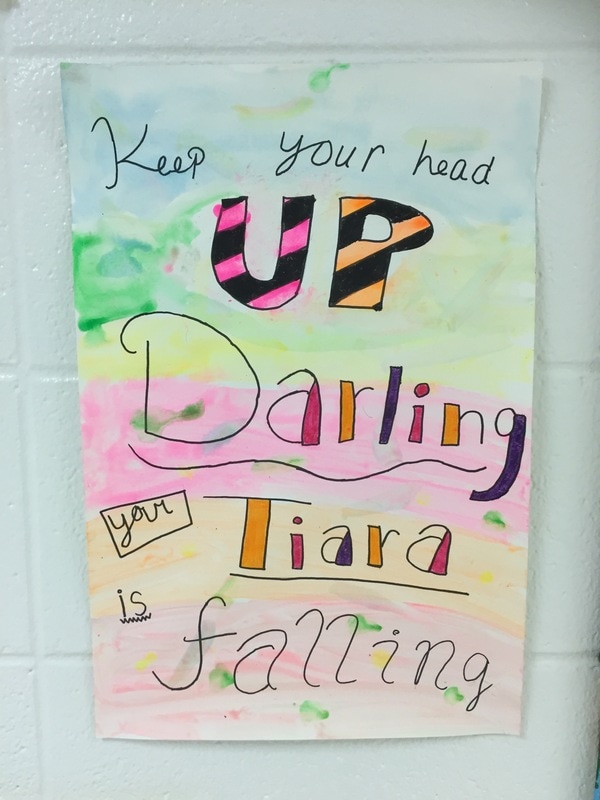
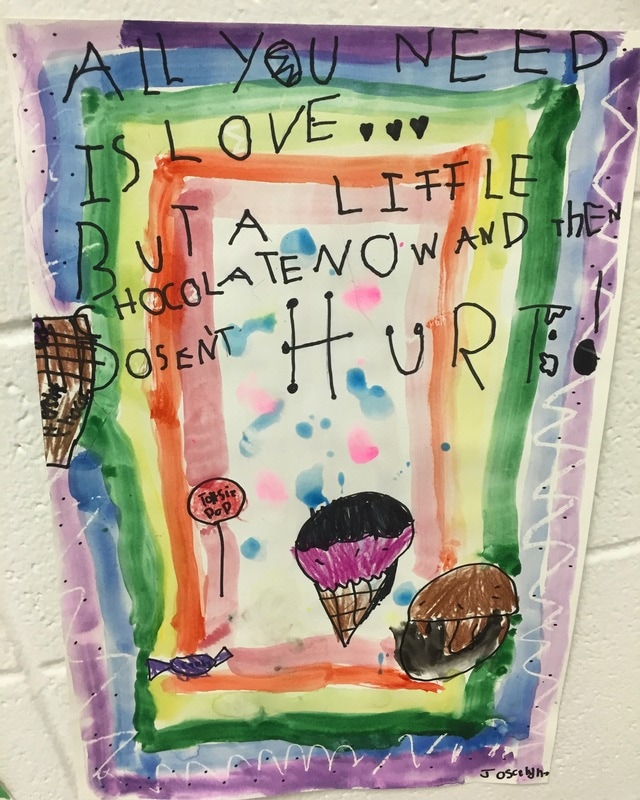
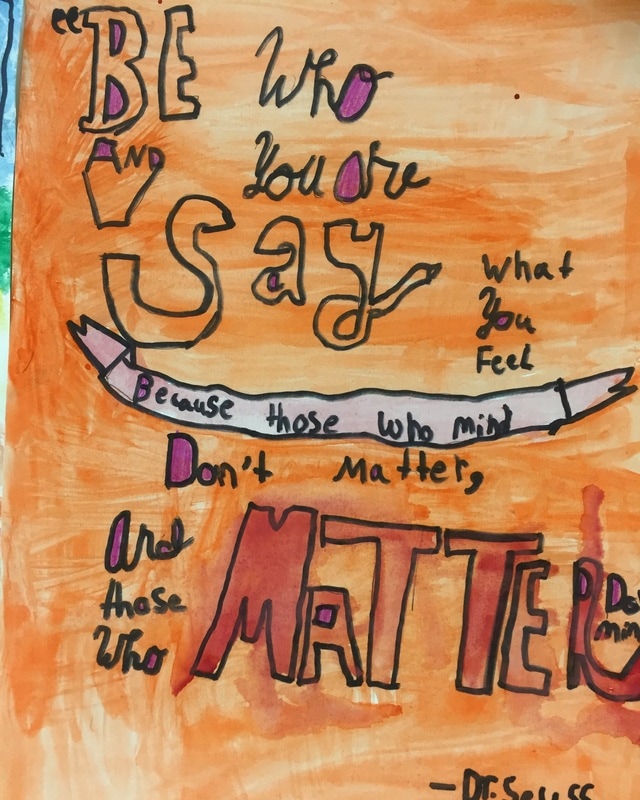
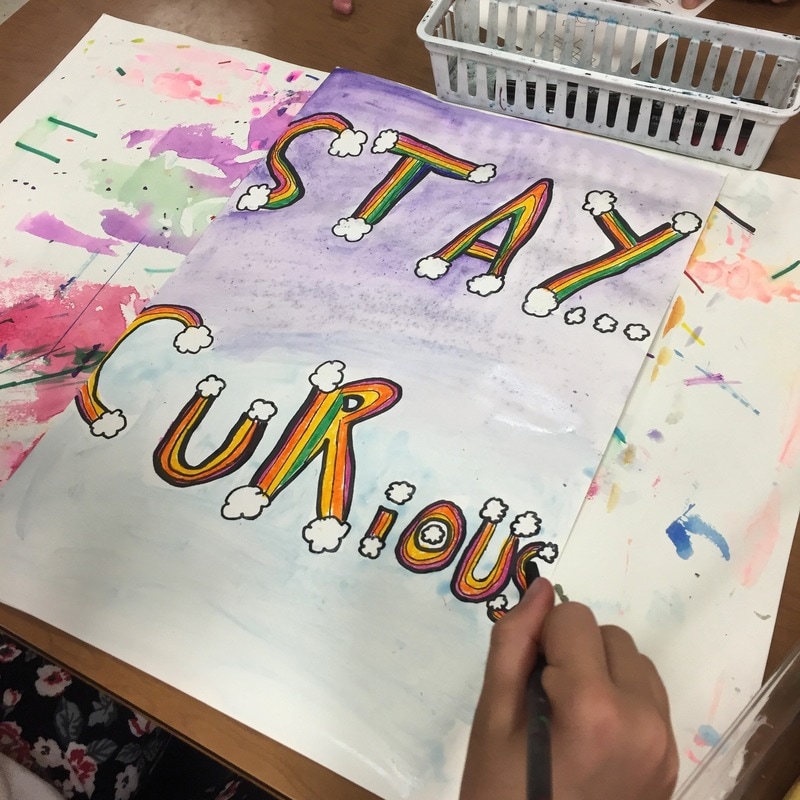
For this project, we used tag board, which I was not entirely impressed with....I wish we would've used real watercolor paper. We also used watercolor---both the regular sets and liquid neon watercolor. I had to explain that students had to be very careful not to let the neon colors mix in the container. Since half of my students started this lesson when I took my personal day in March, I typed up a very extensive sub plan to help them get started with the lesson. I also had tons of visuals posted around the room for ideas, lettering guides and font alphabets. They could choose any uplifting quote (we had recently lost a staff member), and should keep in mind that these would be posted around the building in time for MAP testing
For this project, we used tag board, which I was not entirely impressed with....I wish we would've used real watercolor paper. We also used watercolor---both the regular sets and liquid neon watercolor. I had to explain that students had to be very careful not to let the neon colors mix in the container. Since half of my students started this lesson when I took my personal day in March, I typed up a very extensive sub plan to help them get started with the lesson. I also had tons of visuals posted around the room for ideas, lettering guides and font alphabets. They could choose any uplifting quote (we had recently lost a staff member), and should keep in mind that these would be posted around the building in time for MAP testing
Here is what I left for my sub:
Step 1: Choosing A Quote to Illustrate
Step 2: Hand lettering Practice (and drawing symbols)
Step 3: DRAWING BIG
At the end of each class, pass out the wooden clothes pin for each table, and have students clip their papers into the clip to keep them organized for next time.
At the end of the day, please have the last class put the chairs up.
Step 1: Choosing A Quote to Illustrate
- Today students will be selecting a quote to illustrate.
- Students may use a quote posted on the board, or they may use one of their own quotes as long as it is school appropriate.
- Later we will be incorporating the quote and the writing into a watercolor illustration, today is all about practicing the lettering and selecting something that they might want to use for the project.
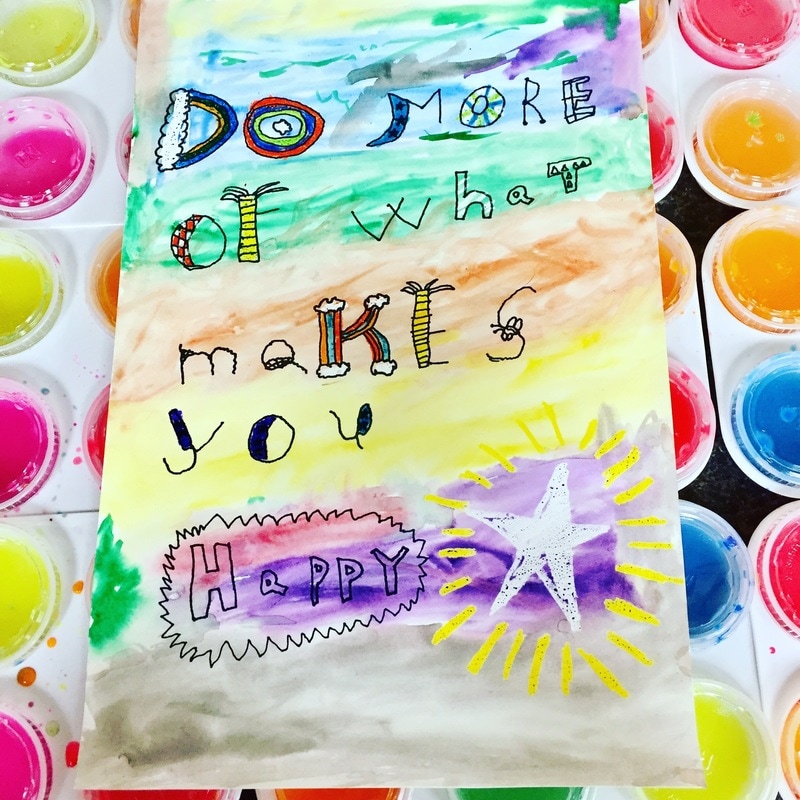
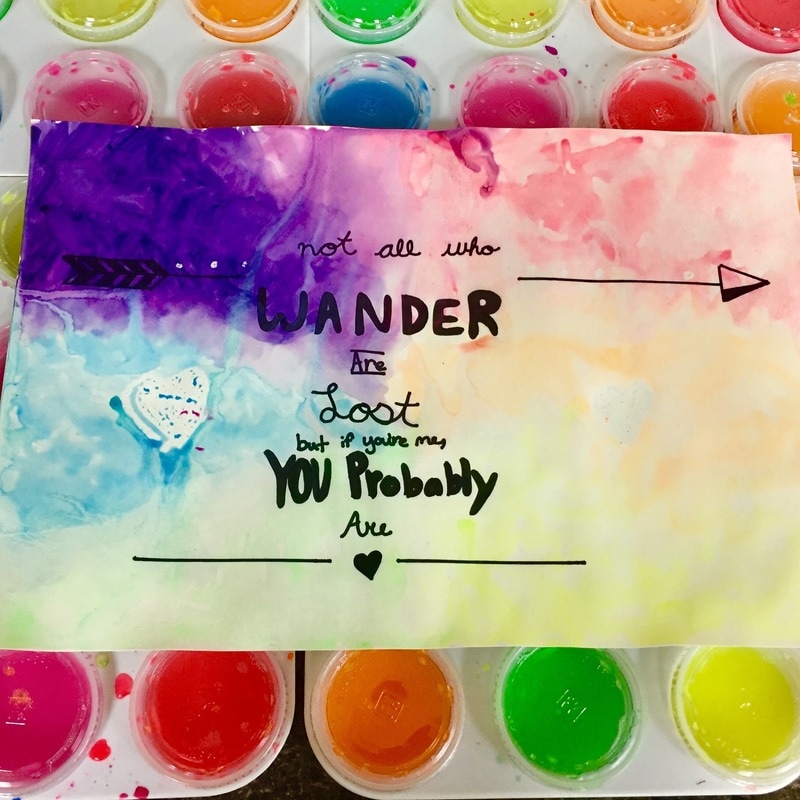
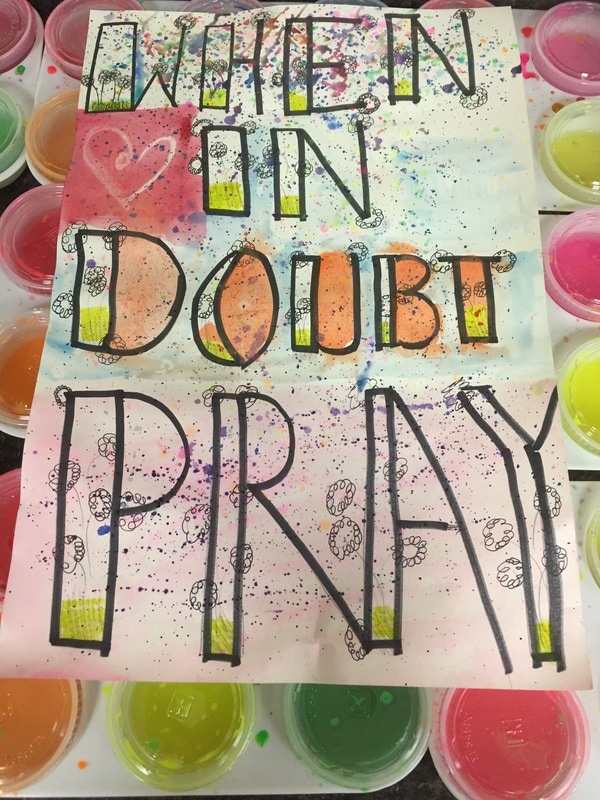
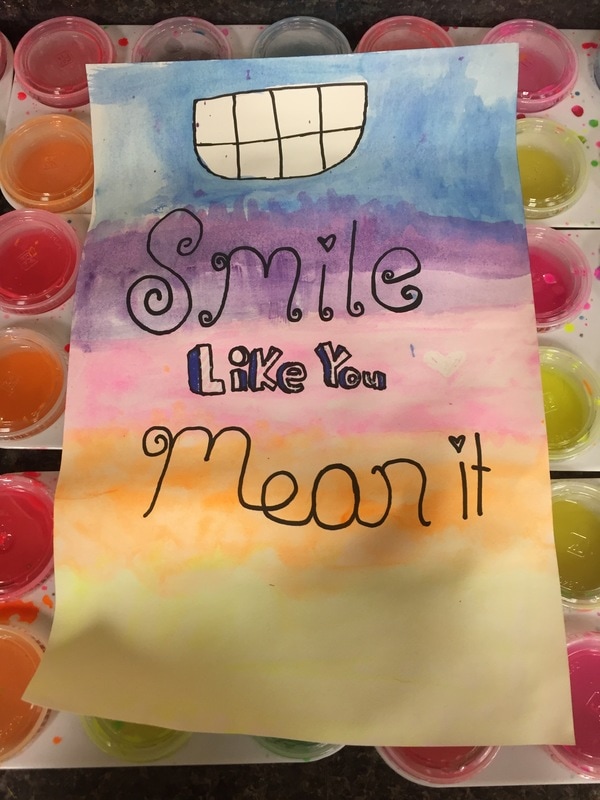
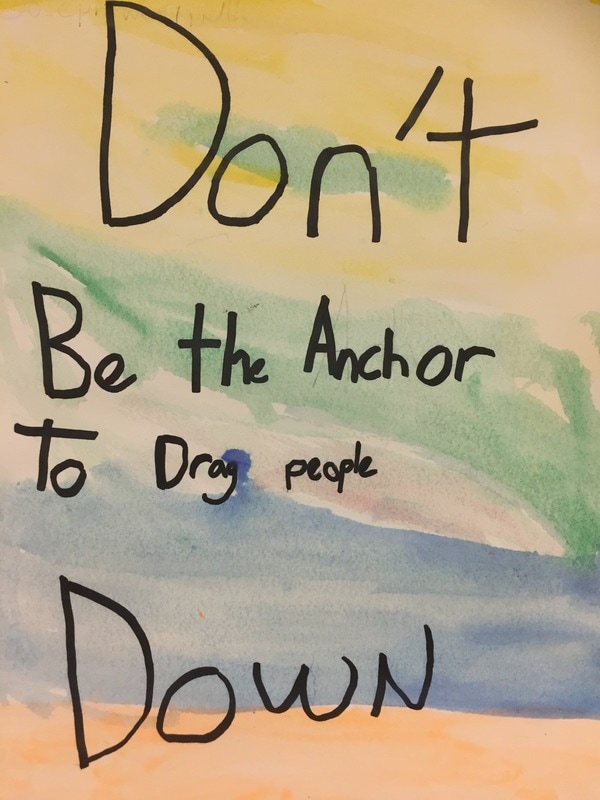
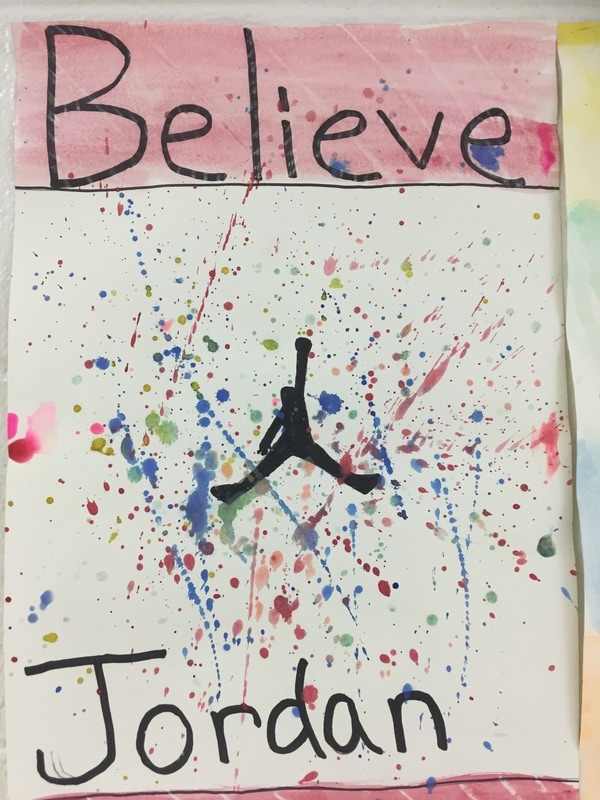
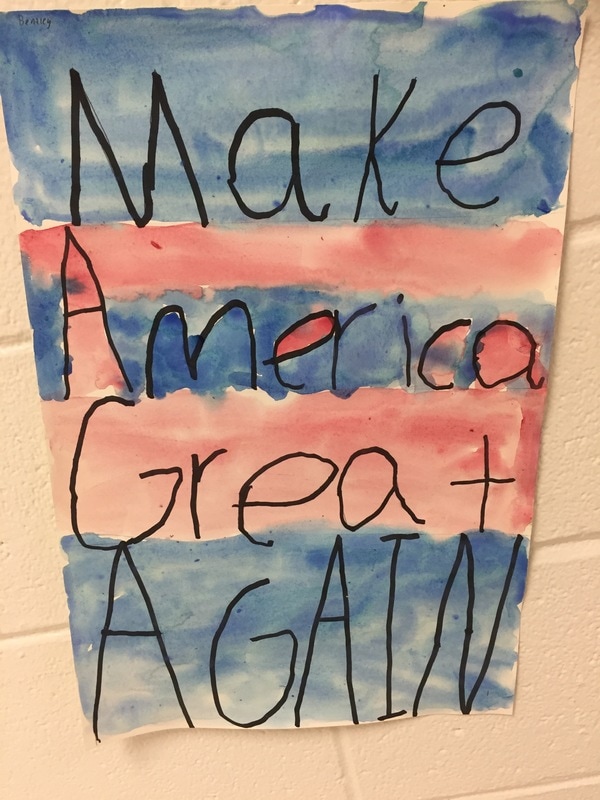
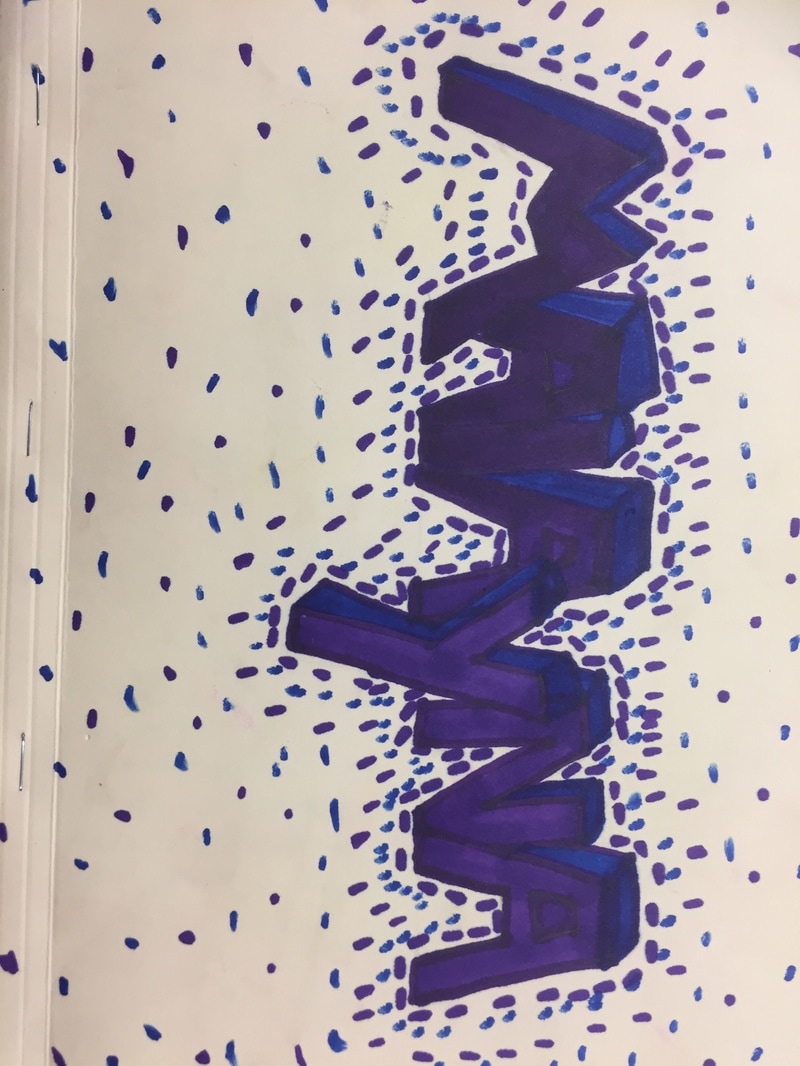
- This project is about selecting something that is personal, uplifting, encouraging and meaningful to them. Spelling is important!!
- As they think about which quote to use, they should consider what colors and imagery might correspond to help illustrate their idea. How they write it is just as important as what they write.
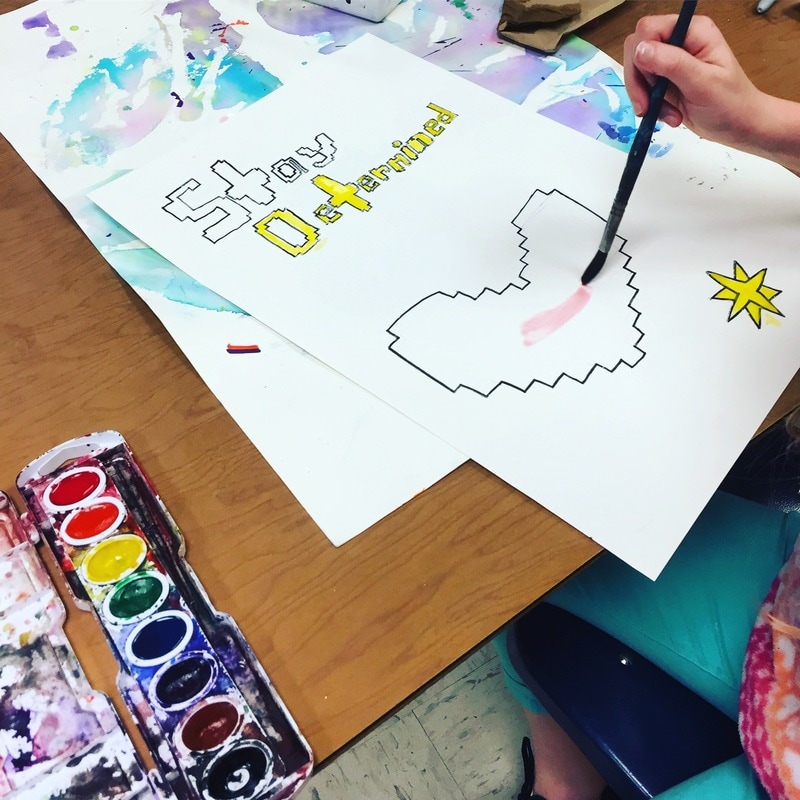
Step 2: Hand lettering Practice (and drawing symbols)
- As most students have never learned cursive writing, this might be challenging for them, but when I get back next week, I will teach them a few techniques and we will use some special pens, which will help with the writing.
- Today, we are using mechanical pencils for the first time. This might help them draw lightly.
- Today, students should use the grid paper to help them practice the letters and phrases. I have posted a plethora or really cool lettering they can use. They can practice as much as they want, practice makes perfect!
- They can pick any kind of writing that they want to go with their quote.
- I don’t mind if they use more than one paper, but they should not throw away the paper until most of it is covered with ideas (sometimes kids make one mark and then toss it, which is wasteful). I put out TWO types of grid paper, one has smaller boxes, they can use either one.
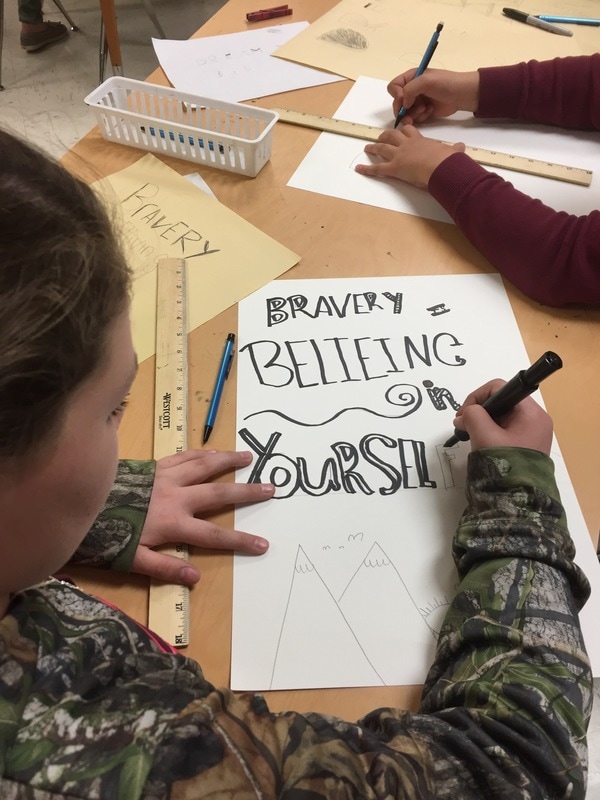
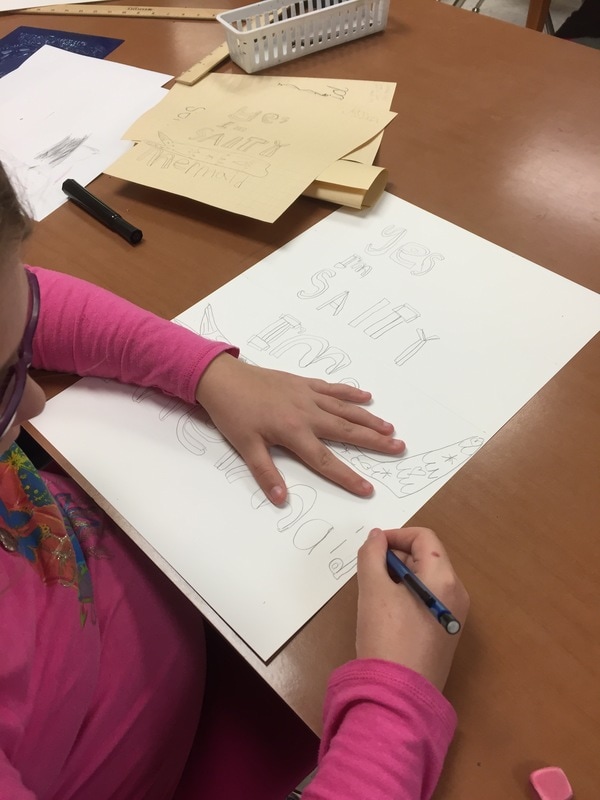
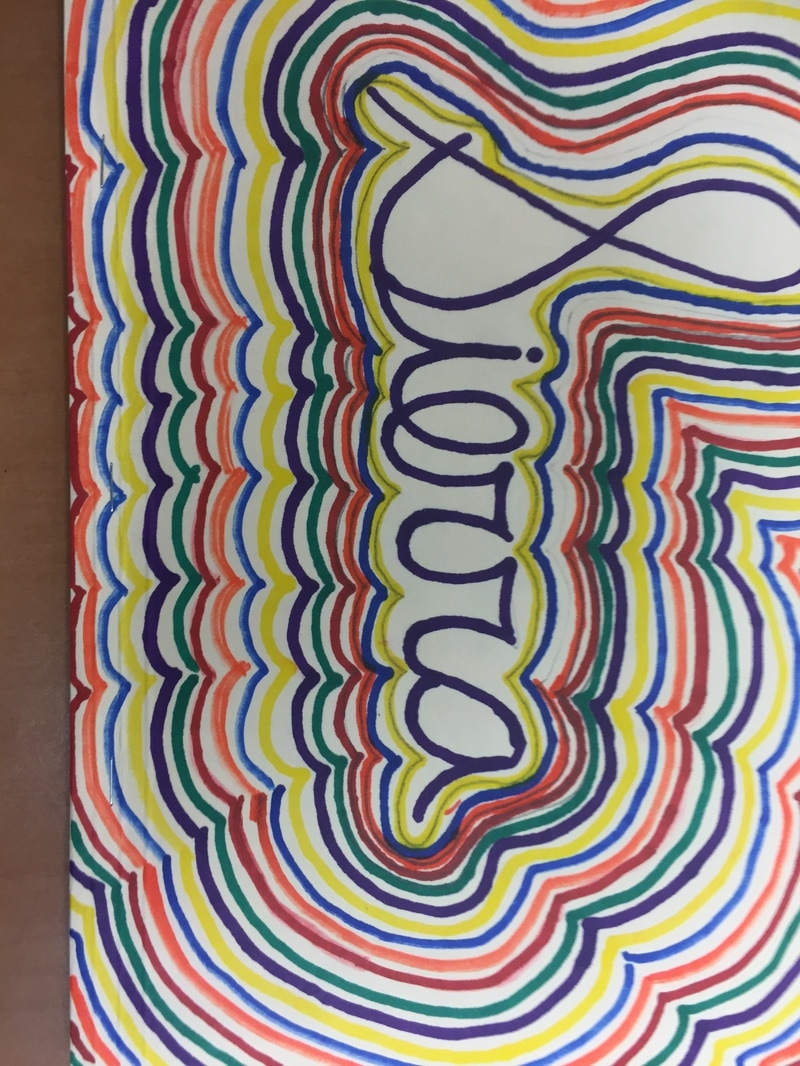
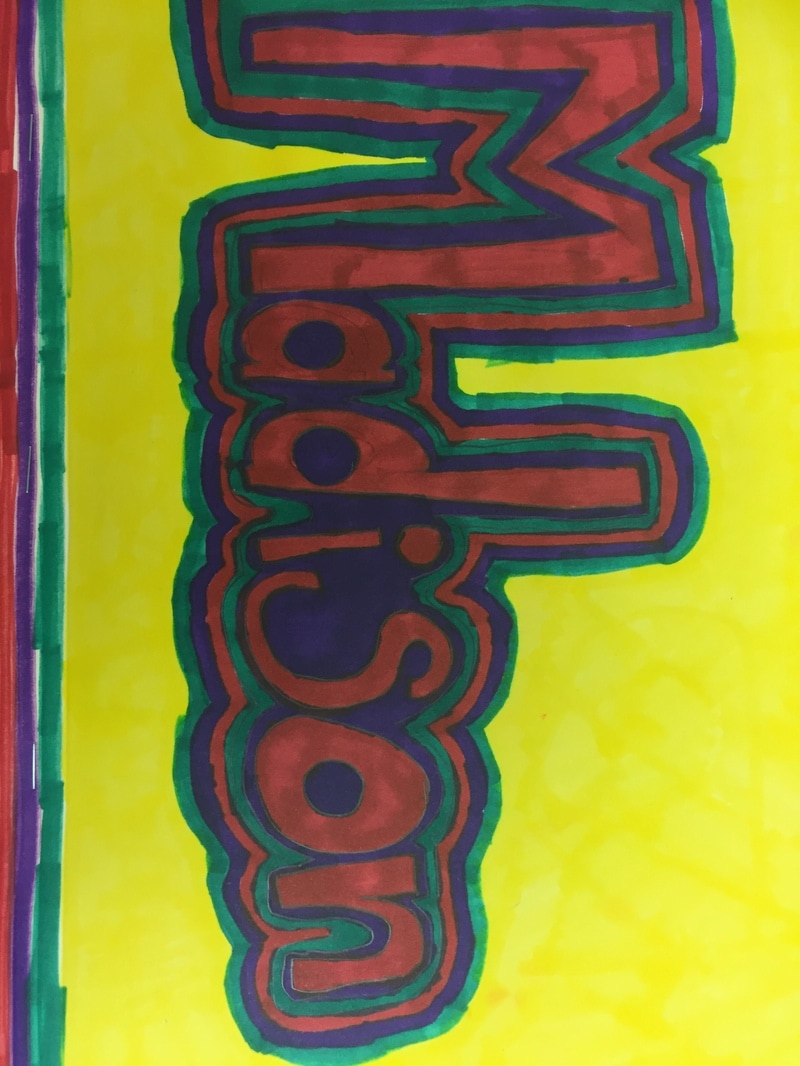
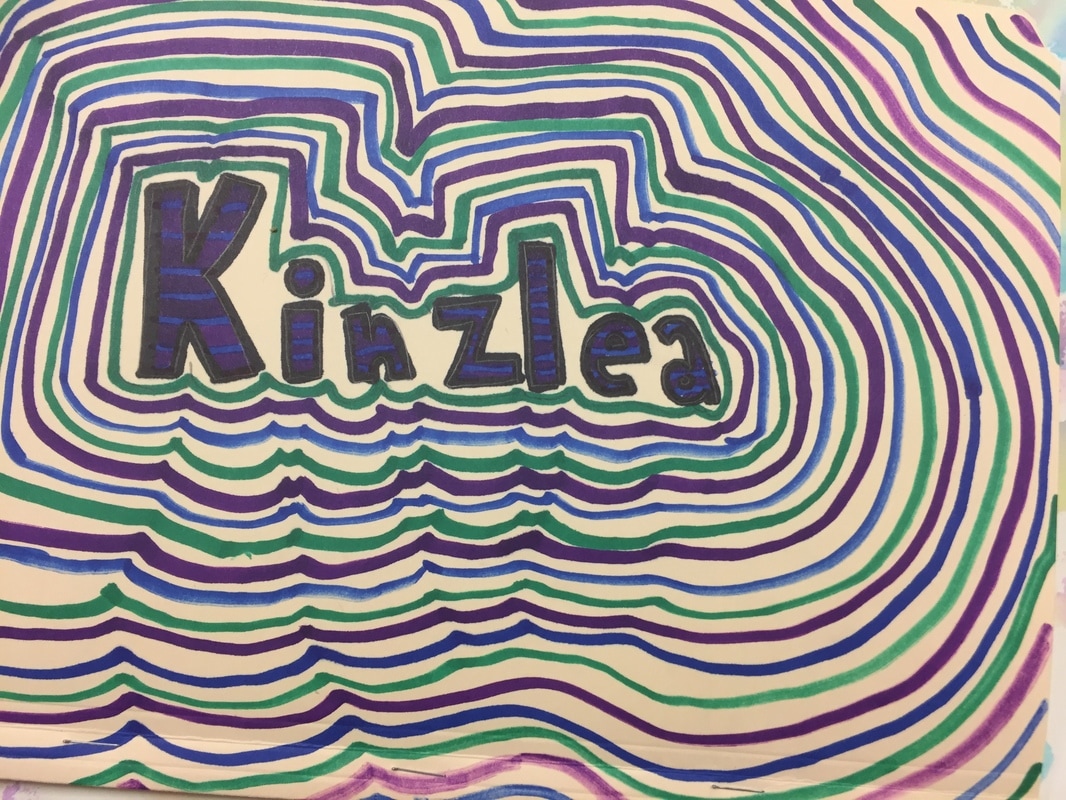
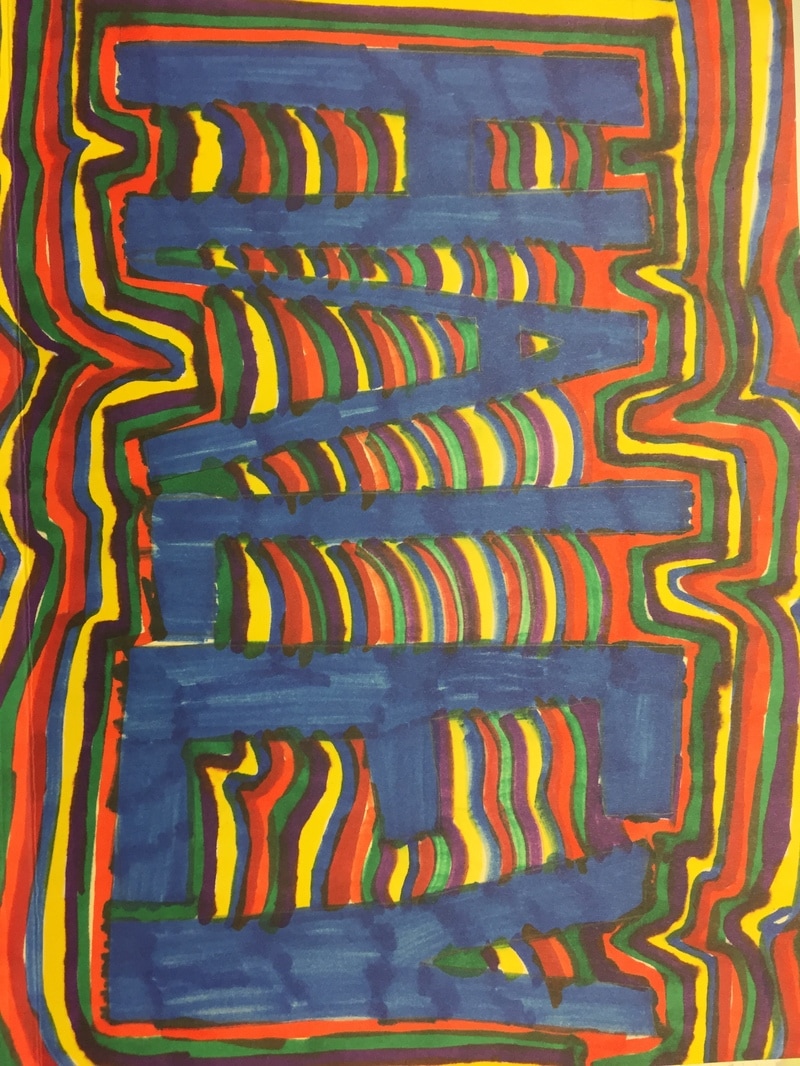
- Students should roughly sketch out their phrase or quote in pencil on the grid paper a 3-4 of times. (see my example)
- They should look at how it is placed and think about what words should be emphasized.
- They should then use markers (the chisel tip markers work great) to draw over the top of their quote, the pencil should be done lightly so that the marker will cover it. The grid paper should help them to place the words and space out the letters.
- Students should also think about images and symbols that could be used to illustrate their quote. They may want to add a frame or a design around the quote. This should be practiced today.
- Names should be on the practice papers.
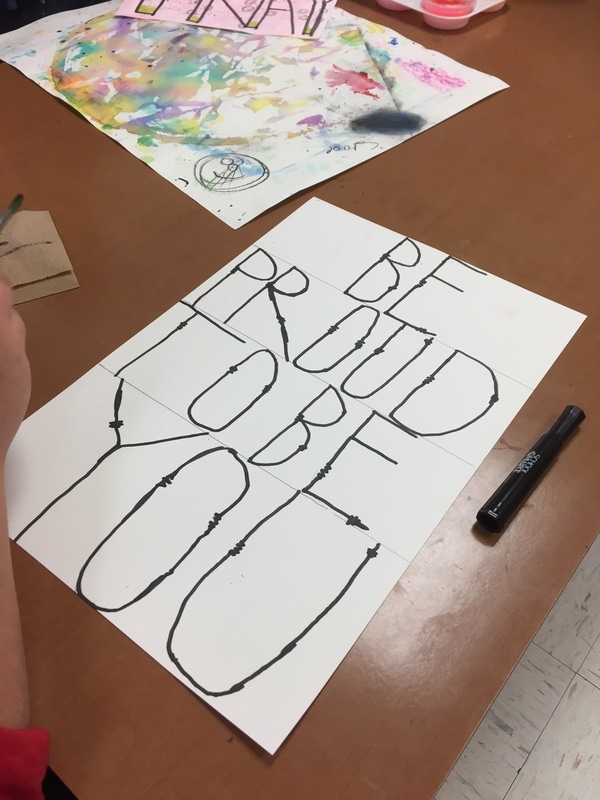
Step 3: DRAWING BIG
- If students finish their practice paper, they can VERY LIGHTLY section off the 12X18 manilla paper into a grid using 3 lines. One line should be at the 4”, 8” and 12” mark on the page (see my example).
- Students may need help using the ruler to measure and make the marks on the manila paper. The longest rulers work best as they are 18” long.
- These guidelines will help them draw the lettering much bigger.
- Once they have the guidelines, they should write their lettering and draw their symbols in pencil very lightly on the paper.
- They can also trace over the lettering with marker. IF they majorly mess up, they can always flip it to the back and try again.
- Names should be on the paper, if they do not finish with this step today, it is okay! We will save for next week.
- Early finishers can look at books, free draw, do a coloring sheet or work on the Notan Mural on the south end of the room.
At the end of each class, pass out the wooden clothes pin for each table, and have students clip their papers into the clip to keep them organized for next time.
At the end of the day, please have the last class put the chairs up.
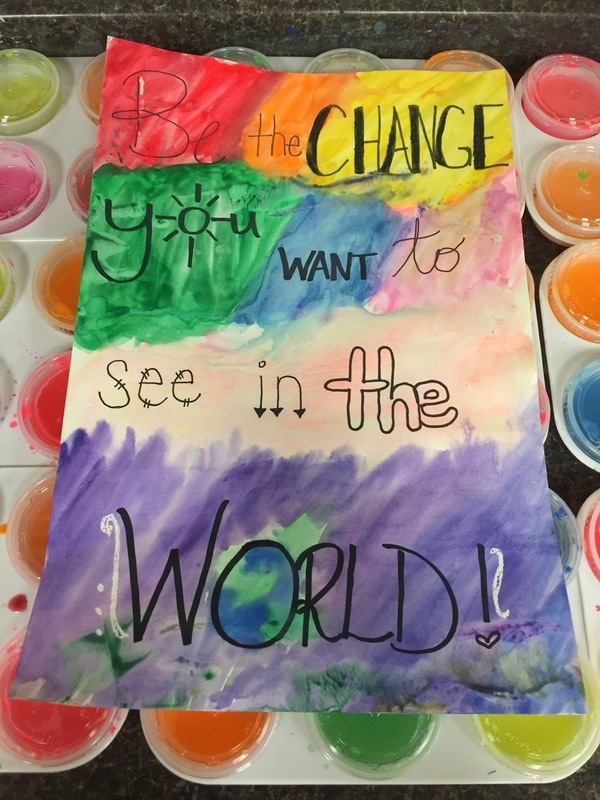
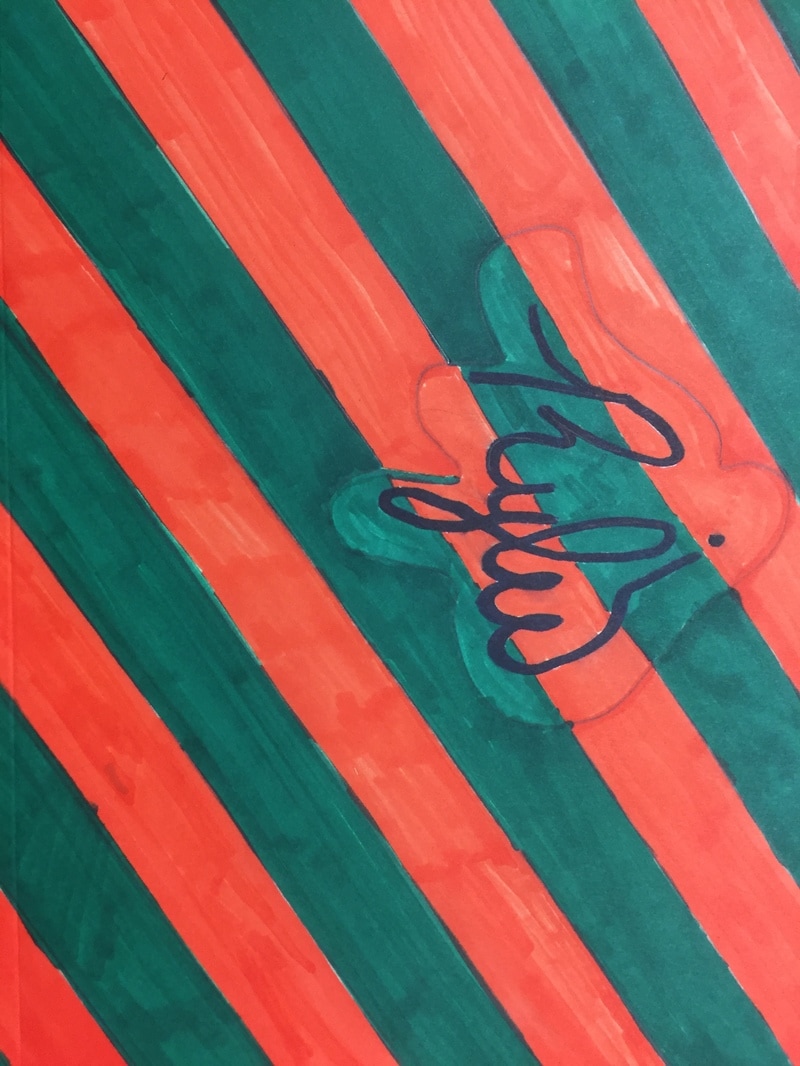
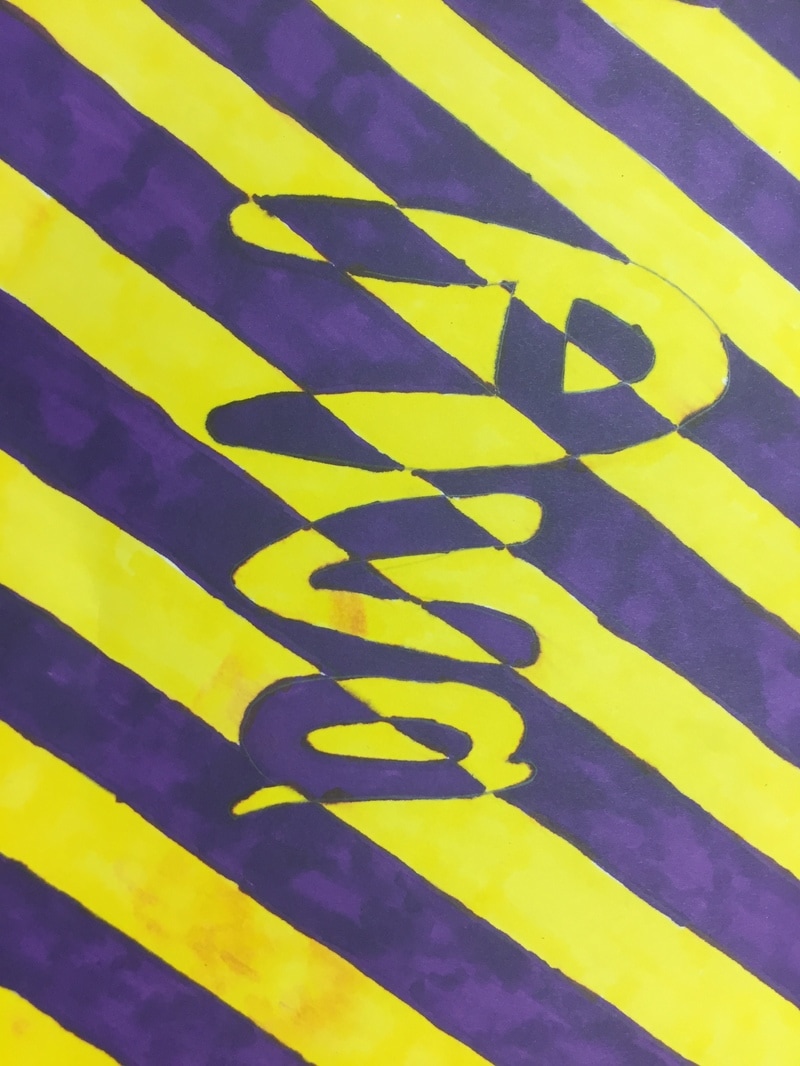
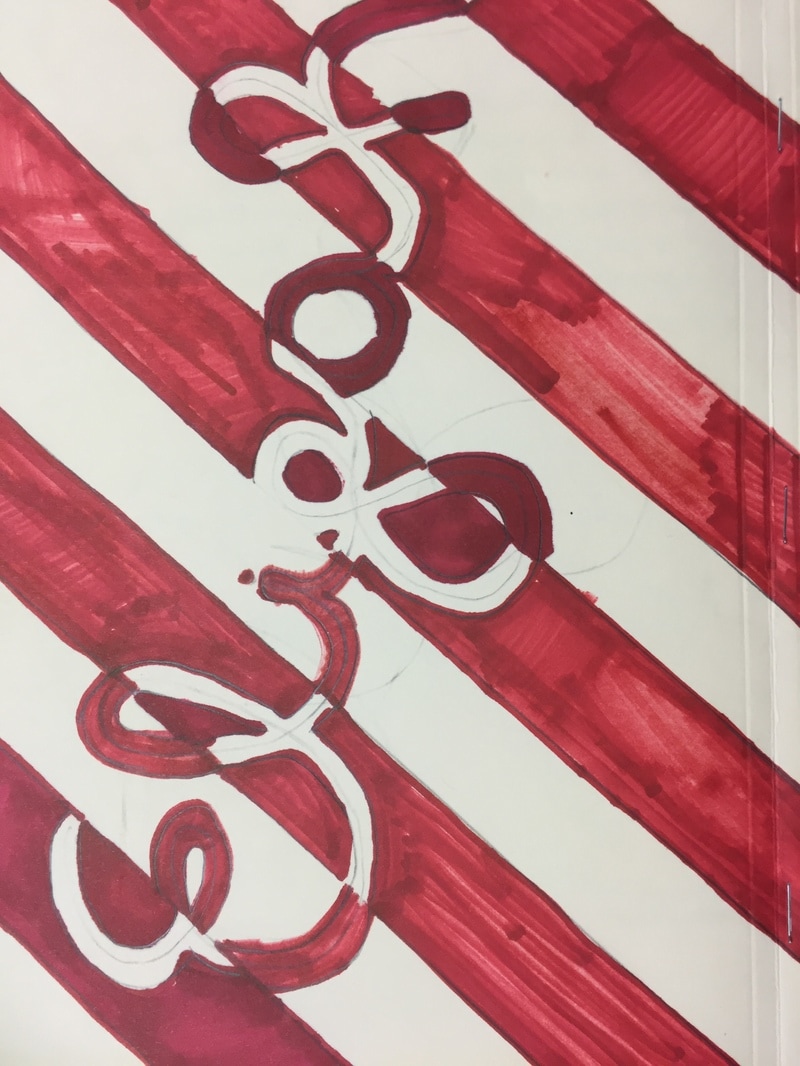
Once students had practiced on the manila paper, they were to show their 'sloppy copy' to me, and then I would give them the white tagboard. This was a great chance for me to notice misspelled words or give them advice on placement before the real thing. It is a little harder to erase on the white tagboard. If a student was absent on the first day, this was a good day for them to catch up.
They were supposed to draw/write it in pencil and then trace in black marker.
The very last day, we painted the tagboard. I showed this (kind of long) video that I made to each class before painting.
I always show how students should color small details very hard with a crayon (and how they can draw with white) and it will show up even if they paint over it.


 RSS Feed
