When a friend asked if my students could have artwork ready for a group show by September 11th, I thought, NO PROBLEM! We started back to school on August 10th, of course we would have time to finish.
For whatever reason, I designed a project that took WAY longer than I thought it would, so I felt like I was rushing my students to finish at the end so I could send artwork to her show, but it is just such a great project that I have to share!
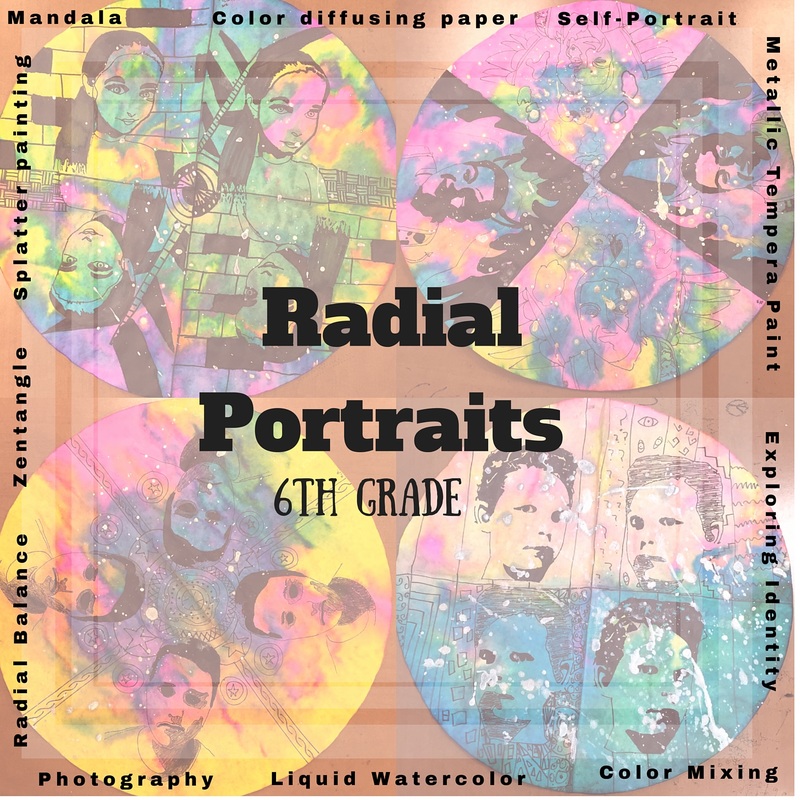
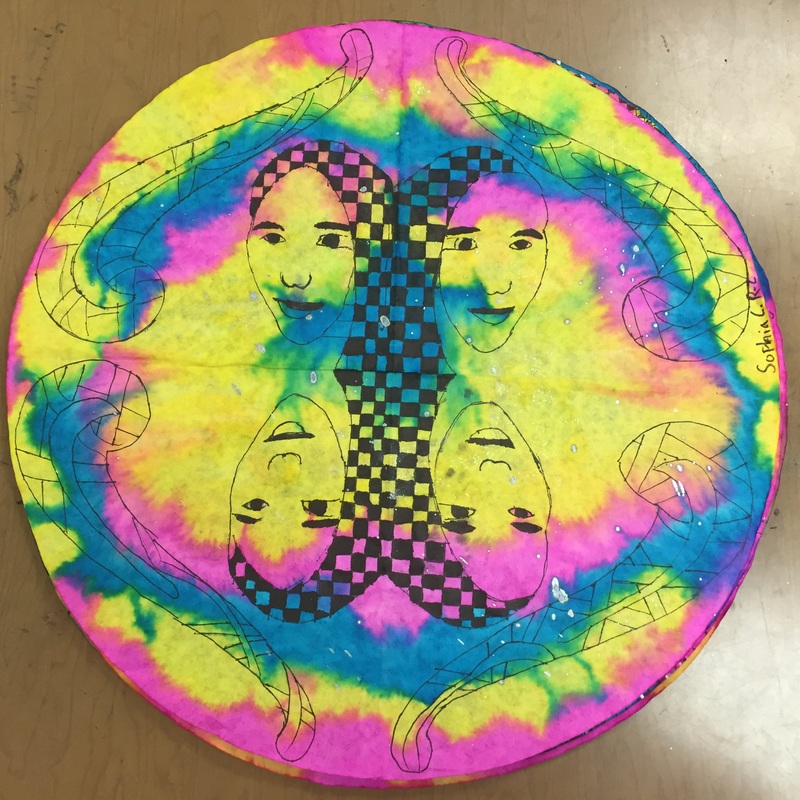
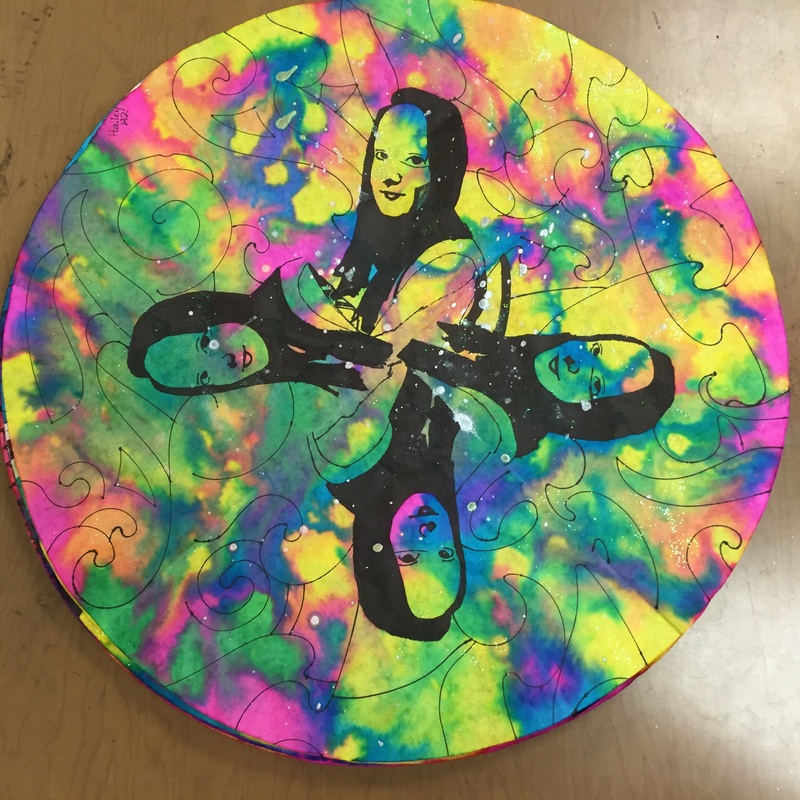
This project has a little bit of everything----self-portrait, photography, radial balance, zentangle, high contrast, color mixing, and even splatter painting.
I only did the large version with my 6th graders, but it could be adaptable for slightly younger, and would be perfect for older students too. I did a smaller version with my 5th graders on coffee filters which turned out great too--look for the post on that one soon!
And without further ado, I will attribute the concept for this lesson to the wonderful and talented Kathy Barbro at Art Projects for Kids. Her Mona Lisa version is great!
Materials:
18" Color Diffusing Circles
Thick and Thin Sharpies and fat black permanent markers
Liquid watercolor paint in primaries
Eye droppers
Metallic paint
Lightboxes or overhead projectors
Black-and-white high contrast photos printed for each student (on copy paper)
Day 1
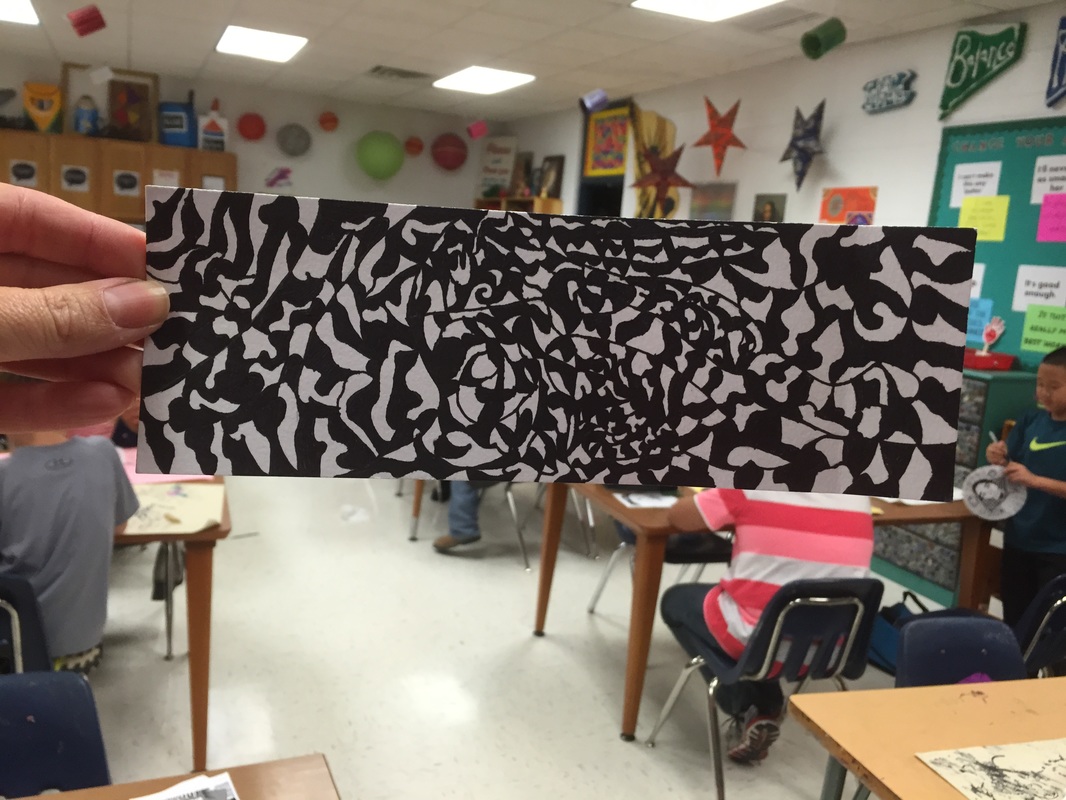
Initially, I choose to introduce the idea of Zentangling. I realized that my students had never done any 'structured doodling' and it was such a calm and relaxing way to start the week. Did you know that there are 3-hour relaxing music videos on youtube? We listened to the calming music while we drew.
Students made zentangled bookmarks with skinny and fat sharpies. It was great that many of my 6th graders did mini-optical illusions that we practiced last year in their designs.
When they were done or almost done with their bookmarks (one-day project), I distributed one iPad mini to each table and explained how to, take a selfie---as if they needed any explanation!
I tried to encourage them NOT to show their teeth and make sure they had decent lighting. I explained the basics of converting the image to black and white and they shared the photo with me on google drive. I had previously signed in to google drive on all of my devices (with an art teacher account, created just for the purpose of organizing student artwork). Students simply had to upload their photo to my google drive account so that I could print the photos. It was a painless process---why didn't I figure this out ages ago!
Note: I imported all of their images to iPhoto and edited them in one big batch so that the contrast was accelerated----making much darker blacks and very little grey with the white so that students could have 'Warhol'-like images to work from. I printed them 2-per 8X11 copy paper and it was a great size for this project. I realized that students with blonde hair turned out a little better if they had a darker back ground and vice versa---in a white wall room, it was tricky but we managed.
If you don't have time to take the photos the day of Zentangling, give yourself another day or two to get the photos printed, since someone is always absent.
FYI: I have started doing TAB Fridays--utilizing art centers each week, giving my students tons of free choice. After introducing zentangling, one boy grabs me and says: 'Mrs. Mitchell, we made a timelapse of a zentangle bookmark.' OMG! So proud!!
Day 2-3
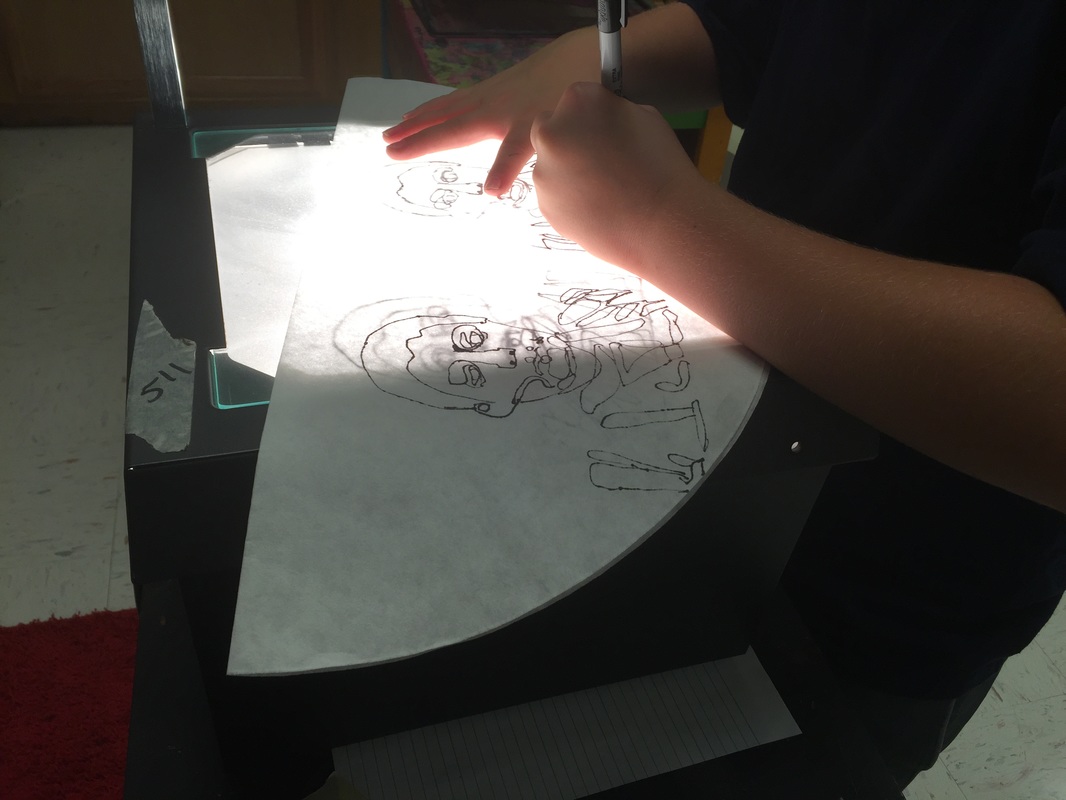
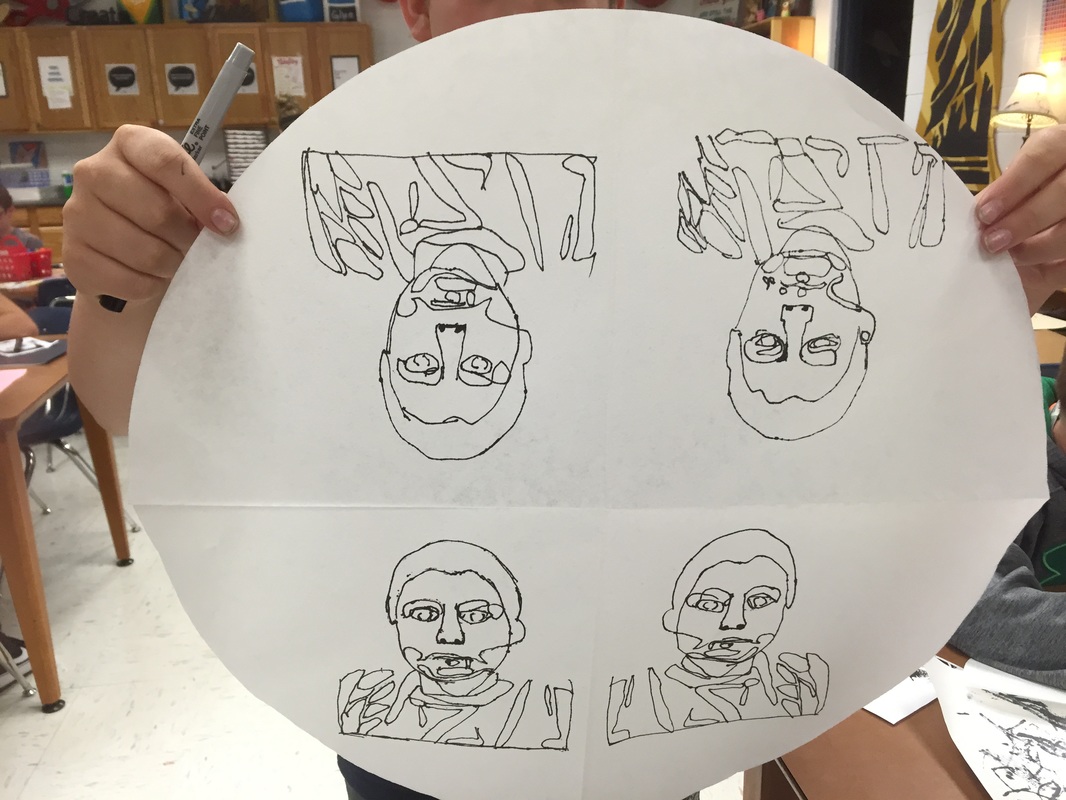
TRACING?! Yes, its true. For this project, I explained that we would be 'transferring' the portrait 4 times, on the radial 'mandala', so the best way to maintain consistency would be to TRACE the face with a sharpie--no pencils allowed. I pre-folded the circles before passing them out to the students and emphasized the idea that this is a CIRCLE, the image will be repeated, so don't trace your face once in the middle, think of it more like a piece of pizza with your pepperoni-face on each slice-HA!
Since the images were converted to the stark contrast, I encouraged them to ONLY trace the 'black' shadows and shapes on their faces. Some kids did not heed my warning, and they tried to freehand their eyes and noses---which made them look a LOT like Quazimodo (no one knows who that is anymore!) and some of those were a little messed up looking.
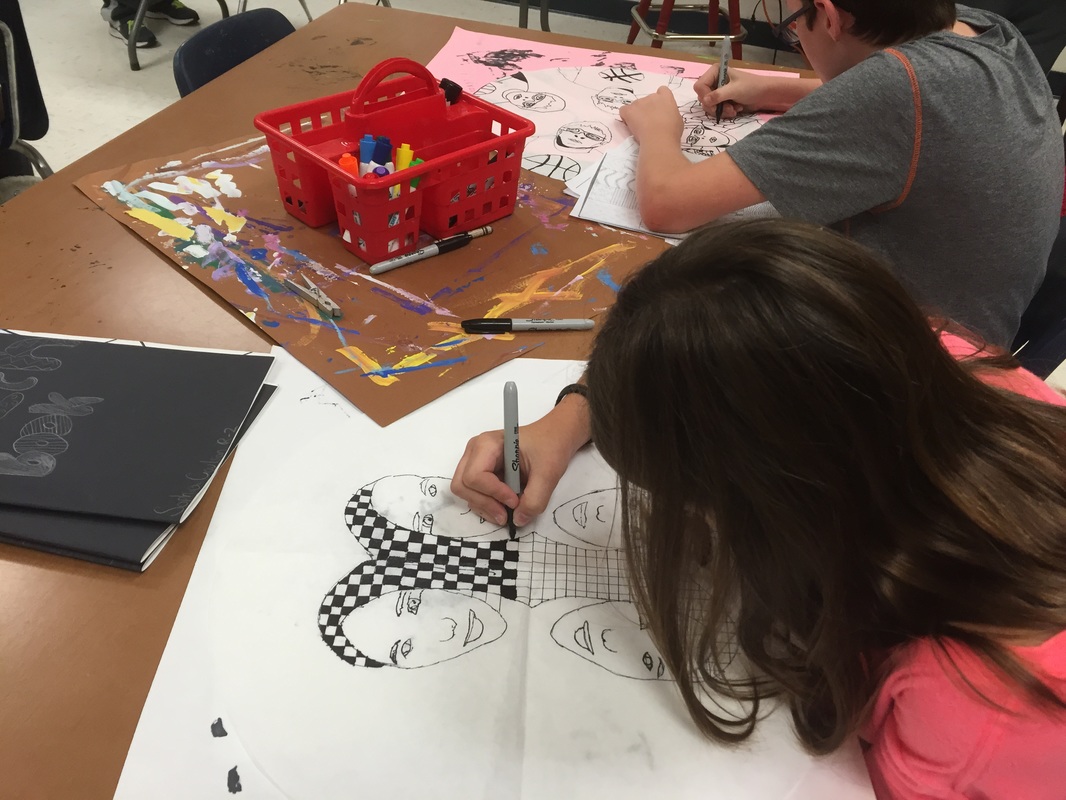
Also, I encouraged them to SHADE some things in with fat black permanent markers (after moving the photo to the side--don't keep it under while shading, as the fat black markers ruined a few photos). The diffusing circles were so thin that even though we had cover sheets on the table, some tables were destroyed with marker ink---and it is STILL there, weeks later.
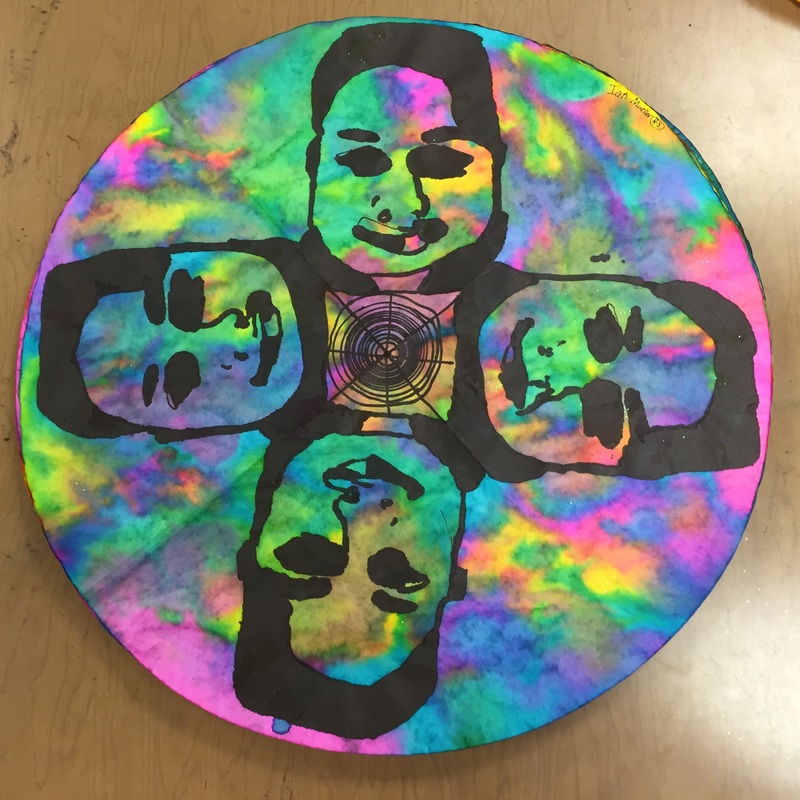
Students had to decide if they wanted the portraits to be mirror images, all 4 'sections' exactly the same, or if they wanted a 'reflection' on the bottom---which they could achieve if they traced the 'traced' version on the top of the design. Confused? Me too. But we got through it.
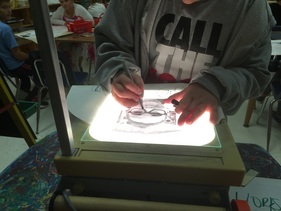
Some students were introduced to OLD SCHOOL overhead projectors for the first time. Most of the projectors were on their way to the dumpsters, but I rescued the bulky machines and gave them a 2nd life for this project. They make perfect light boxes. I set up 4 stations around the room.
Some students could see their photo through the BIG 18" Color Diffusing circles without using a light box, but I was so glad to have them for this project, as they really helped with the tracing process. Royolco makes a 9" color diffusing circle, but the 18" version is great for this project because the photos fit around the circle 4 (or even 6 if the photo was small) times.
The tracing took longer than I thought it would---some students needed two or three art days to transfer their face to the diffusing circle multiple times.
At the end of one of those class periods, I showed a little bit of this video about Mandalas and explained how they are created with sand by monks. Students were really intrigued.
TRACING?! Yes, its true. For this project, I explained that we would be 'transferring' the portrait 4 times, on the radial 'mandala', so the best way to maintain consistency would be to TRACE the face with a sharpie--no pencils allowed. I pre-folded the circles before passing them out to the students and emphasized the idea that this is a CIRCLE, the image will be repeated, so don't trace your face once in the middle, think of it more like a piece of pizza with your pepperoni-face on each slice-HA!
Since the images were converted to the stark contrast, I encouraged them to ONLY trace the 'black' shadows and shapes on their faces. Some kids did not heed my warning, and they tried to freehand their eyes and noses---which made them look a LOT like Quazimodo (no one knows who that is anymore!) and some of those were a little messed up looking.
Also, I encouraged them to SHADE some things in with fat black permanent markers (after moving the photo to the side--don't keep it under while shading, as the fat black markers ruined a few photos). The diffusing circles were so thin that even though we had cover sheets on the table, some tables were destroyed with marker ink---and it is STILL there, weeks later.
Students had to decide if they wanted the portraits to be mirror images, all 4 'sections' exactly the same, or if they wanted a 'reflection' on the bottom---which they could achieve if they traced the 'traced' version on the top of the design. Confused? Me too. But we got through it.
Some students were introduced to OLD SCHOOL overhead projectors for the first time. Most of the projectors were on their way to the dumpsters, but I rescued the bulky machines and gave them a 2nd life for this project. They make perfect light boxes. I set up 4 stations around the room.
Some students could see their photo through the BIG 18" Color Diffusing circles without using a light box, but I was so glad to have them for this project, as they really helped with the tracing process. Royolco makes a 9" color diffusing circle, but the 18" version is great for this project because the photos fit around the circle 4 (or even 6 if the photo was small) times.
The tracing took longer than I thought it would---some students needed two or three art days to transfer their face to the diffusing circle multiple times.
At the end of one of those class periods, I showed a little bit of this video about Mandalas and explained how they are created with sand by monks. Students were really intrigued.
 |  |
Day 4 and 5
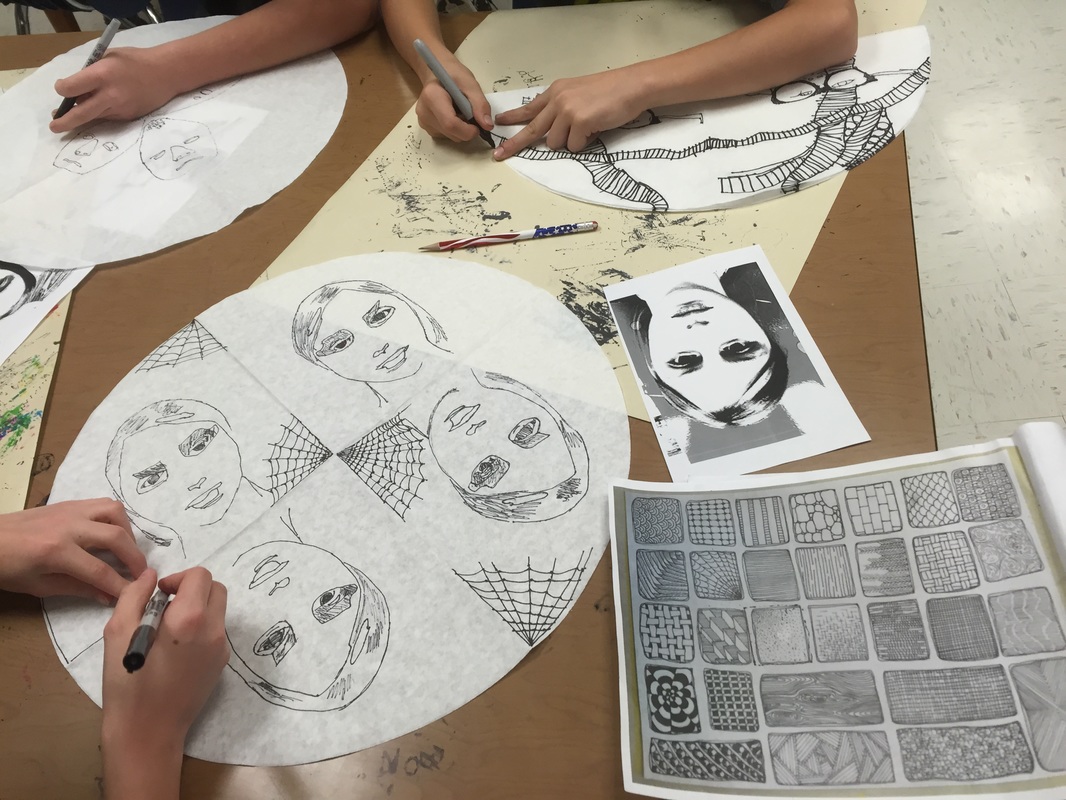
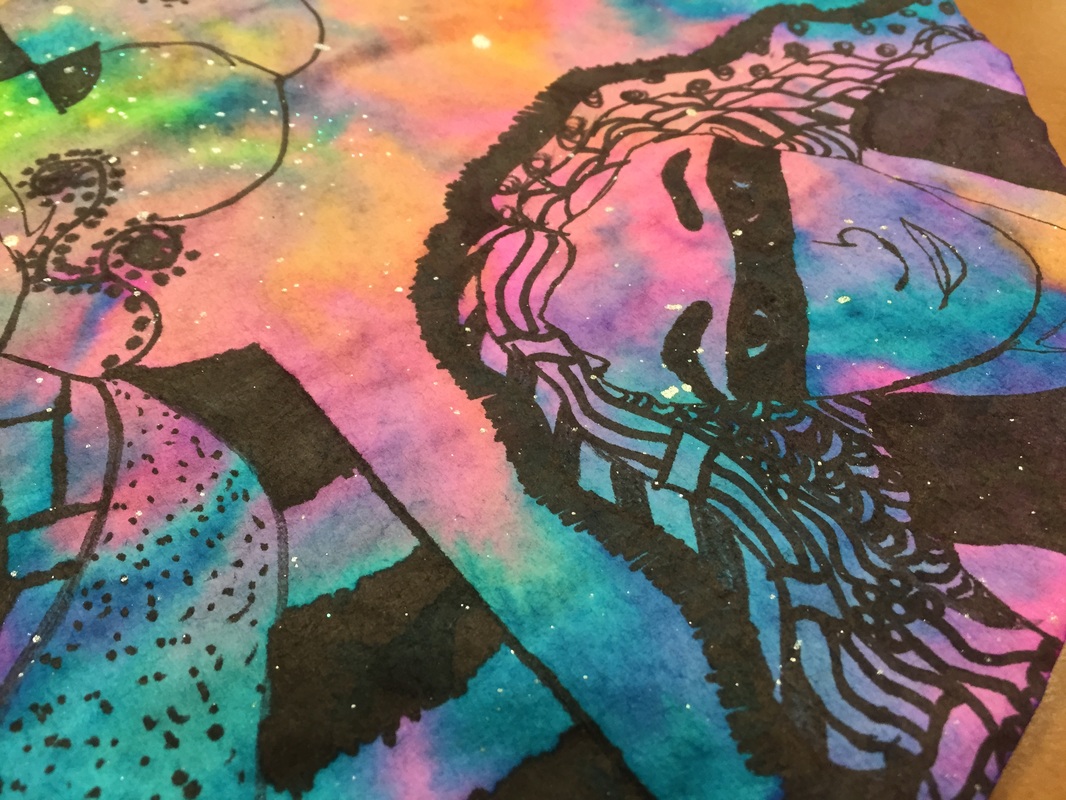
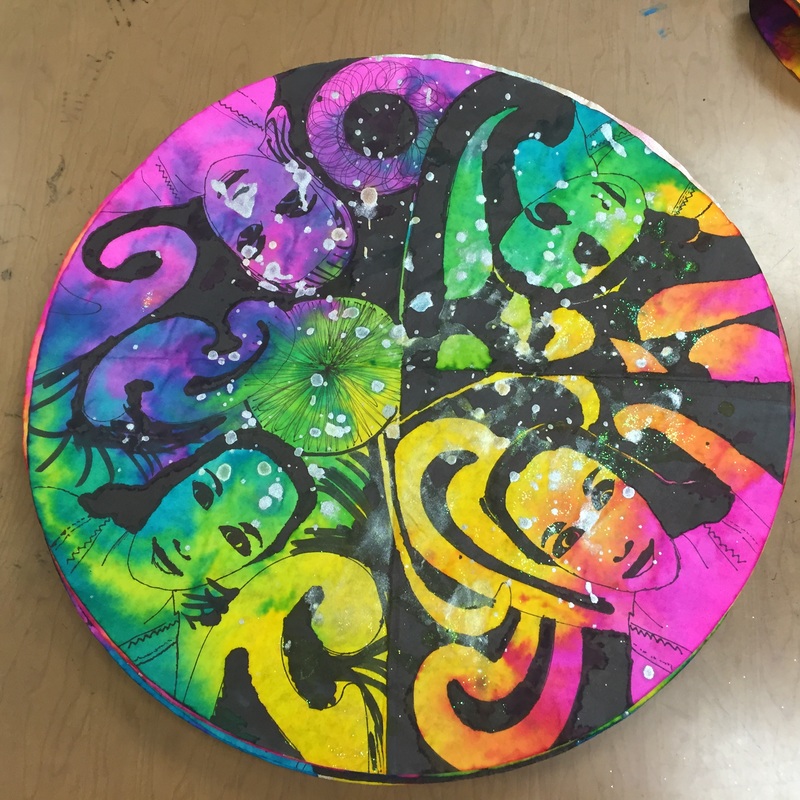
Explain how to Zentangle around the portrait. In my demo, I show students how I made a 'good' vs. 'evil' version of myself. They really took to this concept. I also had a seat work prompt on the board asking them how an artist could reveal their identity in a self-portrait. Students shared great ideas about using symbolism, special colors, and even words to share more about their personality in their work of art. It was a great discussion and many great ideas were generated. This was a LARGE project for many students, I really should've given them another day to draw with the sharpies, but like I said, I was on a time crunch and a deadline.
I also pulled out rulers, circle templates and french curves to help them finish up the zentangles.
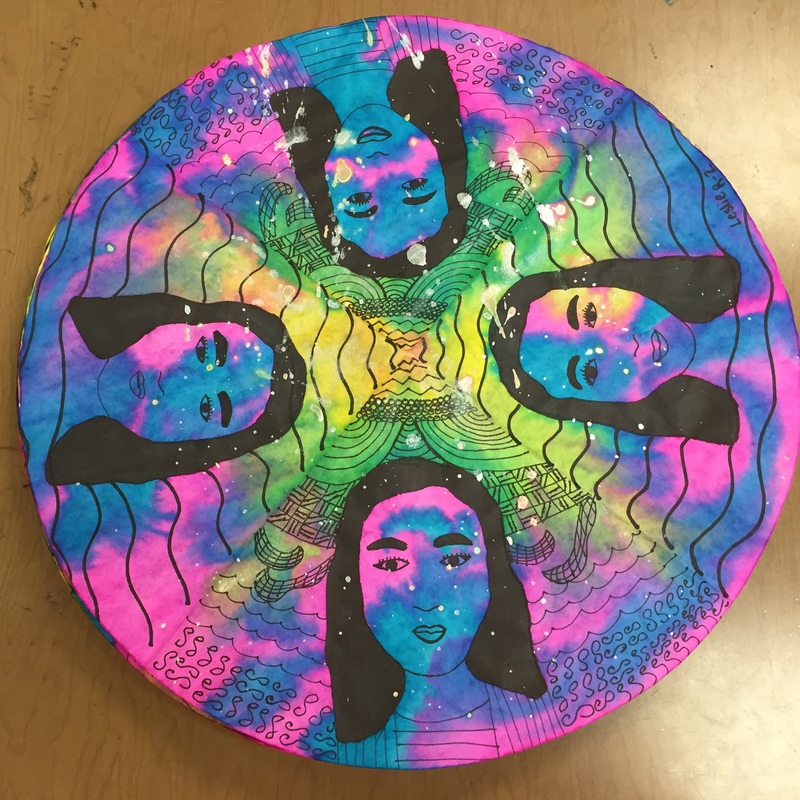
When students were zentangling, I had handouts on the tables for them to look at to see examples of 'structured' doodles. Those were tremendously helpful---students had to branch out from their typical polka dots, and they had to create smaller sections within the pie pieces to put the doodles in. Many girls zentanlged their hair which turned out cool. I had a coloring sheet that was super helpful in this visual.
Day 6
Painting using liquid watercolors.
Any tips for distributing liquid watercolors?
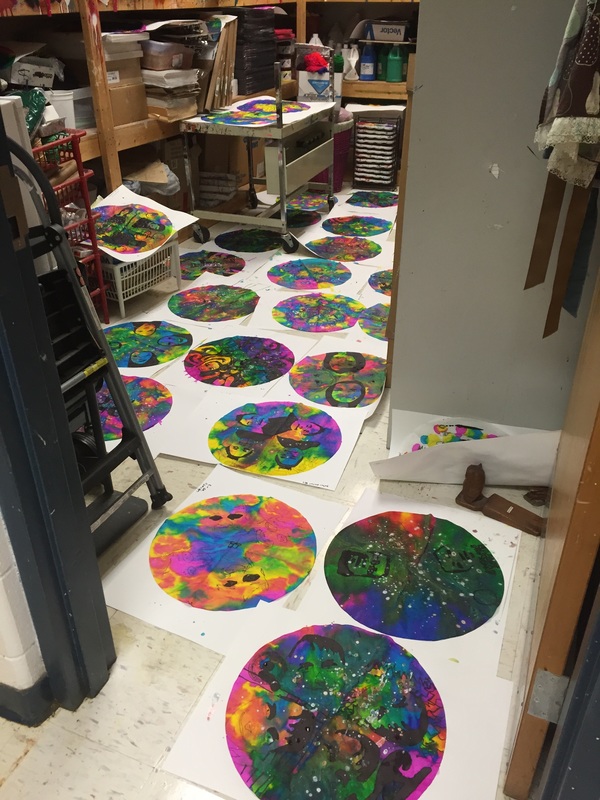
I had quite a bit of stress the day that we painted because the pictures were a little too big for my drying wracks and I had to be the one to pass out all of the paint and pick it up from each table at the end of each class. It was so stressful. Some students really needed one more day to draw---so I felt like I was rushing them to PAINT today! While I picked up all of the paint sets, and refilled them as students used up the colors rather quickly, students had to find a spot in the room to put their gait paintings to dry.
In the future, I would probably call a few students a time to a painting station---but the deadline loomed---I needed enough portraits DONE and DRY by 10:00 a.m. on Friday so that I could send them to the show----that also meant getting to school super early to pull previous day's paintings out of the drying wrack and quickly making labels for the ones that went to the exhibit.
One thing I learned, with color diffusing paper, make sure students have paper under their project, and they don't lift the paper off until after the artwork is dry because the water and paint spread out and fade, making the color way less vibrant.
Also, I ended up watering down the paint after the first class because they were almost TOO vibrant, and some of the drawing was swallowed up in the intensity of the liquid watercolor.
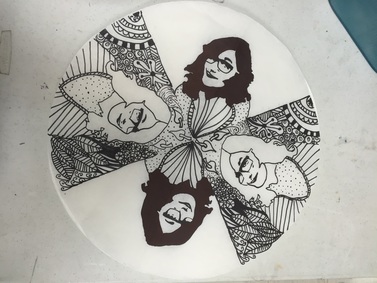
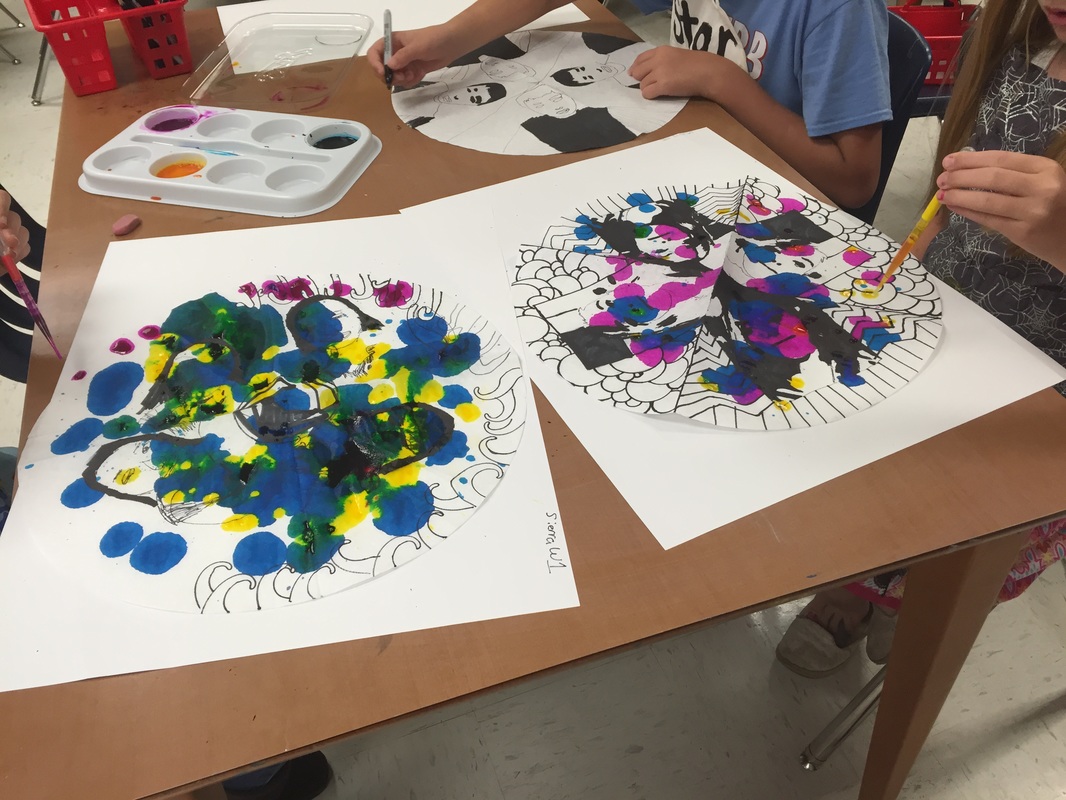
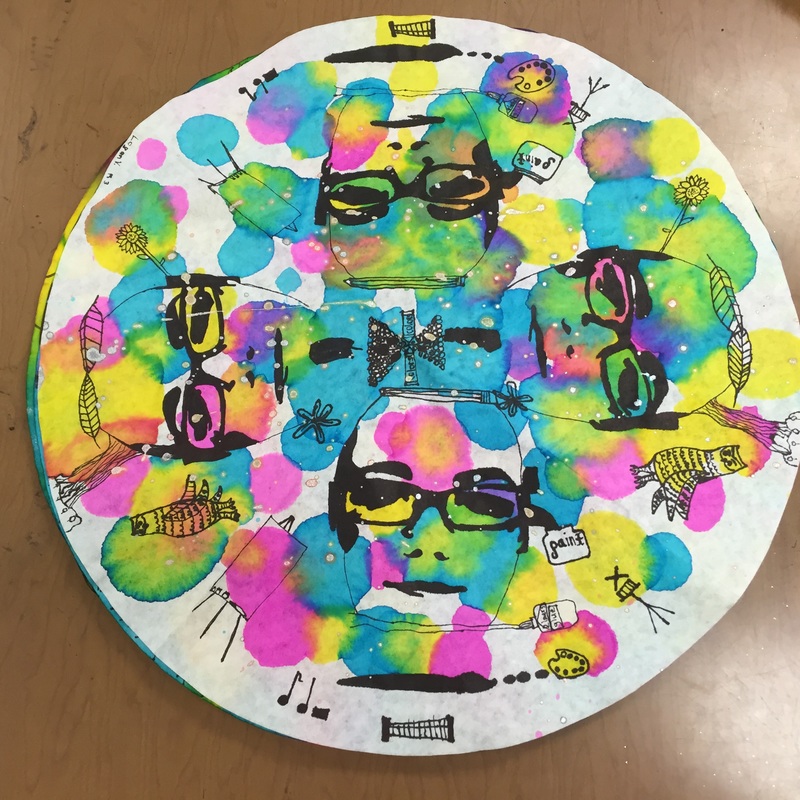
For this project, students used eye droppers to distribute the liquid watercolors onto the color diffusing paper. I gave them magenta, turquoise, and yellow, and reviewed the basics of the the color wheel quickly. I demonstrated how to squeeze droppers-full of paint onto the circle. Be careful not to try to soak it too much, once it is saturated, that is pretty much it---more doesn't mean more, it just means a runny mess.
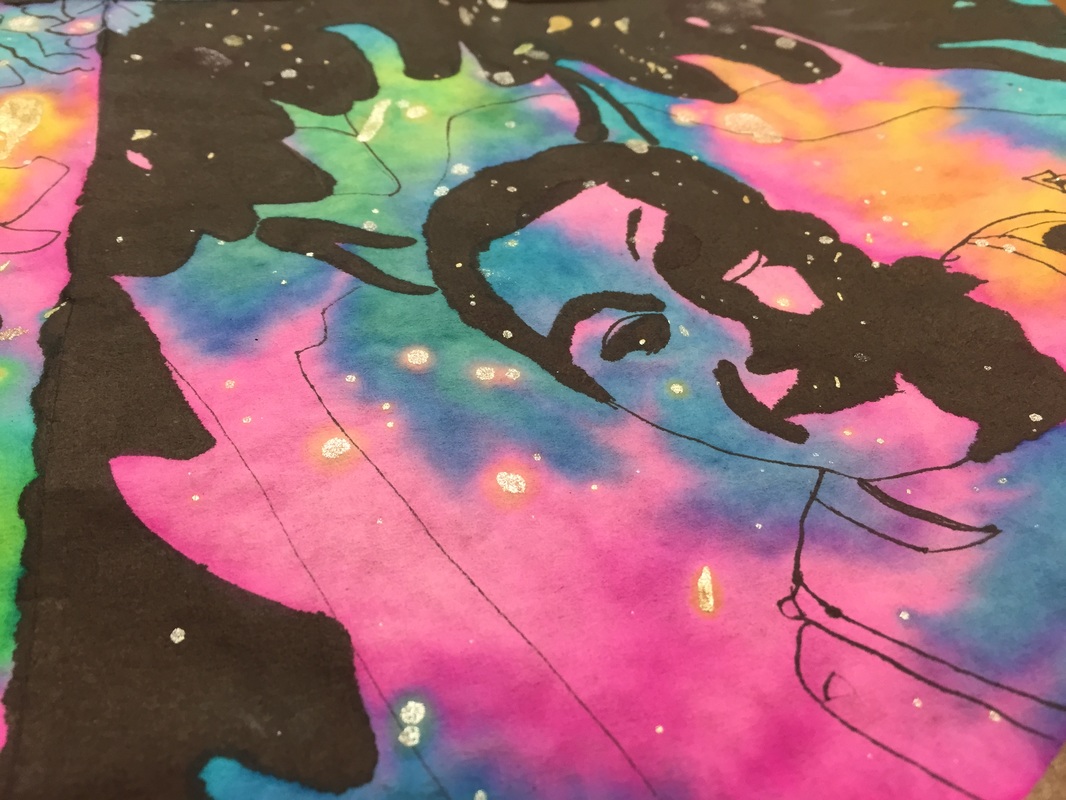
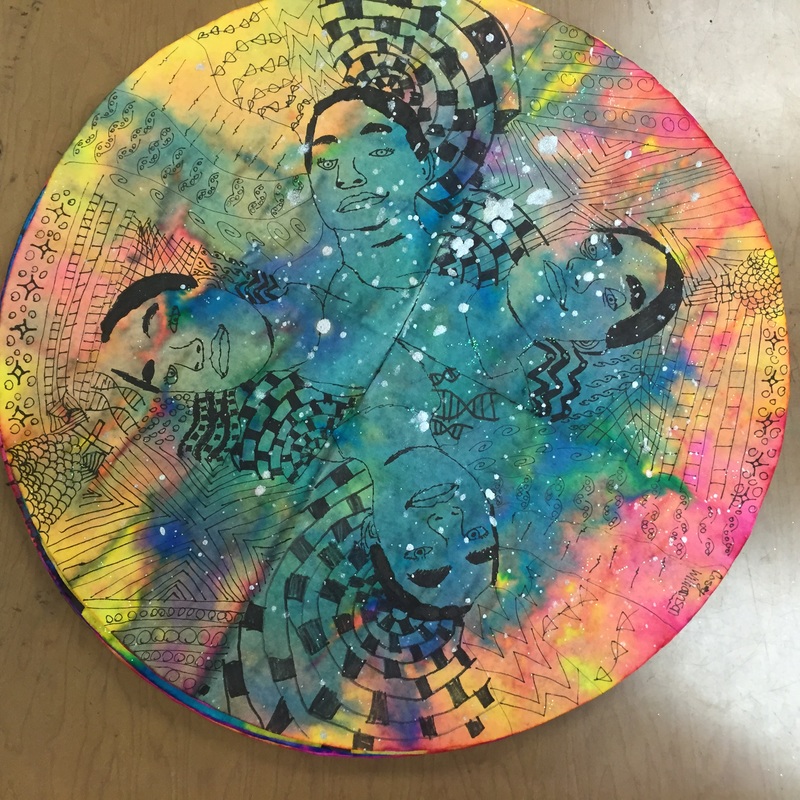
As a finishing touch, students could 'splatter' paint with metallics: gold, silver, or copper paint---but they had to do that very last.
Some of the splattering looked amazing. Some looked like big snot blobs right on their faces. Some completely covered all of the drawing they had done, rendering all of their hard work completely pointless.
Painting using liquid watercolors.
Any tips for distributing liquid watercolors?
I had quite a bit of stress the day that we painted because the pictures were a little too big for my drying wracks and I had to be the one to pass out all of the paint and pick it up from each table at the end of each class. It was so stressful. Some students really needed one more day to draw---so I felt like I was rushing them to PAINT today! While I picked up all of the paint sets, and refilled them as students used up the colors rather quickly, students had to find a spot in the room to put their gait paintings to dry.
In the future, I would probably call a few students a time to a painting station---but the deadline loomed---I needed enough portraits DONE and DRY by 10:00 a.m. on Friday so that I could send them to the show----that also meant getting to school super early to pull previous day's paintings out of the drying wrack and quickly making labels for the ones that went to the exhibit.
One thing I learned, with color diffusing paper, make sure students have paper under their project, and they don't lift the paper off until after the artwork is dry because the water and paint spread out and fade, making the color way less vibrant.
Also, I ended up watering down the paint after the first class because they were almost TOO vibrant, and some of the drawing was swallowed up in the intensity of the liquid watercolor.
For this project, students used eye droppers to distribute the liquid watercolors onto the color diffusing paper. I gave them magenta, turquoise, and yellow, and reviewed the basics of the the color wheel quickly. I demonstrated how to squeeze droppers-full of paint onto the circle. Be careful not to try to soak it too much, once it is saturated, that is pretty much it---more doesn't mean more, it just means a runny mess.
As a finishing touch, students could 'splatter' paint with metallics: gold, silver, or copper paint---but they had to do that very last.
Some of the splattering looked amazing. Some looked like big snot blobs right on their faces. Some completely covered all of the drawing they had done, rendering all of their hard work completely pointless.
Good Vs. Evil---made herself a little devil!
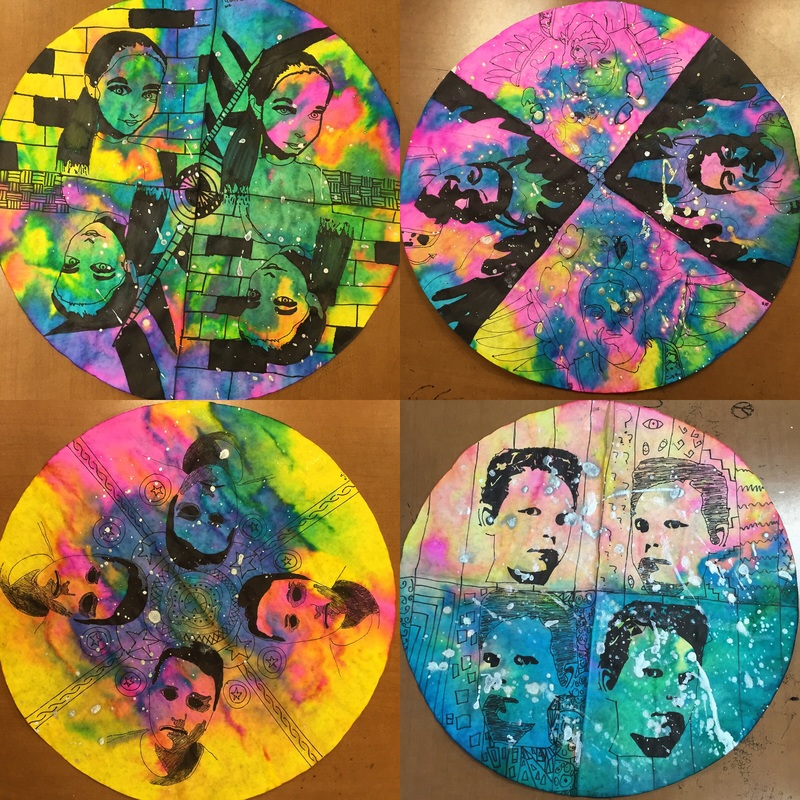
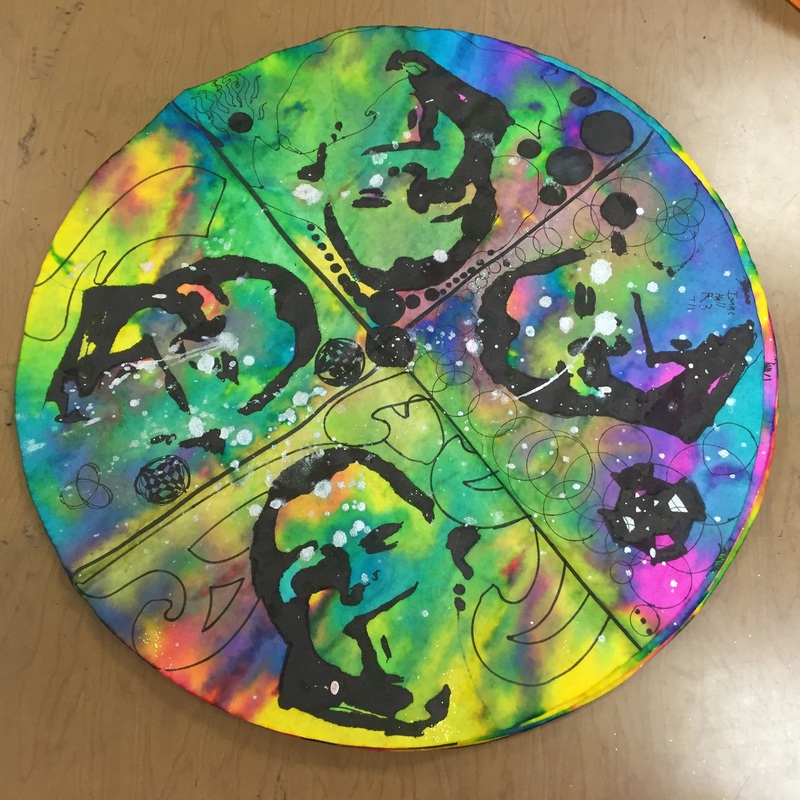
Love this one! Nature Vs. Art---So good!

Little too much splatter.
Final tip--have students write their name on the front, along the edge, anything written on the back shows through to the front.

 RSS Feed
