Product review and owl lesson plan for Kindergarten
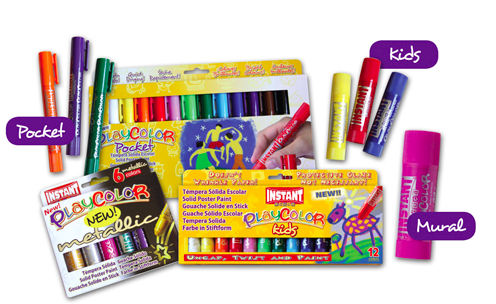
It's a marker. It's paint. It's an oil pastel.
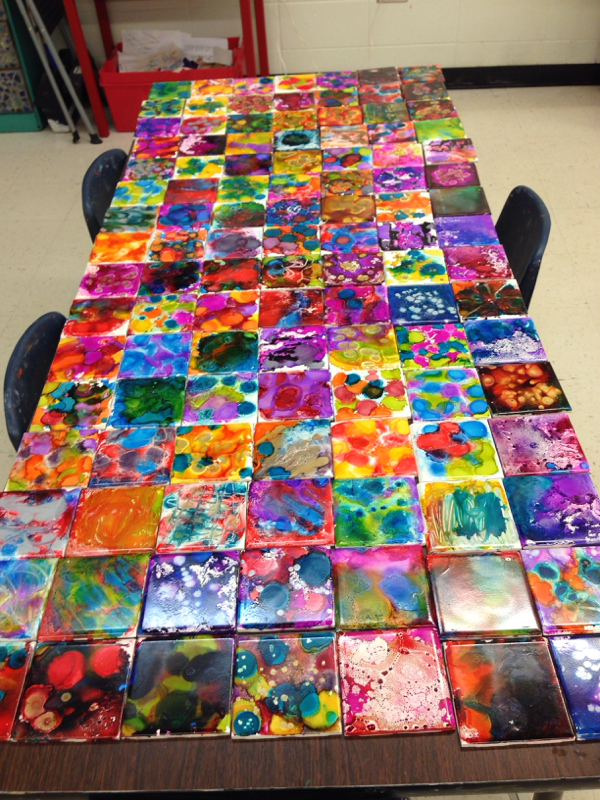
It was hard to explain to my students exactly what we were using....but the results are kind of awesome.
Normally, this lesson is done with white paint the first week on a dark color of construction paper, like black. The 2nd week, I have students use chalk to draw the details of the owl over the top of the dried white paint. This year, I took the plunge and invested in a class set of the Play Color and Metallic Play color poster paints. We used them in place of the chalk pastels.
The colors were so vibrant! Also, these poster paints basically eliminated the mess that chalk creates with this project. The initial investment is rather expensive, but now that I have the class pack, I can order another one and I will always have some extra in the future.
I did remind mine NOT to twist the color all the way out. I noticed that one of the reds had been mistreated...and the tip broke off...but I pushed it back into the hollow tube and it worked okay for a while. I also show them not to rub the paint at first, it will feel wet, but it dries fast. I like these because they don't smear like oil pastels.
I was very happy with the class pack. It was just enough for my 13 classes of K and 1st to do this project. I still have some left over, but probably not enough to do a big project like this again. The metallic silver and gold are exceptionally nice.
Week 1
Materials Required: black 16X10 construction paper, white crayons, white tempera paint, books about owls, owl pictures,
Goals & Objectives: The primary goal of this lesson is for the student to use lines and shapes.
GLEs Accomplished In Lesson:
Kindergarten
PP 3. G Create an original artwork that communicates ideas about the following themes: Outdoors (seasons, nature) EP1.A Identify and use lines 1.B Identify and use shapes, Categorize large and small 1.E Identify and use color
1st Grade
PP 1.A Fill an area with solid color/value using crayon, pencil, or marker
1.B Apply paint with a dragging, not pushing motion
EP 1.B Identify and use triangle, circle, square, rectangle and oval shapes
Categorize large and small and medium
Procedure (Guided Lesson, Instructions, etc):
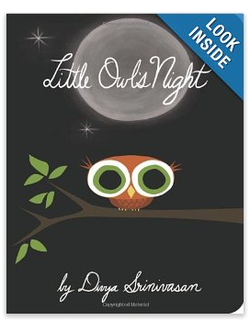
This year, I requested my librarian to order some new books about owls. As a result, there are many cute ones to choose from. I selected the book: Little Owl's Night. It is SO cute!
Project (Steps, Examples, etc):
1. Read the owl book to students. I showed everyone what they could do after painting, because the painting really doesn't take the whole art time. I show them all of the owl books in the room, I have some art centers set up with an owl magazine, a coloring page of an owl, and markers to use for that. I also have a couple of 'worksheets' about owls that they can do. Many choices.
2. When I distribute the paper, I demonstrate where to write their names. I have all of the papers folded 'tall and skinny' in half.....so that the back is making a peak in front of them when I set it down, and we will flip it over, and do the painting on the other side. I quickly have them write their names on the back, with a white crayon and then put on a paint shirt. I pick up all of the white crayons as soon as they are done with names...so that they don't accidentally try to draw the owl.
3. I demonstrate on my painting, how to paint a large 'B'. Put the stem of the B on the fold. It HAS to be on the fold. Paint the curved lines of the B and fill the whole thing in solid white.
4. Fold over gently, rub the back of the paper (one boy threw his on the ground and stomped on it….it did make a cool texture for feathers)……open it up and see a symmetrical owl…This is a really big "WOW" moment..I make a big deal of of it...ARE YOU READY FOR THIS? before I open mine up.
5. Lastly, demo how to add a tree branch, stamp the brush for leaves, add a full or crescent ‘c’ moon, and add a few small stars. Mention that they should be careful not to totally cover the paper with white paint…it will be a snow scene and the owl won’t show up….Explain that next week, we will draw on the details, once the white paint is dry. Students need to put them in the drying wrack to dry.
6. Pass out the paint, let students work…cleanup.
Week 2
MATERIALS
Play Color Poster Paint, glue, 12X18 paper for the frame
Procedure/Steps/Examples
1.Today we are finishing the owl. The white paint is dry. I taught students this fun owl poem:
The Owl
There’s a wide-eyed owl
With a pointed nose.
He has pointed ears
And claws for toes.
He sits in a tree
And looks at you.
Then he flaps his wings
And says, “Tu-whit, tu-whoo”
2. Since coloring the owl does not take the whole art time, I had supplies available for students to make an owl puppet. I have a cute printed mini owl that they can color and cut out and attach a puppet stick.
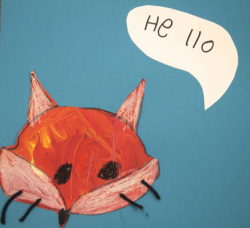
3. Demonstrate how to use the Play Color Poster Paints to add the details. Draw the eyes, add a beak (I showed an easy way and a hard way), add feathers for the wings...students could put one wing and a belly or two wings. Demonstrate how to color the tree, leaves, moon, and stars. Remind them that they do not have to color the sky since it is already black like night, but if they want to make it more spooky, they can put purple and blue around the background like a spooky haze.
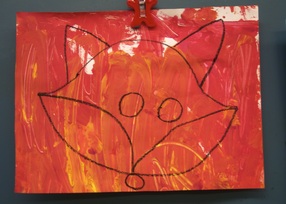
4. Demonstrate how to add a frame around the edges. I had 3 colors for them to choose from. Students had to glue the owl in the center, and put lines around the edges. I demonstrated how to draw the lines on the bottom, then turn the paper all the way around as they add lines to each edge.
Assessment and Reflection: The students will use the play color poster paints to color a night owl scene according to a teacher constructed rubric. Students should be able to use the white paint, the poster paint, draw the shapes, and color essential parts of the composition with little or no teacher assistance.
It was hard to explain to my students exactly what we were using....but the results are kind of awesome.
Normally, this lesson is done with white paint the first week on a dark color of construction paper, like black. The 2nd week, I have students use chalk to draw the details of the owl over the top of the dried white paint. This year, I took the plunge and invested in a class set of the Play Color and Metallic Play color poster paints. We used them in place of the chalk pastels.
The colors were so vibrant! Also, these poster paints basically eliminated the mess that chalk creates with this project. The initial investment is rather expensive, but now that I have the class pack, I can order another one and I will always have some extra in the future.
I did remind mine NOT to twist the color all the way out. I noticed that one of the reds had been mistreated...and the tip broke off...but I pushed it back into the hollow tube and it worked okay for a while. I also show them not to rub the paint at first, it will feel wet, but it dries fast. I like these because they don't smear like oil pastels.
I was very happy with the class pack. It was just enough for my 13 classes of K and 1st to do this project. I still have some left over, but probably not enough to do a big project like this again. The metallic silver and gold are exceptionally nice.
Week 1
Materials Required: black 16X10 construction paper, white crayons, white tempera paint, books about owls, owl pictures,
Goals & Objectives: The primary goal of this lesson is for the student to use lines and shapes.
GLEs Accomplished In Lesson:
Kindergarten
PP 3. G Create an original artwork that communicates ideas about the following themes: Outdoors (seasons, nature) EP1.A Identify and use lines 1.B Identify and use shapes, Categorize large and small 1.E Identify and use color
1st Grade
PP 1.A Fill an area with solid color/value using crayon, pencil, or marker
1.B Apply paint with a dragging, not pushing motion
EP 1.B Identify and use triangle, circle, square, rectangle and oval shapes
Categorize large and small and medium
Procedure (Guided Lesson, Instructions, etc):
This year, I requested my librarian to order some new books about owls. As a result, there are many cute ones to choose from. I selected the book: Little Owl's Night. It is SO cute!
Project (Steps, Examples, etc):
1. Read the owl book to students. I showed everyone what they could do after painting, because the painting really doesn't take the whole art time. I show them all of the owl books in the room, I have some art centers set up with an owl magazine, a coloring page of an owl, and markers to use for that. I also have a couple of 'worksheets' about owls that they can do. Many choices.
2. When I distribute the paper, I demonstrate where to write their names. I have all of the papers folded 'tall and skinny' in half.....so that the back is making a peak in front of them when I set it down, and we will flip it over, and do the painting on the other side. I quickly have them write their names on the back, with a white crayon and then put on a paint shirt. I pick up all of the white crayons as soon as they are done with names...so that they don't accidentally try to draw the owl.
3. I demonstrate on my painting, how to paint a large 'B'. Put the stem of the B on the fold. It HAS to be on the fold. Paint the curved lines of the B and fill the whole thing in solid white.
4. Fold over gently, rub the back of the paper (one boy threw his on the ground and stomped on it….it did make a cool texture for feathers)……open it up and see a symmetrical owl…This is a really big "WOW" moment..I make a big deal of of it...ARE YOU READY FOR THIS? before I open mine up.
5. Lastly, demo how to add a tree branch, stamp the brush for leaves, add a full or crescent ‘c’ moon, and add a few small stars. Mention that they should be careful not to totally cover the paper with white paint…it will be a snow scene and the owl won’t show up….Explain that next week, we will draw on the details, once the white paint is dry. Students need to put them in the drying wrack to dry.
6. Pass out the paint, let students work…cleanup.
Week 2
MATERIALS
Play Color Poster Paint, glue, 12X18 paper for the frame
Procedure/Steps/Examples
1.Today we are finishing the owl. The white paint is dry. I taught students this fun owl poem:
The Owl
There’s a wide-eyed owl
With a pointed nose.
He has pointed ears
And claws for toes.
He sits in a tree
And looks at you.
Then he flaps his wings
And says, “Tu-whit, tu-whoo”
2. Since coloring the owl does not take the whole art time, I had supplies available for students to make an owl puppet. I have a cute printed mini owl that they can color and cut out and attach a puppet stick.
3. Demonstrate how to use the Play Color Poster Paints to add the details. Draw the eyes, add a beak (I showed an easy way and a hard way), add feathers for the wings...students could put one wing and a belly or two wings. Demonstrate how to color the tree, leaves, moon, and stars. Remind them that they do not have to color the sky since it is already black like night, but if they want to make it more spooky, they can put purple and blue around the background like a spooky haze.
4. Demonstrate how to add a frame around the edges. I had 3 colors for them to choose from. Students had to glue the owl in the center, and put lines around the edges. I demonstrated how to draw the lines on the bottom, then turn the paper all the way around as they add lines to each edge.
Assessment and Reflection: The students will use the play color poster paints to color a night owl scene according to a teacher constructed rubric. Students should be able to use the white paint, the poster paint, draw the shapes, and color essential parts of the composition with little or no teacher assistance.


 RSS Feed
