
When planning for this project, I scoured the internet for a tried and true lesson plan and template to follow.
What should students do first?
What is the most important students needed to know when working with hot glue and cardboard?
A lesson plan like that just doesn't exist.
I had to start from ground zero with this project.
While I did use a few things I found online to help with the planning, for the most part, this is an original project.
PipdoArt has a few great african mask pictures on instagram. Creatively Hamish is currently creating steampunk superhero helmets that are absolutely incredible.
It was artroomadventures who mentioned the artist AJ Fosik.
Bingo.
That was the most perfect artist to reference for this project, and her 7th and 8th graders have some amazing masks on her instagram feed.
It was exactly what I needed to inspire the project to move forward in a way that would make sense and be relevant for my young artists.
Day 1
We began the unit by looking at the artwork of AJ Fosik. First, I showed my 5th and 6th graders an artist profile video on VIMEO. Then I made a slideshow of pictures of his work. We talked about 3D and how that is different than drawing.
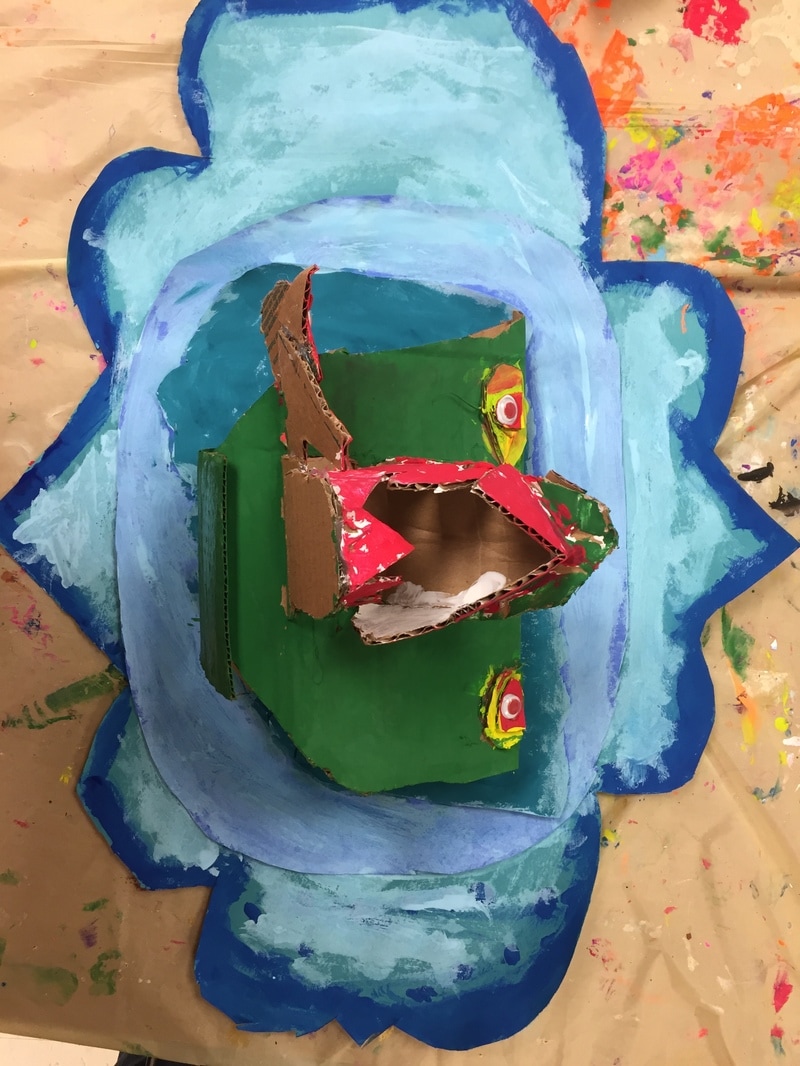
I explained that students would be creating a mask sculpture that could be inspired by folk art, mythical creatures, or animals. I showed them a couple of examples of masks and folk art artifacts that I have on my shelves (a totem pole, a couple of oaxaca animals, African and Maori masks). I used a Chinese Dragon as a reference for my example. I had tons of Zoo Book Magazines that students could use as references.
I explained that folk art means that is usually hand made and only found in certain regions, usually created by tribes of people.
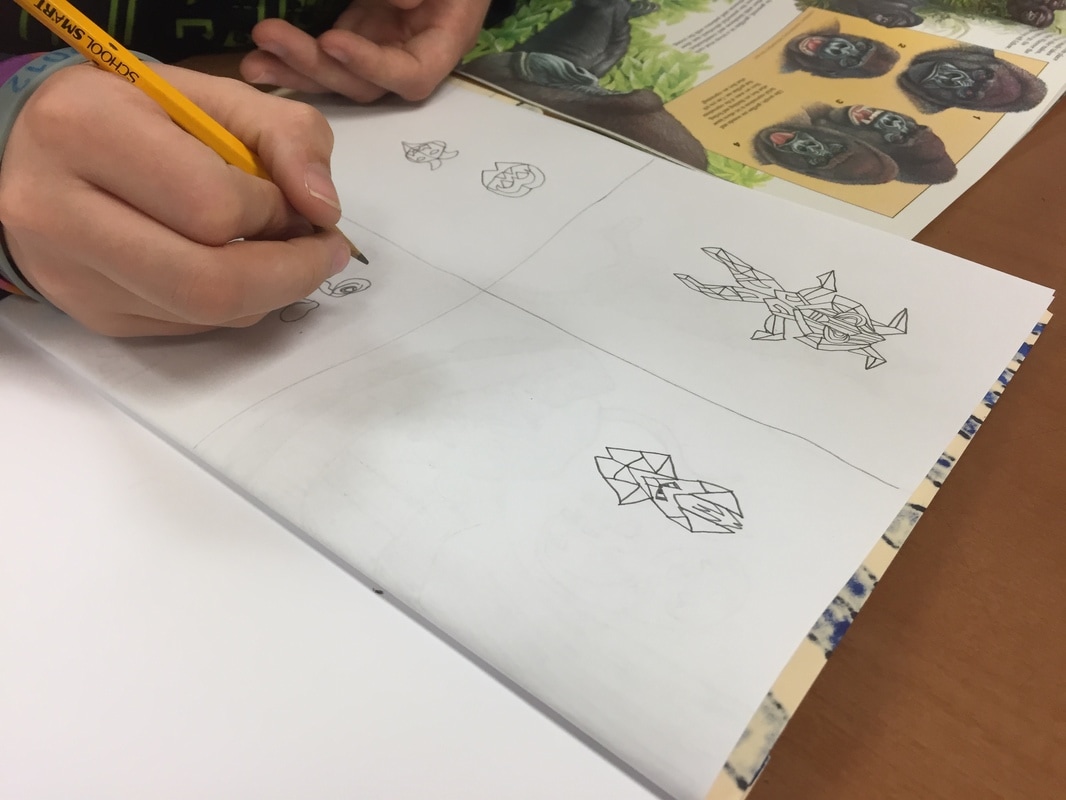
Then students had time to begin planning their masks.
I encouraged them to separate their sketchbook page into 4 sections, and draw 3-4 ideas and select the BEST idea for the project.
They should think about creating their masks symmetrically and then color the one they plan to use.
We began the unit by looking at the artwork of AJ Fosik. First, I showed my 5th and 6th graders an artist profile video on VIMEO. Then I made a slideshow of pictures of his work. We talked about 3D and how that is different than drawing.
I explained that students would be creating a mask sculpture that could be inspired by folk art, mythical creatures, or animals. I showed them a couple of examples of masks and folk art artifacts that I have on my shelves (a totem pole, a couple of oaxaca animals, African and Maori masks). I used a Chinese Dragon as a reference for my example. I had tons of Zoo Book Magazines that students could use as references.
I explained that folk art means that is usually hand made and only found in certain regions, usually created by tribes of people.
Then students had time to begin planning their masks.
I encouraged them to separate their sketchbook page into 4 sections, and draw 3-4 ideas and select the BEST idea for the project.
They should think about creating their masks symmetrically and then color the one they plan to use.

Day 2
(Once students have had a chance to draw) Today we talked about symmetry and using cardboard to create their masks. I explained that they might want to consider making the 'eye hole' for the mask where the mouth is, like on a mascot or a costume, so that it can be bigger than a humans head and extend above their own head....also, it is much easier to cut one hole behind the mouth than to cut two identical eye holes. Most students listened to this advice.
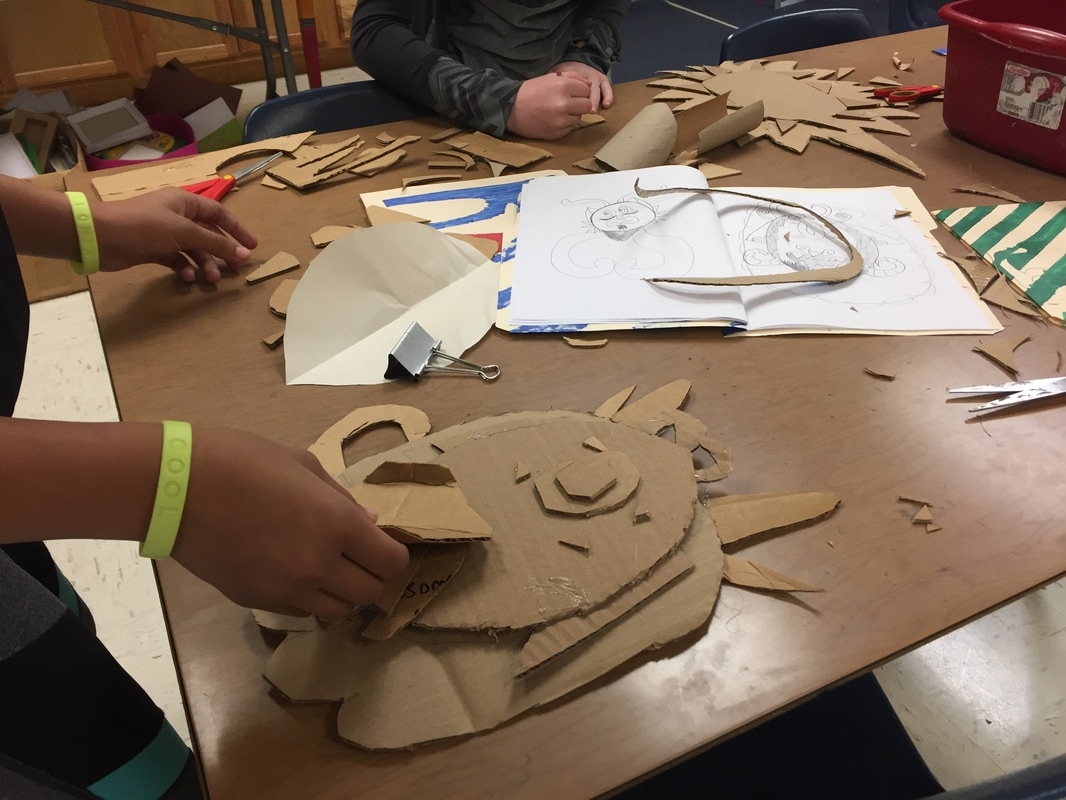
Today, students used thin newsprint to create a symmetrical template for their mask. They had to fold the paper in half, and draw half of the mask along the fold. It helped that they had recently done this on a previous project!
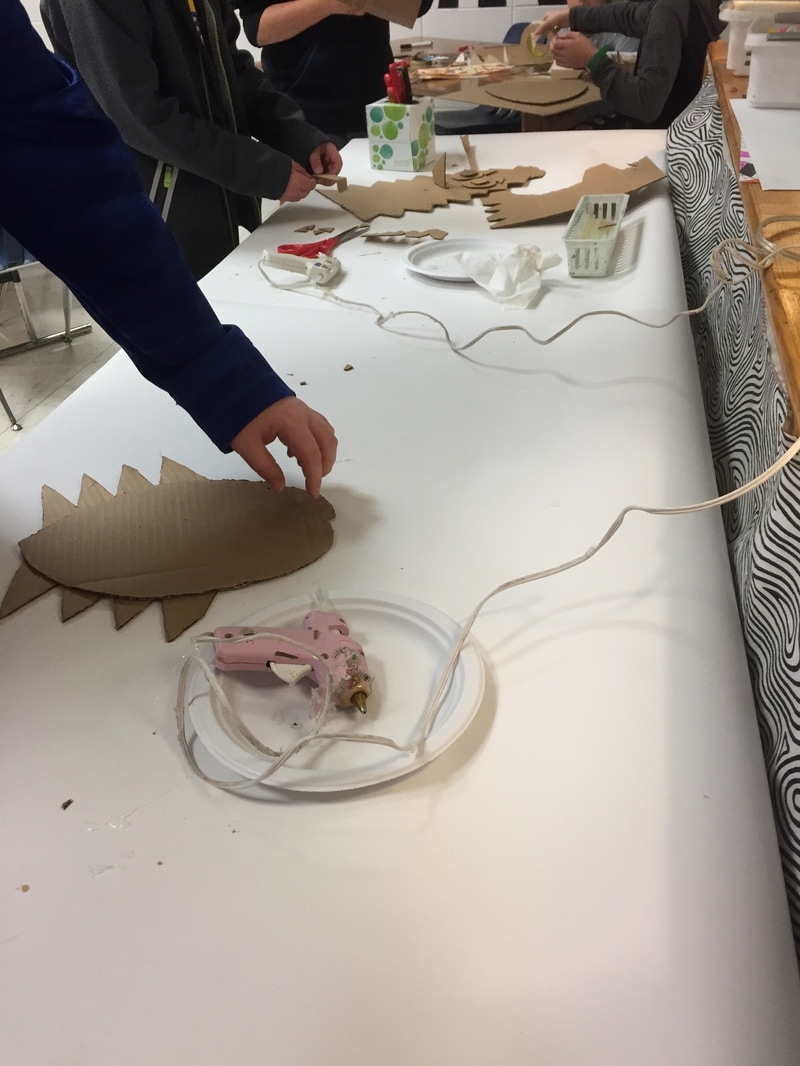
Once they had made the template, I was waiting for them at the cardboard store. I had them show me their template and I helped them find a big piece of cardboard that would be a good fit. Then they took the template and cardboard back to their seat and traced it and began cutting it out. This is the hardest part, cutting out the big base of the sculpture, especially if they made it very spikey or furry (like my example). I had big 'adult' scissors available for this step because it was hard to cut the cardboard for some of them.
If they finished that, they were to put their name on the back, and they could use the mini glue guns and small cardboard to begin making things on their mask. I told them that I would share some techniques next time if they aren't sure how to start, not to worry!
(Once students have had a chance to draw) Today we talked about symmetry and using cardboard to create their masks. I explained that they might want to consider making the 'eye hole' for the mask where the mouth is, like on a mascot or a costume, so that it can be bigger than a humans head and extend above their own head....also, it is much easier to cut one hole behind the mouth than to cut two identical eye holes. Most students listened to this advice.
Today, students used thin newsprint to create a symmetrical template for their mask. They had to fold the paper in half, and draw half of the mask along the fold. It helped that they had recently done this on a previous project!
Once they had made the template, I was waiting for them at the cardboard store. I had them show me their template and I helped them find a big piece of cardboard that would be a good fit. Then they took the template and cardboard back to their seat and traced it and began cutting it out. This is the hardest part, cutting out the big base of the sculpture, especially if they made it very spikey or furry (like my example). I had big 'adult' scissors available for this step because it was hard to cut the cardboard for some of them.
If they finished that, they were to put their name on the back, and they could use the mini glue guns and small cardboard to begin making things on their mask. I told them that I would share some techniques next time if they aren't sure how to start, not to worry!


Day 3
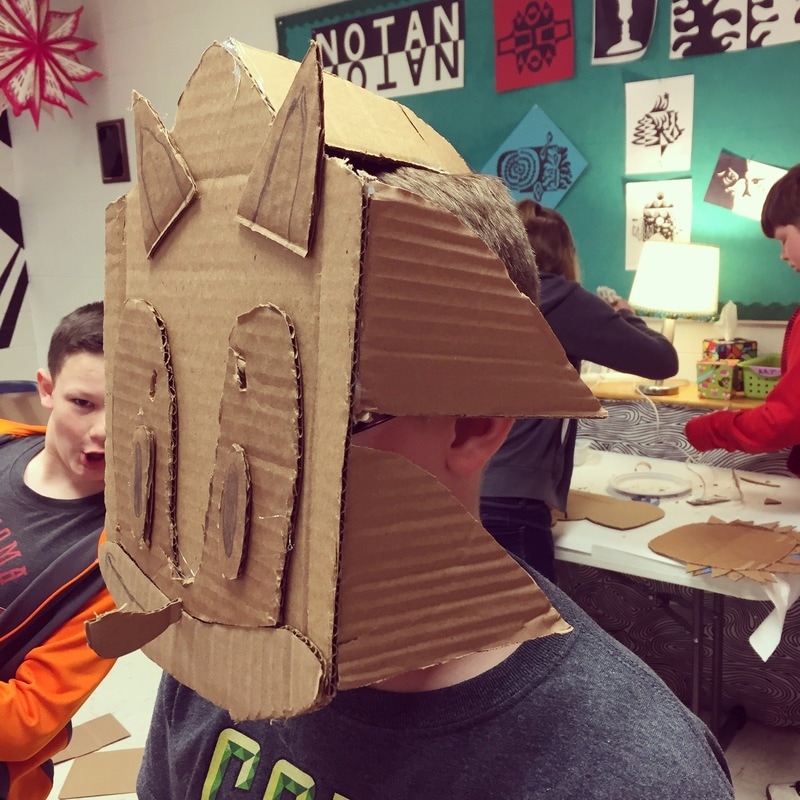
Learn basics of making the mask 3-D, add details.
This was a great day for my principal to observe me! I had created a DIY video, in which I show the basics of how to make some things on the mask 3-D (Flange, hinge, pop up, tabs, etc.) It is kind of a boring video....but it helped me show them some stuff that really made all the difference in success.
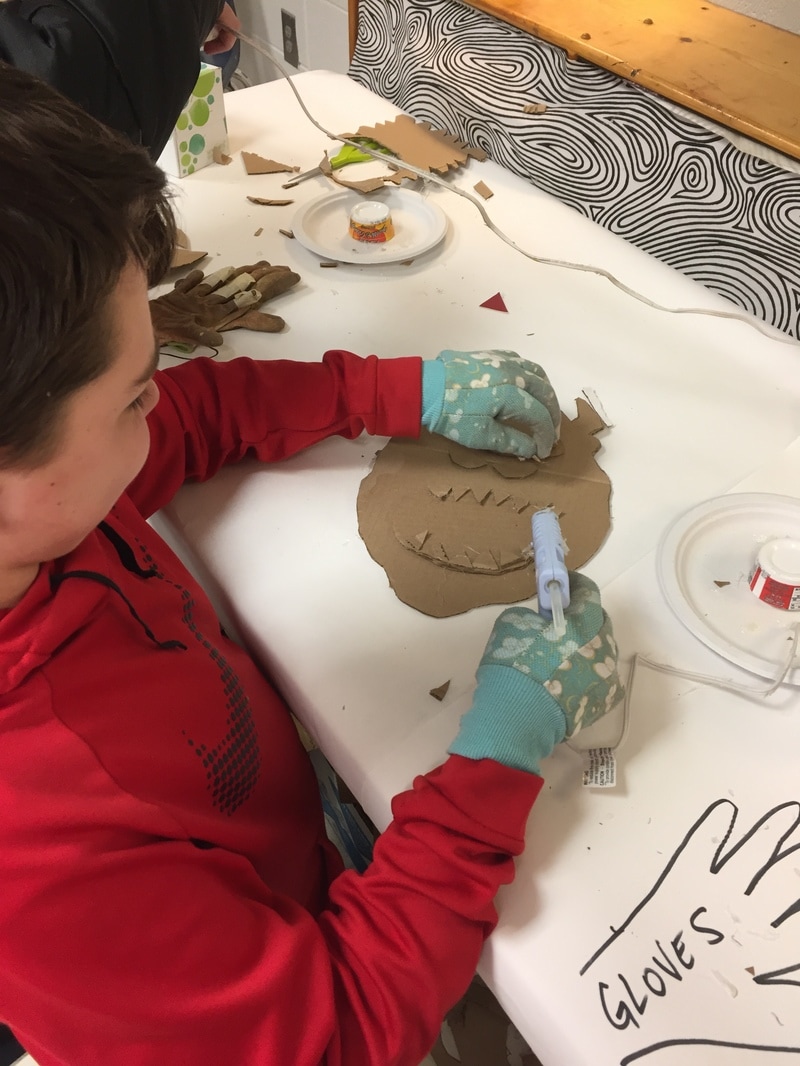
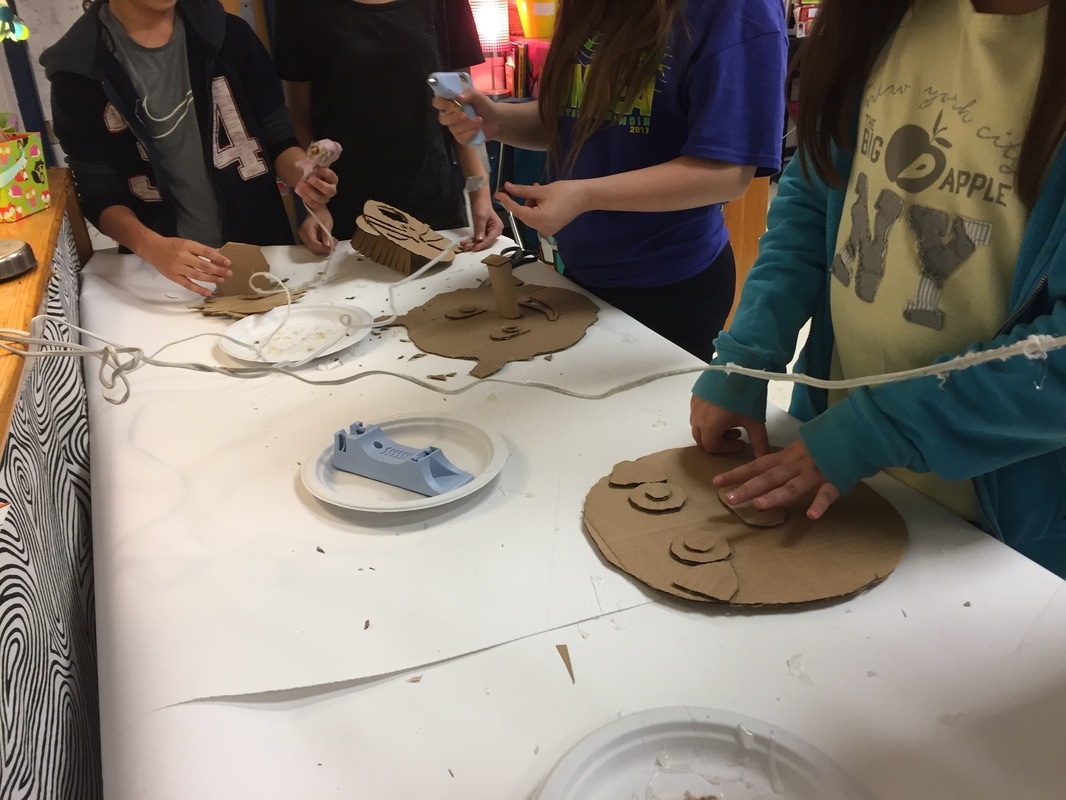
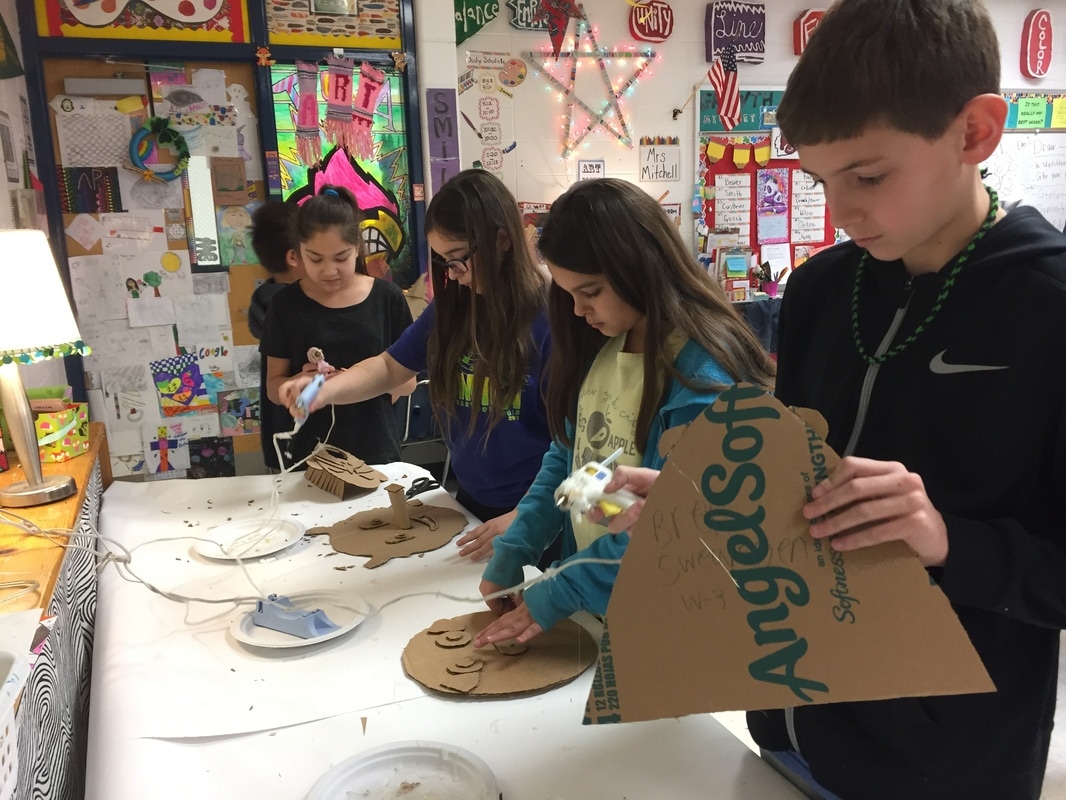
I learned really quickly that I should have had gardening gloves for the students to use while using hot glue guns. Since I have up to 36 in a class and I was trying to help some of them find bigger pieces and cut their bases, for the most part, students were on their own at the hot glue stations. I had 5 mini hot glue guns set up for them to use. I also had small pieces of cardboard and paper towel tubes.
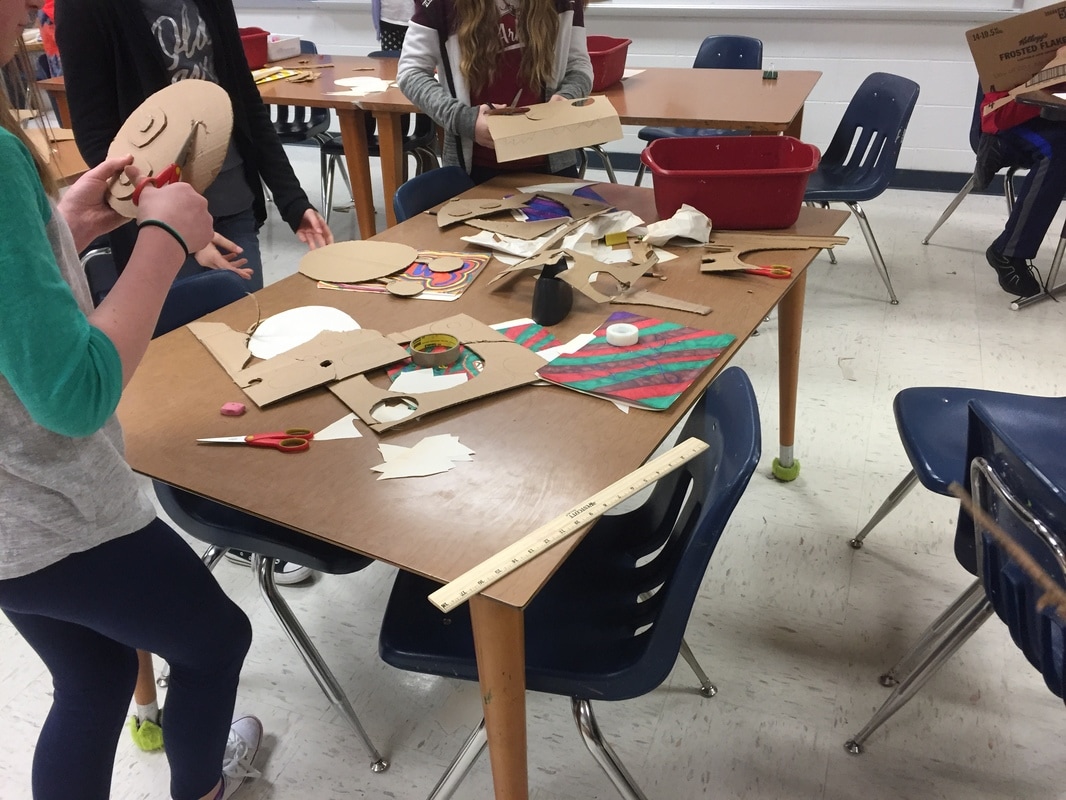
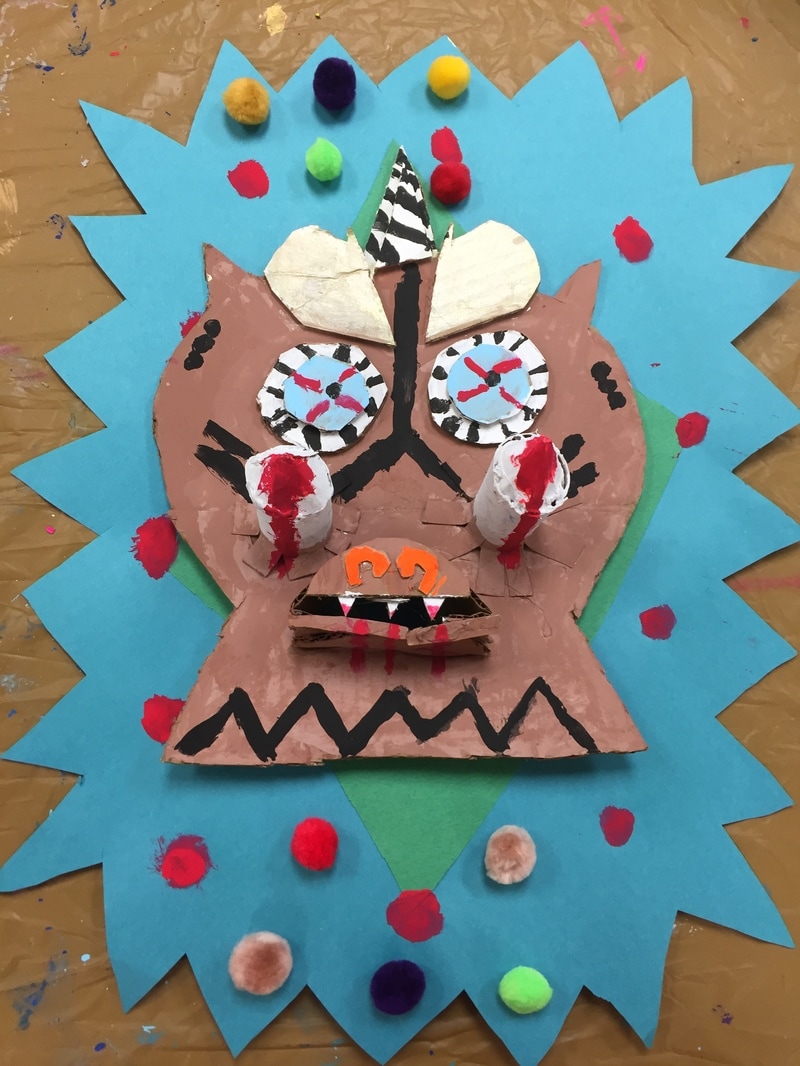
Most of the small details can be cut out with small scissors. If they needed to cut a hole in something, I encouraged them to draw the shape and then I used my box cutter at a cutting station to help them cut out a hole or at least make scoring lines so they could get their scissors in there. I encouraged them to add layers of cardboard to make their mask more 3-D. They could add extra fur behind the mask on lion's manes and a tongue sticking out.
Some students created more of a helmet---which became a challenge for storage but I really like how they turned out!
If their piece of scrap cardboard had black writing on it, I reminded them to try to make that the back--so that it would be easier to paint over the brown than it would be the writing. It would be annoying if their mask said 'Charmin Extra Soft' across the front or "Alpo".
Day 4--- Last day for construction, if students were absent, this is their chance to get caught up. If someone is done, they can help others, or work on a free choice activity. LAST DAY FOR CONSTRUCTION. Create a base for the mask so it can hang on the wall. Put name on back.
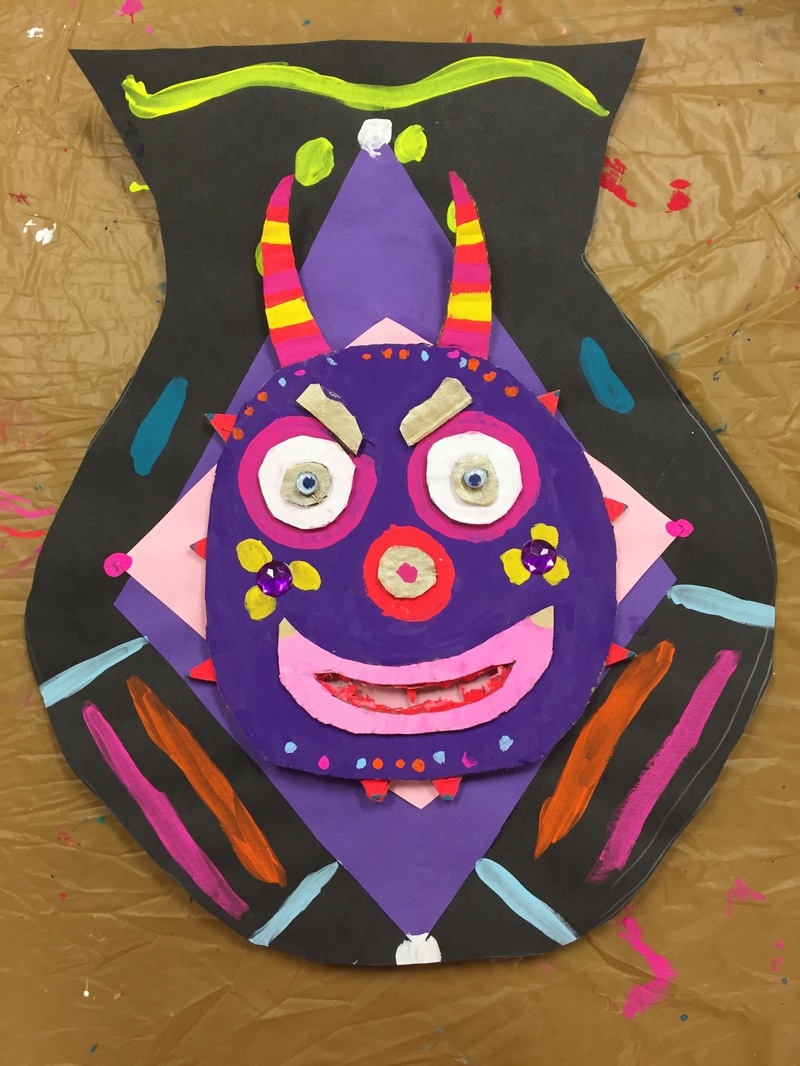
For the frames, I wanted their masks to have one more layer but I didn't want to scavenge for more cardboard so I created some templates and allowed them to choose a tracer for the shape that would work best for their mask. They simply selected the template they liked (they could hold their mask up to the shape and see if it fit well) and then found that tracer and traced it on 18X24 paper. Then they could collage more paper on the frame to make it more colorful.
Day 6---Paint mask. Go over procedures for painting.
For the first day of painting, I really wanted them to paint the base of their sculpture. First, I told them to pull off the hot glue 'cob webs'.
I had lots of color choices including neon and metallic colors. I encouraged them to use gold, baby blue and white first, as those might need more than one coat.
Using tempera paint means letting some colors dry before using other colors nearby, as the paint can smear easily. Since I allowed them to refill their own paint pallet, most of my lesson was about how to get a water bucket, how to select a pallet (I have 6 classes a day so they did not get a clean pallet, they were supposed to pick more than one pallet if necessary and use the paint that was already poured out). I also had to talk about not tapping the wet brush on the side of the water container.
I also told them not to mix more than 2 colors. We haven't spent a lot of time on color mixing, so it was a real pain if they started mixing every color in their pallet. But I DID let them mix to make tints and shades of the colors.
SAVE BLACK FOR LAST!!!
The hardest part of this project, was transitioning between classes. Since the masks were so big, they would not fit in my drying rack. I had the custodians set up 8 FT tables in a neighboring room. Each class had 2 tables and at the end of the hour, they had to carefully take their wet project to the room and set it on the table. It was a logistical marvel.
For Day 7---Paint additional layers.
Today I provided black in small cups. Students really needed to save black for last---cheetah spots, eyes, etc. look best if the bottom layer is dry and then they add the black on top.
Day 8---Final day for painting, attach mask to the base/frame. Add any painted details to the frame. Write a reflection on the success of the project.
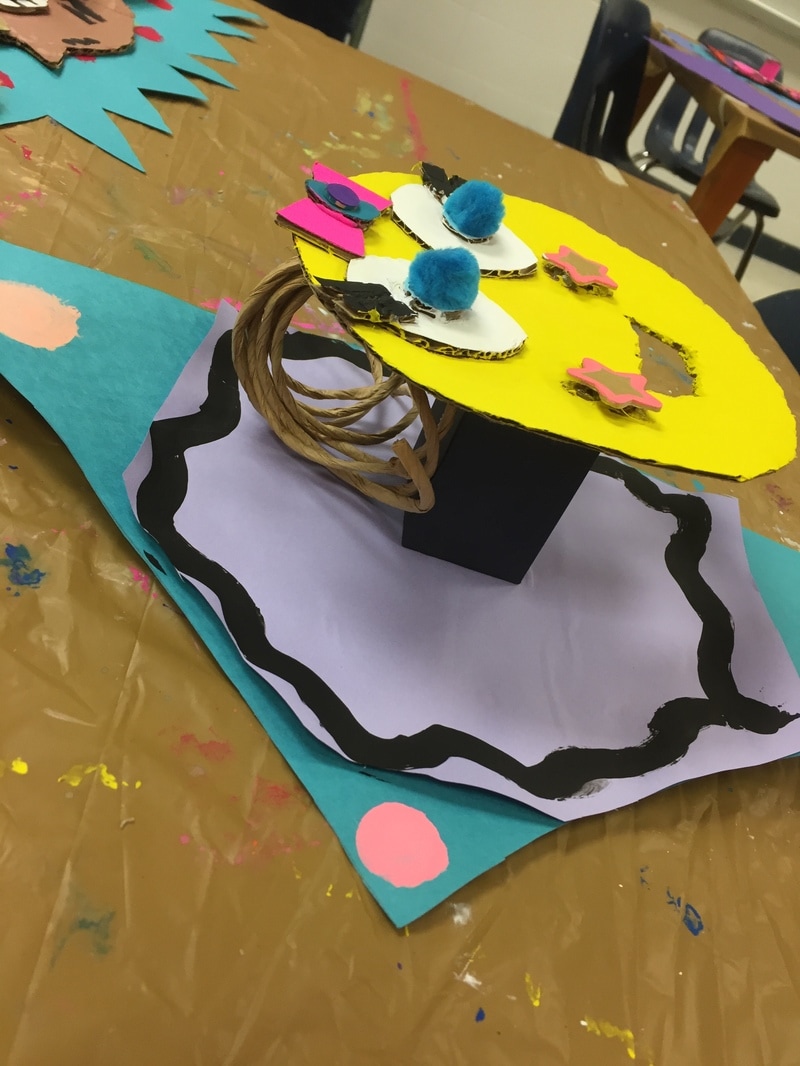
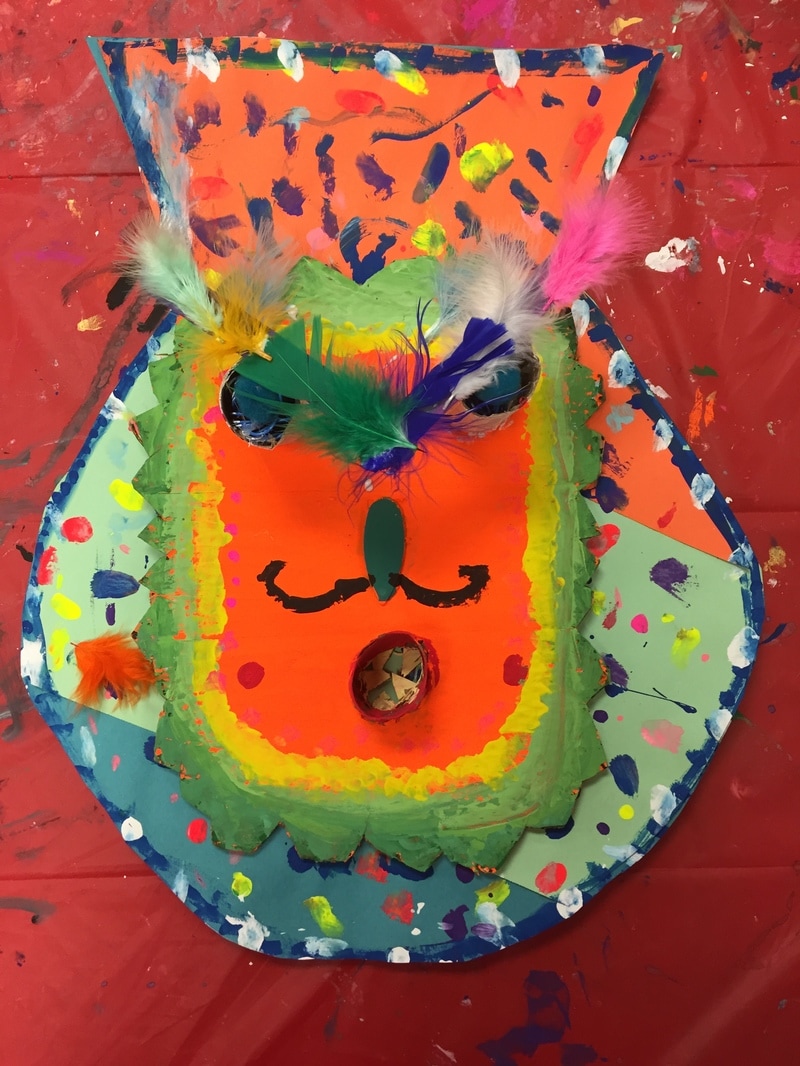
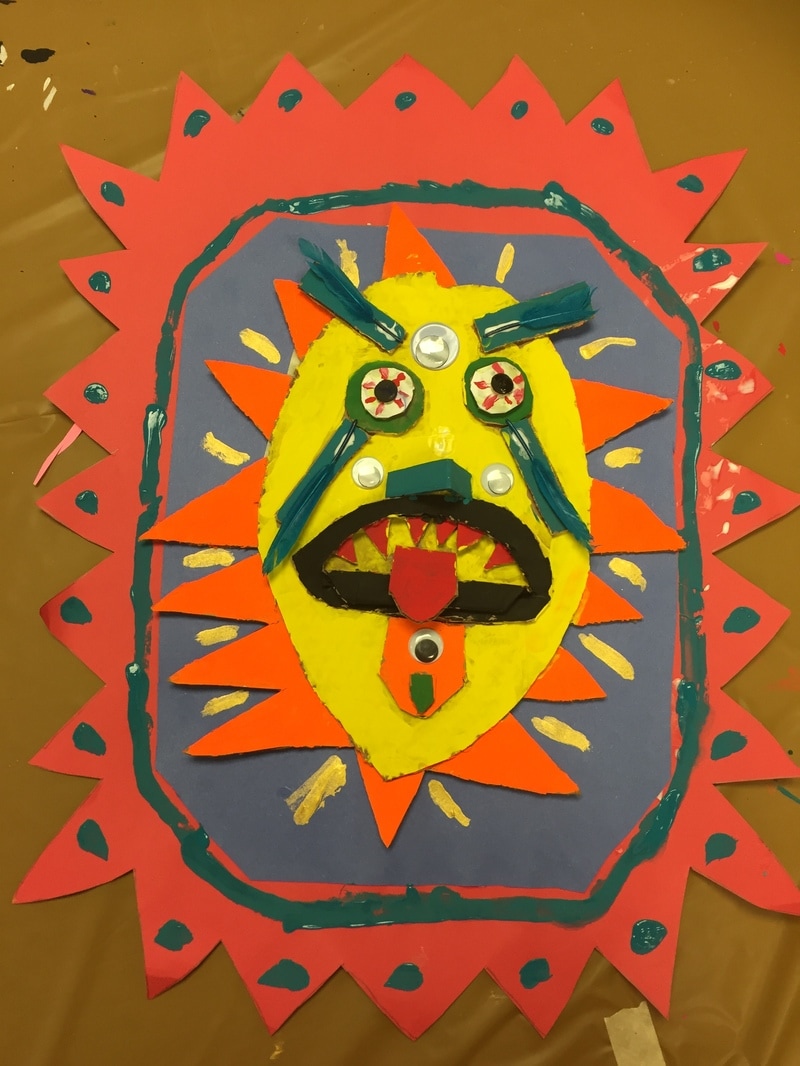
Today, students needed to finish painting the mask first. Then they needed to make the frame if they did not do that previously. They also had the opportunity to add embellishments. I explained what embellishments were. They could shop at the store for those---if anyone ever asks me if I think they should attach googlie eyes...my answer is always YES! I love them! I also had TACKY glue---NO HOT glue on things like feathers and sequins. Other things in the embellishment store: paper straws (for whiskers), cotton fluff balls, plastic gems, scrap craft grass and yarn. For embellishments, I told them they could have as much as they wanted, as long as they attached it to the frame or the mask. They could not take a handful of goodies home. Sorry! I did not have enough for that!
Once their mask and frame were complete (add some paint to the frame so it matches the mask), they were to bring the mask to me so could use my big super hot hot glue gun to attach the mask to the frame. If they wanted the mask to be removable from the frame, they should have put strips of masking tape on the back to signal that they want to eventually wear the mask and they plan to remove it from the frame. I wanted the frames so that they would make a more impactful display!
If they had free time, I let them use up some of the paint and 12X18 paper to paint 'frames' for another project later.
Today I provided black in small cups. Students really needed to save black for last---cheetah spots, eyes, etc. look best if the bottom layer is dry and then they add the black on top.
Day 8---Final day for painting, attach mask to the base/frame. Add any painted details to the frame. Write a reflection on the success of the project.
Today, students needed to finish painting the mask first. Then they needed to make the frame if they did not do that previously. They also had the opportunity to add embellishments. I explained what embellishments were. They could shop at the store for those---if anyone ever asks me if I think they should attach googlie eyes...my answer is always YES! I love them! I also had TACKY glue---NO HOT glue on things like feathers and sequins. Other things in the embellishment store: paper straws (for whiskers), cotton fluff balls, plastic gems, scrap craft grass and yarn. For embellishments, I told them they could have as much as they wanted, as long as they attached it to the frame or the mask. They could not take a handful of goodies home. Sorry! I did not have enough for that!
Once their mask and frame were complete (add some paint to the frame so it matches the mask), they were to bring the mask to me so could use my big super hot hot glue gun to attach the mask to the frame. If they wanted the mask to be removable from the frame, they should have put strips of masking tape on the back to signal that they want to eventually wear the mask and they plan to remove it from the frame. I wanted the frames so that they would make a more impactful display!
If they had free time, I let them use up some of the paint and 12X18 paper to paint 'frames' for another project later.


Takeaways and reflection:
This is a project that spanned the course of 8+ class periods. Nearly 400 students created 3-D masks.
This project incorporated critical thinking and the use of sophisticated materials that middle school aged students should have an opportunity to utilize at school. When I polled each class, most kids raised their hand that they had used a hot glue gun before.
This project was a massive undertaking to initiate and I have spent hours scouring for cardboard, cutting it to size, and planning each station to make it safe and accessible for multiple students. Most kids are VERY careful around the hot glue because they understood the danger.
I understand that using hot glue is dangerous, just as scissors are dangerous.
Safety is always something that I stress in my lecture when starting a new project, it is always part of instructional input when I cover the routines and procedures for a project.
Students could get a bad paper cut that would hurt just as bad as the glue gun burn, it happens, and there are risks for every single thing we use. I know that this risk falls on my shoulders and I don't take it lightly, but it comes with the territory.
The students responded so well to this project, most kids are thrilled to walk in the door and get to work on their mask, (which does not happen with every project we do).
There are students who haven't had success on anything ever before, making the most special and wonderful creations. To an adult, the designs may not look like much, but the thought process, the vision and the application of skills are really quite incredible, it just can't be replicated through other process like drawing or painting.
The risk involved with using hot glue guns was quite minimal in my opinion. We did have a few minor burns, but I encouraged them to use the old gardening gloves and always put the hot glue o the BIGGEST thing they were gluing, not the tiny thing they were attaching. Also, if they got a spot of hot glue on their hand, the worst thing they could do would be to wipe it----they should rush to the sink and run cold water over it---then peel off the hot glue.
I would definitely do this project again without many changes. It was a lot of work to get the cardboard ready and the tables set up to allow the masks to dry, but it was worth it.
I have spent the last week hanging all 12 classes around the building and I just love them all so much! This project had a very high success rate and I am proud of the work that my creative students have put into it.

 RSS Feed
