THIS LITTLE CLASS OF MINE
  • Home
  • Contact Me
  • Lesson Plans

Teach with your Strengths

1/24/2018

0 Comments

 
Picture
Last year, I set a goal to read 40 books. The goal was through goodreads and I met the goal!!  This year I am trying to read 45 books. I try to vary the  type of books that I read; one series, a couple of classics, a self-help, fiction, non-fiction, I try to read a broad variety because I enjoy it. 

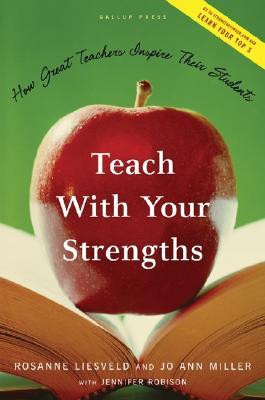
One of the books that I read is called Teach With Your Strengths: How Great Teachers Inspire their Students. It came with an online gallup poll that I took to determine my strengths. As an educator, it seems like we fixate on what we do poorly and spend a lot of energy trying to get better. This book has a different theory, it basically says to identify what you do really well and try to do it better. 

My top 5 themes are deliberative, intellection, input, strategic and learner. 


Deliberative personalities anticipate obstacles and take serious care in making decisions or choices.

Intellection people are introspective and engage in intellectual activity like reading, writing and spending time thinking.

Input people are talented in craving to know more and like to collect and archive all kinds of information and 'things'.

Strategic find alternative ways to proceed and can quickly spot relevant patterns and issues. 

Learners have a great desire to want to learn and improve, they like the process of learning rather than the outcome. 


All of my results combined really point out what an introvert I am deep down. Many of the things suggested said that I should make time every day to think things through and to reflect. Also, find a place to write (like my blog) my reflections and thoughts about things because that is where my strengths are. I think I get very overwhelmed when I don't have time to mentally process my day or when I don't have down time after a busy weekend. 

How all of this will impact my teaching is still undetermined as I am still thinking about and processing how it will make a difference, but I am happy to follow the suggestions in the book and focus on strengthening my talents instead of focusing on my weaknesses. 

I would definitely recommend this book and the quiz to my teacher friends if you are curious about what you are most talented at and you are interested in strengthening your best traits.

Picture
0 Comments

Emoji Bookmarks

1/19/2018

1 Comment

 
Picture
Rarely do I do the same thing the exact same way twice. Usually, I change things up a bit each time I teach something in order to make it better or more exciting (for me). This semester, I decided to have my students learn about Radial Symmetry by creating paper relief sculptures.

In the fall, when I taught the radial symmetry project, students did pretty well but I felt like the unit was missing something. This week, the day that we finished practicing the basic origami folds (which I taught completely under the document camera), I showed them how to make an origami bookmark. We then took it to the next level and made an emoji bookmark on yellow paper.

​These bookmarks only took about 20 minutes (even after the practice bookmark) especially if someone did a really simple smile....but it was great because it gave them something they could take home the same day. Last year and the year before, my students would've went crazy over 'emoji' bookmarks, this year, they were just 'meh'......My favorite ones are the made up ones. 

Day 1 
Practice folding a corner bookmark. Demonstrate how to trace a circle on to the square bookmark, and cut off the corners without cutting off the entire fold. If you cut the entire fold at the top, the bookmark will fall apart, as many of my students learned the hard way and I didn't give them new paper, they just had to tape it back, oops. I learned how to make the bookmarks with this video. 

Use paper scraps to cut out eyes, tongues, etc and a black sharpie to draw on face details. I also encouraged them to draw their face on the newsprint practice bookmark to 'plan' it out. I just had the small paper scraps in a bin. The yellow paper is copy paper so it is a little thinner than construction paper. I also cut a few red and lime green squares so kids could make an emoji that wasn't yellow, but a lot of them wanted to make the poop emoji, but I wasn't sure how they could do that with the round templates that I provided, so I just told them they could try to figure that out at home.

Supplies
square yellow paper (we used 8.5X8.5)
small red, blue, green, black, white scraps
sharpies
glue sticks
scissors
pencils
​circle templates 
Picture
Picture
Picture
Picture
Picture
Picture
Picture
1 Comment

Fall Still life

1/17/2018

0 Comments

 
Picture
This was one of those projects that had the chance of being great, but the final results were just okay. I have mentioned that when I moved to the middle school, I thought I would be leaving the tempera paint and crayons behind, trading up for acrylic and charcoal. I don't know why, but in my mind, those things were more sophisticated and suited to older students. This is the first and only acrylic painting project I have tackled so far. 

I set up a still life made of up of fake leaves, fake sunflowers, fake fruit, with real pumpkins and gourds on every table. Students practiced drawing them, and then tried to 'zoom' in and draw a close up of some element of their still life on bigger 12X12 brown craft paper. We painted them still life pictures with acrylic paint....and we did not outline anything in sharpie. For that I am proud. I am guilty of black outlining everything. (a few kids wanted to and I let them, but it wasn't required)

We really focused on overlapping and value. Students would have to draw the textures in their sketches so they could paint them later. 
​
This was also the year that a boy carved a pumkin and brought it to school for me! So thoughtful!!
Picture
Picture
Picture
Day 1
Look at a slide show about still life art. Focus on word: overlapping, hierarchy and  proportion. Practice drawing the still life on the table in your sketchbook with a pencil. DO NOT move the objects. You could move around the table, but don't move anything, they need to be basically the same for each class. Once you have selected a view (I think we did several warm up sketches). Begin drawing it on 12x12 brown craft paper. Try to 'zoom' in on the objects so you don't have as much background to fill in later. 
Day 2 
We talked about color mixing to get a variety of tints, shades and types of oranges and greens. Students need to mix enough of the color that they need for the object they are painting, paying attention to shadows and highlights. Also, this is just the first layer, we will go back and add visual texture on top, once this dries. 

Day 3-4
Adding shadows and visual texture. Also, finish painting the background. Watch this video on how to finish the still life. Early finishers can use 6X12 brown scraps to paint a fall painting, could be a sign or a free time just for fun since we have all this paint out. 

Supplies
pencils and erasers
still life objects
12X12 brown craft paper
palletes
brushes
acrylic paint
water cups and paper towels


Picture

Picture
Picture
Picture
Picture
Picture
Picture
Picture
Picture
Picture
Picture
Picture
Picture
0 Comments

CHALK STILL LIFE

1/17/2018

0 Comments

 
Having three snow days in a row has really motivated my blogging. I'm digging all the way back to the 2014-2015 school year for lessons and photos on my external hard drive. After getting a new (much smaller hard drive) computer at school, backing up all of my old photos on an external drive, getting a new phone and finishing up my master's that year, I just did not do much blogging. At least I did take a lot of great photos of projects that I am excited to share now. 

​For this project, we did some observational drawing in our sketchbooks. We drew the manikins in action poses, and we drew random stuff around the art room. Then, students picked one of their sketches to draw big. I was obsessed with 18X24 that year.

We mostly drew with chalk on black paper and colored with chalk pastels AND oil pastels. I have found that I have more and more students that are sensitive to the texture of drawing with chalk or sharpies on paper.

The vibrations bother them and I either have to let them use a rubber glove, an alternative supply or find some other way for them to complete the project.

Do you have sensory issues with supplies like this? What do you do? 
Picture
Picture
  Day 1-2
Draw objects to practice in your sketchbooks. First, pose the manikin and draw the pose. Do 2-3 drawings of the manikin in different poses. Then, I will bring around a tub of tools, objects and basic still life materials. Set up a still life or draw one object at a time, practicing LOOKING at the contour lines of the object. No tracing! Select one of your sketches to blow up big. Sketch it on black paper with chalk. 

Day 2
​Finish coloring still life with chalk and oil pastels. Look at examples of Jim Dine's tool still life drawings. 

*I think I might've let a few classes work with a partner on this project. Also, I let them draw objects around the room, like my lava lamp. And I even let them draw a few made up objects like ice cream and sports balls and nail polish....

Supplies
still life objects
pencils and sketchbooks
chalk
black 18X24 paper
chalk pastels and oil pastels
Picture
Picture
Picture
Picture
Picture
Picture
Picture
Picture
Picture
0 Comments

Minions

1/17/2018

0 Comments

 
Picture
Picture
 When the minion movie 3 came out in 2015, I was excited to see it. Partially because the trailer was so funny, and partially because I got to take my nieces to the movies for the first time. 

At school, we celebrated by watching the trailer and we spent a day making minions using one of those cute dice game templates. I love using the dice games as a template for an all-school installation or mural. 

I am linking the Roll a Minion by Night Owl on TPT, but I do not think this is the one that we used for this project.....I will look when I get back to school. 

Supplies
Dice (1 per table)
printed roll and draw game from tpt
pencils
sharpies
markers (lots of yellow and blue refills)

Picture
Picture
0 Comments

Optical Illusions

1/17/2018

0 Comments

 
In 2015, I was feeling my way through the whole middle school process. Most kids enjoyed looking at optical illusions and I knew I wanted to create an optical illusion unit for the first time. I was also trying to figure out a good way to incorporate a LITTLE bit of technology into the project. 

So I created a SMORE flyer with tons of step-by-steps and guides on how to make optical illusions that I had collected around the internet, mostly via pinterest. The idea was that students could 'explore' and narrow it down to one that they were interested in making.

In theory, this made tons of sense. But in reality, most kids picked the one that looked 'easiest'. And then wanted to play on the iPads as soon as they were finished. I've phased out using technology as much in this way....because it just didn't yield the best results and I felt like I was trying to control them a little too much, which I was. Also, I only had a dozen ipads so kids still had to have OTHER visuals, books and some printed step-by-steps in order to have access to enough materials for each kids to use. 
Picture
Day 1-3
Introduce the idea of optical illusions. Look at examples. Scan QR code which takes you to the smore flyer 
Sketch idea on white drawing #80 paper in pencil. Use 9X12 or 12X12 depending on design. Color with markers, colored pencil or crayon. Use willow chalk to add light shading on marker. 

Supplies
 pencils
rulers/circle templates
erasers
9X12 and 12X12 paper #80
markers
colored pencils
willow vine charcoal

Picture

Picture
Picture
Picture
Picture
0 Comments

One Point Perspective

1/17/2018

0 Comments

 
Picture

Okay so the details on this one are a bit fuzzy. The idea, back in 2014 when we did this project was to introduce some basic procedures, but also to teach about perspective. I don't remember that my students really loved it because it was too cookie cutter. And I agree. I would definitely do it differently now. But as a teacher, I learned a LOT. My students blew through the oil pastels....it was one of the first projects that I did with every students, and oh man, I learned a lot about how quickly they get all chewed up and look old and nasty. I felt sorry for the 6th class each day....

I am pretty sure we looked at the Art Projects for Kids example on how to create a vanishing point along a road. 

When students are going to be coloring with oil pastels, I don't like it when they start the project with pencil. I think the results are much better if they start with white or yellow chalk....that way their erased pencil lines can't leave a groove in the paper and they have to draw much bigger with chalk than they do in pencil, making it easier to color. In my opinion. 

Picture
Picture
Picture
Day 1
Seat work: Draw what Mrs. Mitchell looks like when you are talking while she is talking. Review a few procedures, practice a few of them, cover anything that was forgotten.

Objective 6: Interpret the environment through art: Use techniques to depict the illusion of depth in a landscape drawing.
  • Read poem about perspective…..or quote….Define perspective. 
  • Start ‘perspective project’.
  • Draw Horizon line, make small dot in center, draw lines converging into the ‘vanishing point’.  Be careful not to smear the chalk while drawing.
  • Students may choose between a DAY scene or a NIGHT scene.
  • Make sure names and class codes (R-1) are on the back. Students might have a little time to add some color, but should start with the mountains, using cool colors that OVERLAP.
Supplies: 
gray 12X18 paper
chalk
ruler

Day 2

  • Seat work: What are the cool colors?
  • Objective: Use cool colors, use oil pastels
  • Students should begin with the middle part of the paper being careful when coloring not to smear the pastel. Use COOL colors (write blue, turquoise, green on the board…purple is also a cool color, but we are substituting yellow because it mixes with green better).
  • Save one blue color for the sky, use hot colors for sun. Use white for clouds.
  • Be careful when coloring around trees.
  • Save black for very last.
​

Supplies
Water soluble oil pastels
Table covers
Drawings from previous class
0 Comments

Charcoal Owls

1/17/2018

0 Comments

 
Picture
It is no surprise to my students that owls are my favorite animal. I have tons of owls all around my room, many of them gifts from former students. One of our very first projects when I transferred to the middle school was definitely going to be an owl project. This is an oldie but a goodie from 2014. I was really big into making my students use 18X24 paper that year.

​When I look back, almost every project we did was huge like that. In order to make room, students had to work at the counter, on the floor and spread out in every direction. You could tell I was used to having smaller classes at the elementary level....now my classes are quite a bit bigger and it is harder to spread out that much. 

When I first moved to the middle school, I really thought we would primarily be using fancy supplies like charcoal, paper mache and acrylic paint...forget crayons and tempera....but a lot of my students were still at the same level the 4th graders I was used to so it should not have been a surprise that charcoal was really messy and somewhat foreign to them.

In the photos below, you will see chalk and charcoal on the floor. Yes, we made a mess. And I felt bad as the new band room wasn't finished and each day during my prep, the percussion team would use my room to practice, getting dust and crumbs all over their brand new instrument cases....Oops. 

I am sure I got the idea from Art Dish with MJ. For references, I photocopied photos of owls and put packets on the tables. I also had one bulliten board with owl photos on display. The photocopies helped them recognize values and textures. We tried to stick to black and white for the bodies, yellow or orange for the eyes and one solid color for the background. 
Picture
Since I forgot to type this up in 2014, I am copying my lesson plans from that date here. 
Day 1
  • Seat Work: Complete the value scale from dark to light. The bottom strip. For the top strip, draw different textures, dark and light together.
  • Explain that today we will be using texture to create value.
  • Have students make a mini owl on the back of their value scales. This is a THUMBNAIL sketch of their design. Next time, we will use CHARCOAL to make the owl on BIG paper.
  • Some students MAY have time to finish landscapes, point out oil pastels and class boxes.
Objectives: Use value and texture to design an owl’s portrait. I will know I have learned this when I practice my value scale and complete my thumbnail sketch.
Supplies: Value scales, pencils, visuals of owls.
Day 2
  • Before students enter, have paint shirts at the door and encourage them to wear today, it will be super messy!
  • Use charcoal to draw an owl BIG on big paper. Try not to smear the black everywhere. Use black to make some dark areas, but also leave some areas lighter (value).  Students may want to stand today.
  • Explain how to do clean up and drying wracks, and wiping down tables, and chairs.
  • Select two (or 3) spots to use color on the paper: eyes, background and/or beak. Use CHALK PASTELS.
  • Make sure names are on back.
  • Put in drying wrack. CLEAN WELL!
Supplies: Big white paper, charcoal, colored chalk

Day 3
​Stress following procedures, remind them of some things they are doing well or could be improved. Give them a list of options for their ‘free day’. We are almost there!
  • Students should use the time today to complete their landscapes and their owls.
  • If both projects are completely finished, give them the option of adding an INK wash on the landscapes. Owls will go in the class box if they finish.
  • Clean up really well!!
Picture
Picture
Picture
Picture
Picture
Picture
Picture
Picture
Picture
Picture
Picture
Picture
0 Comments

Chuck Close Fingerprint Portraits

1/16/2018

0 Comments

 
Since I am home on a snow day (yesterday AND today) I decided to update my blog. Wow. I have let a lot of great projects go undocumented. Part of the problem stems from the fact that I moved from K-4 in 2014 to a middle school. I now have 6 classes a day and WAY less time to blog. Another factor for some of the posts I am finally sharing never being shared is that we got new computers and I got a new iphone around the same time. That meant that a lot of stuff got backed up on an external hard drive never to be seen again. Until today. 

This is one of those stunning projects that was a huge 'WOW' in the cafeteria but I never shared it here. The portraits were 18X24, which meant they were a huge storage issue at the time, but since we did them at the end of the semester, it wasn't as huge of an issue. 

The lesson was almost completely taken from the blog Frecklephoto. She inspired almost every element, which is good, because there are many details I can't remember. More here. More here. And here. My students did this lesson in December 2014, and I haven't tackled it since. 
Picture
 From what I remember, I took photos of every student on an iPad and uploaded them on my computer. I converted each one to black and white, bumped up the contrast and printed them off so they were roughly 8X6 (I think). Since I took each student's photo, I encouraged them to look pleasant, not show their teeth and have their eyes open. We learned a lot about Chuck Close through videos and the images on my smore flyer. 

It was labor intensive before we actually started to get them all prepped. Meanwhile, students practiced grid drawing on a couple of worksheets. They also used the practice handout of the portrait to practice stamping different values with one finger. I made up my own based on the example on Frecklephoto, you will see it below. I will try to scan it and add to this post when I get back to school. 

Perhaps the hardest part of the project was drawing their portraits using the grid drawing method. No. I take that back. Using a ruler was the hardest part. We had to use yard sticks because the paper was so big and lots of kids needed help holding it down to measure their 18X24 paper and then LIGHTLY trace the pencil lines with a ruler. This took two art days. Students also had to draw a small grid with a regular ruler on their printed photo so that it would correspond with the big paper. We had a really hard time erasing the pencil lines, as you can see from some of the examples....but all well. 

The finger printing on the face didn't take too long.....and for the background, we made a 2nd 18X24 grid and painted it with tempera cakes. We were rushed to finish right before Christmas break, so the last step was cutting out the portrait and gluing it down to the dry painting, or as some classes had to do, onto the still-wet tempera-cake paint. 

Before Project: Photograph each student, convert and print
​
Day 1 
Learn about chuck close. Practice grid drawing. (elephant grid drawing)

Day 2
Draw grid on photo. Draw grid on 18X24 paper. I made a video to explain the grid drawing method. I could tell they were bored when it got to the big paper because it is hard to see my lines. 

Day 3
Finish drawing grids. Begin lightly sketching features on big grid using grid drawing method.

Day 4
Practice making values on handout with black paint. Make a value scale. 

Day 5
Catch up Day. Finish all grids, everyone finish practicing values. Finish sketching all faces on papers. Begin drawing grid on 2nd 18X24 paper. Name on it. 

Day 6
Fingerprint stamp 18X24 portrait. 

Day 7
Paint 18X24 background paper (some need to finish fingerprint stamping their portrait)

Day 8
Cut out portrait and glue it to the background. (Finish painting!!)

Supplies
18X24 paper (2 per student)
printed photos of each student
pencils and erasers
yard sticks
rulers
black paint
copies of practice portrait
tempera cake paint
scissors 
glue​
Picture
Picture
Seriously some of them were so bad, they were funny.
Picture
Picture
Picture
Picture
Picture
Picture
Picture
Picture
I have searched and search for more photos of the finished portraits or of the cafeteria display. Unfortunately, I cannot find any other photos of the student's work. I took 3 to an art show, but I think we had several snow days that year so I might not have photographed them in the school....bummer, there were some great ones. This project took up a ton of space but I LOVE having students work BIG. 
0 Comments

Monster Truck Art

1/16/2018

1 Comment

 
Picture
 Last year, I had two really big classes. The classes had so many students that I needed another table. So, I pushed my desk into an unused classroom and asked the custodian to find me a new table that I could use for the year. This year, I am still using that extra table and I got rid of some other furniture and brought back my teacher desk. Since I didn't realize how big the classes were in advance, I moved my desk and acquired the new table on the 1st day of school. I didn't have a lot of time to re-plan my space since I needed to spend every available second crafting seating charts for every class and going over my 1st day of school routine. 

Anyway, in April a boy complained that the extra table was facing a blank wall. He requested some artwork....He was quite specific when I asked him what he thought should go there, he said: "A Cat. Driving a Monster Truck." 

I don't think he expected me to paint one for him, but that is just what I did. It is Pete the Cat driving this monster truck. After I hung it up, we had a couple of days at the very end of the year that were weird---assemblies and stuff---so I found an Art For Kid's Hub video on how to draw a monster truck, and we made it one of our final projects of the year. I don't use art videos very often, but this was perfect and it went with my poster.

Also, kids could customize their monster truck and put whatever they wanted as the driver. They loved it! They could customize the paint job, the background, and it was a hit with boys and girls alike. 

Supplies
12X18 paper (we used brown craft paper)
pencils and erasers
circle tracers for wheels (we used a tape roll for tires)
sharpies
construction paper crayons and regular crayons (for black and red)

Picture
Picture
Picture
1 Comment
<<Previous
    PictureWelcome!

    Mrs. Mitchell

    Art teacher from Missouri. 

    Instagram
    Add to Flipboard Magazine.

    Archives

    March 2021
    April 2020
    November 2019
    July 2019
    April 2019
    January 2019
    October 2018
    July 2018
    June 2018
    May 2018
    April 2018
    March 2018
    January 2018
    September 2017
    May 2017
    April 2017
    March 2017
    January 2017
    December 2016
    November 2016
    October 2016
    September 2016
    March 2016
    December 2015
    October 2015
    August 2015
    May 2015
    April 2015
    March 2015
    February 2015
    November 2014
    October 2014
    September 2014
    August 2014
    June 2014
    May 2014
    April 2014
    March 2014
    February 2014
    January 2014
    December 2013
    November 2013
    October 2013
    September 2013
    August 2013
    July 2013
    June 2013
    May 2013

    Categories

    All
    1st Day Of School
    1st Grade
    3d
    Abstract Art
    Alcohol Ink Tiles
    Alpacas
    Animal Art
    Animation
    Architecture
    Art Centers
    Art For Kids Hub
    Art History
    Art Hub For Kids
    Art Room
    Art Show
    Art Teacher Conference
    Bell Ringer
    Birds
    Blending
    Bunnies
    Cardboard
    Chalk Pastels
    Chalk Stencil
    Charcoal
    Choice Based
    Christmas
    Chuck Close
    Classroom
    Clay
    Club Day
    Collage
    Color Diffusing Paper
    Colored Pencil
    Colored Pencils
    Construction Paper Crayons
    Contest Art
    Creatures
    Crystal Bridges
    Design
    Dice Games
    Document Camera
    Dot Day
    Drawing
    Early Finishers
    Easter
    Emojis
    Fall
    Field Trip
    Food Art
    Foxes
    Green Screen
    Grid Drawing
    Group Challenge
    Halloween
    Haunted Houses
    Hearts
    Hermit Crab
    High School
    Human Form
    Ice Breaker
    Inspirational Posters
    Ipads
    Jim Dine
    Justand
    Killer Whales
    Kindergarten
    Landscape
    Lesson Plans
    Lettering
    Llamas
    Magazines
    Mandala
    Maori
    Markers
    Masks
    Matisse
    Metal
    Model Magic
    Mona Lisa
    Monster Trucks
    Mother's Day
    Mother's Day Card
    Mummies
    Mural
    Newspaper
    New Zealand
    Notan
    Observational Drawing
    Ocean Art
    Oil Pastel
    Oil Pastels
    Optical Illusions
    Origami
    Owls
    Painting
    Paper Weaving
    Pd
    Pencil Topper
    Perspective
    Pete The Cat
    Picasso
    Polar Bears
    Pop Art
    Portraits
    Printmaking
    Product Review
    Professional Development
    Quiver
    Reflection
    Reflective Teaching
    Room Tour
    Rooster
    Sea Horse
    Seals
    Sea Turtle
    Self Portrait
    Shading
    Shaving Cream Prints
    Shoes
    Sketchbooks
    Sloth
    Solar Eclipse
    Spinners
    Spring Conference
    Star Wars
    Statue Of Liberty
    Step-by-step
    Step By Step Drawing
    Step-by-step Drawing
    Still Life
    Stop Motion
    Story Board
    Sub Plans
    Summer School
    Symmetry
    Tab
    Teacher Appreciation Cards
    Technology
    Tempera Paint
    Tiny Food
    Tissue Paper
    Trees
    Tumbling Blocks
    Valentine's Day
    Warm Ups
    Watercolor
    Wax Resist
    Word Art
    Yellow Submarine
    Zentangle

    RSS Feed

Powered by Create your own unique website with customizable templates.