
While it was a little challenging to teach ORIGAMI folds at the end of the day on a Friday (the Friday at the end of the first full week is hard for kids and teachers because we are all just done by the end of the day). Once the kids got back from the weekend, they were much more able to grasp the basic folds.
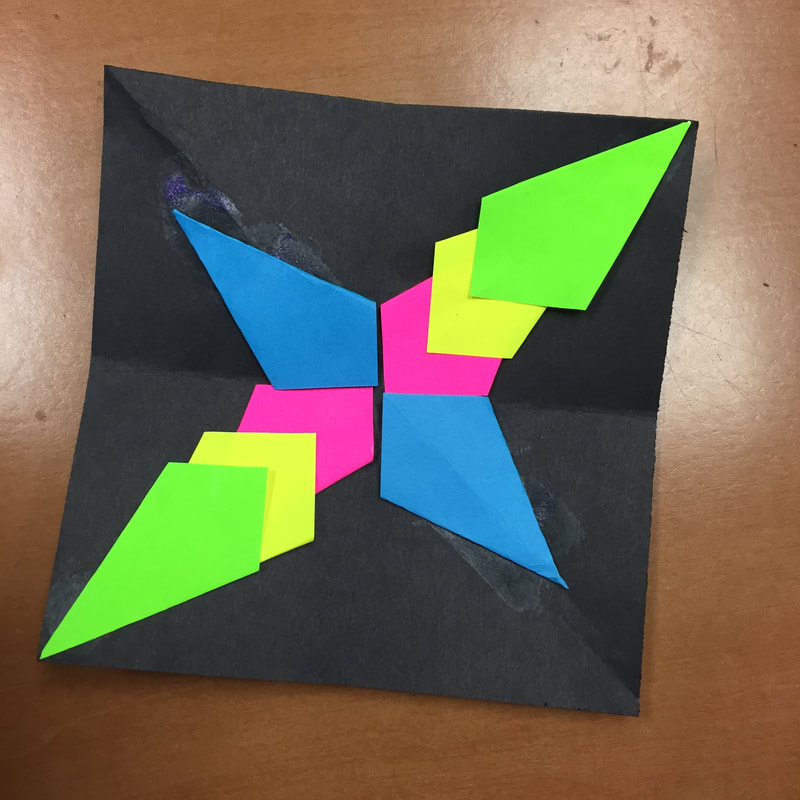
First, I used the Power Point from Art with Mrs. Nguyen to help explain the difference between RADIAL Symmetry and Linear Symmetry which has only one line of symmetry, like a butterfly. Then, we used her youtube video (and I demonstrated while holding up a 12X12 piece of paper) how to fold each of the 3 folds that are used in the Powerpoint: hat fold, kite fold, and samuri fold. Students practiced with 6X6 squares of newsprint.
I polled the class to see who was an 'expert' who had done a little origami and who was a complete newbie. Since I have never taught any origami folding to my students, many of them were complete newbies. I explained that the three folds we were practicing would help them to create many basic origami things using the books later---but if learning the process by watching me felt hard---don't despair because I actually think it is easier to use the books (I pointed to a bunch of books that I checked out from the library) because they have photos of each step and arrows that show which direction to fold the paper. Also, if they couldn't see how to fold the paper, they could always ask an expert sitting nearby and that might help too!
Some kids got the folds right away, while others really struggled. I think I even had a few kids cry....I hate crying the first week...it sets a bad tone for the rest of the year. I told them that as a teacher, I think origami is hard to teach---it is like tying your shoe, until you 'get' it, it is so hard, but once you get it, it is much easier and you can do it without even thinking. For students, this is really challenging, and frustrating and eventually, they can get it, but it takes practice.
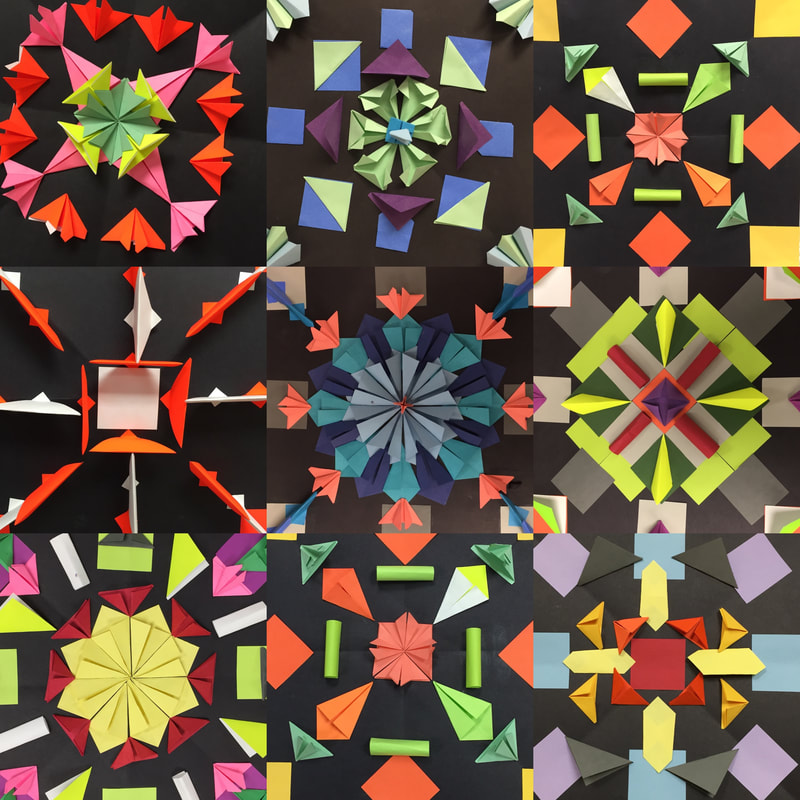
After practicing the basic folds with the newsprint, I gave everyone a 12X12 black square and had them fold it in half both ways like a card and diagonally both ways (like the beginning of the samurai), to show all the lines of symmetry so that they could start to plan out their designs. Then we wrote our names on the back.
Students had about 5-8 minutes to start their designs, many of them chose to glue some flat pieces to the background to get it started. I gave them a big tub of 2X2 squares, a mixture of neon origami paper cut down, scrap construction paper and other scrap paper. This is the tough part about this project....you need a LOT of 2X2 paper. I had actually started cutting the squares last year in anticipation of the project and probably spent a good 3 hours cutting more throughout the week so that students would have enough of each color to make their designs balanced. In the TpT lesson plan I bought, she used 3X3 squares, which would probably go a lot farther---we used the smaller ones so it took a little more for each design.
We used glue sticks to glue the paper down.
***NOTE: I have taught this lesson in the past in one day....I did not teach the origami folds and I did not use a powerpoint. We focused more on making it balanced with the colors and we used really simple 3D shapes. When I handed out the background paper, I had pre-folded it into 4 even quadrants and I told them to make it balanced---whatever you do in one quadrant, you do in all the quadrants. Sort of like a quilt square. Students were highly successful---but it was a ONE DAY lesson.....I let them take it home the same day and I did not grade it. Here is a blog post with examples (I can't find my images anywhere)
First, I used the Power Point from Art with Mrs. Nguyen to help explain the difference between RADIAL Symmetry and Linear Symmetry which has only one line of symmetry, like a butterfly. Then, we used her youtube video (and I demonstrated while holding up a 12X12 piece of paper) how to fold each of the 3 folds that are used in the Powerpoint: hat fold, kite fold, and samuri fold. Students practiced with 6X6 squares of newsprint.
I polled the class to see who was an 'expert' who had done a little origami and who was a complete newbie. Since I have never taught any origami folding to my students, many of them were complete newbies. I explained that the three folds we were practicing would help them to create many basic origami things using the books later---but if learning the process by watching me felt hard---don't despair because I actually think it is easier to use the books (I pointed to a bunch of books that I checked out from the library) because they have photos of each step and arrows that show which direction to fold the paper. Also, if they couldn't see how to fold the paper, they could always ask an expert sitting nearby and that might help too!
Some kids got the folds right away, while others really struggled. I think I even had a few kids cry....I hate crying the first week...it sets a bad tone for the rest of the year. I told them that as a teacher, I think origami is hard to teach---it is like tying your shoe, until you 'get' it, it is so hard, but once you get it, it is much easier and you can do it without even thinking. For students, this is really challenging, and frustrating and eventually, they can get it, but it takes practice.
After practicing the basic folds with the newsprint, I gave everyone a 12X12 black square and had them fold it in half both ways like a card and diagonally both ways (like the beginning of the samurai), to show all the lines of symmetry so that they could start to plan out their designs. Then we wrote our names on the back.
Students had about 5-8 minutes to start their designs, many of them chose to glue some flat pieces to the background to get it started. I gave them a big tub of 2X2 squares, a mixture of neon origami paper cut down, scrap construction paper and other scrap paper. This is the tough part about this project....you need a LOT of 2X2 paper. I had actually started cutting the squares last year in anticipation of the project and probably spent a good 3 hours cutting more throughout the week so that students would have enough of each color to make their designs balanced. In the TpT lesson plan I bought, she used 3X3 squares, which would probably go a lot farther---we used the smaller ones so it took a little more for each design.
We used glue sticks to glue the paper down.
***NOTE: I have taught this lesson in the past in one day....I did not teach the origami folds and I did not use a powerpoint. We focused more on making it balanced with the colors and we used really simple 3D shapes. When I handed out the background paper, I had pre-folded it into 4 even quadrants and I told them to make it balanced---whatever you do in one quadrant, you do in all the quadrants. Sort of like a quilt square. Students were highly successful---but it was a ONE DAY lesson.....I let them take it home the same day and I did not grade it. Here is a blog post with examples (I can't find my images anywhere)
Day 2
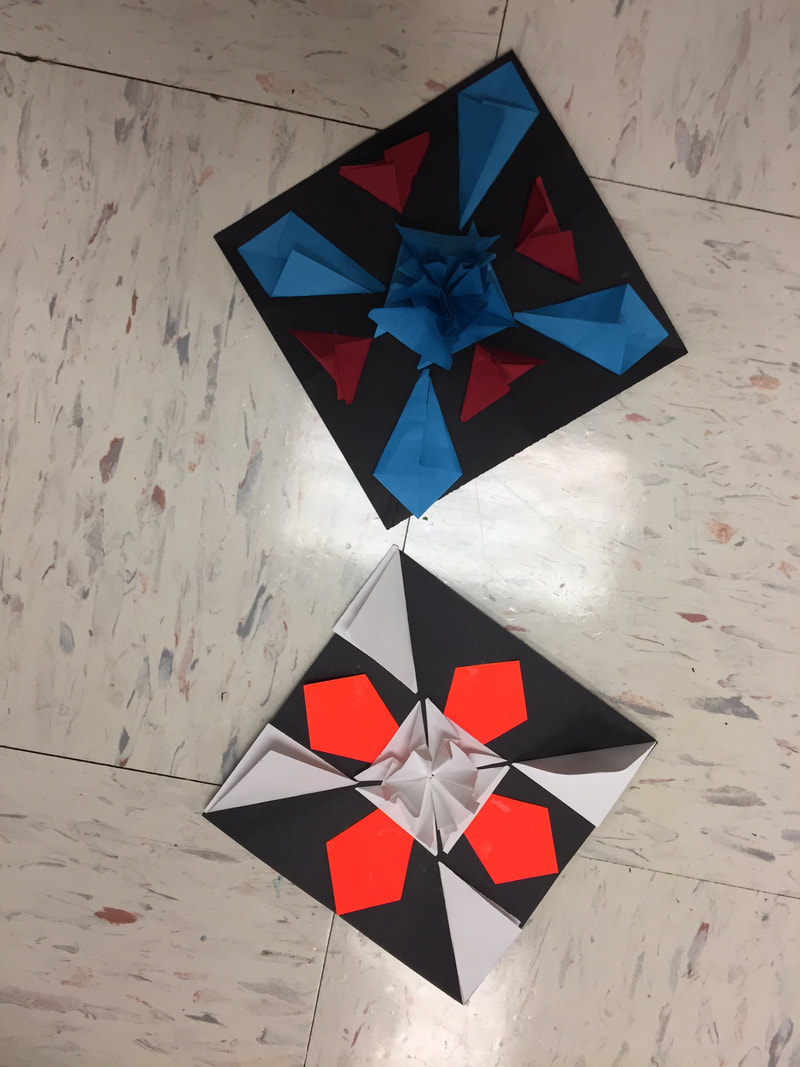
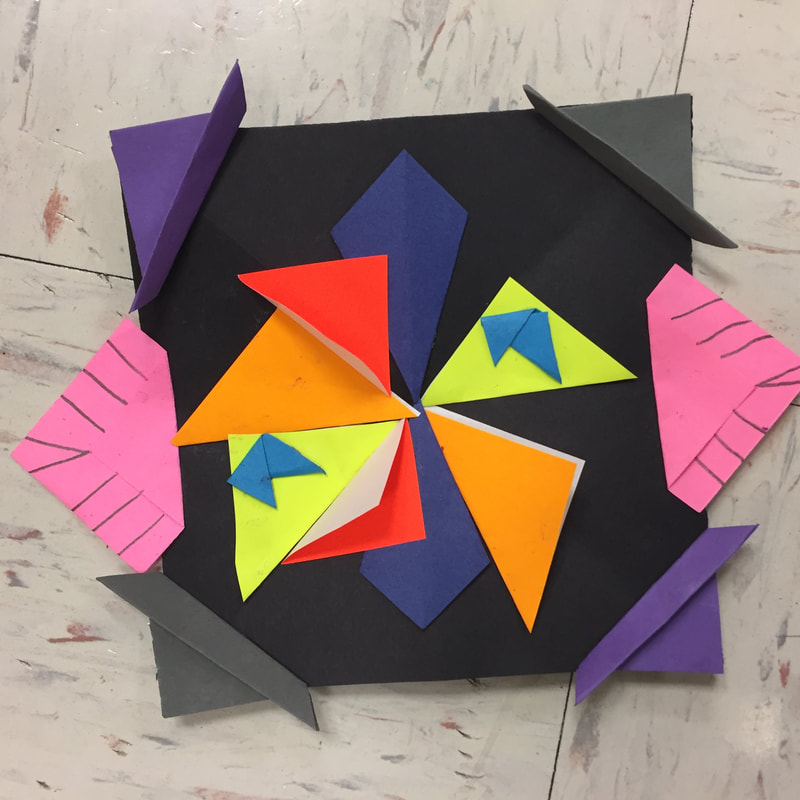
I reviewed the folds quickly by pointing out the big 12X12 versions I had tacked to the whiteboard. I also printed out the handouts that came with the TpT lesson---and had those available for students to refer to if they forgot one of the folds. I gave them the entire day to work on creating a symmetrical design. I showed them a couple of examples as a reminder that the design had to be balanced and it had to be 3D. I also mentioned that they could use other types of folds to make it 3-D, not just the ones that I taught them.
Since these had to be put in the drying wrack, I encouraged them not to make them too tall as things could get ripped off pretty easily. Also, students needed to give their designs the SHAKE test. Pick it up and shake it to make sure nothing falls off before taking it to the drying wrack.
If students could not find the right paper color to finish their design, they were allowed to go to other tables, but they were not allowed to fight over the paper (I had paper wars in a couple of classes with kids hoarding the neons and not sharing) and they weren't allowed to go to another table just to talk to a friend, they could only grab what they needed and get back to their spot. They liked the freedom and independence to move around the room! I would rather them get the right colors than just glue random stuff down in order to hurry and be done quickly.
Early finishers were allowed to help a friend or try out the origami books. I always have origami for early finishers, but I hope that by showing them a few basic moves, they will be more willing to try it on their own as they will have a little confidence and some background knowledge. I explained the difference between the practice newsprint paper and the REAL origami paper--mine is white on the back---and it can be very expensive so don't waste it!!
I noticed lots of kids naturally spinning their big 12X12 papers and noticing the optical illusion effects. Certain colors and the neon papers on the black background were tricking their eyes in really neat ways.

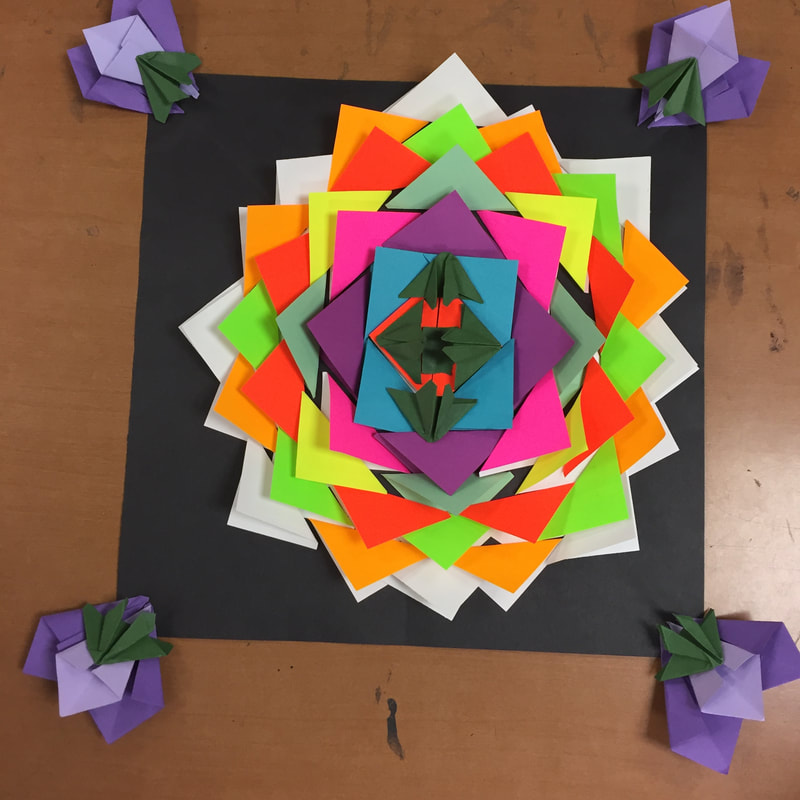
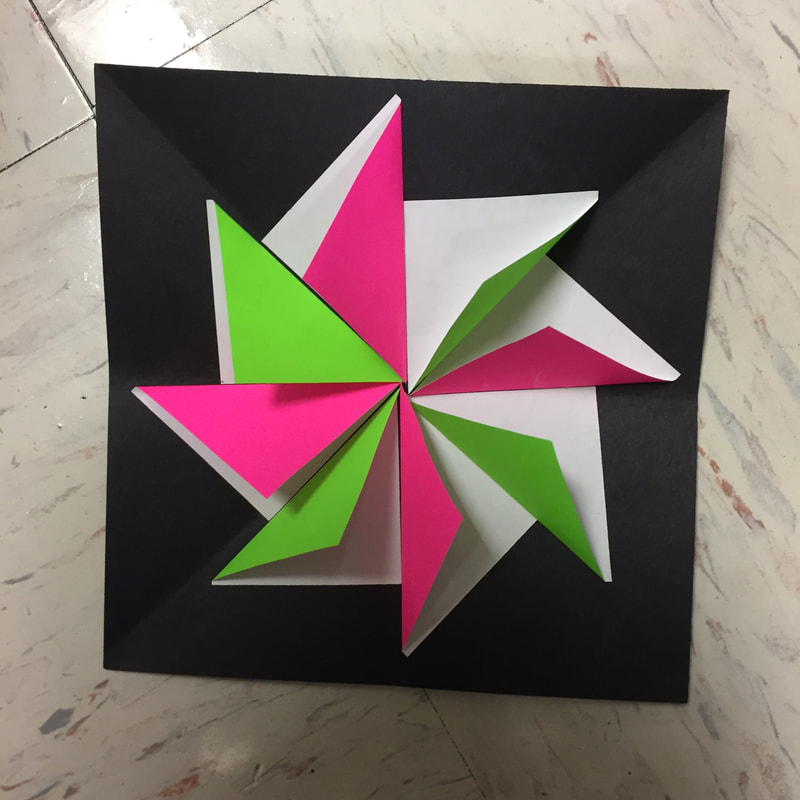
This one wasn't really radial design, but I loved it so much!!
Day 3 Spinners
Day 3
Most kids were ready to put the finishing touches on their designs---some needed an entire third day for the project, while others just needed a minute or two to finish or fix pieces that had fallen off. This was the day I mentioned that I would be sending them home at the end---rather than stuff them back into the drying wrack and wait for me to grade them, I was worried they would fall apart if they were all stuffed into my cabinet over Labor Day, it would be better for them to take them the same day. I explained the grading---if the design was balanced and used all three of the folds I taught them they get a 3, if it isn't balanced or they don't use any 3D paper techniques it is a 2 or 1. Most kids got a 3, but a few got a 2.5 or a 2 if they didn't use any of the folds I taught them.
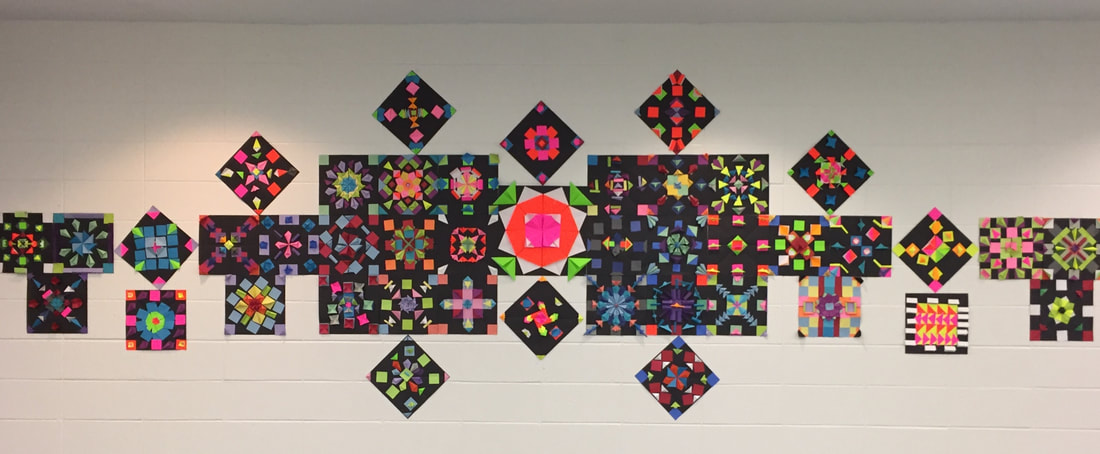
I also explained how I pick artwork for my art displays. I pick a few from each class for each project and hang a big display in the cafeteria. I try to pick something from every student between now and Christmas. And if I pick theirs, they get it back later. Everyone else gets to take theirs home today. I told them please don't have their feelings hurt if I don't pick theirs this time, I can't pick them all, sometimes I already have another design similar to the one they made and I have to pass over theirs.
Okay, I really didn't want to start a whole new project for the ones that were done, but in most classes, about half were completely done or only needed 5-10 minutes. So, I made 6X6 black squares so the kids could use their origami and design balancing skills to make a MINI radial spinner to take home. Very first class, a kid asked, "do we HAVE to make one?" YES!! You have to make one if you finish with the big one. The big one is graded, so it is a priority, I need it first. The same kid was the one that exclaimed, 'THIS IS AWESOME!" about his mini spinner.
To make the mini spinner, you fold it in half like a card both ways and diagonally both ways, just like we did the big one and the samurai fold. Don't forget to fold it, because a couple of kids forgot and theirs would not spin without the center point on the bottom from the folds, it is like the point on a top, it helps it spin. Also, if anyone had trouble with their spinning, it was because they had glued paper on the bottom of the design and it was like a brake---it created too much drag and theirs would not spin.
After folding the black paper, use the origami folds to make it balanced and symmetrical. I gave them a mini lesson about the color wheel. Opposites like blue-orange, red-green, and purple-yellow (also pink+green) give off a more powerful visual effect when spinning, if you put them side-by-side on your design. Also, if you use white paper (with the black background), it is the opposite of black and it looks really cool. A girl used orange on black and we could see a blue dot that wasn't actually there! When the designs spin, you see shapes that aren't actually there. Our next project will be an optical illusion, so this is a great intro!
Students loved making the spinners. IF they had time, they could even make two! 4 samauri folds in the middle made a great handle. When they were finished, they spent time practicing their spinning on the floor or the table. The fidget-spinner obsessed kids were in heaven. Let's be honest, the neon paper looked amazing...I wish I would've had a blacklight because it practically glowed in the dark. Next time I do this project, I will definitely bring a blacklight and buy a LOT more neon paper.
Update: I had a 500 pack of FLUORESCENT ORIGAMI paper from School Specialty. I cut it down to 2X2 so it would stretch amongst all of my students for this project. It is kind of expensive but really, really vibrant.
Most kids were ready to put the finishing touches on their designs---some needed an entire third day for the project, while others just needed a minute or two to finish or fix pieces that had fallen off. This was the day I mentioned that I would be sending them home at the end---rather than stuff them back into the drying wrack and wait for me to grade them, I was worried they would fall apart if they were all stuffed into my cabinet over Labor Day, it would be better for them to take them the same day. I explained the grading---if the design was balanced and used all three of the folds I taught them they get a 3, if it isn't balanced or they don't use any 3D paper techniques it is a 2 or 1. Most kids got a 3, but a few got a 2.5 or a 2 if they didn't use any of the folds I taught them.
I also explained how I pick artwork for my art displays. I pick a few from each class for each project and hang a big display in the cafeteria. I try to pick something from every student between now and Christmas. And if I pick theirs, they get it back later. Everyone else gets to take theirs home today. I told them please don't have their feelings hurt if I don't pick theirs this time, I can't pick them all, sometimes I already have another design similar to the one they made and I have to pass over theirs.
Okay, I really didn't want to start a whole new project for the ones that were done, but in most classes, about half were completely done or only needed 5-10 minutes. So, I made 6X6 black squares so the kids could use their origami and design balancing skills to make a MINI radial spinner to take home. Very first class, a kid asked, "do we HAVE to make one?" YES!! You have to make one if you finish with the big one. The big one is graded, so it is a priority, I need it first. The same kid was the one that exclaimed, 'THIS IS AWESOME!" about his mini spinner.
To make the mini spinner, you fold it in half like a card both ways and diagonally both ways, just like we did the big one and the samurai fold. Don't forget to fold it, because a couple of kids forgot and theirs would not spin without the center point on the bottom from the folds, it is like the point on a top, it helps it spin. Also, if anyone had trouble with their spinning, it was because they had glued paper on the bottom of the design and it was like a brake---it created too much drag and theirs would not spin.
After folding the black paper, use the origami folds to make it balanced and symmetrical. I gave them a mini lesson about the color wheel. Opposites like blue-orange, red-green, and purple-yellow (also pink+green) give off a more powerful visual effect when spinning, if you put them side-by-side on your design. Also, if you use white paper (with the black background), it is the opposite of black and it looks really cool. A girl used orange on black and we could see a blue dot that wasn't actually there! When the designs spin, you see shapes that aren't actually there. Our next project will be an optical illusion, so this is a great intro!
Students loved making the spinners. IF they had time, they could even make two! 4 samauri folds in the middle made a great handle. When they were finished, they spent time practicing their spinning on the floor or the table. The fidget-spinner obsessed kids were in heaven. Let's be honest, the neon paper looked amazing...I wish I would've had a blacklight because it practically glowed in the dark. Next time I do this project, I will definitely bring a blacklight and buy a LOT more neon paper.
Update: I had a 500 pack of FLUORESCENT ORIGAMI paper from School Specialty. I cut it down to 2X2 so it would stretch amongst all of my students for this project. It is kind of expensive but really, really vibrant.
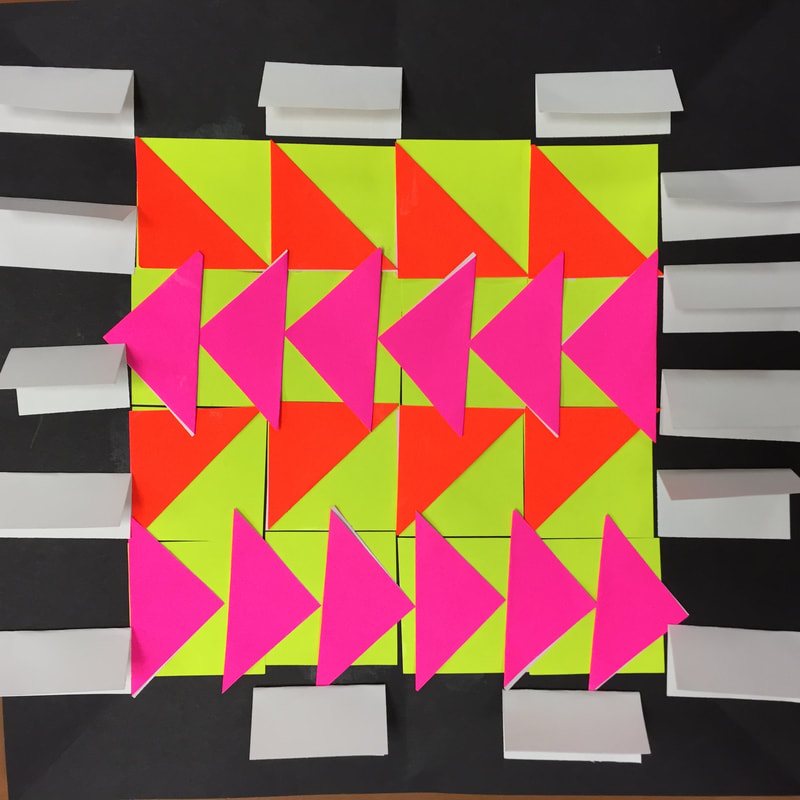
If you wanted to simplify for younger students, and do this project with everyone, THIS would be a highly successful design. Make a pattern of diagonally folded papers.

 RSS Feed
