THIS LITTLE CLASS OF MINE
  • Home
  • Contact Me
  • Lesson Plans

Optical Illusion Weavings

3/19/2018

0 Comments

 
When I saw the Art Lesson: Op Art Paper Weavings on Teacher's Pay Teachers, I knew that it would be perfect for my middle schoolers. 5th and 6th graders 'get' weaving so much easier than my little baby 1st and 2nd graders ever did. We flew through this project with ease, and I wish I would've made it just a ltitle bit harder. 

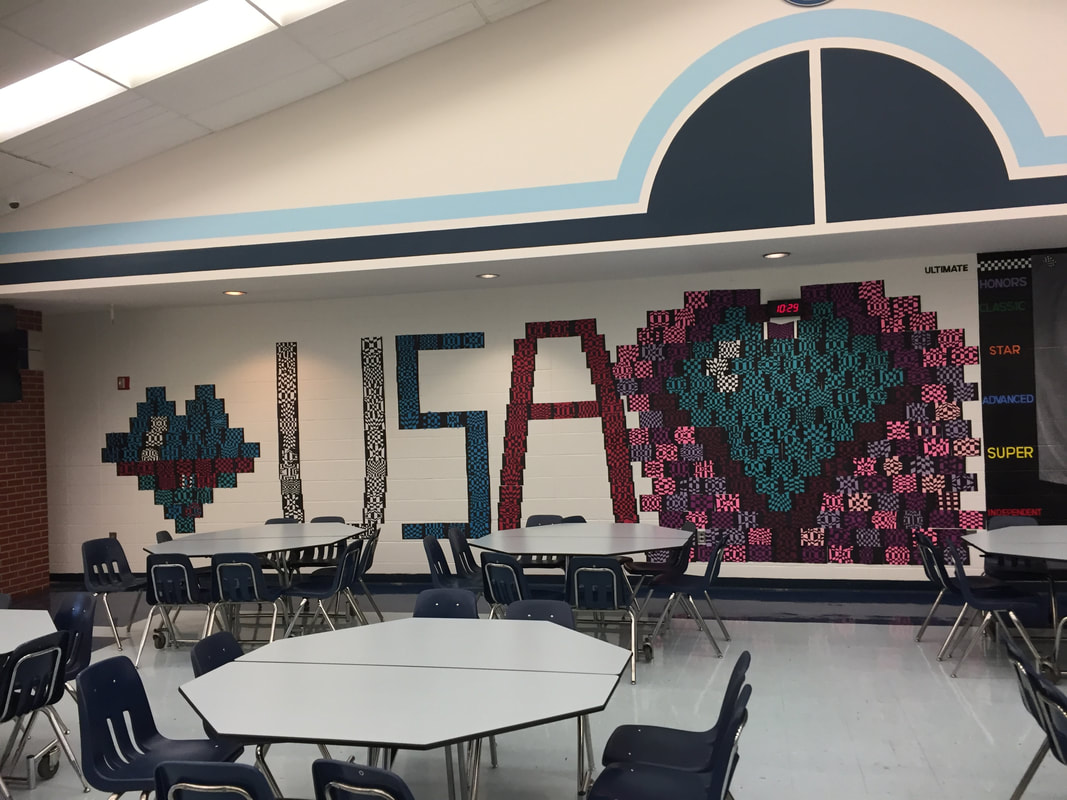
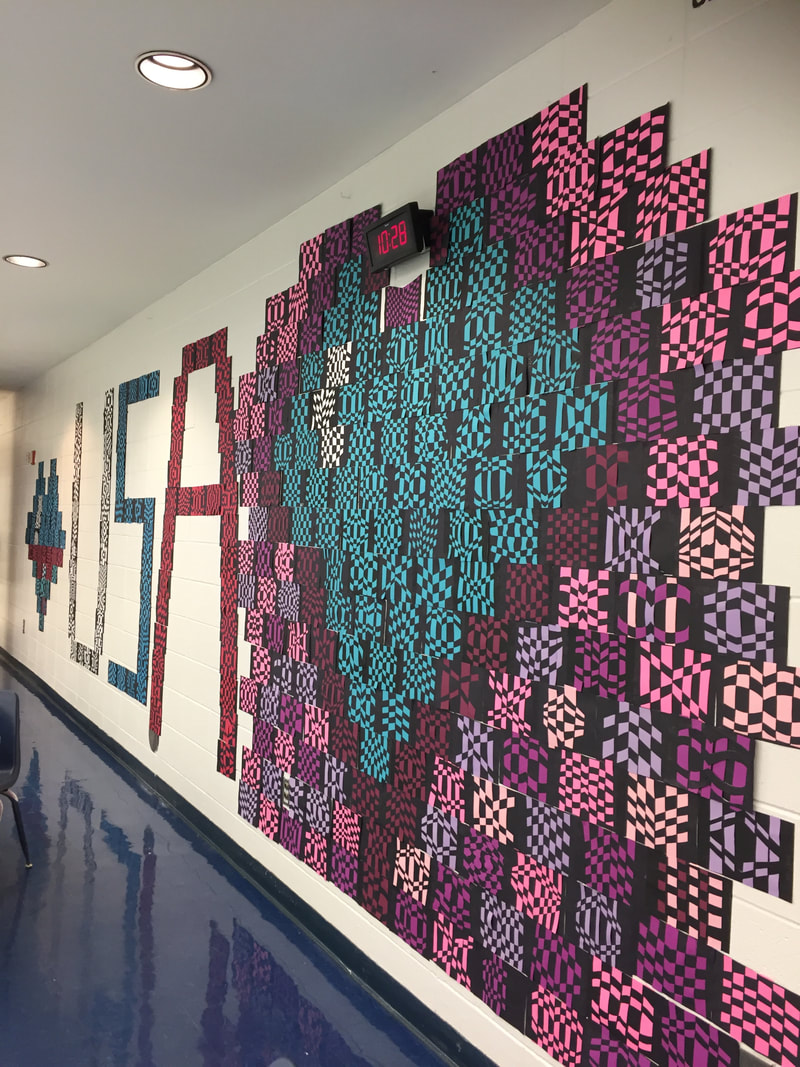
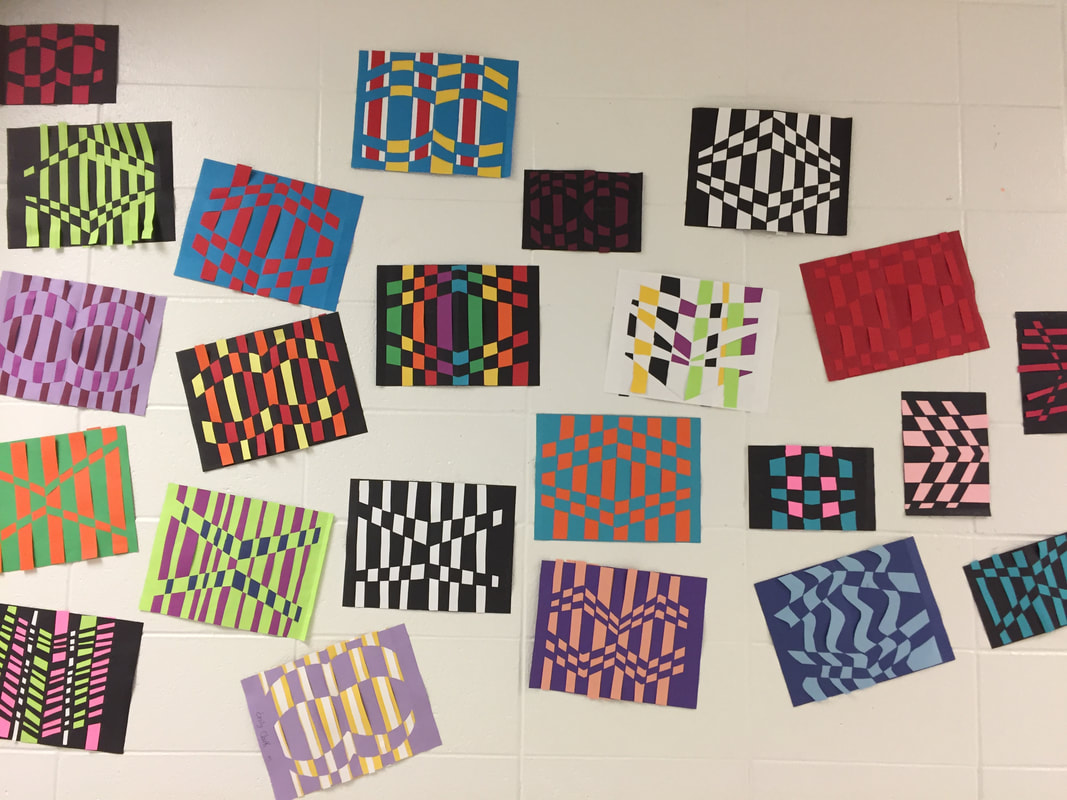
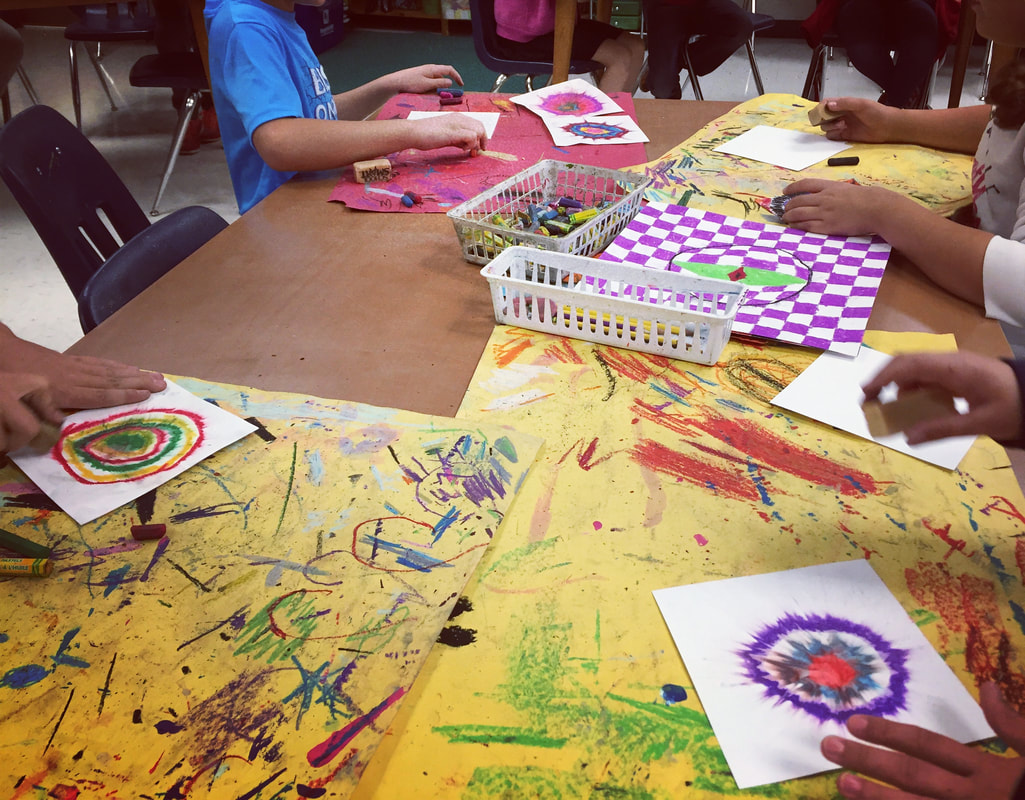
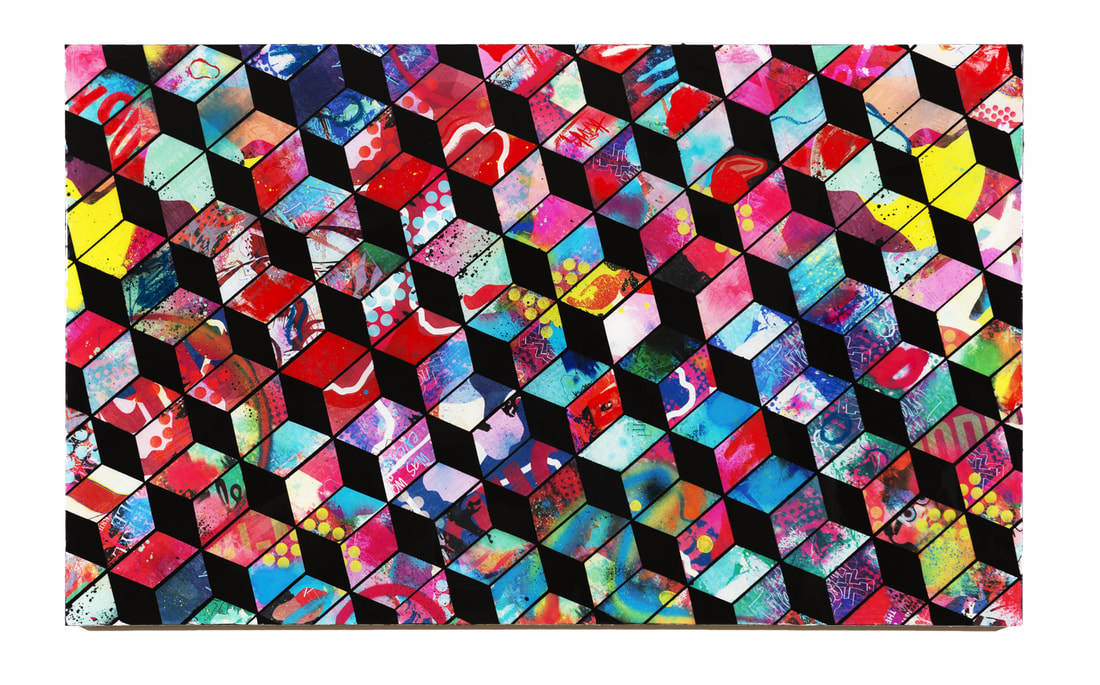
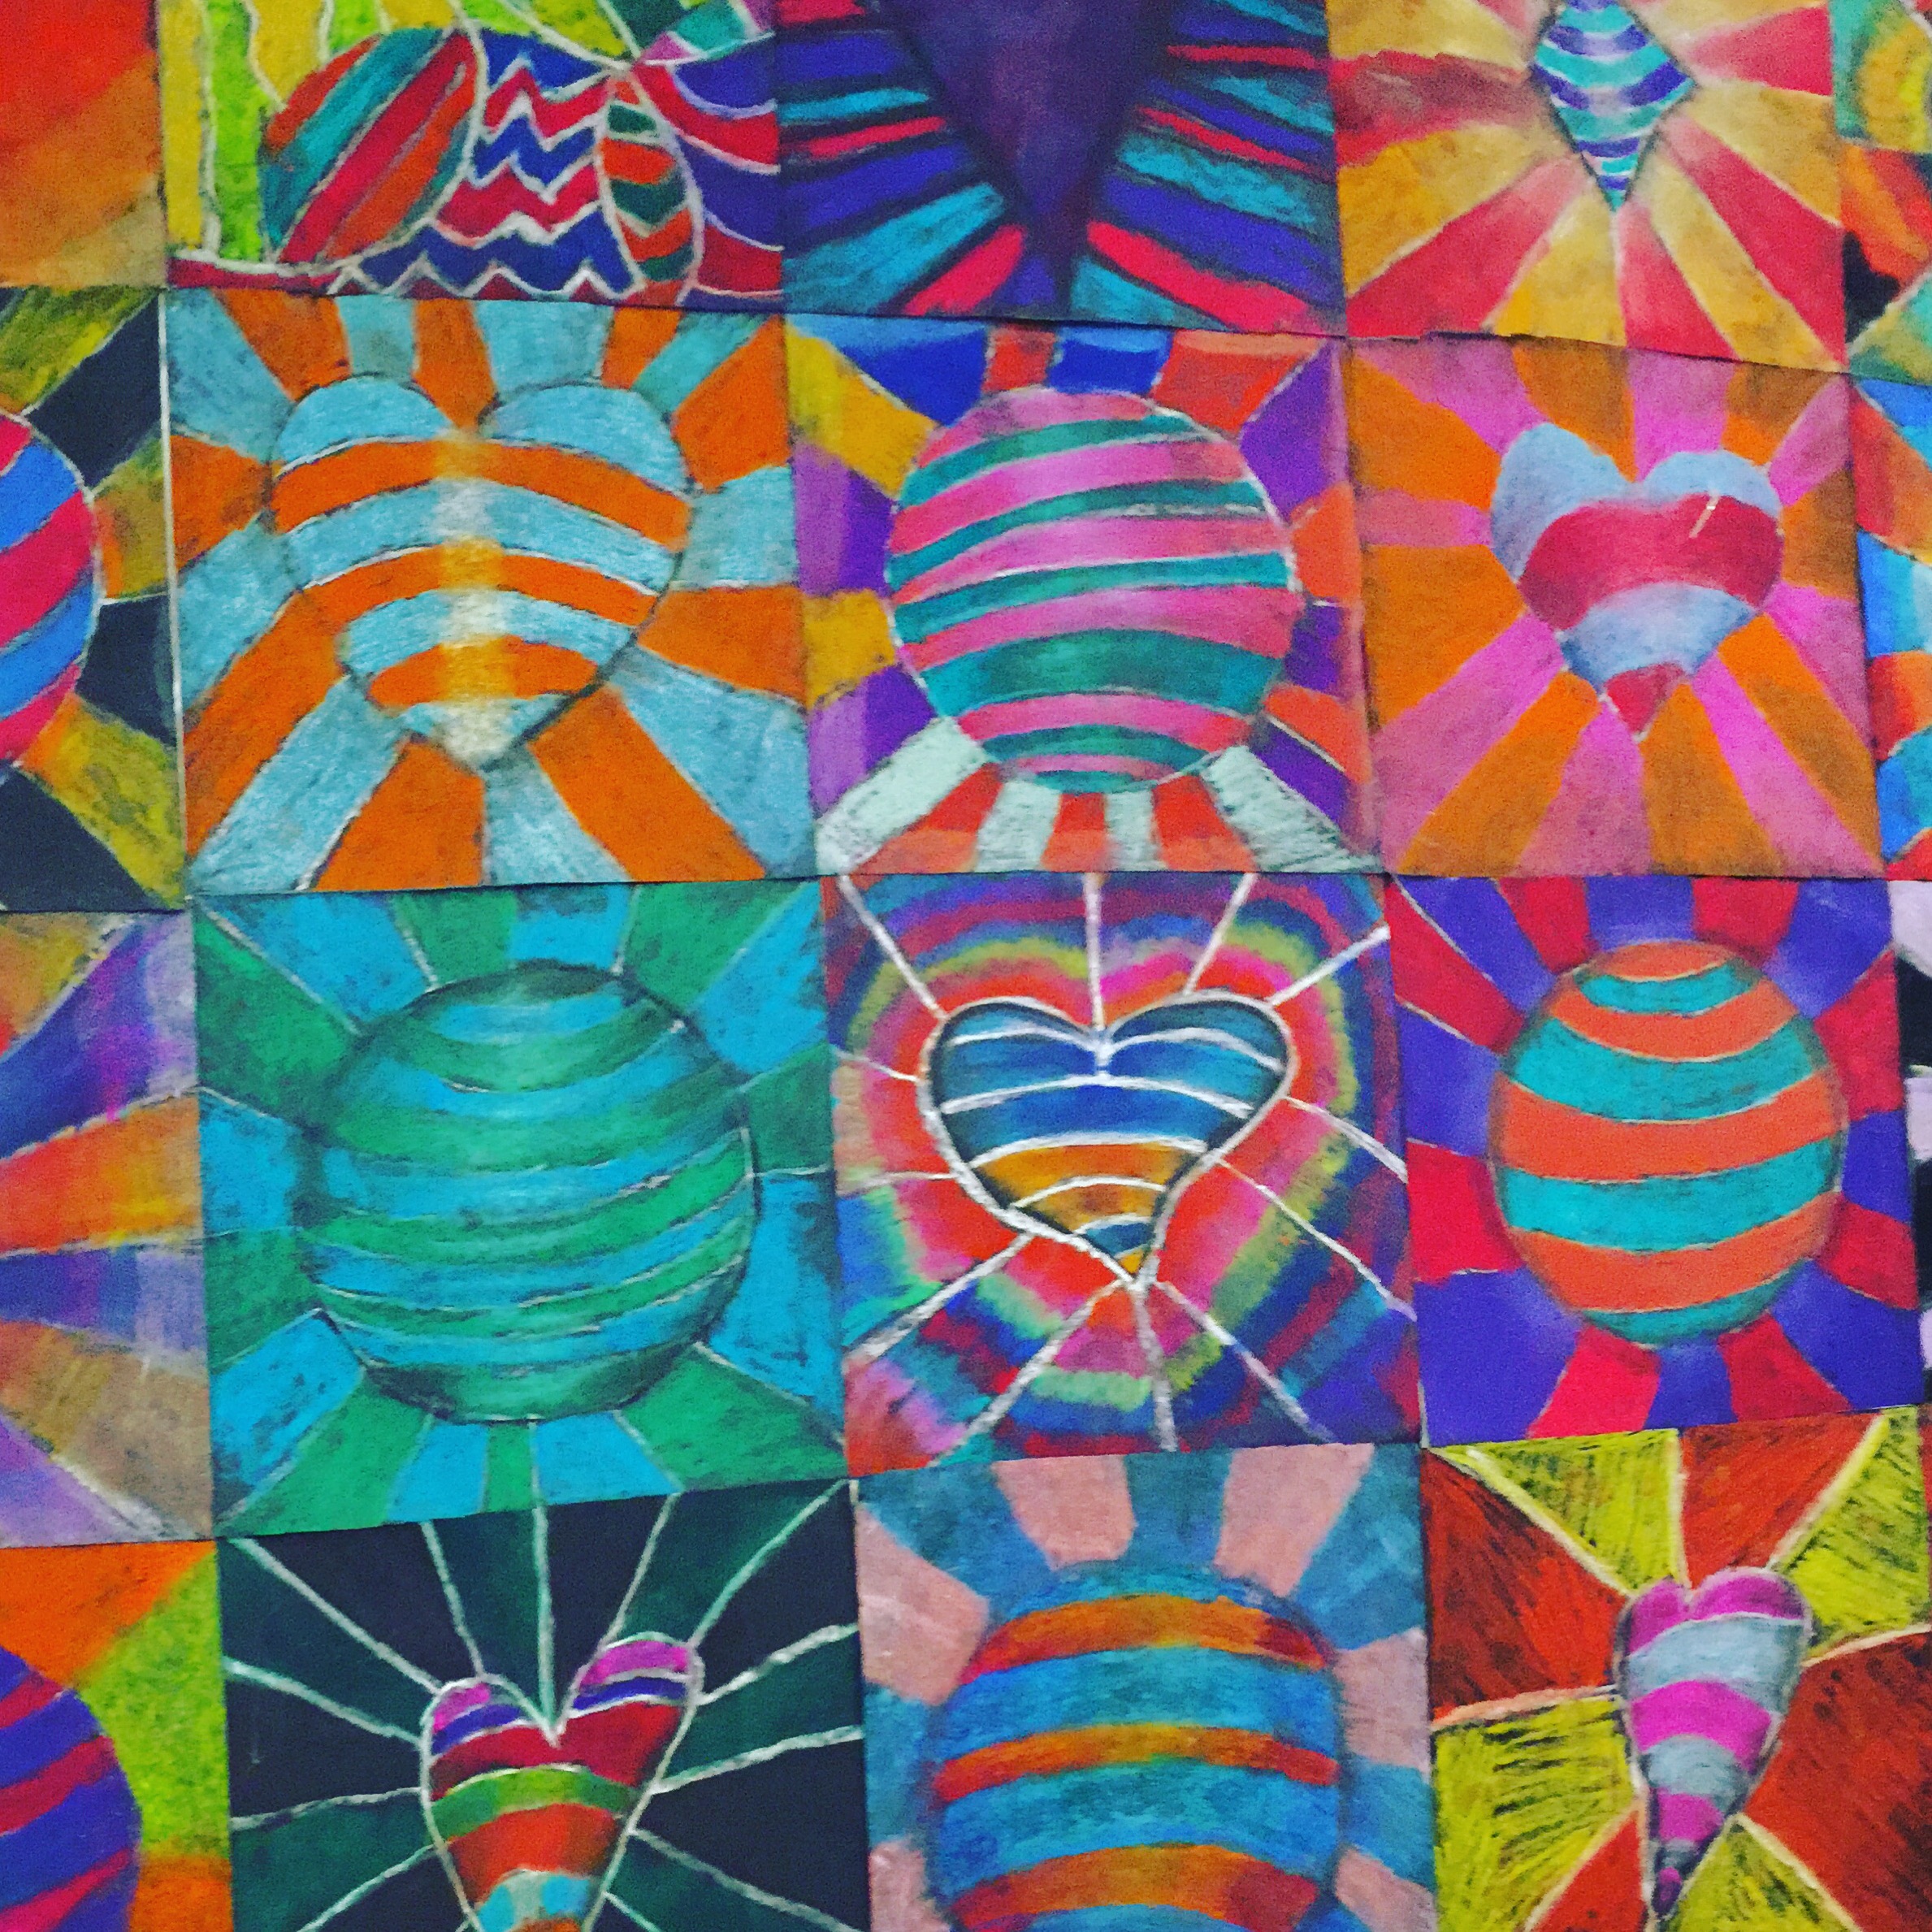
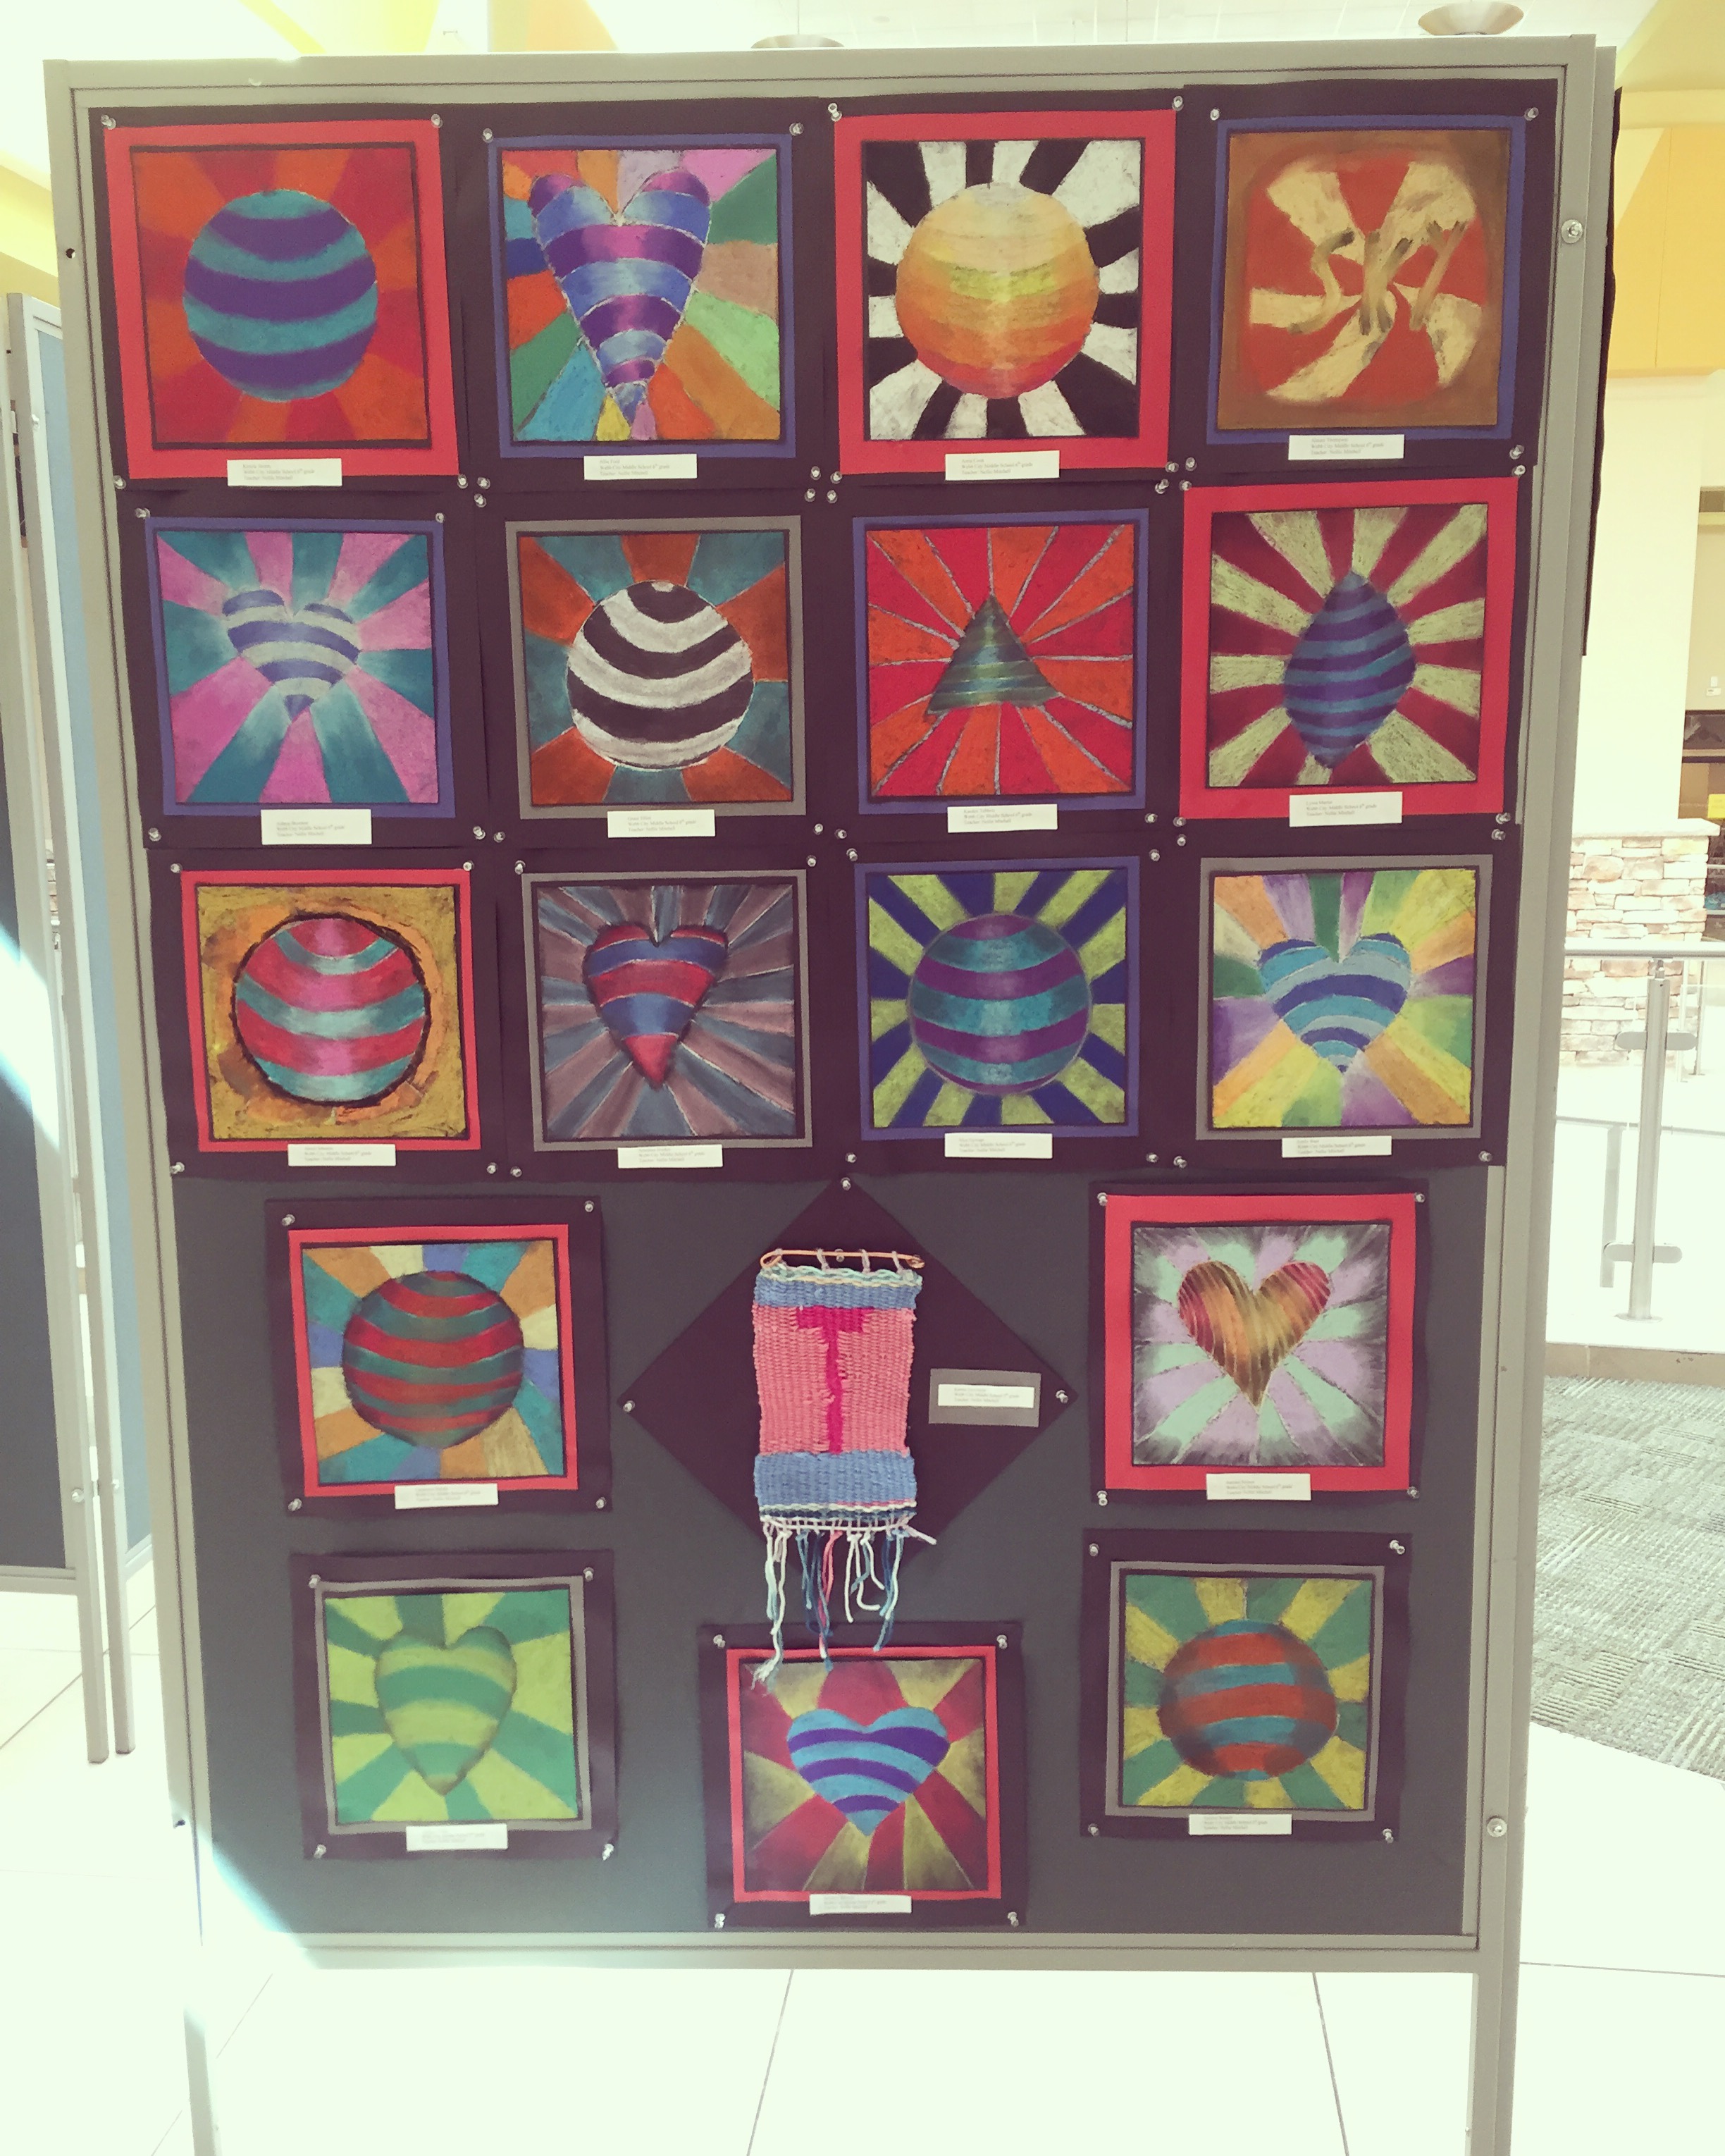
In the lesson plan, she suggest having them do a 'mini' weaving, so I had mine choose between about 6-7 colors for their paper strips, and cut 6X9 black pieces of construction paper for everyone's loom. I knew that I wanted to create a collaborative mural with all of the mini weavings I just wasn't sure what it would be until I laid them all out and sorted by color. I had mostly red, white and blue so for the Winter Olympics, I knew I wanted to do something patriotic. I also added a couple of '8-bit' hearts on the sides and then I rand out of mini weavings. I decided to call it good and I am happy with the results of the mural.

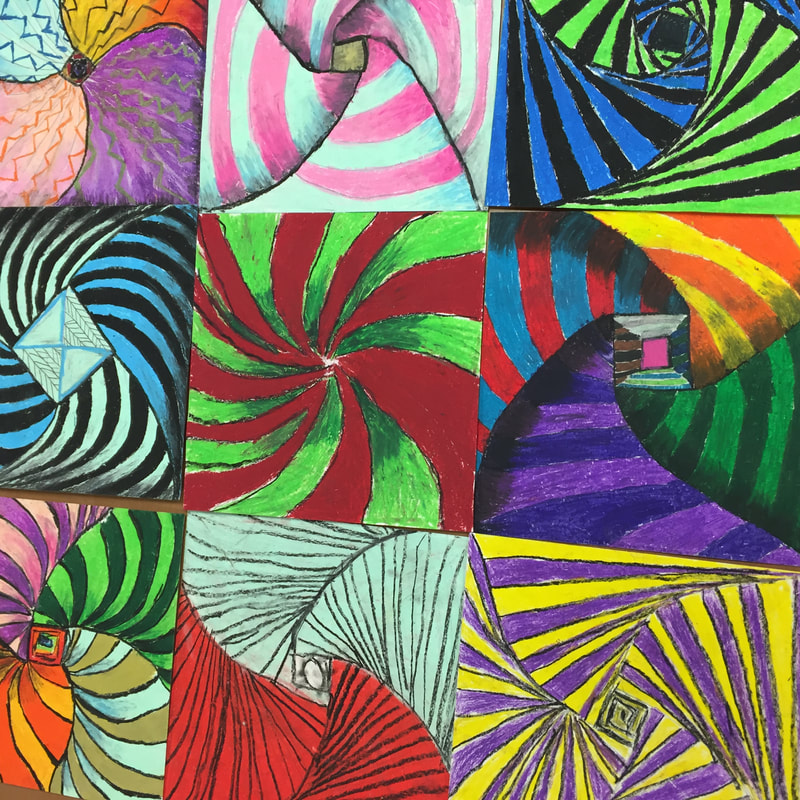
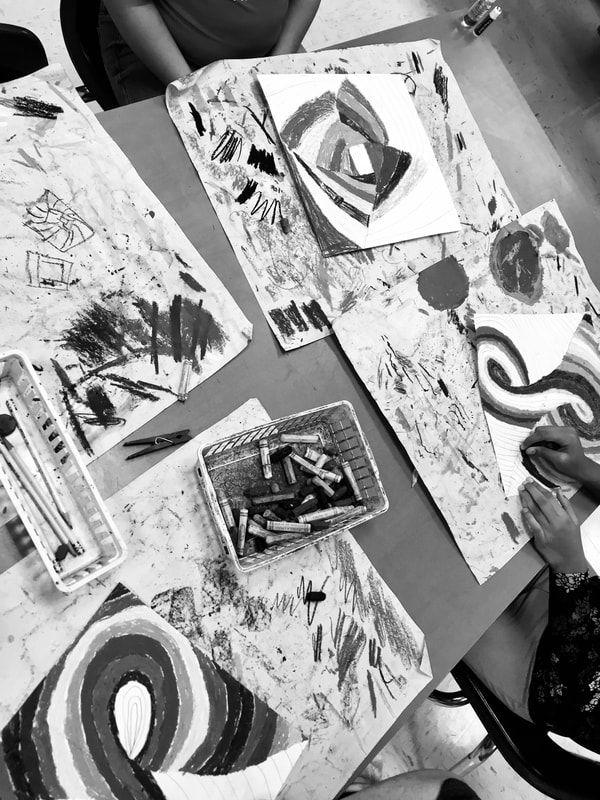
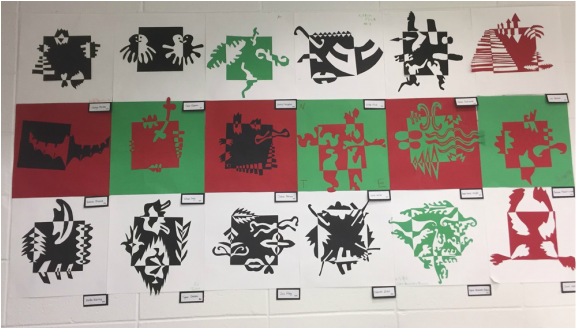
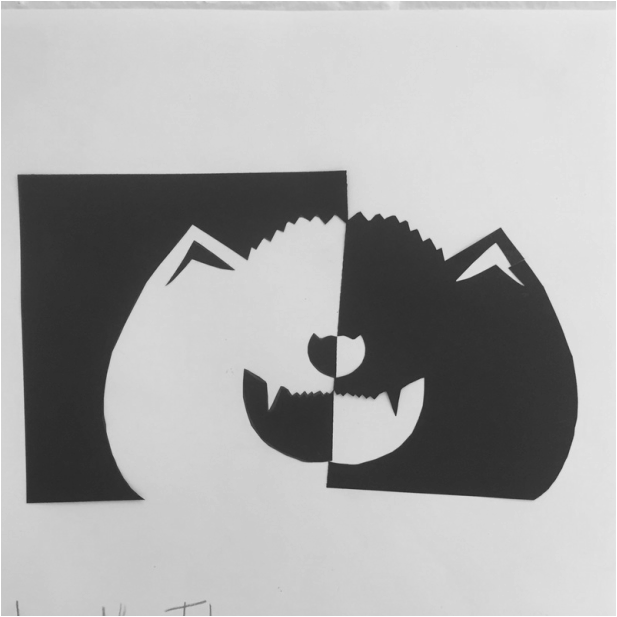
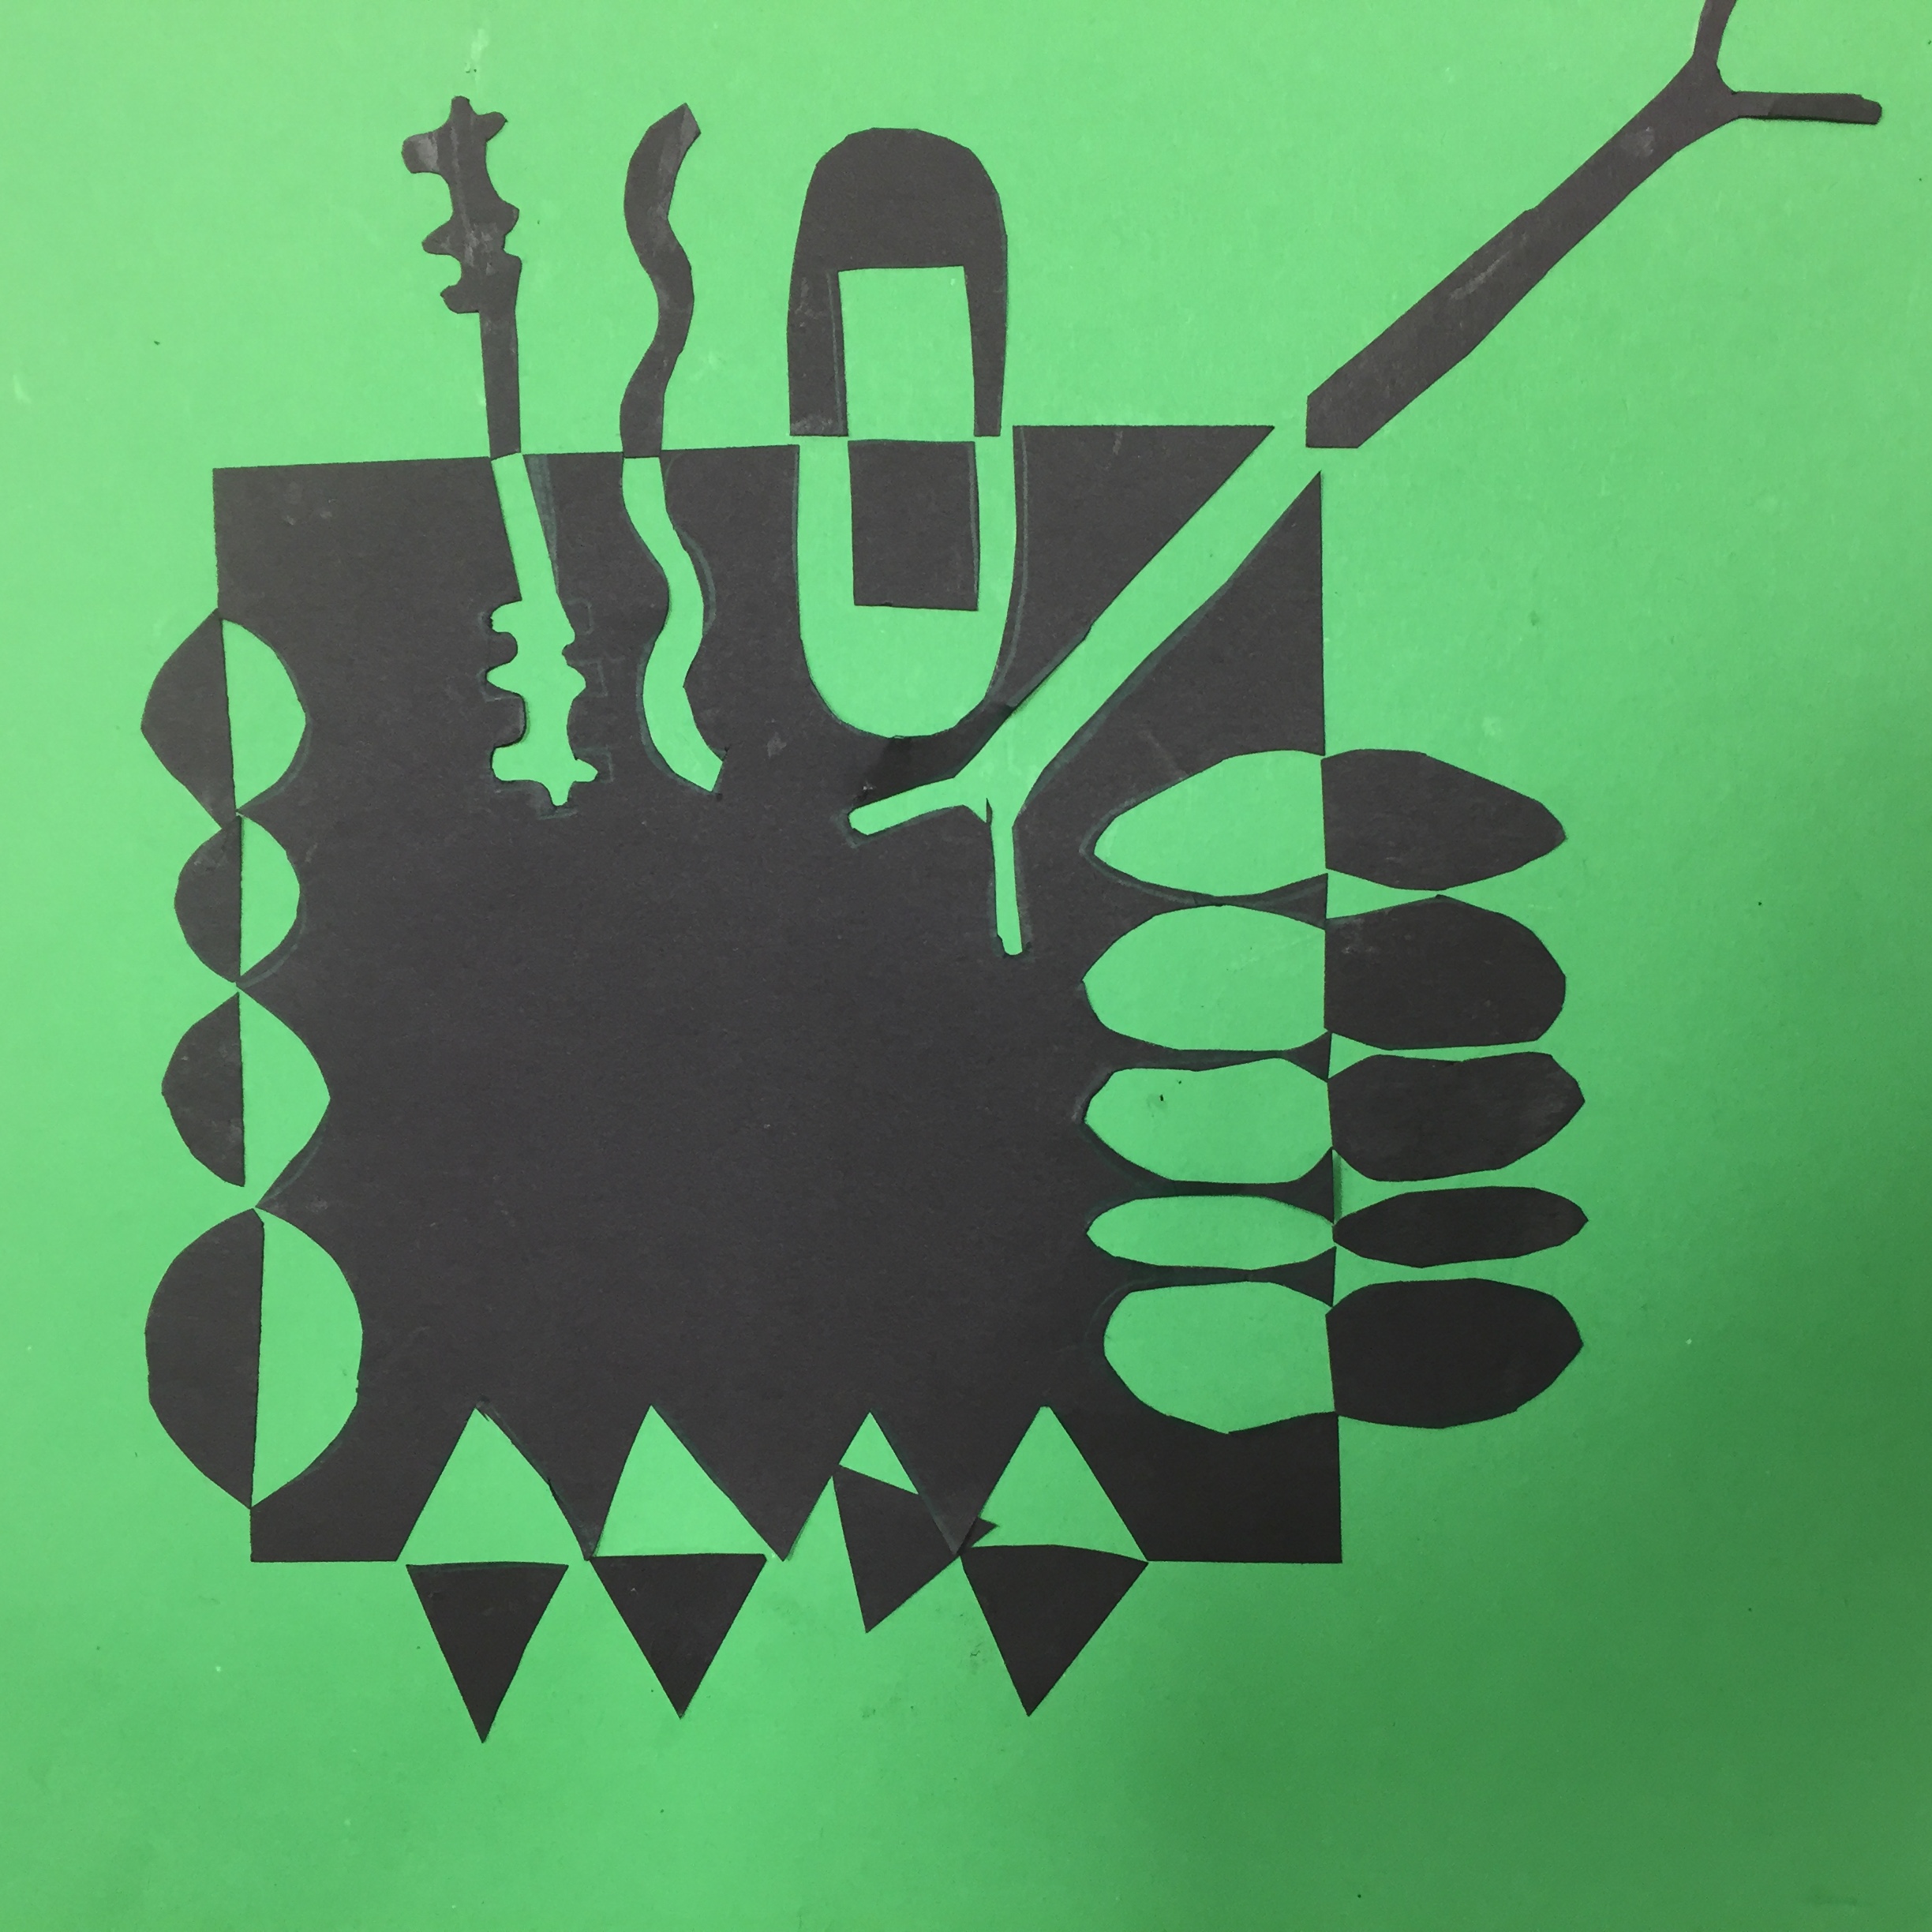
​The black and white mini weavings look the best from far away. 
Picture
Picture
Picture
Picture
Picture
Picture
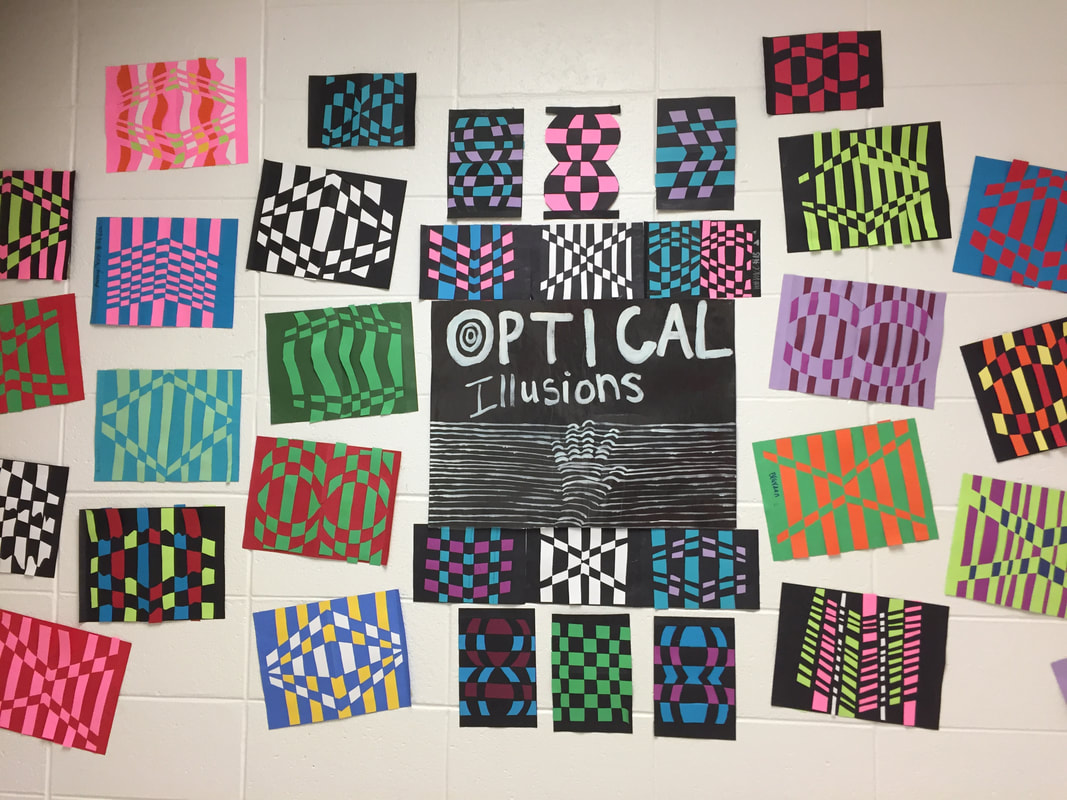
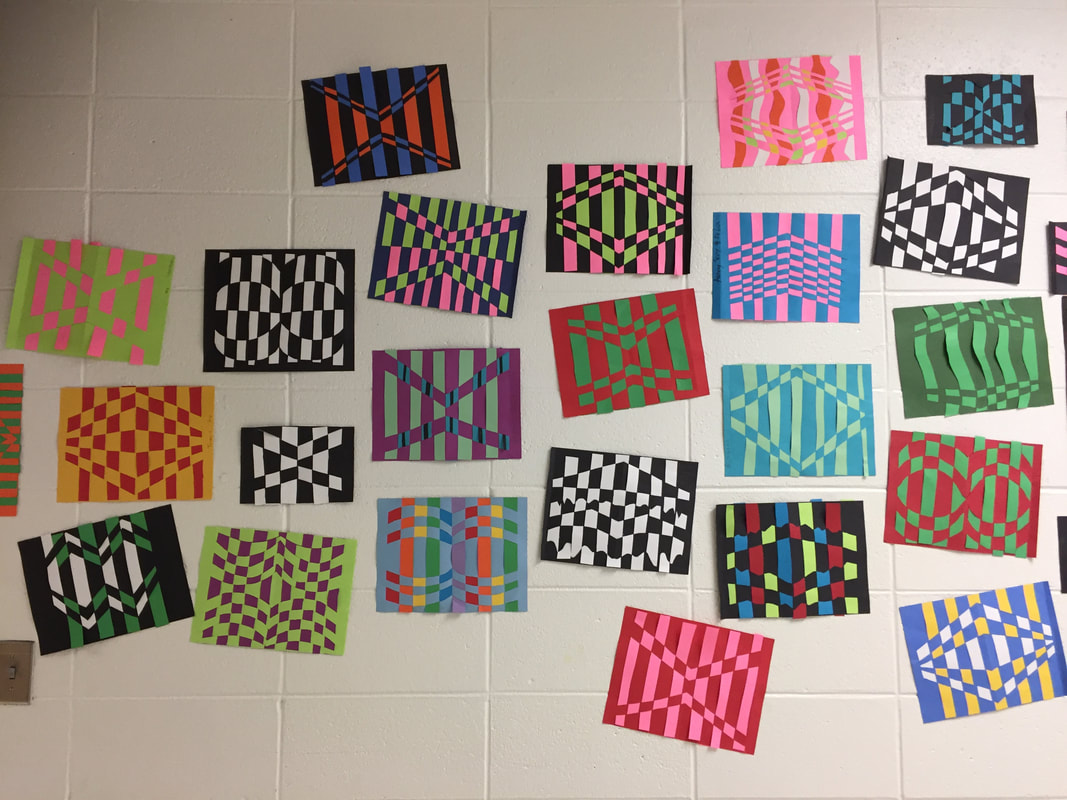
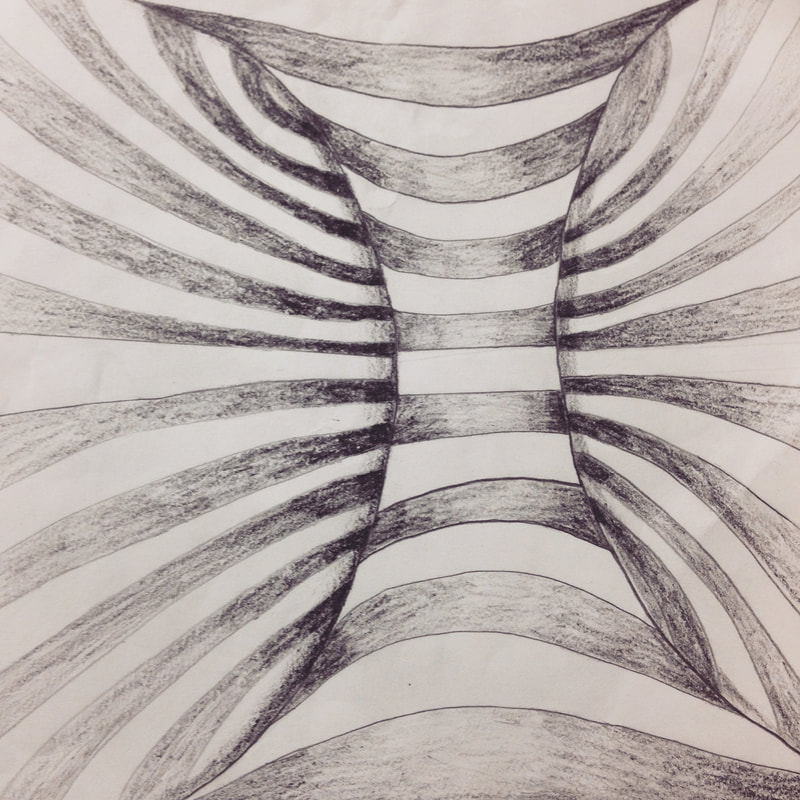
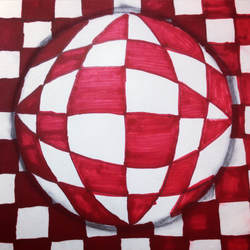
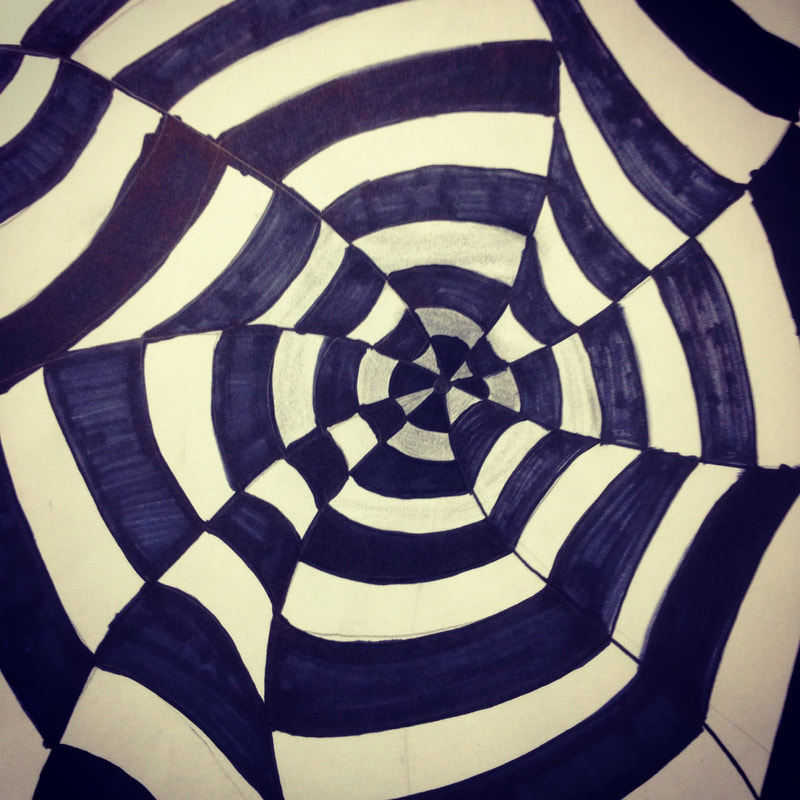
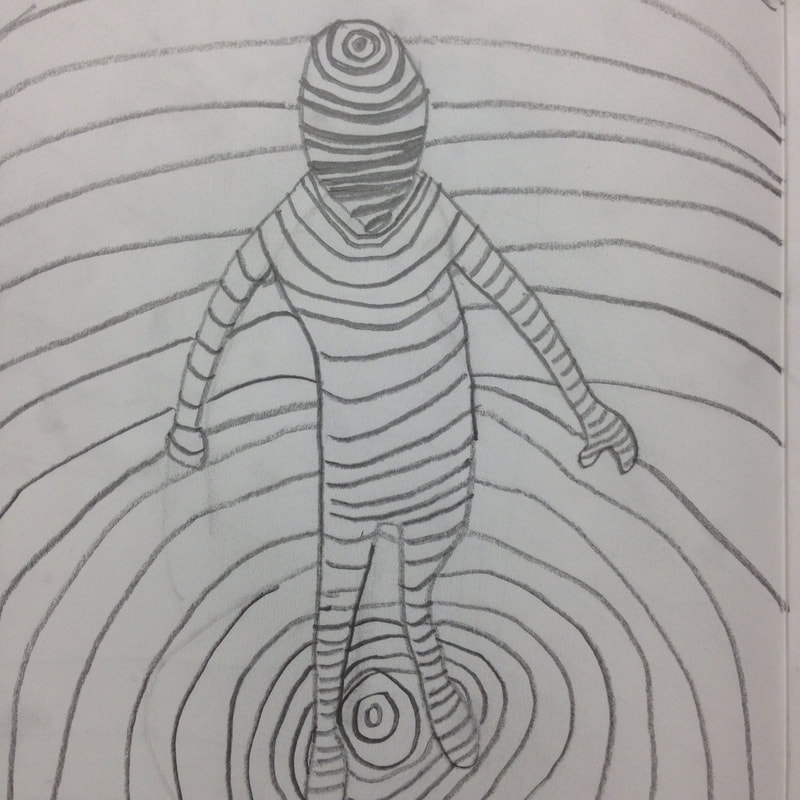
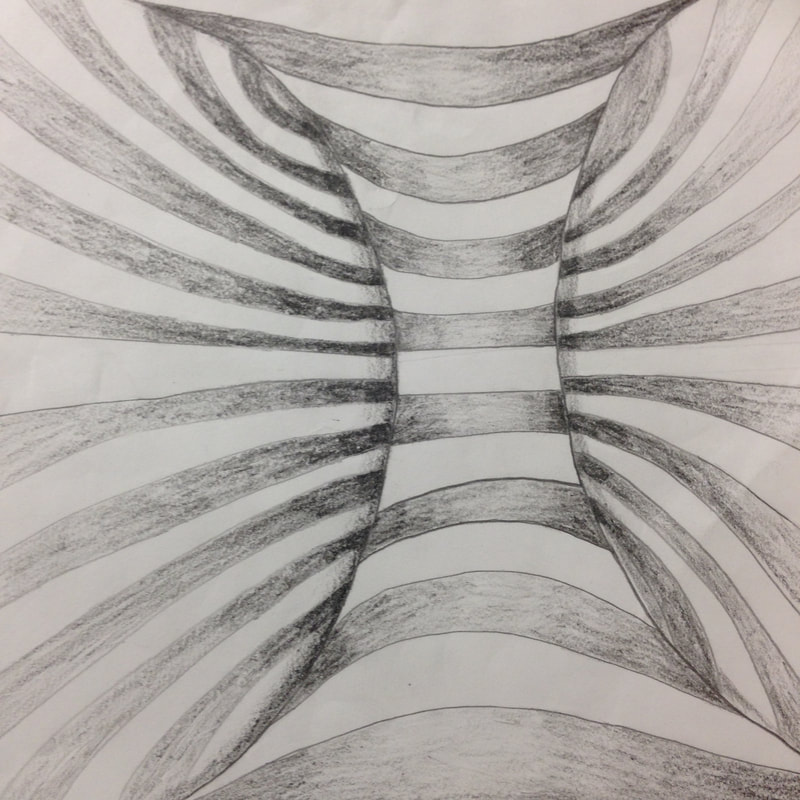
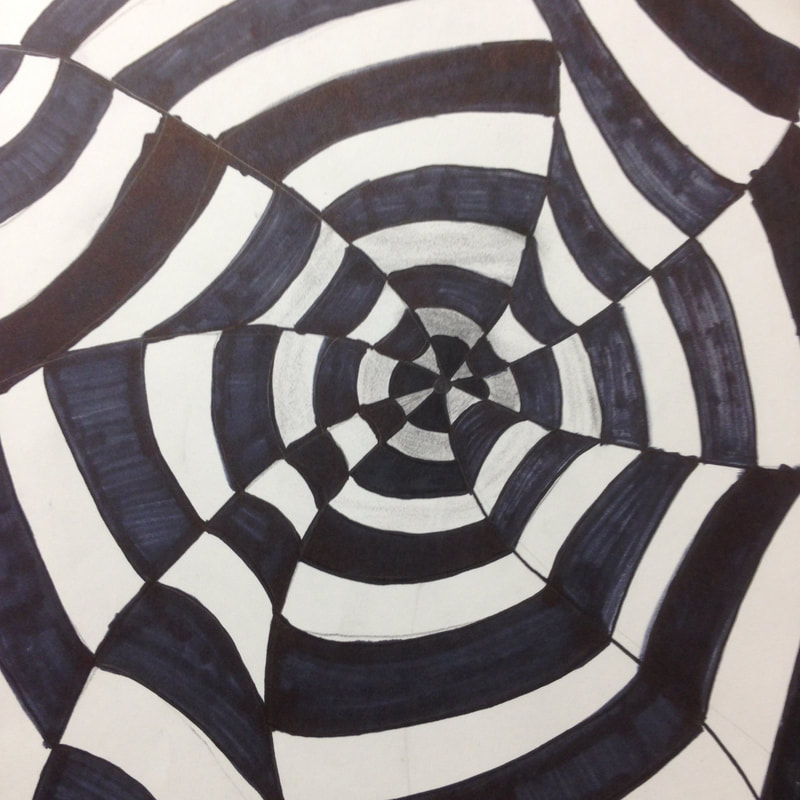
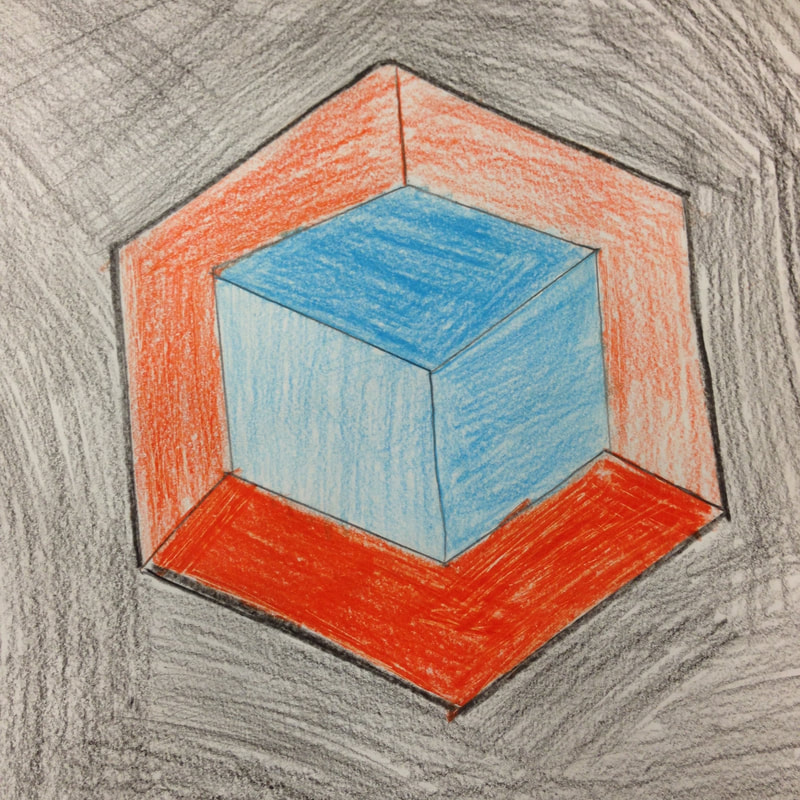
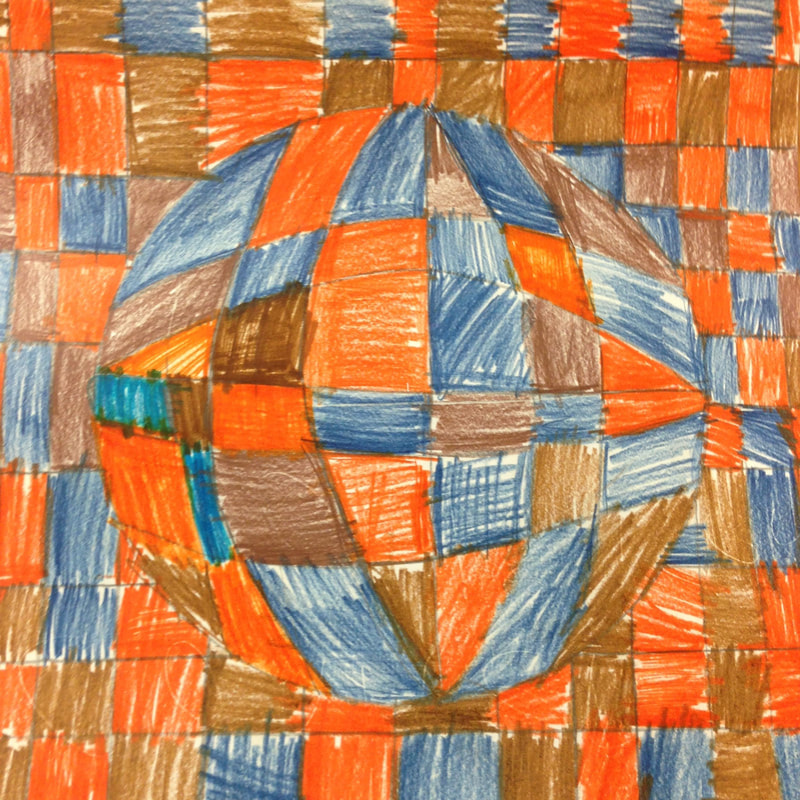
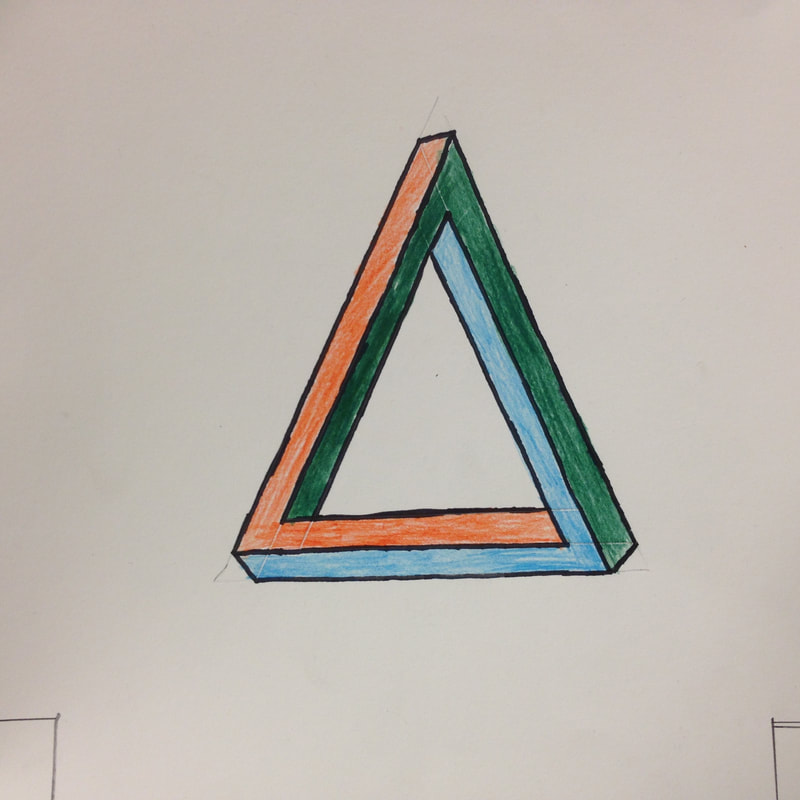
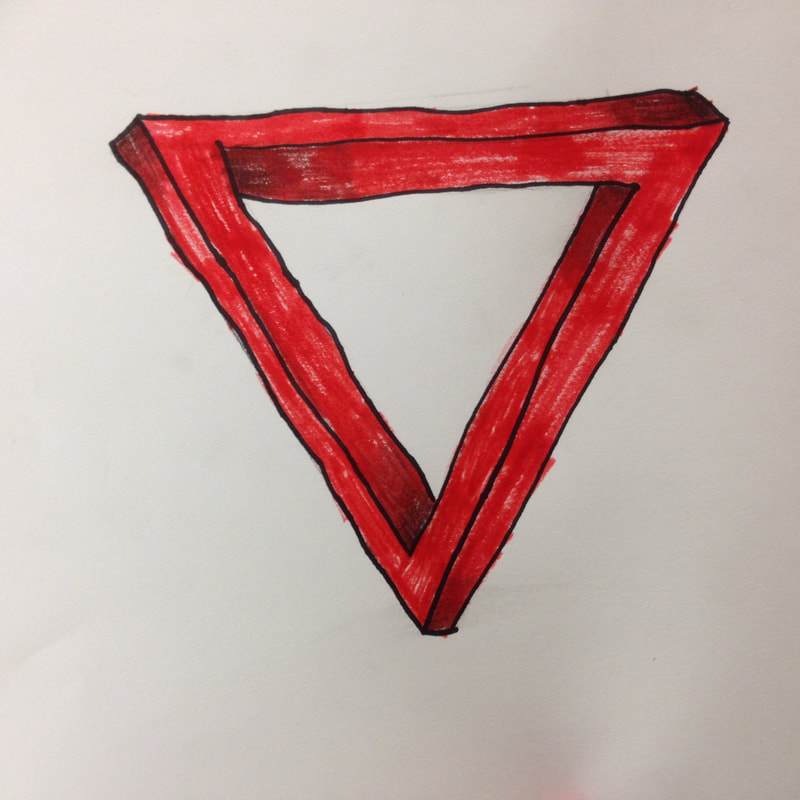
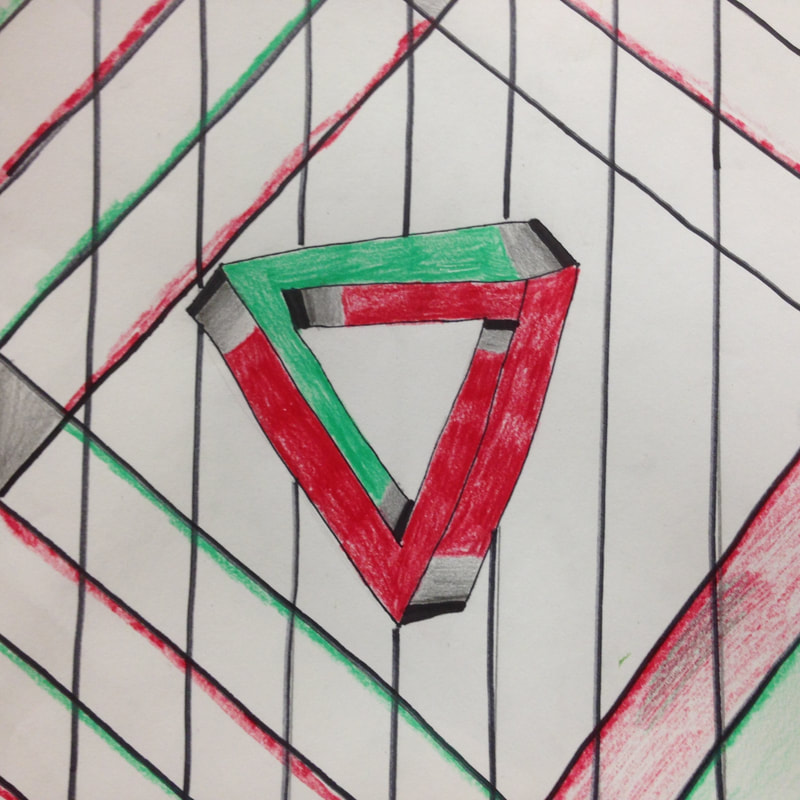
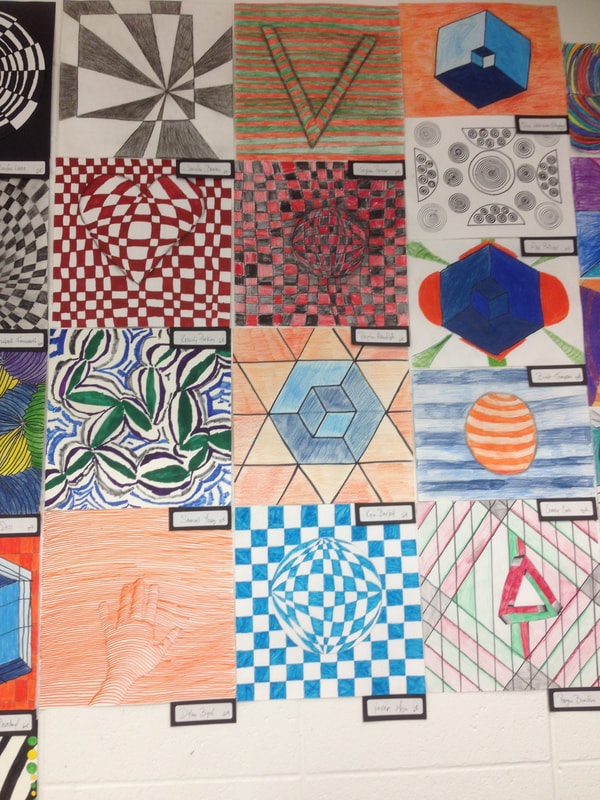
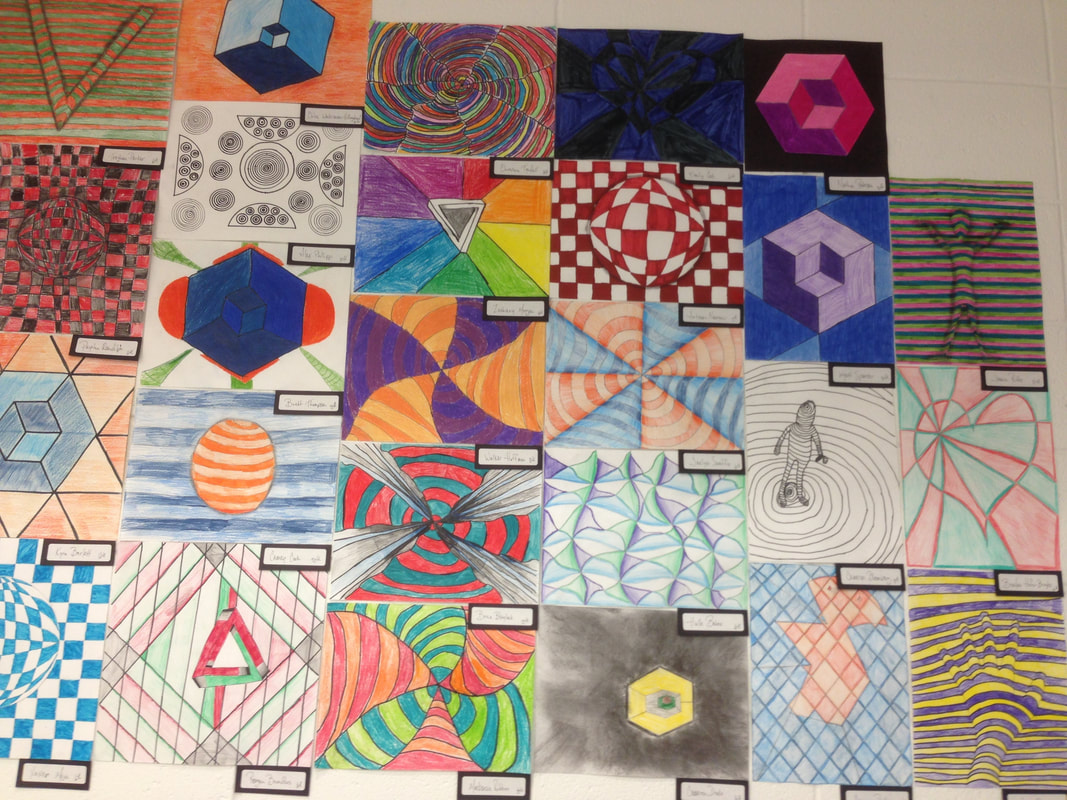
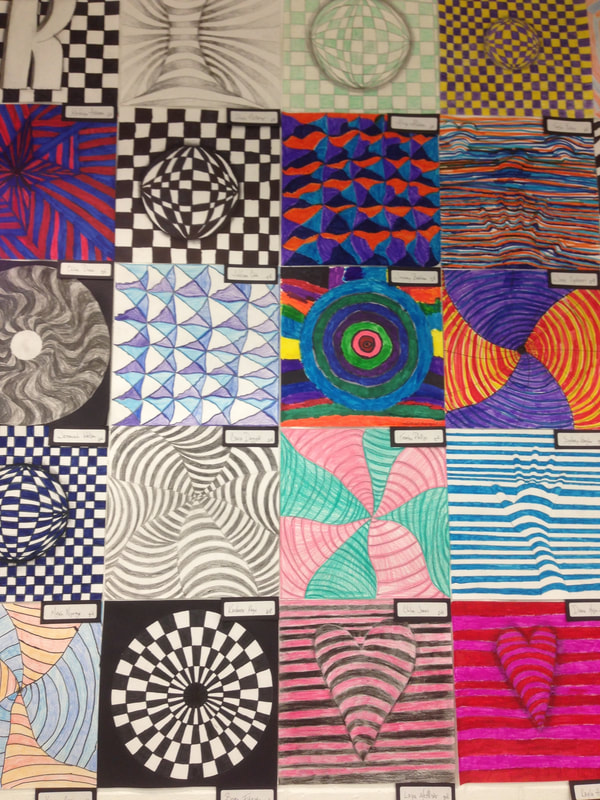
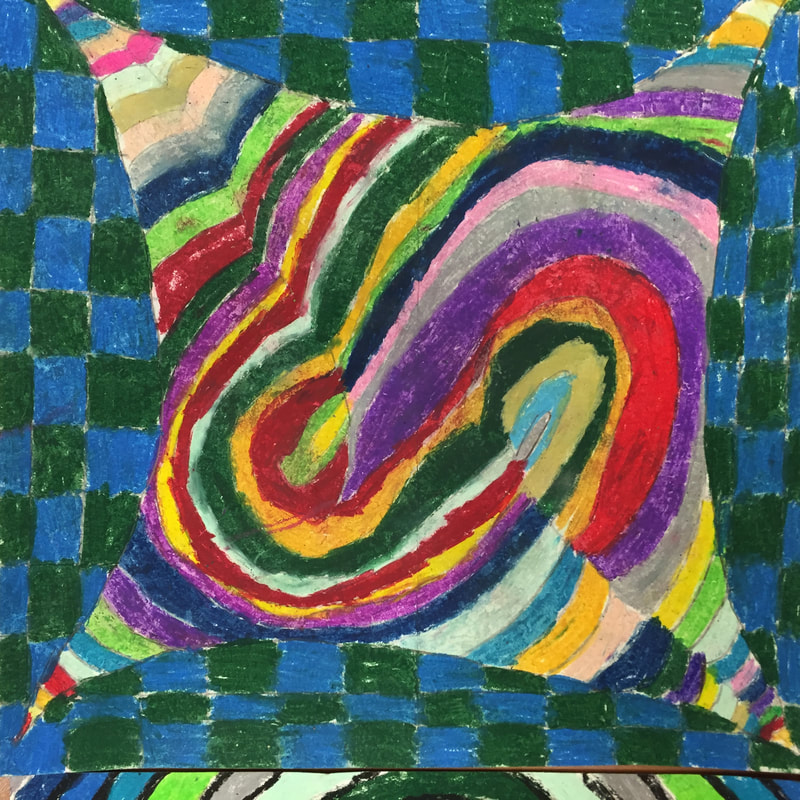
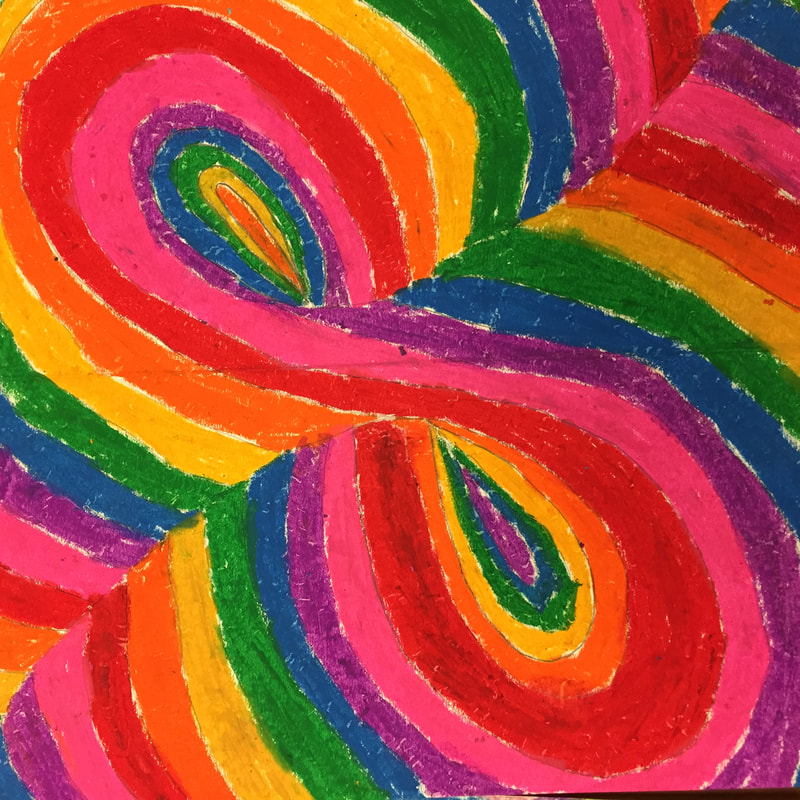
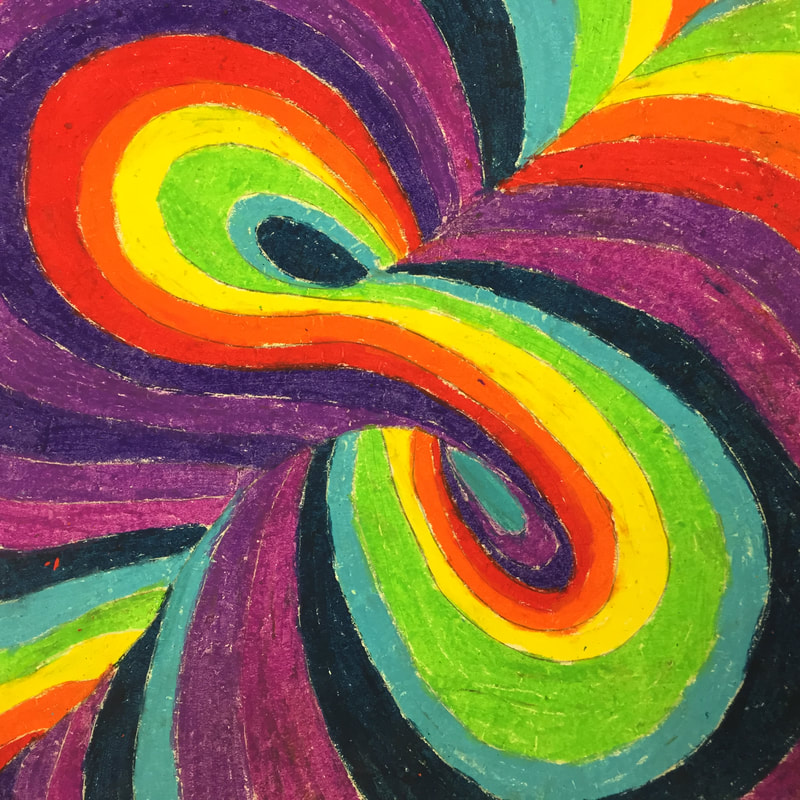
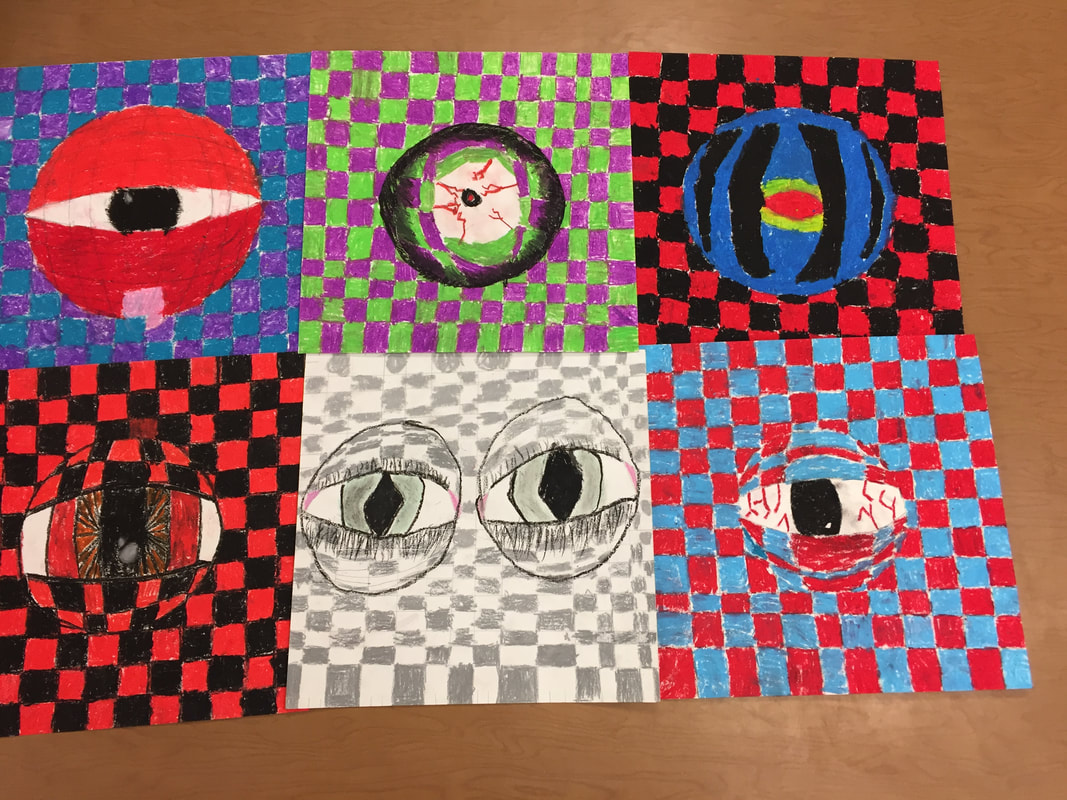
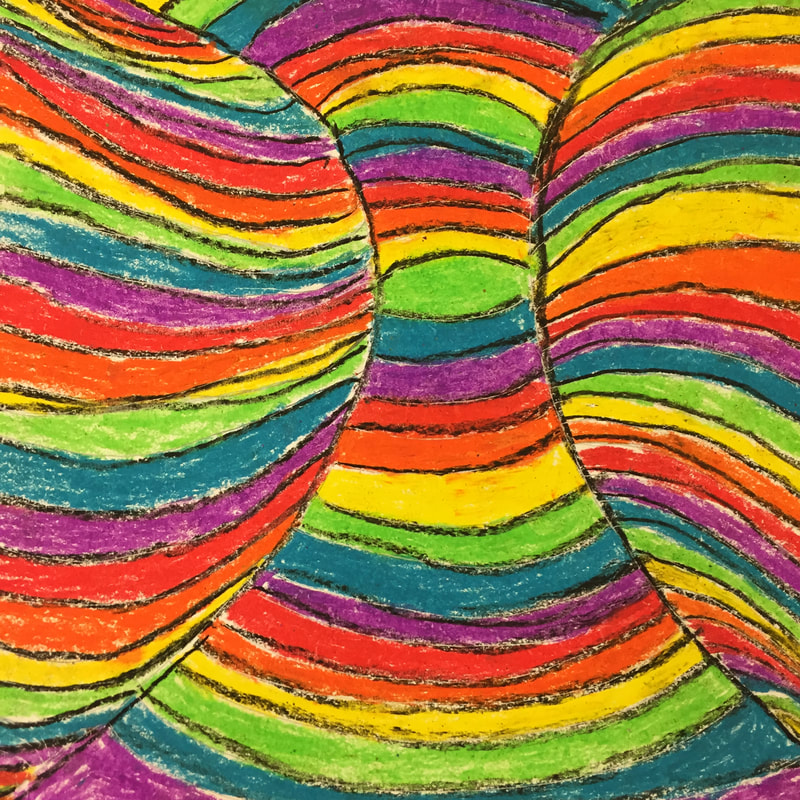
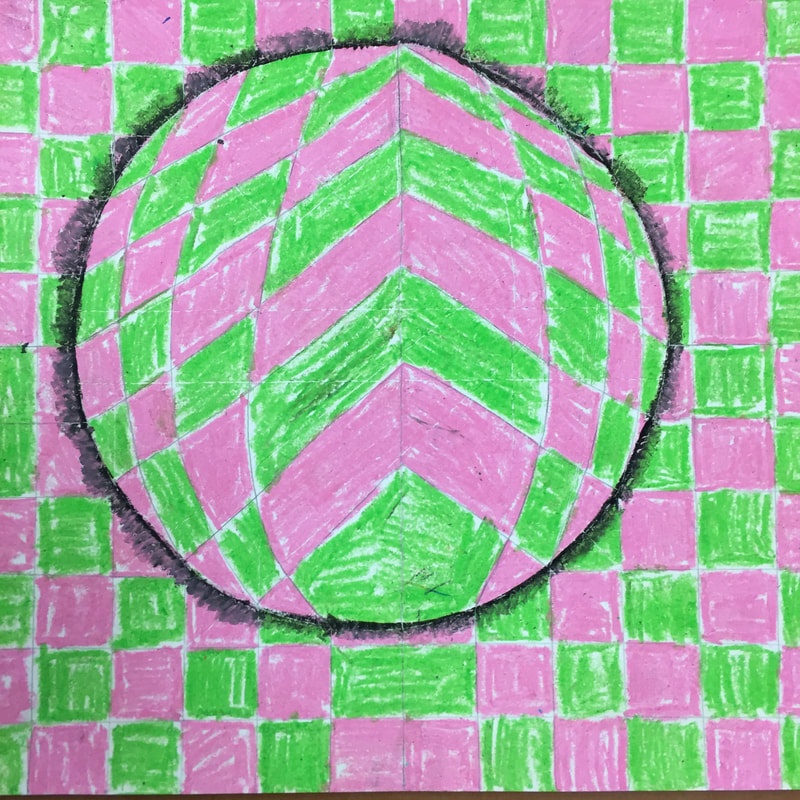
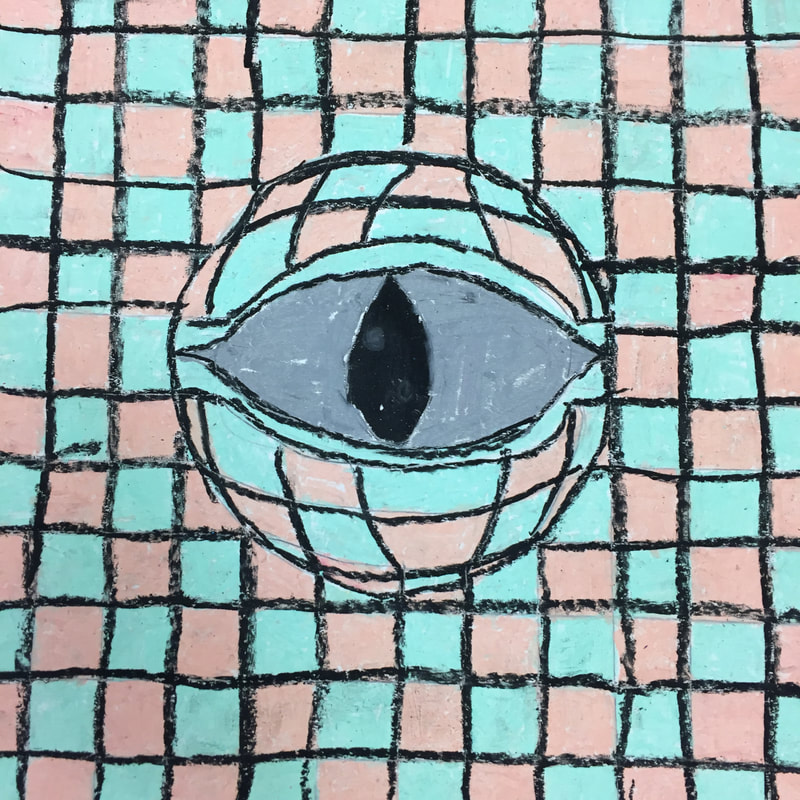
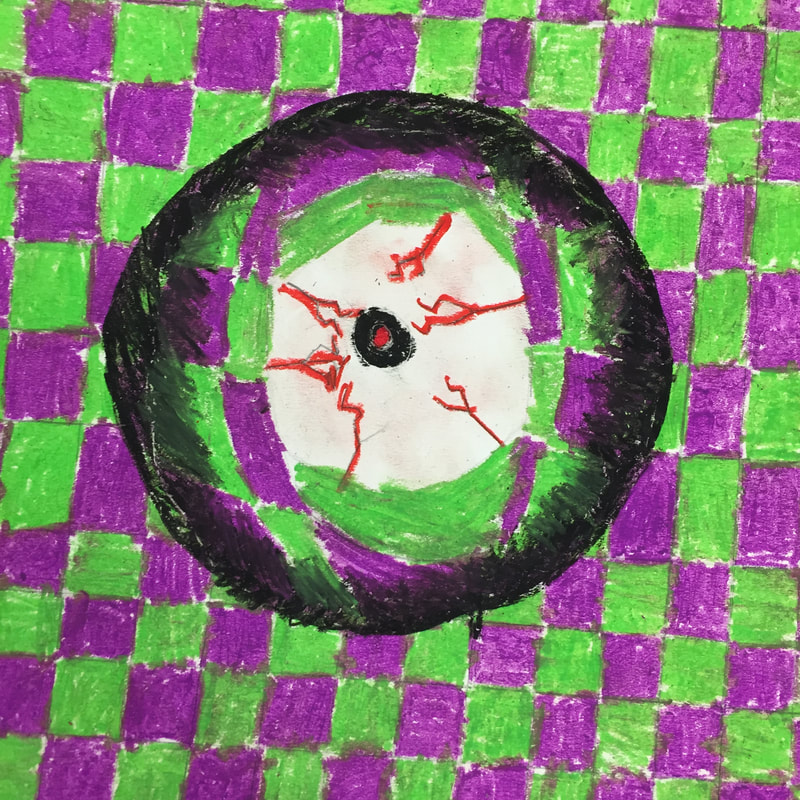
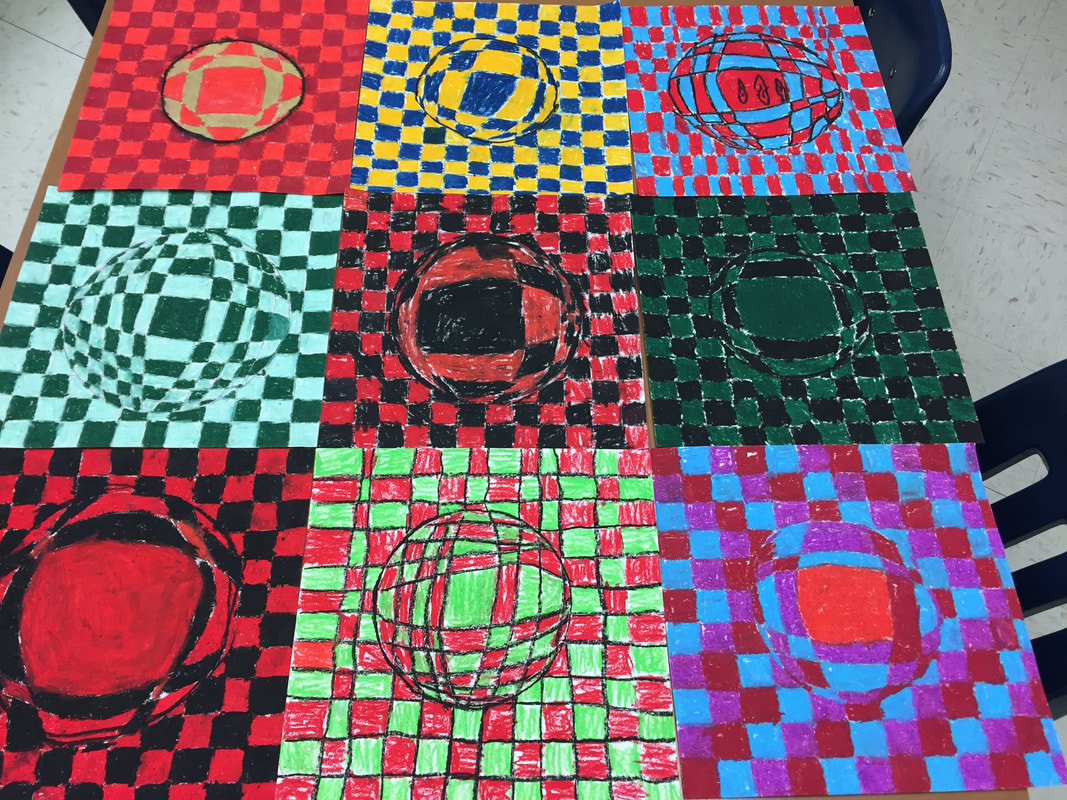
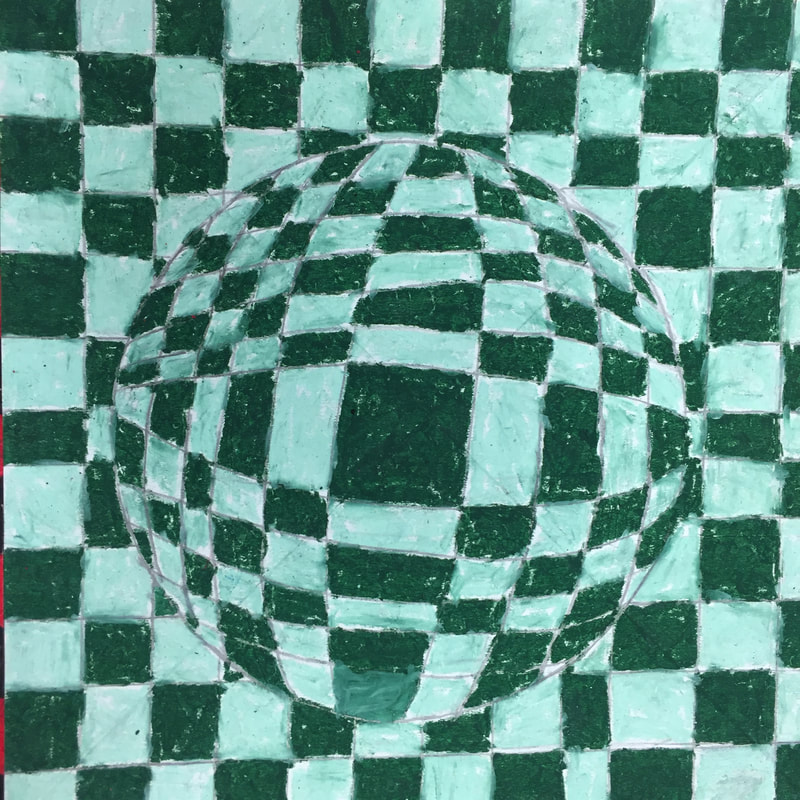
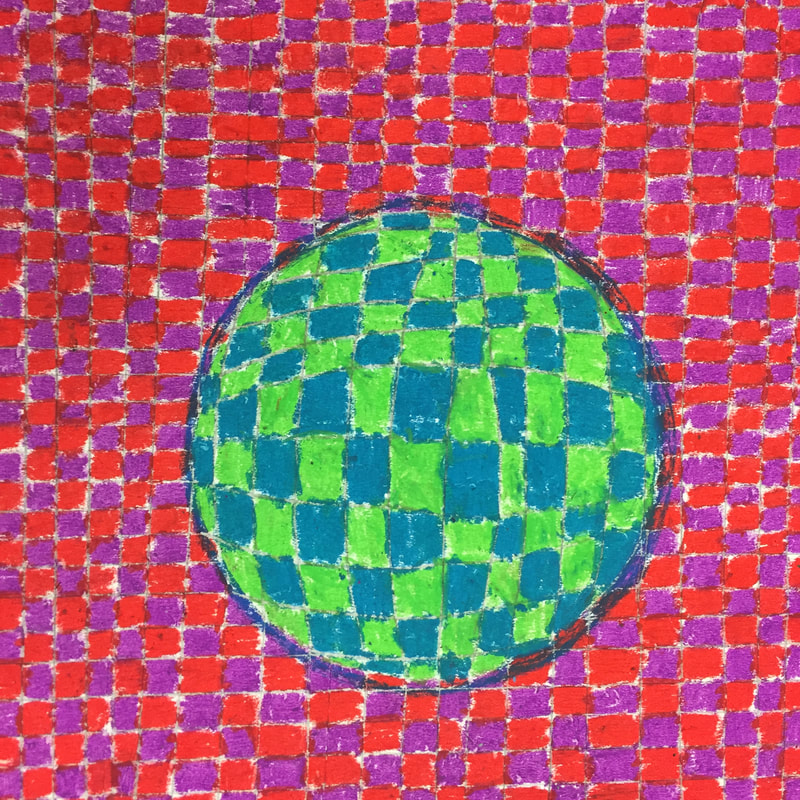
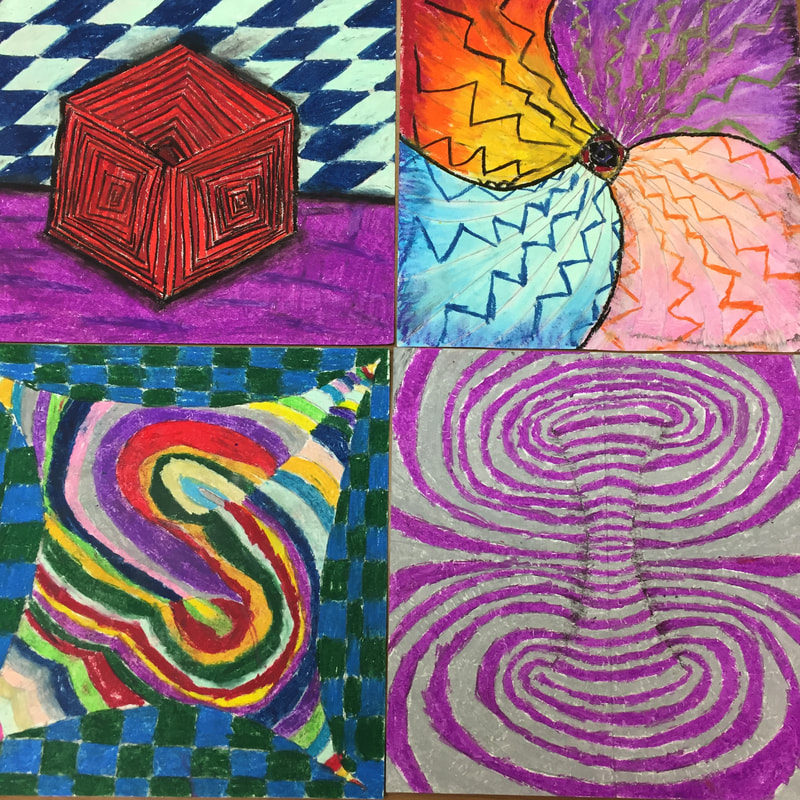
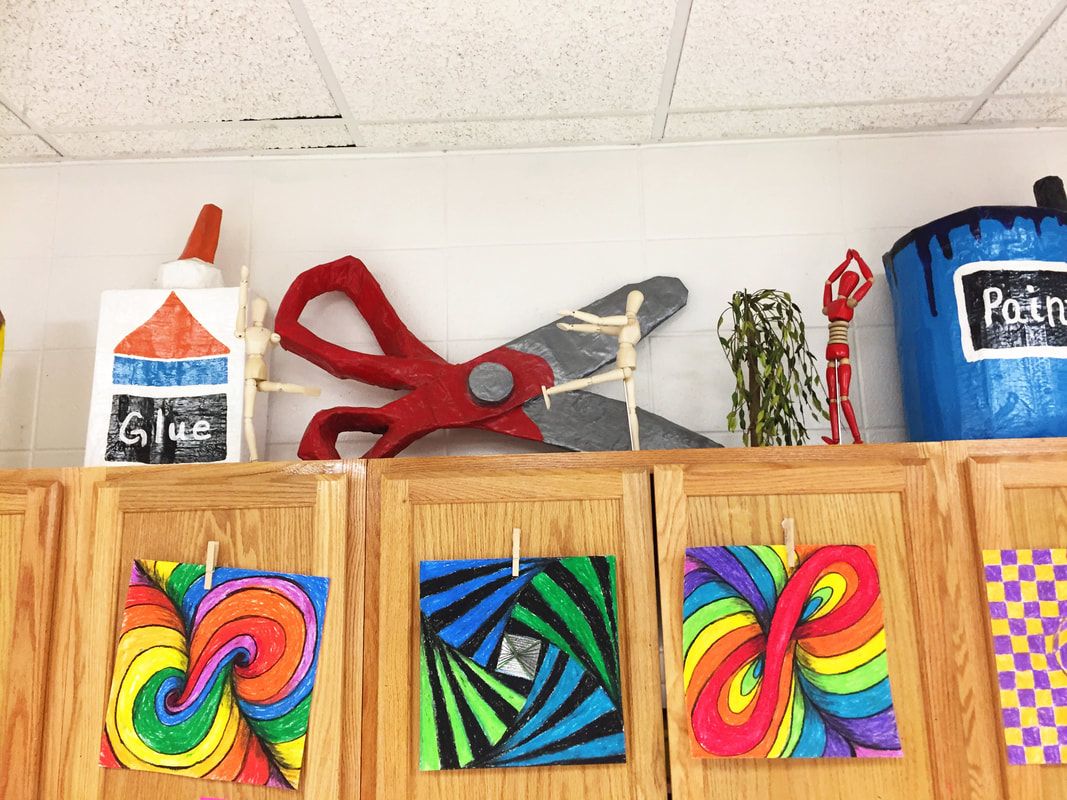
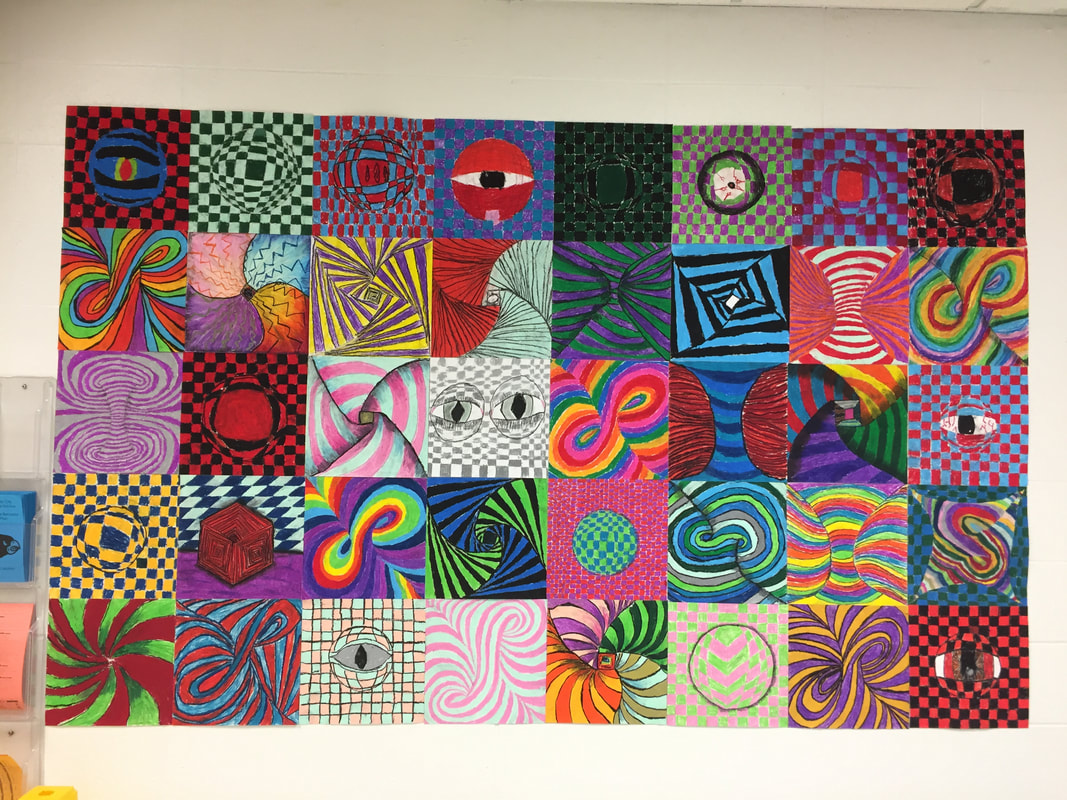
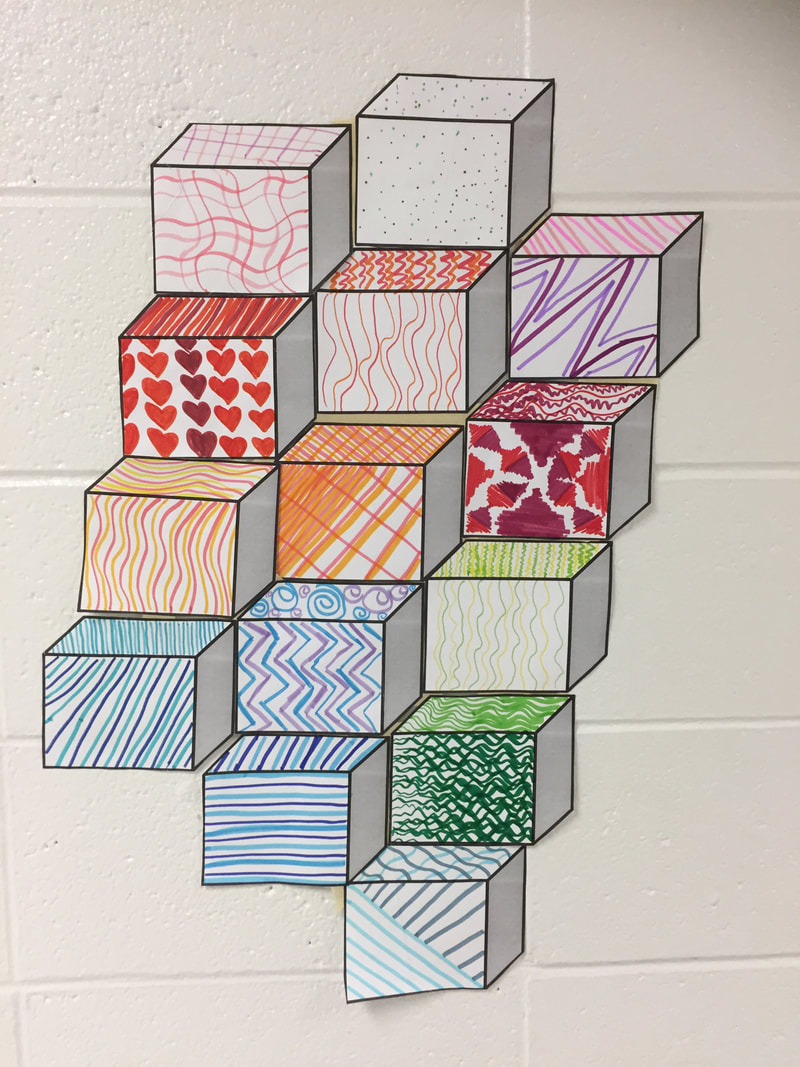
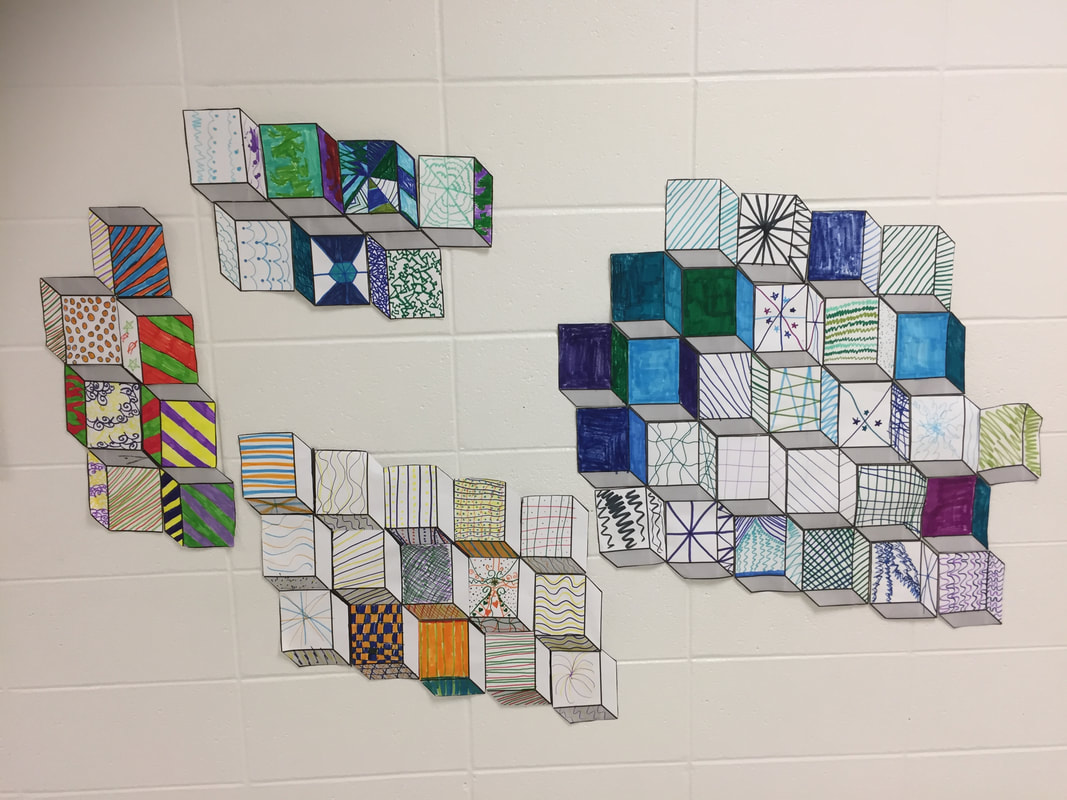
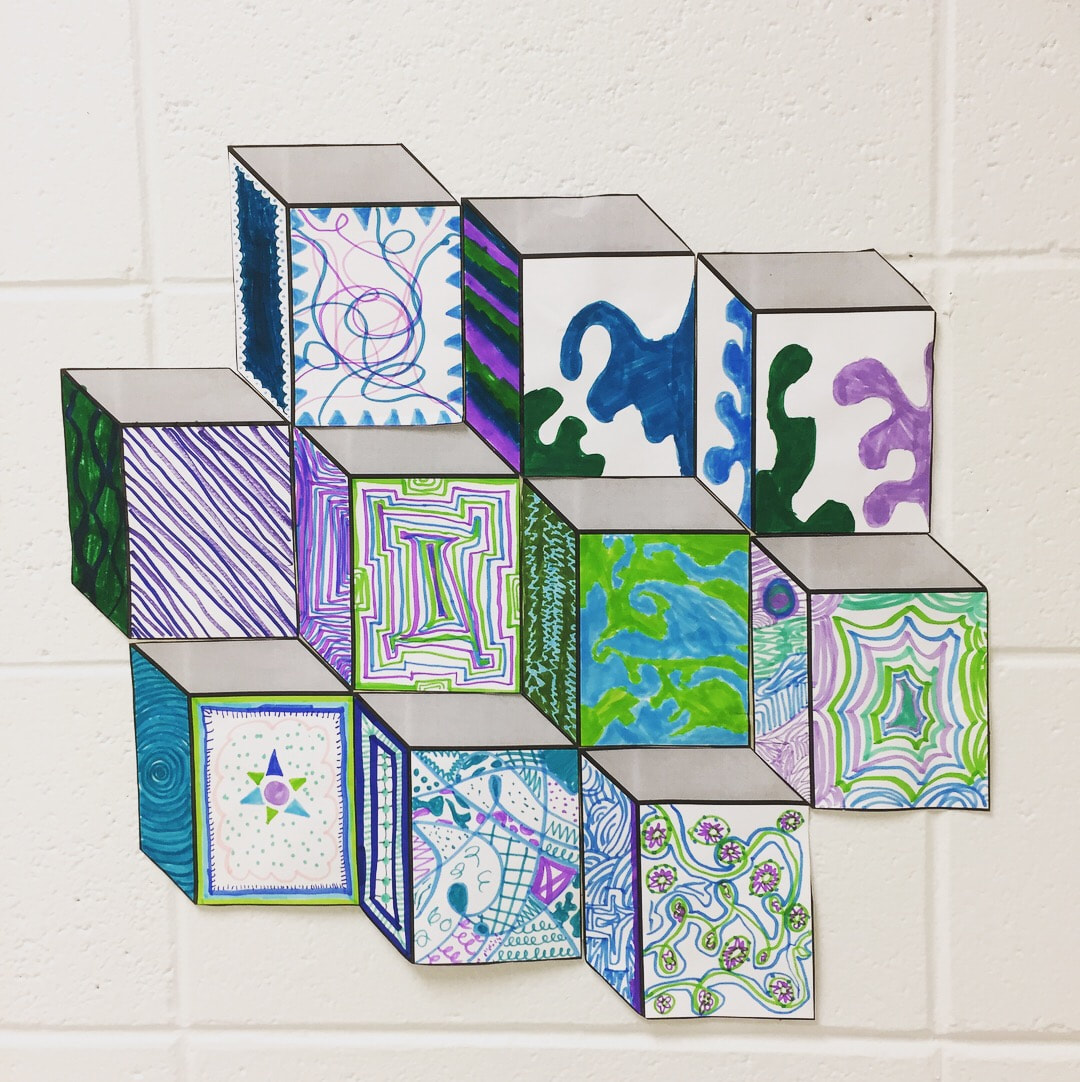
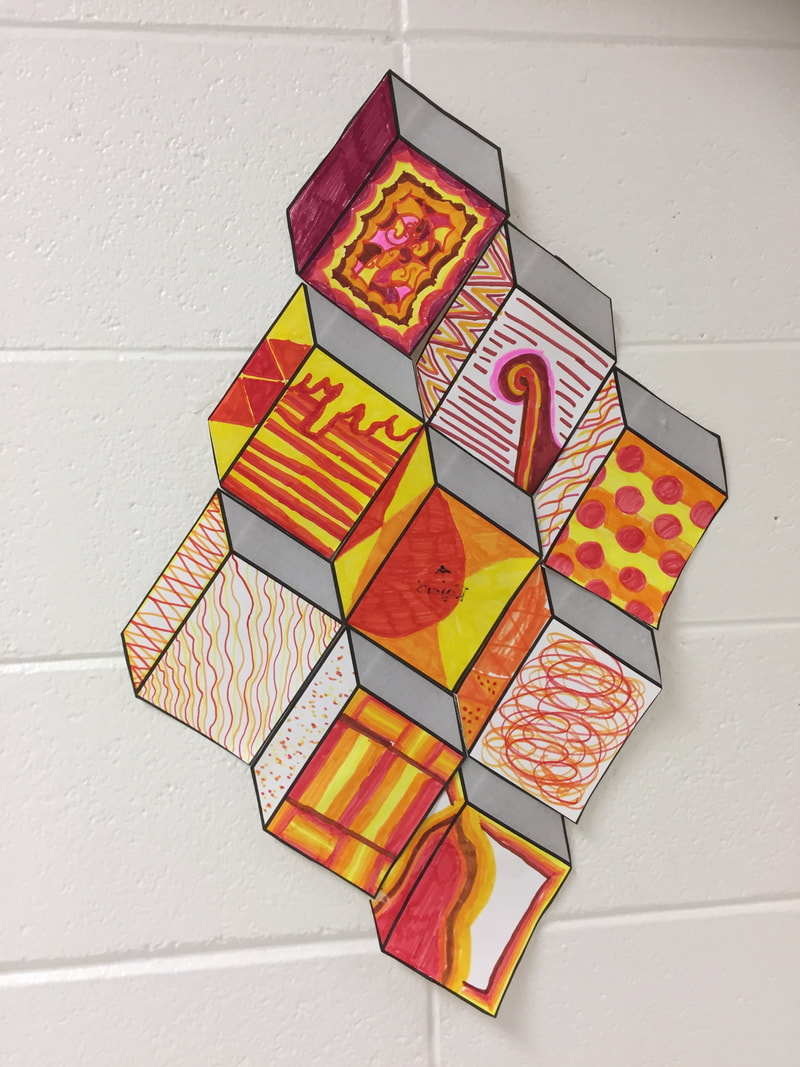
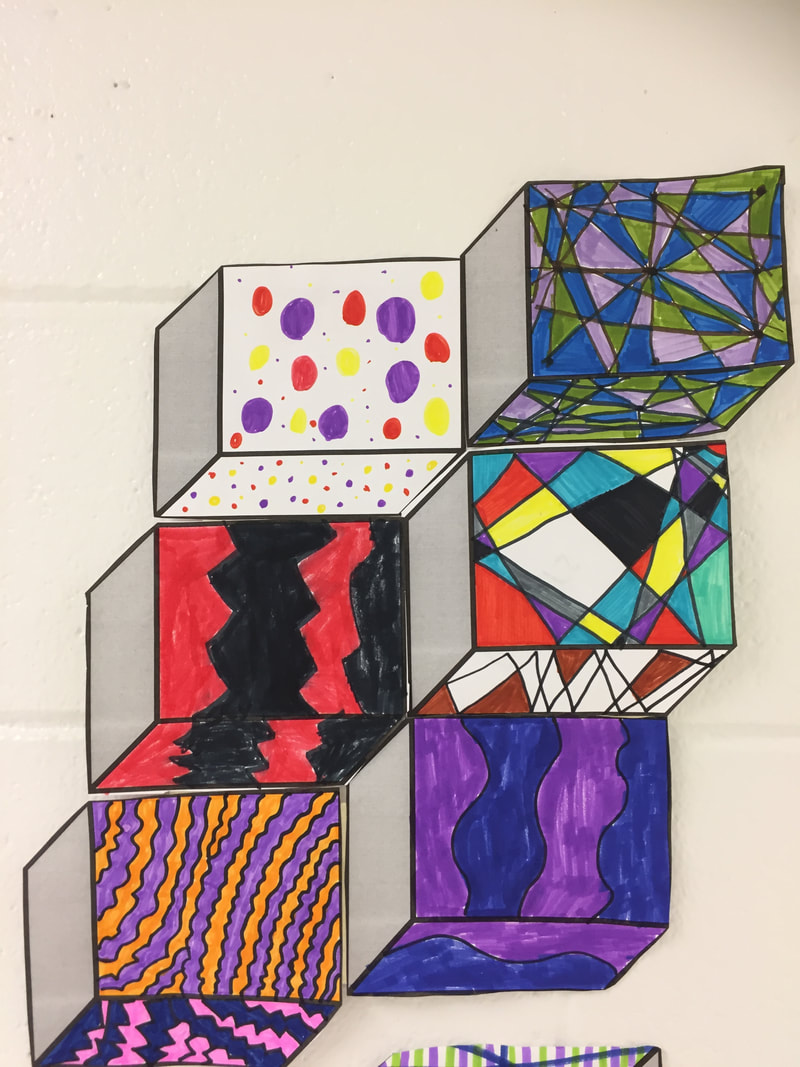
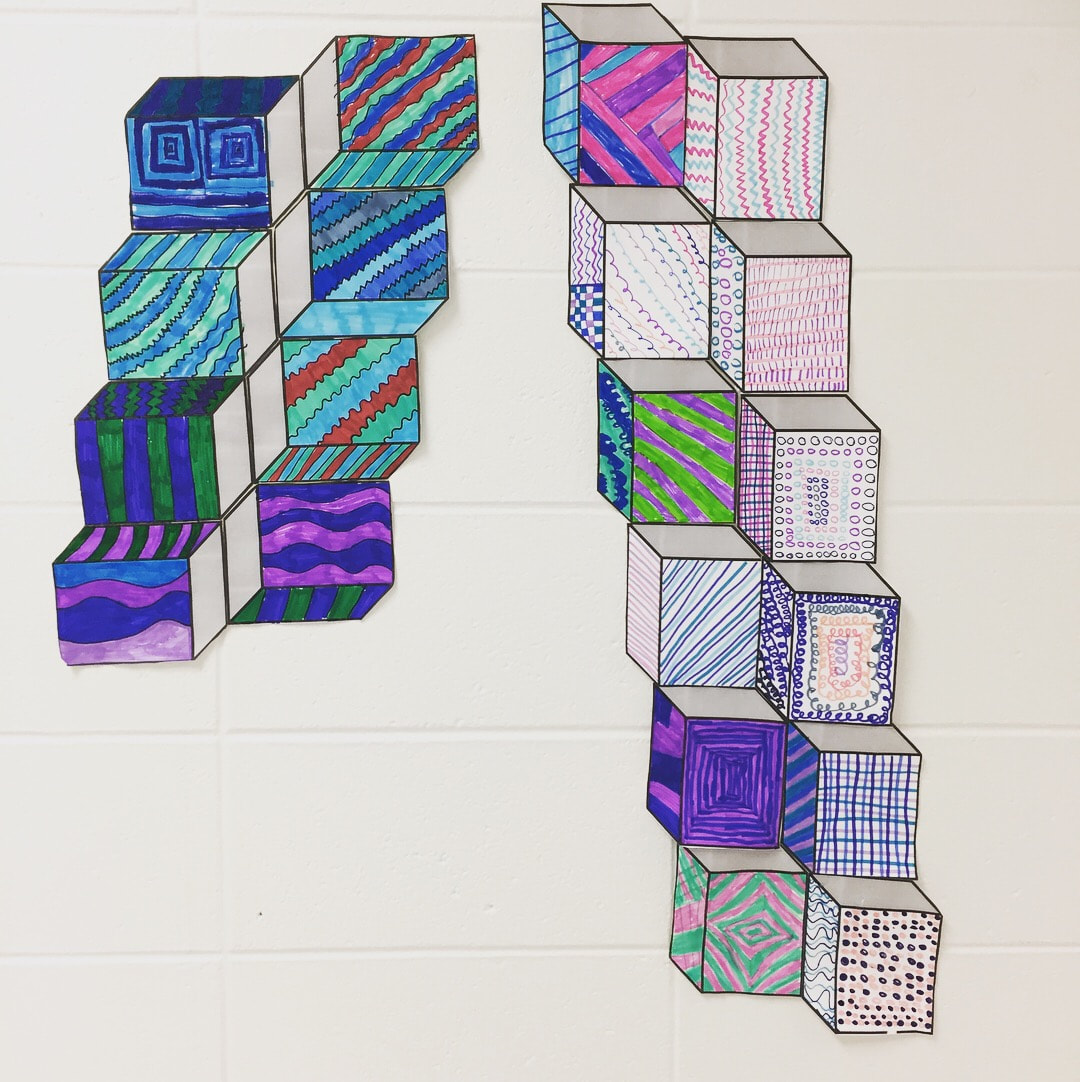
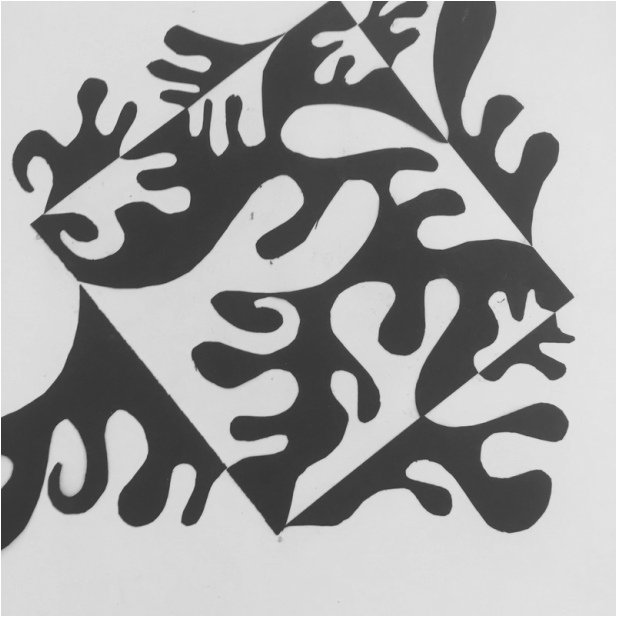
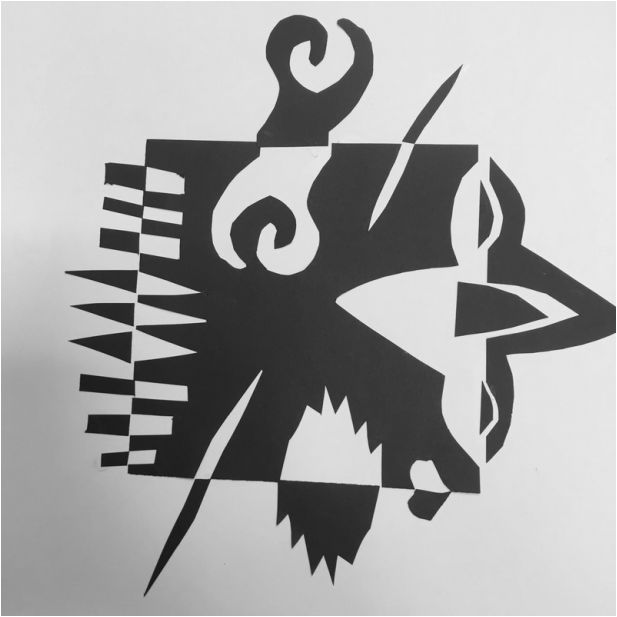
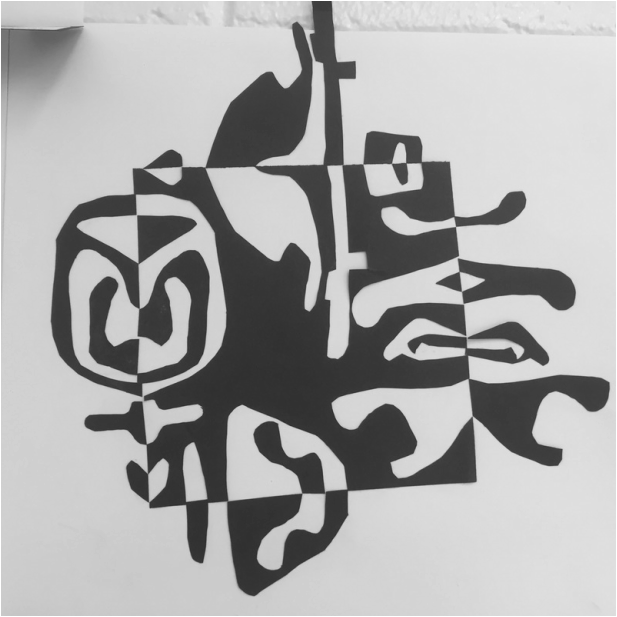
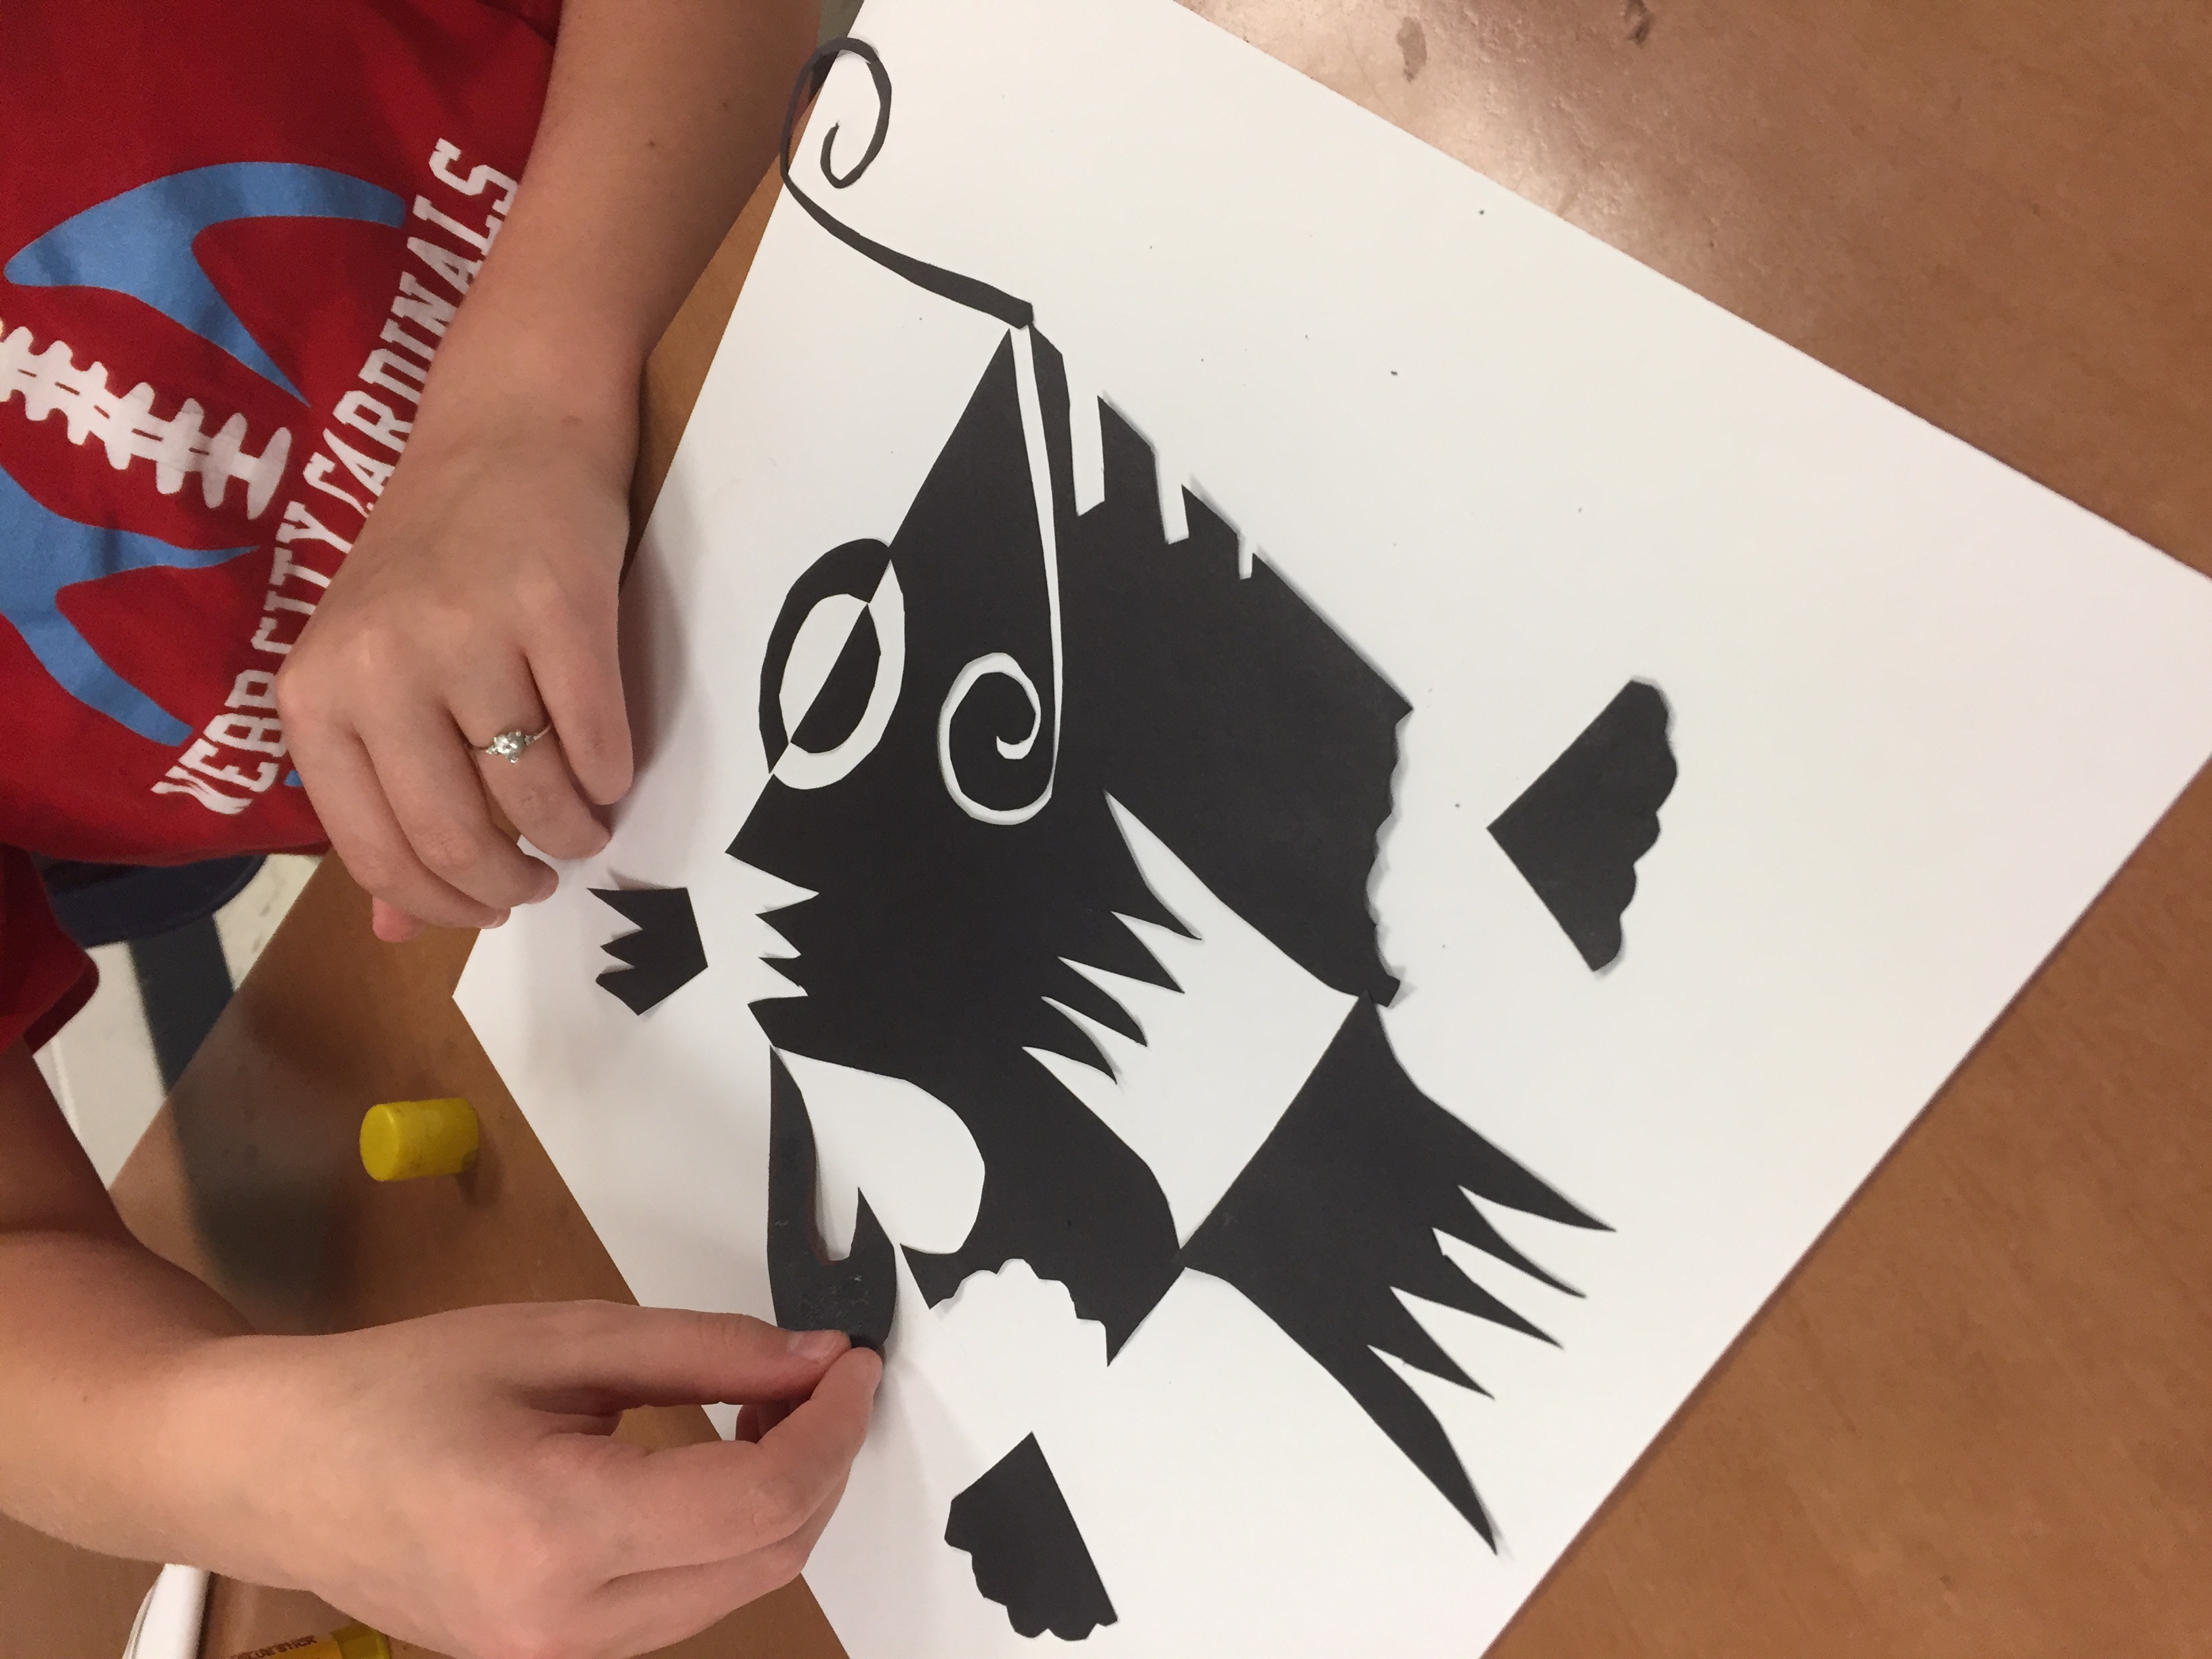
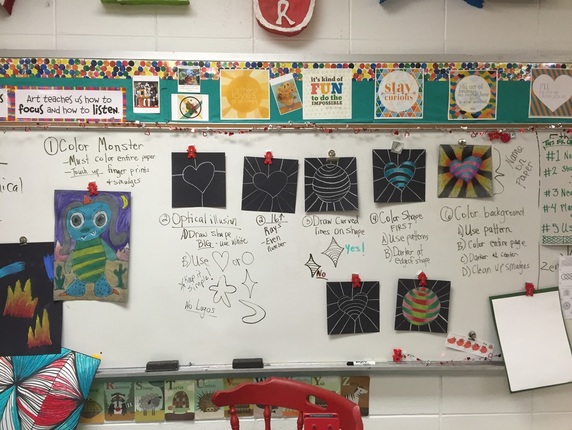
After an art teacher passed away, her husband invited me to look through her old art teacher stuff and take home whatever I wanted. Way back on the bulletin board are some 'really hard' optical illusion weavings that were part of the haul. I still have them, but I wanted to document them here too. I'm not even sure how they made some of them, they are so cool!
0 Comments

Optical Illusions

1/17/2018

0 Comments

 
In 2015, I was feeling my way through the whole middle school process. Most kids enjoyed looking at optical illusions and I knew I wanted to create an optical illusion unit for the first time. I was also trying to figure out a good way to incorporate a LITTLE bit of technology into the project. 

So I created a SMORE flyer with tons of step-by-steps and guides on how to make optical illusions that I had collected around the internet, mostly via pinterest. The idea was that students could 'explore' and narrow it down to one that they were interested in making.

In theory, this made tons of sense. But in reality, most kids picked the one that looked 'easiest'. And then wanted to play on the iPads as soon as they were finished. I've phased out using technology as much in this way....because it just didn't yield the best results and I felt like I was trying to control them a little too much, which I was. Also, I only had a dozen ipads so kids still had to have OTHER visuals, books and some printed step-by-steps in order to have access to enough materials for each kids to use. 
Picture
Day 1-3
Introduce the idea of optical illusions. Look at examples. Scan QR code which takes you to the smore flyer 
Sketch idea on white drawing #80 paper in pencil. Use 9X12 or 12X12 depending on design. Color with markers, colored pencil or crayon. Use willow chalk to add light shading on marker. 

Supplies
 pencils
rulers/circle templates
erasers
9X12 and 12X12 paper #80
markers
colored pencils
willow vine charcoal

Picture

Picture
Picture
Picture
Picture
0 Comments

Optical Illusions

1/14/2018

1 Comment

 
Picture
My middle schoolers love optical illusions. Every year, students request an optical illusion project. Here are a few of my favorites:

​Op Art Ornaments
Optical Illusion Heart/Sphere in Chalk
Optical Illusion Sketchbook Covers
​

For a while, I have wanted to figure out a way to select an optical illusion project that is engaging for all ability levels. At first, I made a smore flyer and allowed my students to choose an optical illusion that they wanted to create from the examples I had provided links to. This did not work well because some students chose things that were too time consuming, or too hard even for me to figure out, OR to easy and not time consuming enough and they finished in one day while everyone else needed weeks. Also, since we had the ipads out, I didn't want to use oil pastels so we were limited to colored pencils or markers. 

For the examples linked above, everyone basically followed the exact same steps. So there wasn't much variety. When my librarian ordered Optical Illusions (How to Art Doodle) by Carolyn Scrace book, I decided that this year, I would make students choose between 3 designs from the book. All 3 were similar in difficulty level and everyone would make a 12X12 oil pastel design. (I was on a 12X12 design kick this year...students did like 6 projects with 12X12 paper!)

The book has rather low reviews on amazon.com, but I found it very helpful in showing my students the steps and giving them ideas. 

This project was really successful as it gave us the opportunity to talk about quality, and I could show examples of really good quality and not so good quality.....but it isn't a lesson that I want to tackle again anytime soon and I am trying to figure out why.....because the results were stunning. 

Picture
Picture
Day 1
We looked at some examples of optical illusions and talked about various optical illusion artists. I share a slideshow with examples by Bridget Riley and M.C. Escher and students are happy to see some familiar images they have seen before. I have one copy of the scholastic magazine about optical illusions which has a ton of great info about Bridget Riley, which is what I basically summarize for my students. When I start a new big unit like this, I always have tons of visuals around the room that students can use for inspiration. I would love to find an optical illusion calendar to cut apart because printing stuff on a color printer just isn't as vibrant. 

Youtube video list of optical illusion videos. 
10 Amazing Optical Illusions---I usually show this the 1st day

Students looked at the examples they could choose from and started practicing in their sketchbooks. 

Supplies:
Sketchbooks
pencils
erasers
circle templates
​rulers
Picture
Day 2
Once students had a small thumbnail sketch of their idea (and many realized it was harder than it looked), we started drawing in pencil on 12X12 white paper. I took some time to demonstrate how to use a ruler to make lines across the paper and then how to make a grid. I also did a few mini demo's on how to make some of the illusions a little easier. Students used oil pastels to start coloring their designs. I highly stressed that they should save black for last, as it smears badly and they should be careful with very light colors and white, as those get dirty easy. I discouraged them from using traditional checkerboard black and white because black is just so messy that I knew the white would get ruined on many of their projects.

Supplies:
Rulers
circle templates
12X12 white paper
oil pastels (no black)
​cover sheets for tables

Picture
Day 3
Those checkerboard designs were getting very tedious....even though it is argubly the easiest one to draw, it is pretty hard to color and it is hard to fix mistakes so kids have to be very careful not to mess up their pattern. I showed students how to add black and blend it to make their illusion pop just a little more. I showed examples of good quality and not so good quality and encouraged kids to work towards getting a '3' on their project. We also discussed craftsmanship and scribbling. With oil pastels, you have to color pretty firmly to get good coverage. 

This is the video I showed every class to demonstrate the blending. It isn't the greatest video, but I made 6X6 mini versions of the projects so I could demonstrate the blending technique quickly. I didn't want to have to make a sample for every class, so the video was very helpful!

Supplies
​Cover sheets
oil pastels plus black
pencils
​
Picture
She used navy instead of black to outline and I really like it!
Picture
This design idea came from a different book.
Day 4
Okay, today many kids were already done or close to being done with their optical illusions. I had a bunch of 6X6 paper ready and I showed them the 'ol oil pastel firework trick with an  eraser. They loved it! Thanks art of ed!

Supplies
Oil pastels
Old erasers (we used hard rubber erasers)
cover sheets
6X6 squares
Picture
Picture

Okay so this project had variety, quality control, a bonus free time extra fun project for early finishers, high level of critical thinking, ruler skills training, and a medium-level-mess-factor.

It wasn't the messiest thing, but it wasn't super clean and boring either.

Why am I not excited to teach this unit the same way again the same way?

Some students did not like the limited options.....they were annoyed that I didn't have MORE variety. Okay, I get that. But as it was, I still had to start each day with instructions specific to each design and tips that would help individual students. If a student had a good idea, I was open to letting them give it a shot. 

While the results of the project are visually very beautiful, I will have to think long and about what I would do differently in the future. 

One of my professional development goals this year is to focus on critical thinking and how I implement it into student learning. I feel like most art projects require tons of critical thinking. Even if there is  an existing 'recipe' like in this project, there is still tons of room for error and each product is different depending on how students used the materials, techniques and executed the process. By giving students tons of opportunities to make decisions about their finished product, they were using critical thinking. This isn't one of those cookie cutter projects where everyone's ended up looking basically the same, there is tons of variety and room for interpretation. 

MDQ 1.1 The teacher provides a clearly stated learning goal accompanied by a scale or rubric that describes levels of performance relative to the learning goal

In order to grade this project, I posted a visual 'rubric'. I pointed to the examples that would be considered a '3' and would meet all of the requirements for the objective. Then, we discussed what a '2' and a '1' would look like. The examples of each are in the photo below. It helped some students to see where they could improve their design even if they said it was done, many students were able to set a goal for improvement. 
Picture
4 examples of a '3' and an example of a '2' and a '1'. Quality control.
Picture
1 Comment

3D Tumbling Block Mural Challenge

1/14/2018

0 Comments

 
Picture
After seeing someone post about ThankYouX on Pinterest via Artsonia, I knew I really wanted to develop a project that would allow my students to make some murals, but I didn't want to have to do all the assembly work myself. We had just finished optical illusions and we needed a one-day challenge that wasn't too messy. 

We used Crayola Supertip makers to add designs to our murals. Each block was individually colored based on a color scheme and then assembled with tape on the back. I had a tape dispenser at each table for each group, some groups using clear tape, and others using masking tape. My students had to work in groups which is always challenging, but a FANTASTIC experience for them. 
Picture
Picture
For this project, I copied about 400 (but quickly realized I needed about 800 for my 370ish students) 3-D squares on regular copy paper. When each class arrived, I numbered them off. As they walked into the room, each table had a number 1-6. Each group was comprised of 4-6 students.

​The students had to work as a team to select a color scheme and design their mural. ​Because I let the teams have some autonomy, all of the murals ended up quite different. Each student had to create at least one block, but then they could take over the job of cutting or taping if someone else really wanted to color more. I wish I would've made them do more intricate designs, but it was a one-day challenge so I was happy with the overall finished product. I posted a couple of design idea sheets in the room to inspire those 'design' challenged kids. 

I have a problem with students who grab one piece of paper, mess up a tiny bit and then want to throw it away. I did not let students throw away their squares. If they had an 'oops' then I would try to pawn it off on a really motivated kid later in the day to finish or fix. 
​
TEAM Collage Optical Illusion
This team challenge MUST involve everyone in the group. As a team you will need to decide on a color scheme. Everyone MUST color ONE piece, but some people may color more than one.

Assign a job to each member of the team: pick up trash, organize supplies, taping shapes together, cutting out shapes, team leader--this person helps everyone else and oversees the design

  1. As a team decide on a color scheme: cool, warm, primary, secondary.
  2. Decide which side will remain uncolored with markers. Everyone must abide by the plan and leave ONE side blank.
  3. Use markers to design two sides of the 3-D cube shape.
  4. Cut out shape, leave the black lines attached.
  5. Lay all the pieces out to make a cool design.
  6. Assemble with tape on the BACK of the shapes.
  7. Write teacher's name on the back of mural in pencil.
  8. Draw an arrow on the back that points to the top of the mural in pencil. 

PictureThe students loved the 'tumbling block' design, so I printed off some coloring sheets from this site for them to have their own to color.


​

​


Picture
I reconfigured the cubes to fit 2 per page this semester so that I don't use up quite as much paper.
Link to tumbling block coloring sheet.
​Link to 3-D Cube printable. 
Picture
Picture
Picture

​Overall, this was a fun one-day challenge for my 5th and 6th graders. We have about 47 minutes for art. 

Supplies:
Copies of 3-D cube (at least 1 per kid, plus many extras for motivated groups
Markers (we used Crayola Super Tips so that there would be tons of options for color schemes)
Scissors
Tape
Design idea sheets
Trash bins at each table (optional)
Pencils (for names on the back)


BONUS: Paintbrush rocket's Tints and Shades tumbling block paintings
​
Picture
Picture
0 Comments

Op Art Sketchbook Covers

3/4/2017

0 Comments

 
This semester, we kicked things off by creating sketchbooks. I like the students to keep a sketchbook so that we have an ongoing record of activities happening in the classroom. They also like the ownership of having something that stays in the room for them to access each week. 

We followed the lead of another art teacher and used manilla file folders as the cover. I did not think ahead and have central office save them for me. We just used a box of new ones that I ordered last year. 

Students spent several days designing an optical illusion for the cover. If they finished quickly, they could also design the back. We looked at the artwork of Bridget Riley and Vasarley for ideas. I created a slide show and we looked at really cool examples of Op Art. It messed with our eyes. ;-) 

Once they were finished, they brought the cover to me and I stapled about 15 sheets of white copy paper, along with a copy of a color wheel for them to color and a shading practice sheet for them to use later. 

Even though I ordered 20 packs of the 'school specialty' brand permanent markers, with all 370 students using them at once, they quickly died. Especially the reds and blues. That was extremely frustrating. Other markers did not match the colors quite right. Also, I choose permanent markers in case of spills or splashes. I didn't want their covers to get ruined unnecessarily after all that work. 

Even with the bad markers, students still had a lot of success with their designs. I encouraged them to color 'most' of the front. They could use the tan color of their folder as part of the design, just as long as they were filling up the front in a way that looked nice. 

*Note: I've noticed that the first page or two that is pressed against the front cover is starting to yellow from the permanent marker ink. Interesting. I'll have to keep that in mind for the future. Maybe we will use colored pencils next year. 
Picture
Picture
0 Comments

Op Art Ornament

12/6/2016

0 Comments

 
​My students love to make optical illusions. I have several optical illusion books in the room for them to look at if they finish early. I also have a smore flyer that they can access with iPads to view step-by-steps, videos and examples of other optical illusions. If we have free time at the end of class, sometimes I will show videos of optical illusions on youtube---it is hard to find some that are viewable if your youtube is set to restricted mode, but I have a list. 

At least once a semester, I put up a big display board with lots of exampls and we incorporate elements of optical illusions into one project. This year, I decided to base the design on an op art heart/sphere we did last year. This time, we used 11X11 paper (so we could add a little 12X12 frame around it) and we used oil pastels instead of chalk. They did not blend as well as I wanted them to, but it was still a pretty successful project. 

We focused on selecting an ornament shape that was symmetrical. I taught them how to practice on 6X6 newsprint, until they got a shape they were happy with. Then they could choose between green or red 11X11 paper. IN order to make the shape symmetrical, if they would draw it with oil pastel, they could simply fold the paper down the middle, rub the back of the paper, and the other half would lightly transfer to the opposite side, making it easy for them to draw the other half exactly like the first half. Then they could decorate the ornament how ever they wanted. I reminded them to draw an even number of 'rays' around the edge. 
Picture
0 Comments

Notan

12/6/2016

1 Comment

 
This project had a very high success rate and the majority of my students could finish in one class period. 

First, I handed each of them a handout (free on teachers pay teachers!) and had them read about the Japanese paper cutting.

Nōtan is a Japanese design concept involving the play and placement of light and dark elements as they are placed next to the other in the composition of art and imagery. I think I remember doing something like this in my Basic Design class in college. 

(My art teachers and I have been complaining about how hard it is for students to follow basic instructions when it comes to cutting and gluing, as the 'crafty' stuff has been phased out of regular classroom curriculum in recent years, they have less and less exposure to the basics).

This project helps them to visuals how to cut something and then flip 'half' of the shape, exposing the negative space. I also like it because they don't have any scraps, they use everything that they cut out. And it isn't seasonal, it can be done any time of year. 

Supplies:
12X12 white background paper (I also had red/green)
6X6 black paper (I also had red/green)
scissors
colored pencil for drawing
glue sticks
After reading and discussing the handout, we watched a little video which really helped them understand how to do this. The artist in the video is using some sort of weird glue, so they were a little baffled by that. I told them to make sure they use glue sticks so they don't have a gluey mess on their tiny little cut outs. I also had a few envelopes so they could save tiny things for next time if they didn't get everything glued down. 

In the future, I could combine this with a lesson about Matisse. 
Picture
Picture
Picture
Picture
Picture
Picture
Picture
1 Comment

Optical illusions

3/10/2016

0 Comments

 
Every semester, I try to incorporate optical illusions. My 5th and 6th graders love to make optical illusions. I created a smore flyer that they can access via iPads to see lots of links to videos and idea sheets. I've also assembled a collection of videos that I will show at the end of art during clean up, or to introduce the unit. Here is a link to the good ones that are safe for kids, because many of the optical illusions videos on youtube are restricted. 

Last spring, I had students use a 9X9 square, draw a heart or trace a cicle in the center with white chalk. Then they drew curved lines on the surface of their shape and an EVEN number of 'rays' coming out of the center. Then, they colored their shape so that the outside of the stripes were darker, and the center was brighter (using white) so it would look more rounded. They also added a little bit of willow charcoal towards the center of the rays and blended it in so it would look darker in the backgroud, like the shape was floating. 
Picture
Picture
Picture
Sadly, when I went to collect this display from the mall, many of the images had been smeared by tiny fingers. This was th display the day that I hung it. Two weeks later, the ones on the bottom were all ruined by little kids touching them or brushing up against them. I will never take chalk art to be hung in public again. 
Picture
Picture
Chalk is very messy. I always set up a couple of water tubs, cut some watercolor paper, and have students shake the extra dust into the water. Instead of blowing it into the air---this traps some of the dust and I can lay the water color paper on the surface and pull soem abstract looking marbled prints off the top. 


0 Comments
    PictureWelcome!

    Mrs. Mitchell

    Art teacher from Missouri. 

    Instagram
    Add to Flipboard Magazine.

    Archives

    March 2021
    April 2020
    November 2019
    July 2019
    April 2019
    January 2019
    October 2018
    July 2018
    June 2018
    May 2018
    April 2018
    March 2018
    January 2018
    September 2017
    May 2017
    April 2017
    March 2017
    January 2017
    December 2016
    November 2016
    October 2016
    September 2016
    March 2016
    December 2015
    October 2015
    August 2015
    May 2015
    April 2015
    March 2015
    February 2015
    November 2014
    October 2014
    September 2014
    August 2014
    June 2014
    May 2014
    April 2014
    March 2014
    February 2014
    January 2014
    December 2013
    November 2013
    October 2013
    September 2013
    August 2013
    July 2013
    June 2013
    May 2013

    Categories

    All
    1st Day Of School
    1st Grade
    3d
    Abstract Art
    Alcohol Ink Tiles
    Alpacas
    Animal Art
    Animation
    Architecture
    Art Centers
    Art For Kids Hub
    Art History
    Art Hub For Kids
    Art Room
    Art Show
    Art Teacher Conference
    Bell Ringer
    Birds
    Blending
    Bunnies
    Cardboard
    Chalk Pastels
    Chalk Stencil
    Charcoal
    Choice Based
    Christmas
    Chuck Close
    Classroom
    Clay
    Club Day
    Collage
    Color Diffusing Paper
    Colored Pencil
    Colored Pencils
    Construction Paper Crayons
    Contest Art
    Creatures
    Crystal Bridges
    Design
    Dice Games
    Document Camera
    Dot Day
    Drawing
    Early Finishers
    Easter
    Emojis
    Fall
    Field Trip
    Food Art
    Foxes
    Green Screen
    Grid Drawing
    Group Challenge
    Halloween
    Haunted Houses
    Hearts
    Hermit Crab
    High School
    Human Form
    Ice Breaker
    Inspirational Posters
    Ipads
    Jim Dine
    Justand
    Killer Whales
    Kindergarten
    Landscape
    Lesson Plans
    Lettering
    Llamas
    Magazines
    Mandala
    Maori
    Markers
    Masks
    Matisse
    Metal
    Model Magic
    Mona Lisa
    Monster Trucks
    Mother's Day
    Mother's Day Card
    Mummies
    Mural
    Newspaper
    New Zealand
    Notan
    Observational Drawing
    Ocean Art
    Oil Pastel
    Oil Pastels
    Optical Illusions
    Origami
    Owls
    Painting
    Paper Weaving
    Pd
    Pencil Topper
    Perspective
    Pete The Cat
    Picasso
    Polar Bears
    Pop Art
    Portraits
    Printmaking
    Product Review
    Professional Development
    Quiver
    Reflection
    Reflective Teaching
    Room Tour
    Rooster
    Sea Horse
    Seals
    Sea Turtle
    Self Portrait
    Shading
    Shaving Cream Prints
    Shoes
    Sketchbooks
    Sloth
    Solar Eclipse
    Spinners
    Spring Conference
    Star Wars
    Statue Of Liberty
    Step-by-step
    Step By Step Drawing
    Step-by-step Drawing
    Still Life
    Stop Motion
    Story Board
    Sub Plans
    Summer School
    Symmetry
    Tab
    Teacher Appreciation Cards
    Technology
    Tempera Paint
    Tiny Food
    Tissue Paper
    Trees
    Tumbling Blocks
    Valentine's Day
    Warm Ups
    Watercolor
    Wax Resist
    Word Art
    Yellow Submarine
    Zentangle

    RSS Feed

Powered by Create your own unique website with customizable templates.