THIS LITTLE CLASS OF MINE
  • Home
  • Contact Me
  • Lesson Plans

3D Tumbling Block Mural Challenge

1/14/2018

0 Comments

 
Picture
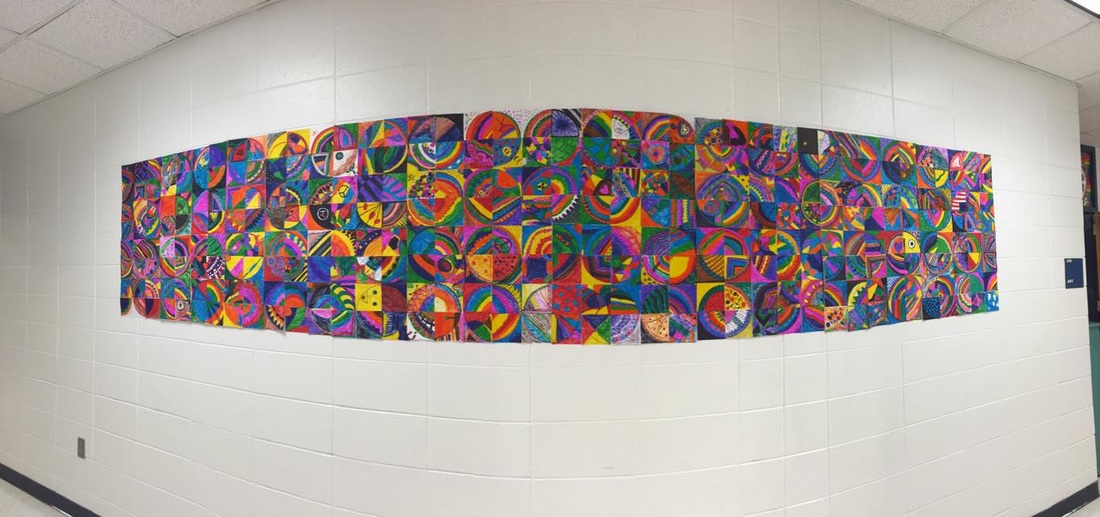
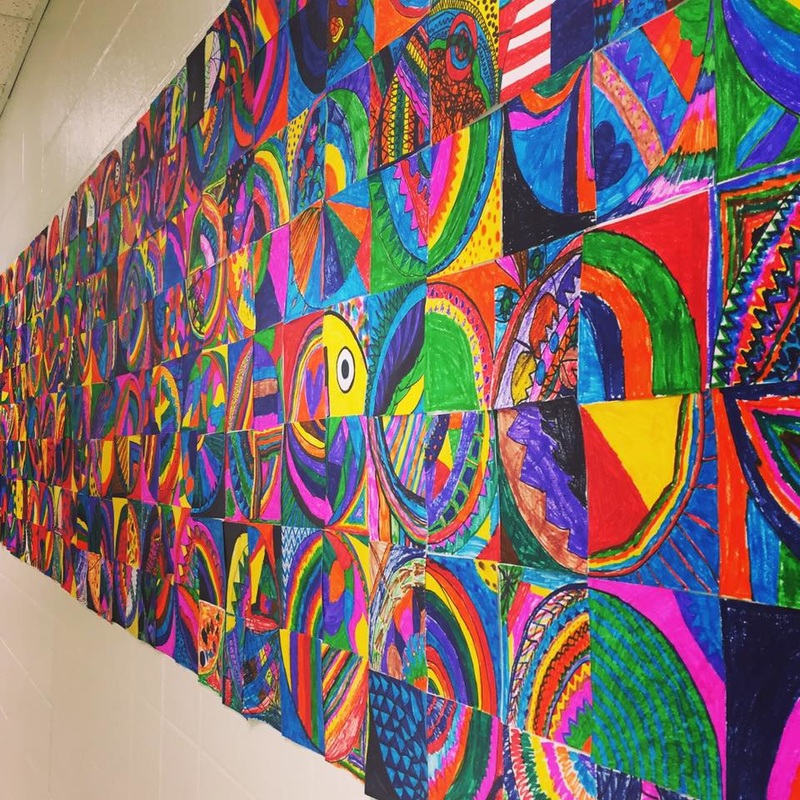
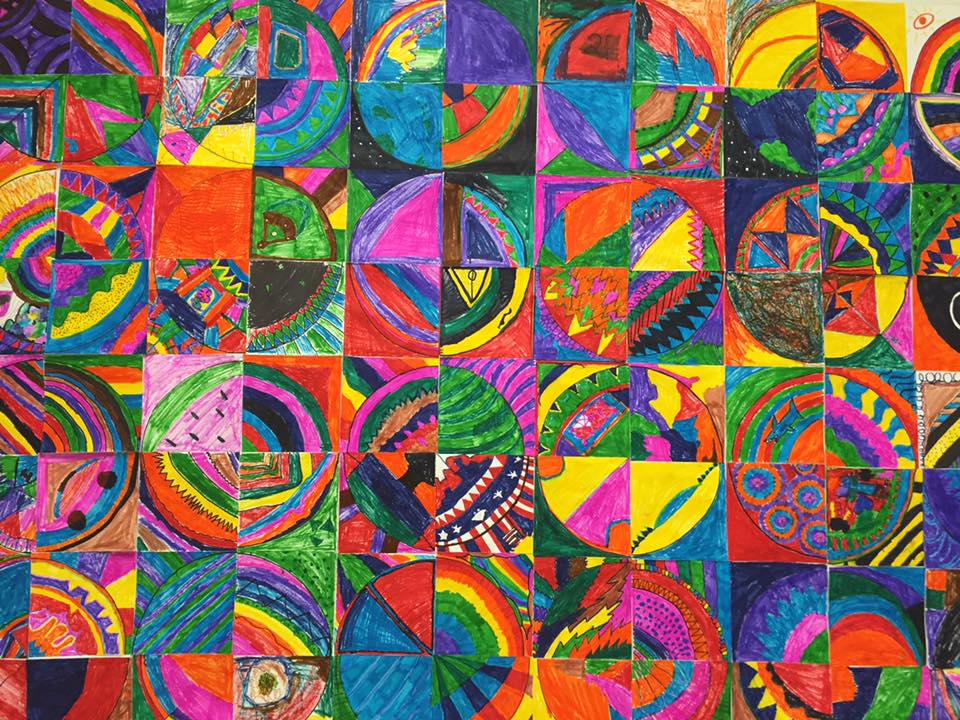
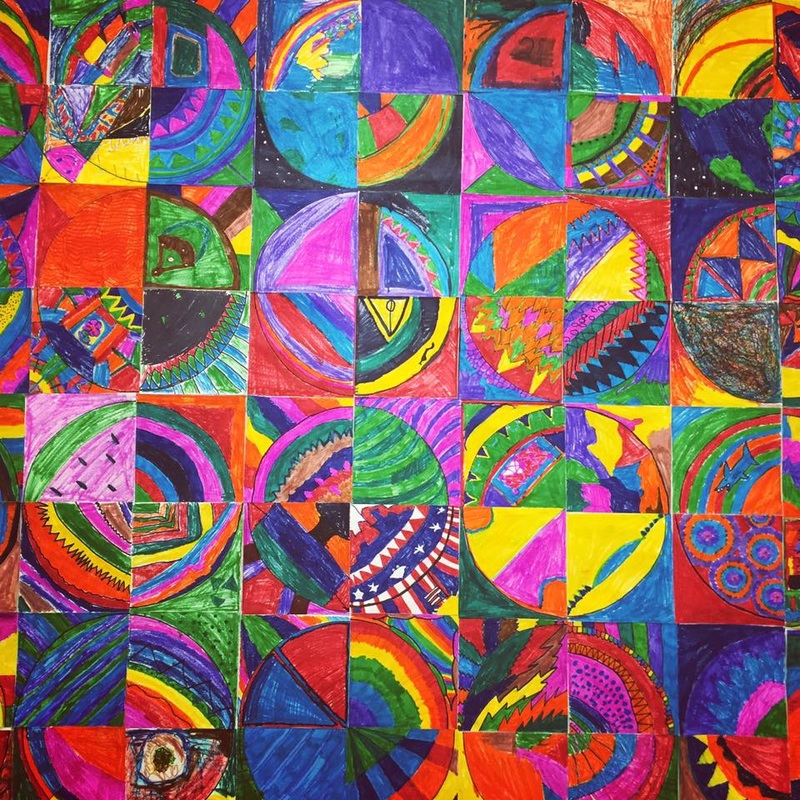
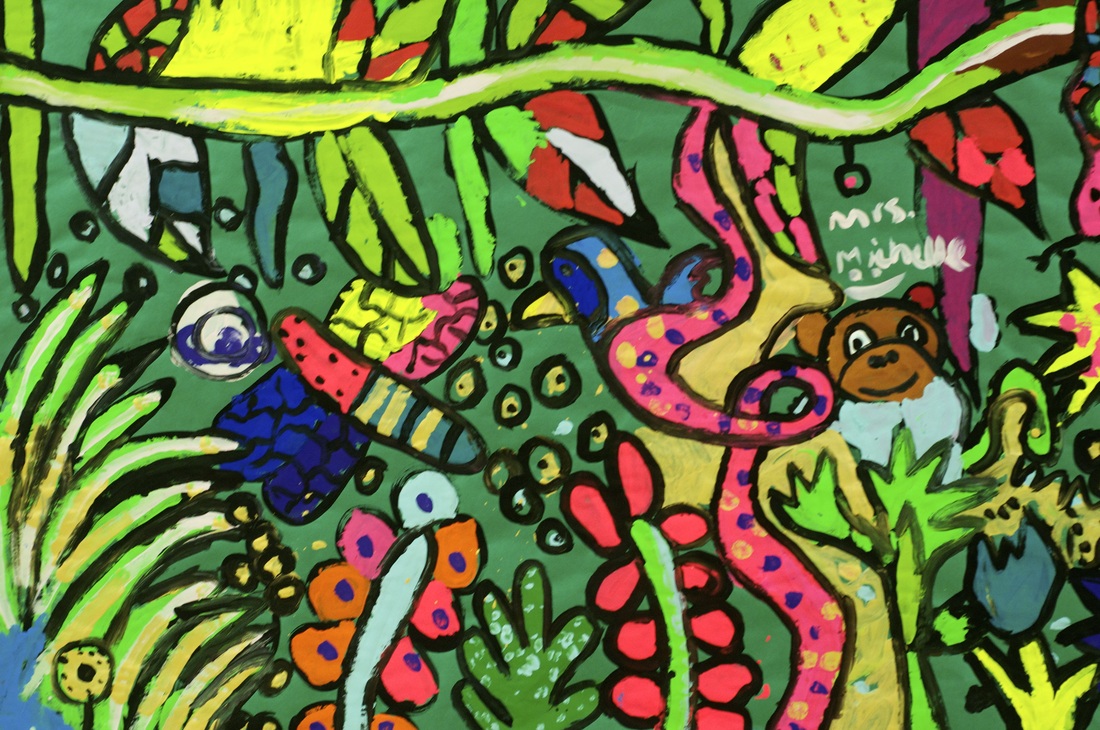
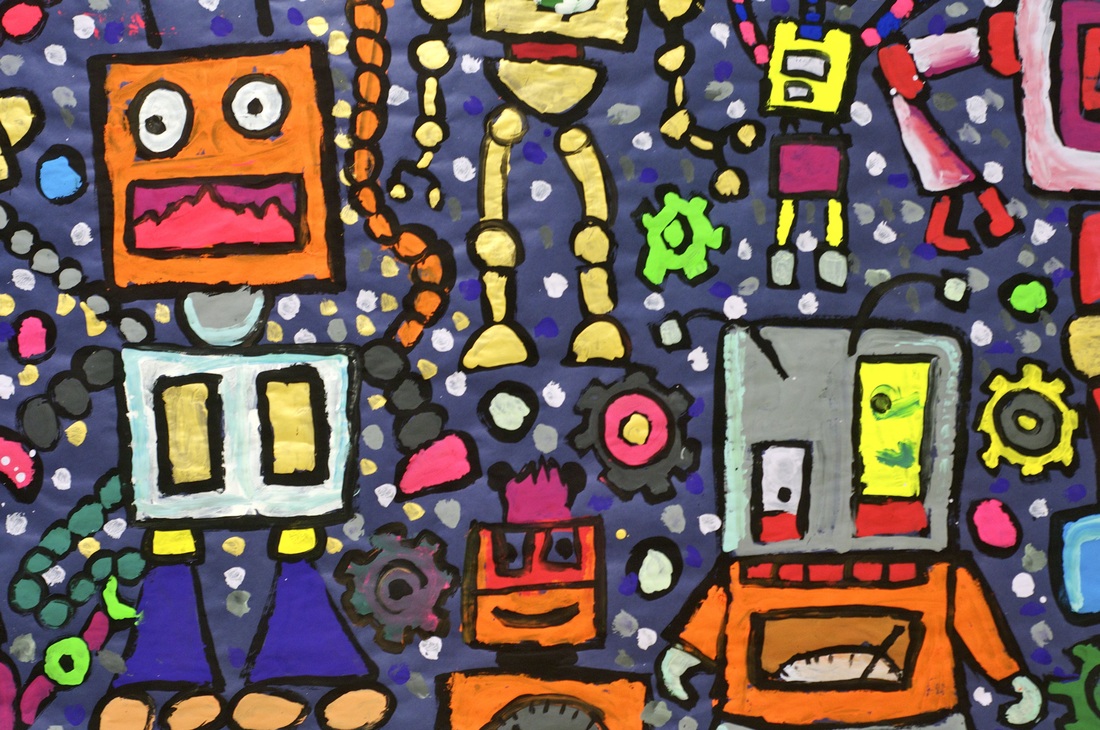
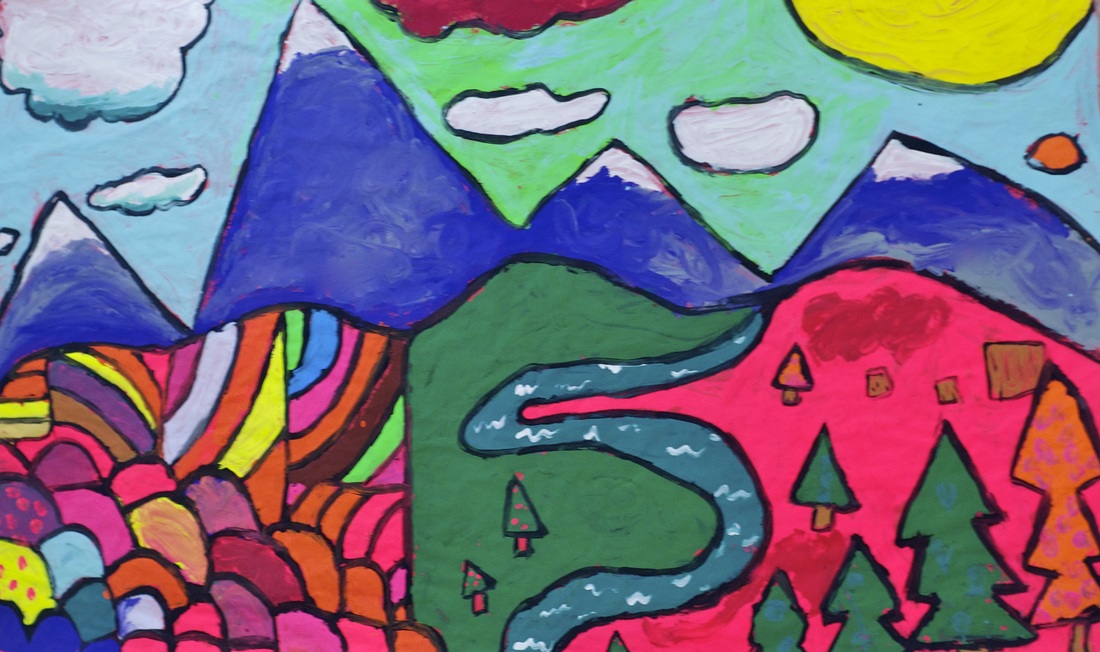
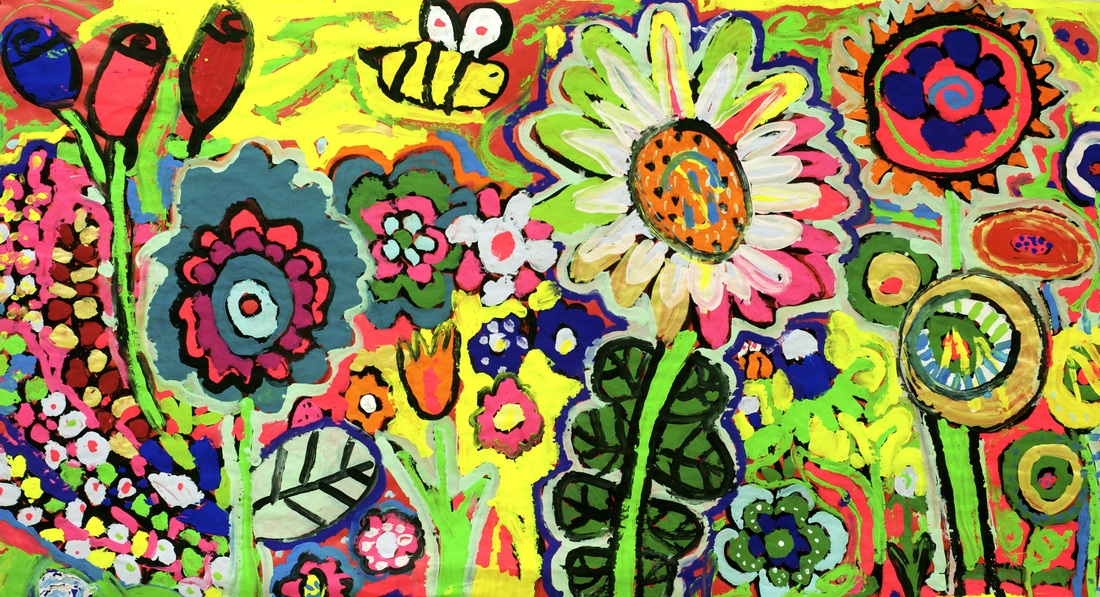
After seeing someone post about ThankYouX on Pinterest via Artsonia, I knew I really wanted to develop a project that would allow my students to make some murals, but I didn't want to have to do all the assembly work myself. We had just finished optical illusions and we needed a one-day challenge that wasn't too messy. 

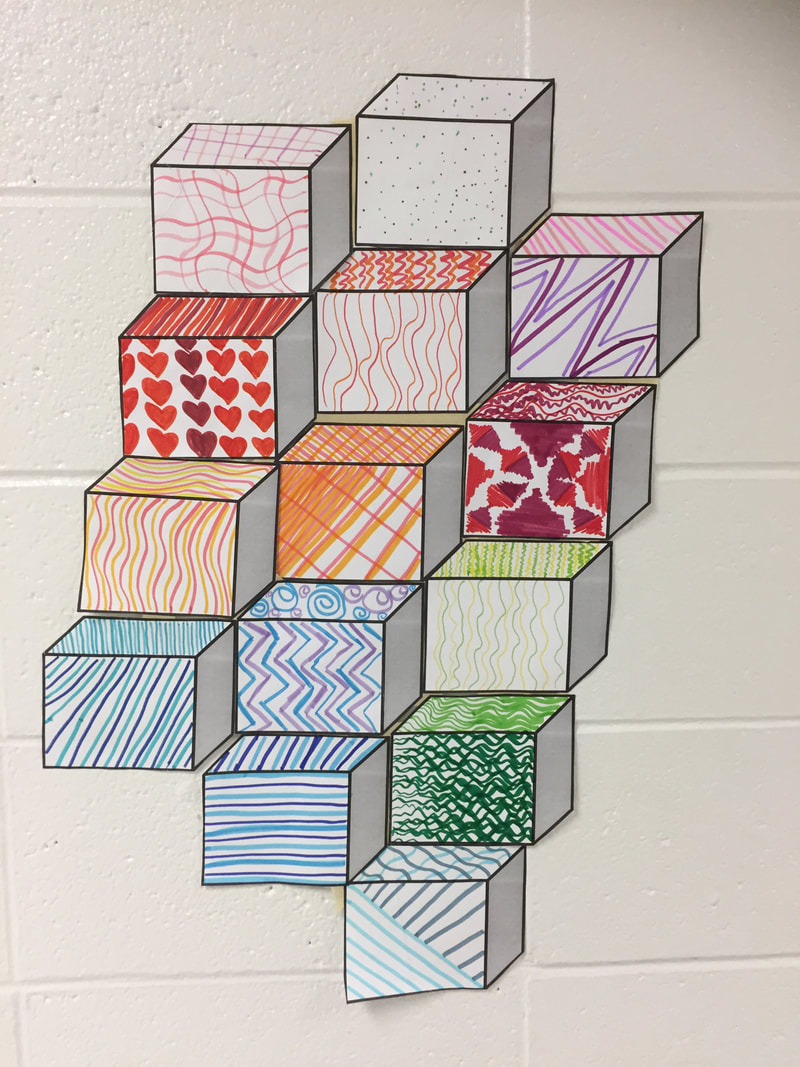
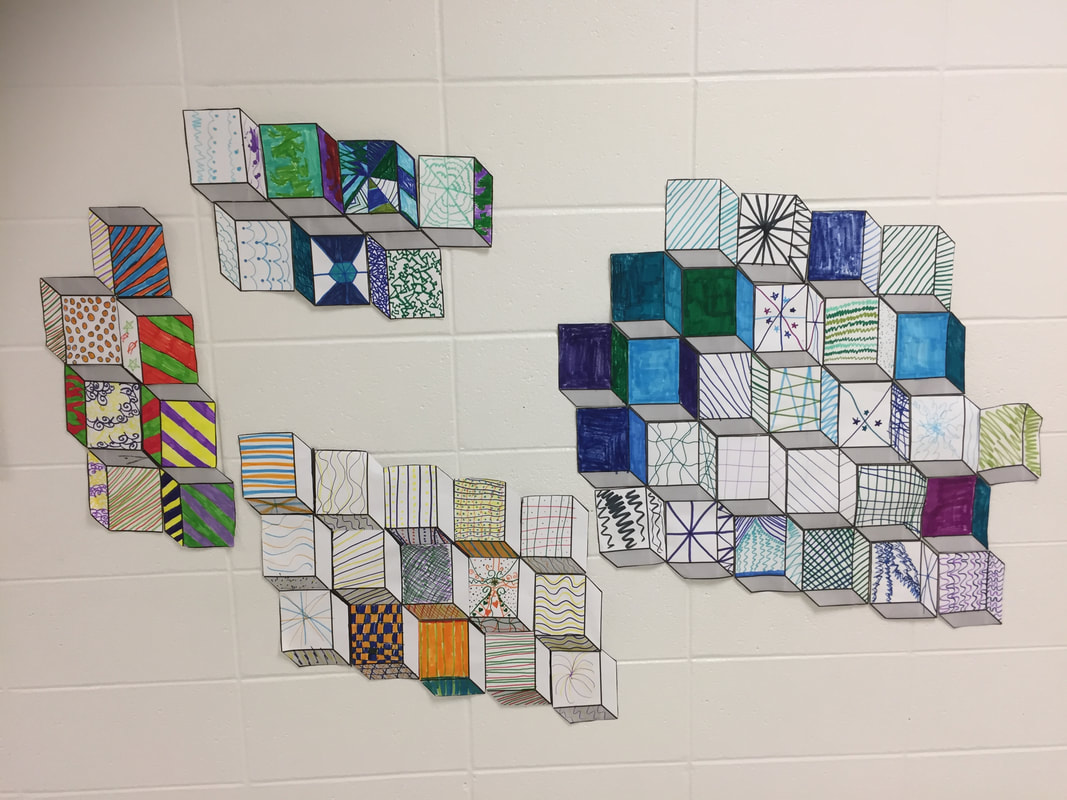
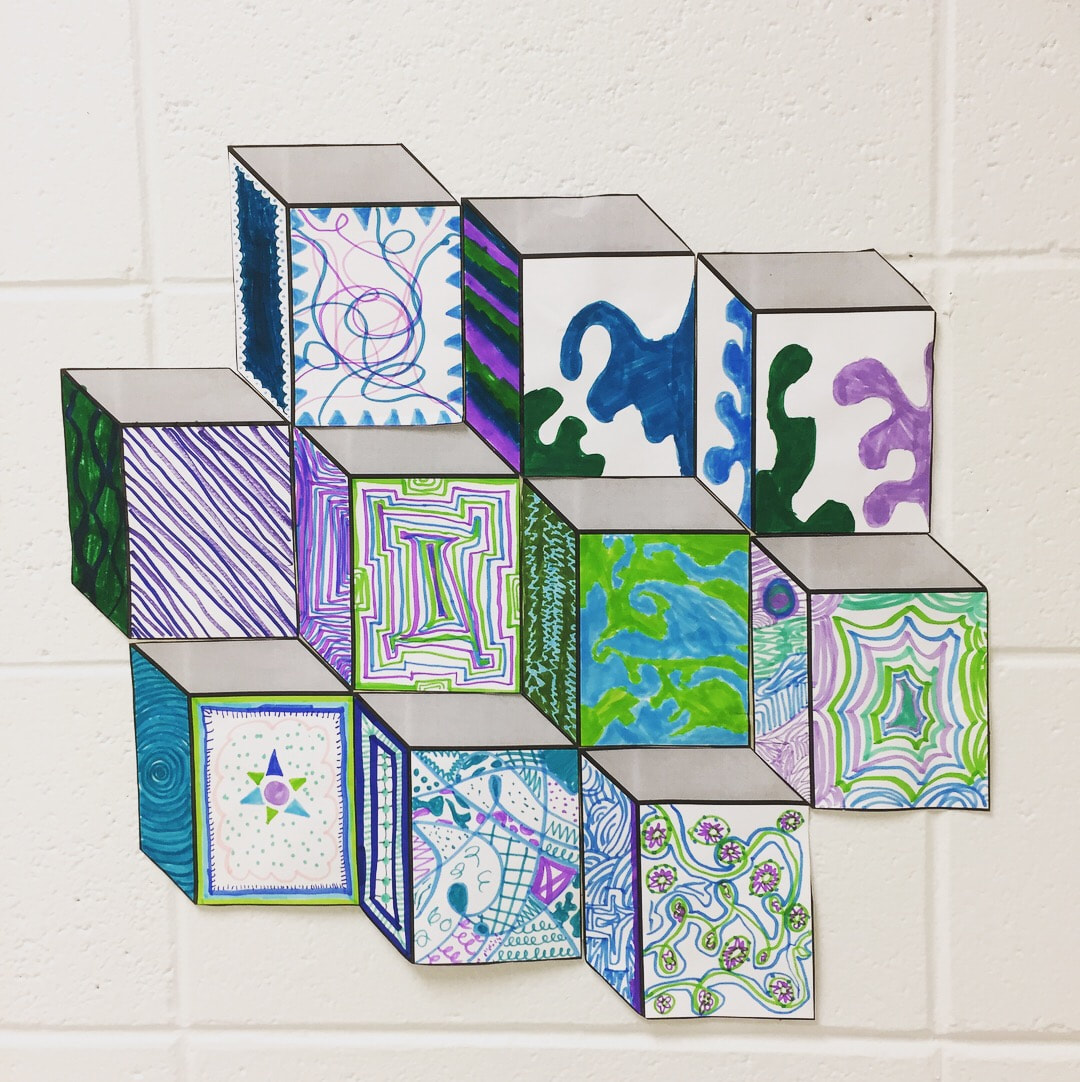
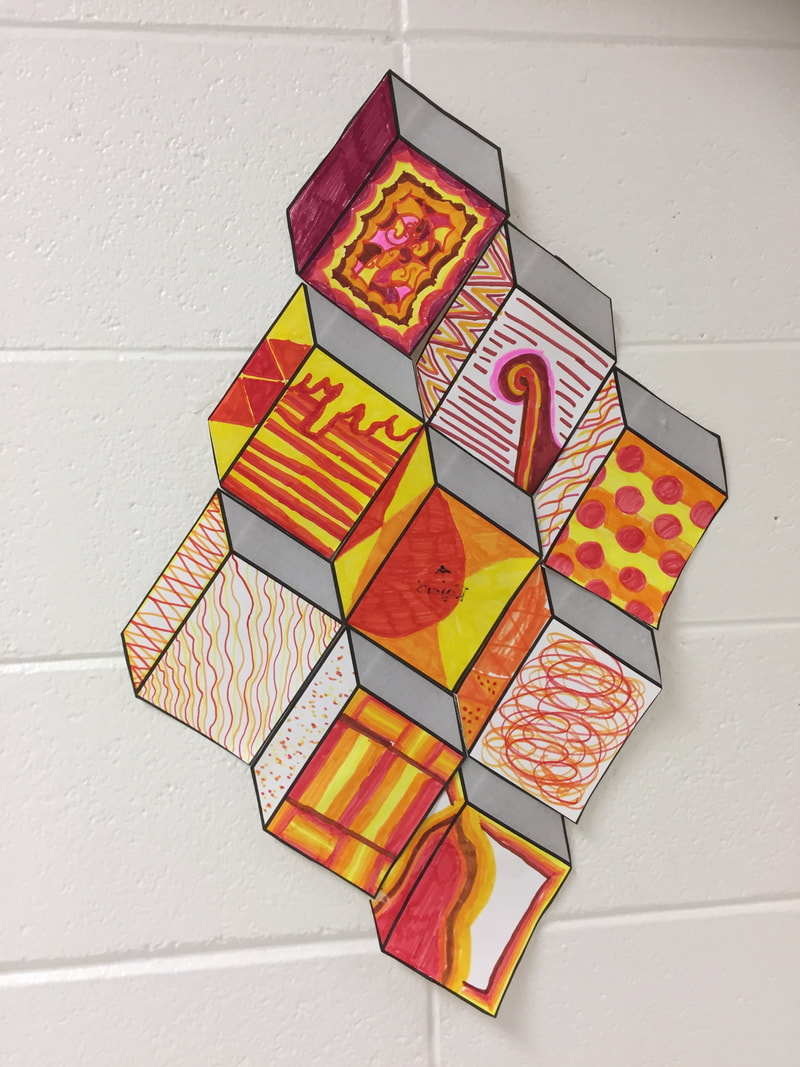
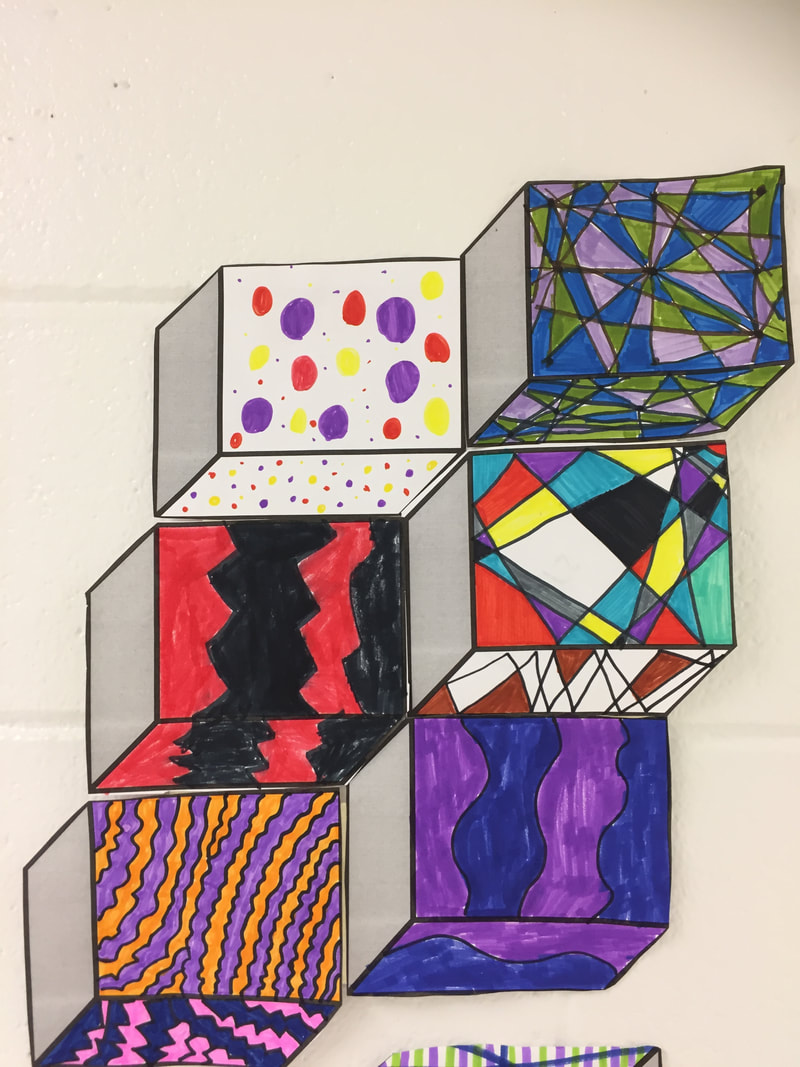
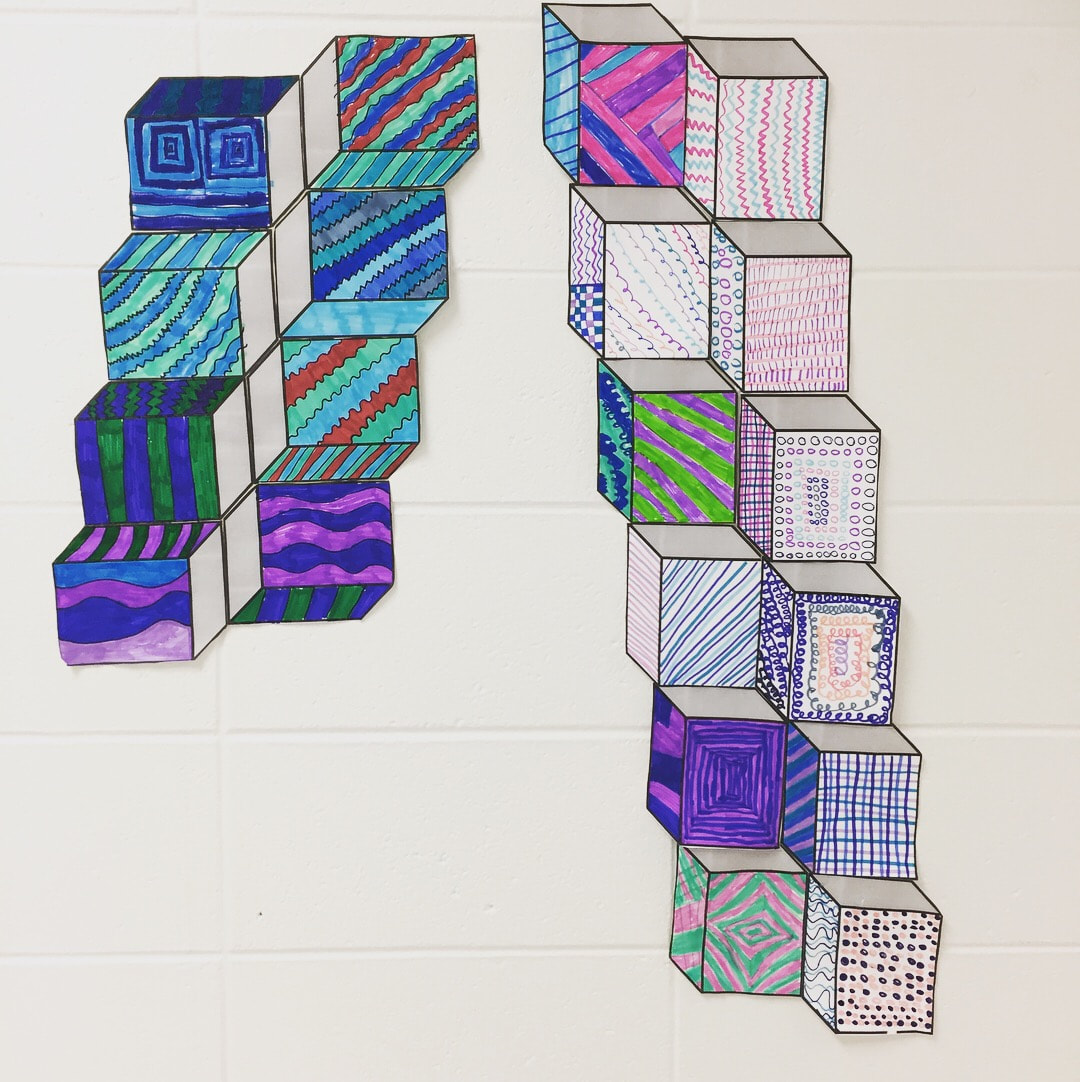
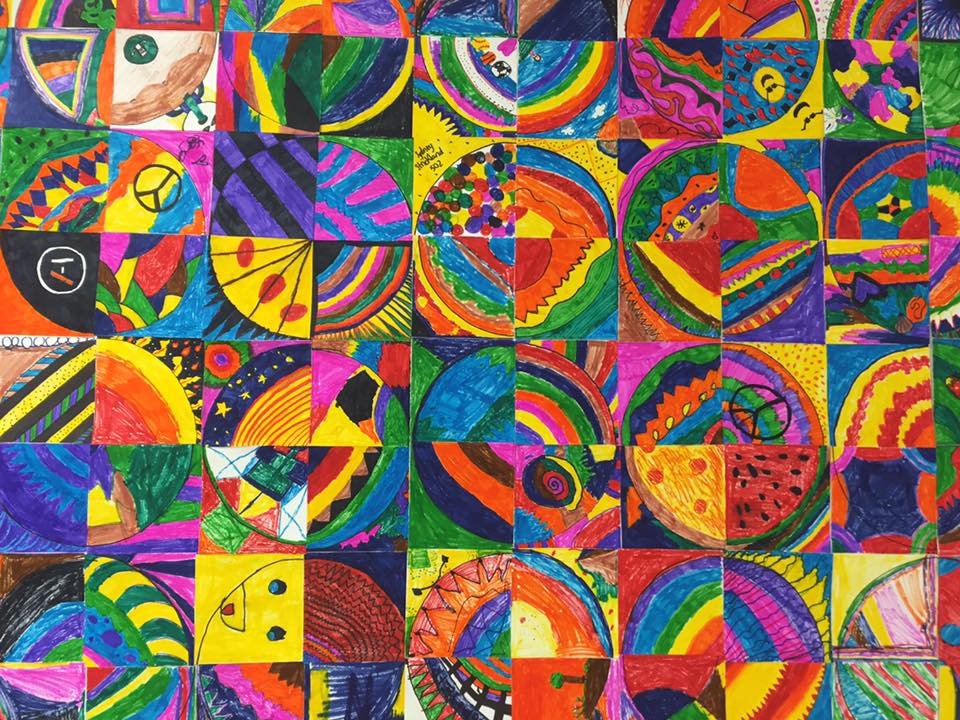
We used Crayola Supertip makers to add designs to our murals. Each block was individually colored based on a color scheme and then assembled with tape on the back. I had a tape dispenser at each table for each group, some groups using clear tape, and others using masking tape. My students had to work in groups which is always challenging, but a FANTASTIC experience for them. 
Picture
Picture
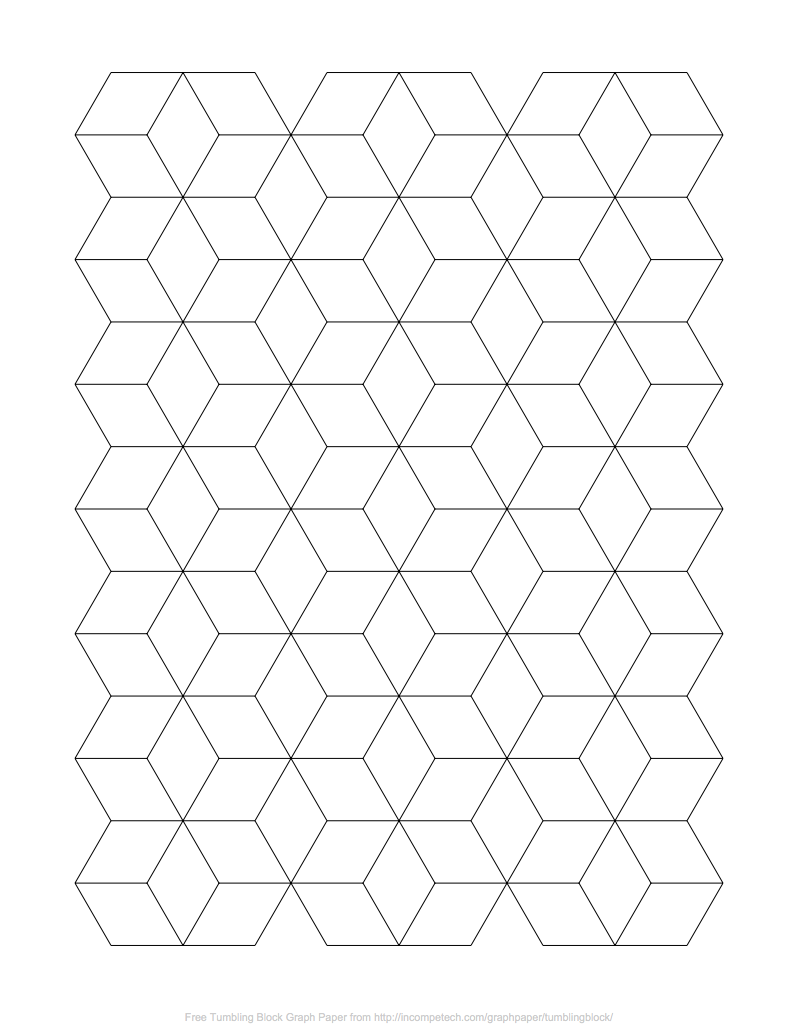
For this project, I copied about 400 (but quickly realized I needed about 800 for my 370ish students) 3-D squares on regular copy paper. When each class arrived, I numbered them off. As they walked into the room, each table had a number 1-6. Each group was comprised of 4-6 students.

​The students had to work as a team to select a color scheme and design their mural. ​Because I let the teams have some autonomy, all of the murals ended up quite different. Each student had to create at least one block, but then they could take over the job of cutting or taping if someone else really wanted to color more. I wish I would've made them do more intricate designs, but it was a one-day challenge so I was happy with the overall finished product. I posted a couple of design idea sheets in the room to inspire those 'design' challenged kids. 

I have a problem with students who grab one piece of paper, mess up a tiny bit and then want to throw it away. I did not let students throw away their squares. If they had an 'oops' then I would try to pawn it off on a really motivated kid later in the day to finish or fix. 
​
TEAM Collage Optical Illusion
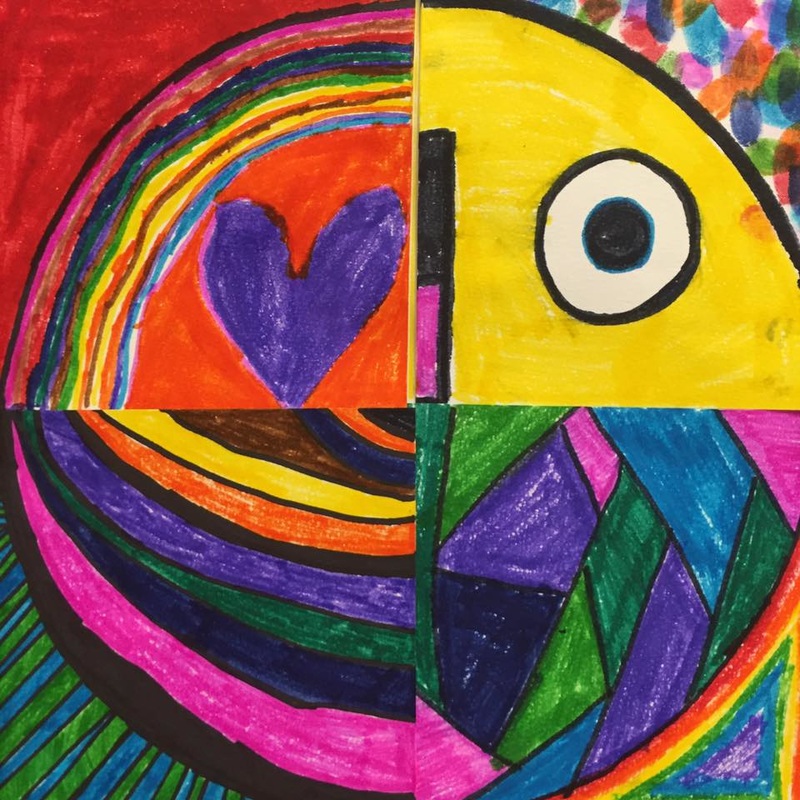
This team challenge MUST involve everyone in the group. As a team you will need to decide on a color scheme. Everyone MUST color ONE piece, but some people may color more than one.

Assign a job to each member of the team: pick up trash, organize supplies, taping shapes together, cutting out shapes, team leader--this person helps everyone else and oversees the design

  1. As a team decide on a color scheme: cool, warm, primary, secondary.
  2. Decide which side will remain uncolored with markers. Everyone must abide by the plan and leave ONE side blank.
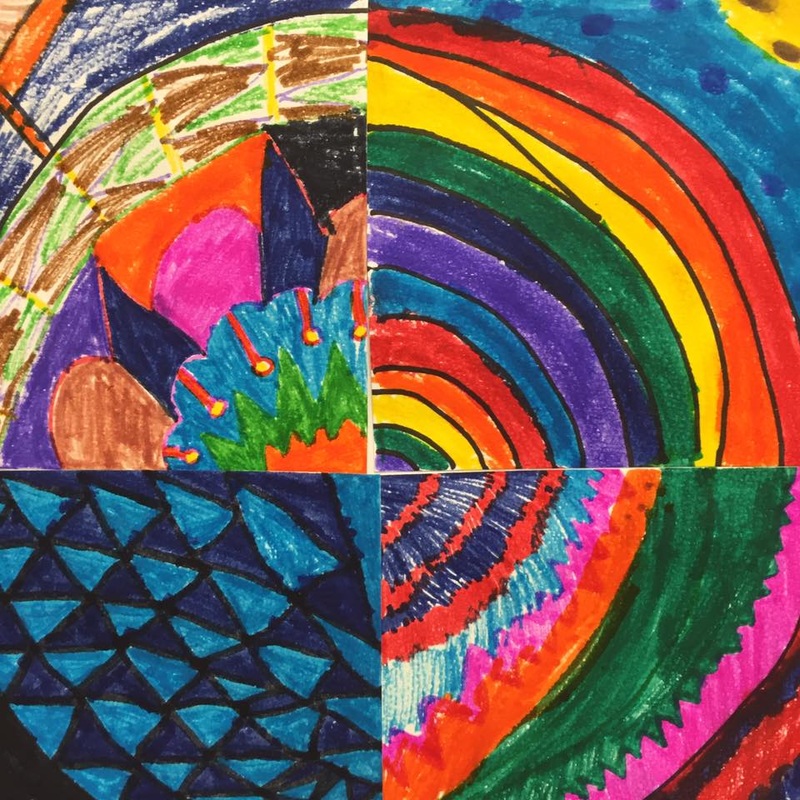
  3. Use markers to design two sides of the 3-D cube shape.
  4. Cut out shape, leave the black lines attached.
  5. Lay all the pieces out to make a cool design.
  6. Assemble with tape on the BACK of the shapes.
  7. Write teacher's name on the back of mural in pencil.
  8. Draw an arrow on the back that points to the top of the mural in pencil. 

PictureThe students loved the 'tumbling block' design, so I printed off some coloring sheets from this site for them to have their own to color.


​

​


Picture
I reconfigured the cubes to fit 2 per page this semester so that I don't use up quite as much paper.
Link to tumbling block coloring sheet.
​Link to 3-D Cube printable. 
Picture
Picture
Picture

​Overall, this was a fun one-day challenge for my 5th and 6th graders. We have about 47 minutes for art. 

Supplies:
Copies of 3-D cube (at least 1 per kid, plus many extras for motivated groups
Markers (we used Crayola Super Tips so that there would be tons of options for color schemes)
Scissors
Tape
Design idea sheets
Trash bins at each table (optional)
Pencils (for names on the back)


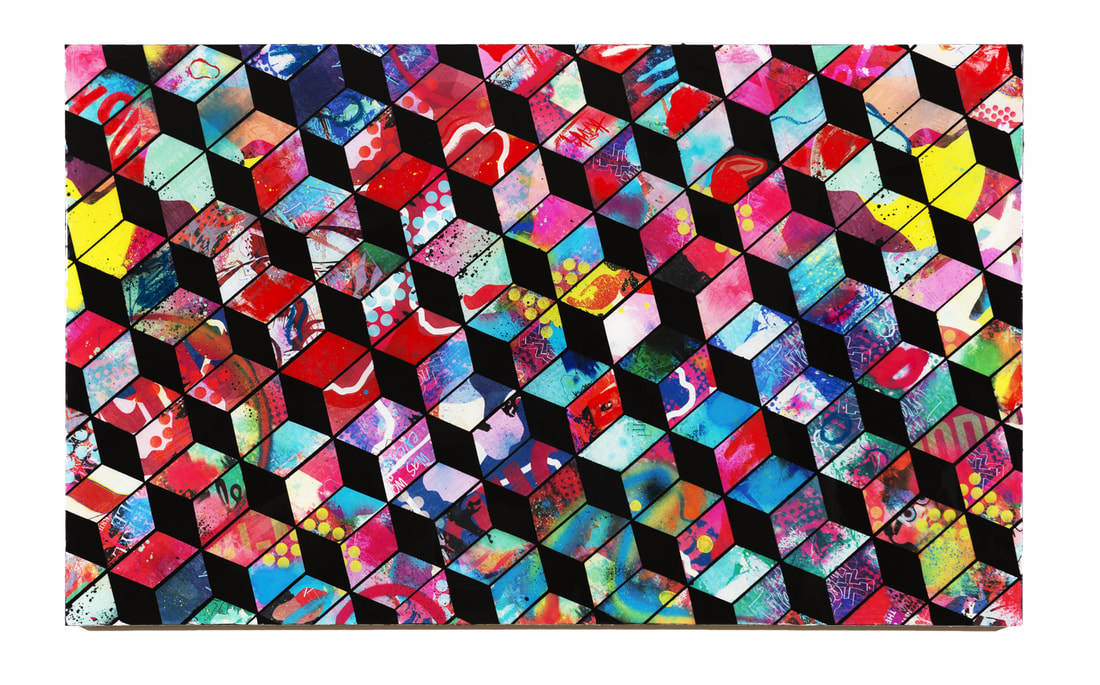
BONUS: Paintbrush rocket's Tints and Shades tumbling block paintings
​
Picture
Picture
0 Comments

Collaborative Circle MuralĀ 

9/22/2016

0 Comments

 
For our first endeavor at art making this year, we dived in with a collaborative project. 

One of my 6th graders said is 'that is so cheesy Mrs. Mitchell'. He said it was 'so cheesy' because when they were finishing their 4X4 squares, I might've reminded them that each student had a square, and even if several of use the same colors or have a similar idea, that they will all create something different and unique because they all have something special to bring to our school. ❄️❄️❄️ like snowflakes--no two are exactly alike. He totally called me on the cheese. Guilty as charged

Each table had to trace a circle onto a square piece of watercolor paper. Then they brought it to me, and I chopped it into squares. Then, they used Mr. Sketch unscented markers to color them. 

Picture
Picture
Picture
Picture
Picture
Picture
Picture
Picture
Picture
I warned them in advance that they probably would not be getting their squares back. I mounted them with white glue onto sheets of butcher paper. I pre-cut the paper into sections that will easily fit in the mini bulletin boards above the doors in our building. When I take down this mural, it will come apart in sections that I will transfer into the doorways above doors that are currently blank. I also wasn't super careful to pair them up with their table's matching circles....which makes it hard for them to find their own, but I just glued them down as they finished them....which gave the ones that needed one more day a little more time to finish and it allowed me to start making the mural right away since I wasn't waiting on a few from each class to finish. 

Thanks for the idea Michelle!
0 Comments

How do you curate student work?

9/20/2014

0 Comments

 
Curating student work is a big job.

Between art shows and building displays, the act of setting up all of the displays is an incredible undertaking. Just the act of selecting a few pieces for a show can be really difficult.

Generally I don't really work on-on one with my students to determine what will be displayed. I usually just sit down and
sort through pile after pile of artwork, taking in to consideration themes, color choices, paper orientation, size of my bulletin board, and how many pieces I have selected from that student in the past. I make selections methodically, with an idea in my mind for the final layout of the display.


Picture
Picture
Recently, I collaborated with a professor friend to organize some student work for a show at her university. The deadline sort of snuck up on me and I had to squeeze the project into the middle of a big unit. The lesson plan was ready-made, it was just a matter of cutting the paper and getting the supplies organized.

It worked out great because I had the chance to introduce my students to the artist of the month: Henri Matisse. (Students read and view the information on a S'more flyer that is accessed via QR code).

I was also able to try out Emaze. Instead of creating a Powerpoint, I created a slideshow on Emaze. I synced my apple tv to my computer with air parrot, so that I could use the cool flash-only template: gallery. I had the slideshow on repeat throughout the entire lesson so students could read and see about the artwork continuously.

I followed the lesson plan pretty closely, demonstrating how to cut out an organic shape, using that free 'painting with scissors' sort of style that Matisse is famous for. While students were working, I allowed them to 'jazz' up the adjoining hallway with organic shapes taped to the walls. They really enjoyed installing their piece to the collaboration. It was a fun experience. When I asked the teachers who work down that hallway if I could use the two walls for my installation, I'm not sure what they were expecting....but I think they are a little creeped out at the results...art people get it....others kind of don't.....but that is okay. It was especially cool that the music teacher down the hall had jazz music playing while we were installing the installation....again, only an art teacher would appreciate the perfection of that sound while we were taping paper scraps to a wall.

Picture
Here is the hallway 'before'. I chose this hallway because it doesn't get a ton of traffic, and students who use the busier hallway (with the creepy Cardinal eye peeping out), can get a peek at the installation.
Picture
Picture
Picture
From the collages that were created during class, I selected around 30, out of 330 to go to the exhibit at PSU. When I told students whose I had selected, some of them were bummed that theirs was not selected...so that always make it harder!

How do you curate student work?


This post is part of the Reflective Teaching Blog Challenge from TeachThought.
0 Comments

Christmas Joy!

12/20/2013

0 Comments

 
I love to throw in a little Christmas joy at the end of the 1st semester with each class. Here is a random sample for you.
Picture
Collaborative murals, painted in art club.
Picture
2nd grade paper poinsettias.
Picture
Draw santa without using RED! Color with play color paint markers.
Picture
Collaborative gingerbread houses. Two students per house. A 3/4 view of the house. Paint, chalk, glitter, OH MY!
Picture
Picture
Picture
Have a Merry Christmas!
0 Comments

2nd week of art: A kindergarten 'Script'

8/7/2013

0 Comments

 
The past couple of years, I briefly remember how much crying goes on in Kindergarten...and then I quickly forget after the first day of school. Since so many kids are now in preschool, the first day is much easier, without many tears from students (I often see blurry-eyed parents dashing out the door).

But after that first weekend at home, kids realize that school is real and they have to go every day....and I always see way more crying the first Monday after the weekend.

And if their first day of art is on that Monday, I QUICKLY remember how much crying goes on in Kindergarten. This year was no exception.

There was so much crying this year. SO MUCH!

Kids cry because they miss their mommies...they cry because they wanna go home...they cry because they ran out of time to make something they really, really wanted to make...they cry because someone is mean to them....they cry because they can't cut good or their drawing is all scribbly, after they did it that way last week.

It is exhausting and it is hard to make the lesson fun when someone is wailing and refuses to go to the safe spot, refuses to hold the little 'calm down bear' I keep in my room just in case such a situation arises...but with this trusty script, I am able to keep the plan moving and try to barrel forward with lesson regardless of Moaning Mertle Missing her Mommy.

I hope I don't sound hopelessly impatient. I promise, I'm not...but after doing this lesson over 60 times, it is hugely successful for the second week of school, even with a few criers here and there.

When students walk in to art, I remind them to find their chair from last week. If they cannot remember or they were not here, wait at the front and I will help them once I close the door.

To read the first week of art script/lesson plan, click here. 

Once students are seated, I go around the room with the seating chart I wrote down last week. I say, 'I'm going to point to you and say your name...if I get it write, just smile at me, if I get it wrong, help me say it right or if you are in the wrong chair, I can help you find the right one.'

After checking the seating charts, I remind them of my name. Then I point out the color chart at the front of the room and begin writing stars. I take 30 seconds to remind them how they can earn stars by being good listeners at the beginning and by doing a good job of cleaning up at the end. Then, I have them all point with me to each of the three places in the room with the 'hands off' symbol.

I quickly demonstrate how to draw a person on the board, since I showed them last week, they should remember how we did it, but sometimes there are new students in the room who have no clue what is going on.

I explain that I will hand back their drawings with the sharpie markers. If they forgot to trace their name or they forgot to trace their eyes or they wanted to draw a few more details, take just a second to do that with the maker...if they don't need the marker, they can leave it on the table and I will hand them the crayon basket.

I demonstrate how to find a skin color, hair color and shirt color and I literally color each one of those things on the drawing that I made last week. I say, 'Don't just take a green and scribble everything in green, do your very best coloring, making this look just like you.'

In order to demonstrate this step, I drew myself in front of every class and I saved my version in the class boxes so that I could continue the demonstration this week.

I point out my finished examples hanging on the board and explain that I am going to stop coloring mine and show them how to cut it out. I point to a big red bucket and explain that I will put this on their table after they have had a few minutes to color...they can grab a pair of scissors from the bucket and use them to cut out their drawing. This is a good time to remind them about scissor safety: don't cut clothes, skin, hair, only cut your paper.

If someone has a lot of fear about cutting, I demonstrate drawing an oval around one of my sample drawings...and tell them they can cut on the oval. If someone feels confident about cutting, they can cut on the black outline, but I suggest everyone 'shadow' cuts their paper.


Each example of cutting: oval drawn around, shadow cutting, and cutting right on the line

I say, ' Now shadow cutting means you cut it out, but you leave a white outline or 'shadow' around the outside edge of your drawing....last week, a boy wasn't shadow cutting, he was cutting right on the outline and you know what he did? He cut his head right off!....now if you are cutting and you accidentally cut off something important like your head or arm...its okay, don't cry (did I mention that there is a lot of crying in kindergarten?!)....don't cry, just save your arm or head (I am saying all of this as I shadow cut out my example).....and I can fix it. All of your scraps and trash can go into the red scissor bucket on your table.

Now, mine is cut out, I'm also going to snip off this strip that has my name on it. You will grab your drawing, your name and anything you accidentally snipped off and you will bring it to the front.....'

I shuffle across a big red paper taped to the board...."This says 'Mrs. Smith's Class'....when you come up to the front, I am going to ask you, "Keegan, where do you want to go? James, where do you want to go? And you will tell me, near the baby blue cardinal, near the title, or near a friend, and I will glue you on to this big red paper. This paper is a mural, say that with me, MURAL...good!
 kindergarten mural

Now, when your teacher arrives at the end of art, I will surprise her with this beautiful creation and she will LOVE IT! She will say, 'OH, I LOVE IT, IT IS SOOOO BEAUTIFUL!"
first grade 'super' mural

'Now when I get done gluing you to the big red paper, you can go back to your chair," I shuffle back to the other side of the board. 'Since I am keeping the big drawing we did last week for your mural, I want to give you a chance to make something to take home today. I showed you how to draw yourself on a big paper, today you get to draw yourself on a little and small paper. In the red bucket with the scissors, there are some small pieces of paper.

Grab one and draw yourself again, the same way we did last week (I demonstrate as I talk). Head, body, details, you can use a sharpie or a pencil. Then color it, just like the big one, skin, hair clothes colors. Then cut it out. Then in the bottom of the red bucket are some craft sticks. You will be taking your mini-you and gluing it to a craft stick....this way, it becomes a PUPPET! (Lots of oohs and ahs!)

I demonstrate how to put a big dot of glue at the top of the stick, then press the puppet's legs onto the glue dot and hold, counting to 30 (or as high as they can). I do the wiggle test, if the puppet stays, it will be on there for ever, if it falls off, press it to the glue and hold a little longer.

'Now, if you make your puppet like mine...(I show them a really good one I made), you may have time to make a friend. This is my student.' I put on a little puppet show for them using puppet voices: "Hi Mrs. Mitchell, what are you doing today?" "Oh, just getting ready to go make some art." "ooh, can I come, that sound fun!" "Sure, here we go!" "doo do do do do do!"


This is Michael Jackson's ghost...You know, Michael Jackson, he died? This is his ghost.
By this time, the students are so excited to make their puppets, they are dreaming up ideas for their 'friend' puppet...I tell them they can make baby brothers, mom, dad, cat, dog, teacher, whomever they want to put on a show with.


Then I pass out the drawings, sharpies, crayons, scissor buckets...staggering each item so that students have a chance to work with each thing in between otherwise they will just grab the scissors and start hacking it up without coloring it. I go around and help make a big oval for students that might have trouble cutting. Once students start bringing me their picture for the mural, I remind them to go make their puppet.

Then, with less than 15 minutes left, I pass out the glue. I put two glue bottles on every table so kids have to share. I have found that by restricting their time with the glue, I force them to take longer on each puppet, and they make fewer messes (there are still some messes though). Also, I wait until I have every big drawing glued to the mural before I pass out the glue, it helps me keep track of who hasn't gotten theirs on yet.

Just like the first week, I give the 'ONE MINUTE WARNING', flash off the lights and count the stars. When students line up, I have them take their puppets.

"Hold up one puppet, we are going to do a mini puppet show in line....now use your best puppet voice to repeat after me: S-M-I-L-E'. Good. Now on the count of 3, we are going to have a puppet dance party, here we go: '1.2.3.DANCE.DANCE.DANCE.'

'Now stop. On the count of 3, puppet rodeo....on the count of 3...puppet floating in space...puppet swimming...puppet karate...(I do two or three until we are out of time and the teacher is waiting in the  hall.)

'Now, look at your puppet and say 'shhhhh, puppet be quiet in the hall'.....now tuck your puppet in somewhere safe...remember, no puppet shows in the hall, we just had a fun one! When you get to the room, put your puppets somewhere safe, like your cubby, backpack or folder, where ever your teacher tells you and then when you get home, you can put on a puppet show for your mom, dad grandma, cat, dog, baby brother or sister.'

At that time, I quietly open the door, reminding students to show me their smiles...and I hand the teacher their mural where she oohs and ahhhhs......


In between each class, I take all of the trash from the buckets, refill them with more sticks, and puppet papers and I organize the glue, sharpies, and crayon baskets so that they are easy to distribute for the next class. I quickly grab the next 'mural' paper and hang my example for the next class on the board. I determine if anyone was absent in the next class and make sure I am ready to find them a chair, since it will be their first time in art, and I make sure I have an extra paper ready for them. I quickly glance over the seating chart and try to memorize at least a few names so I can call on them during class.


For kindergarten, I get a wide variety of finished outcomes...even though I do a directed drawing the first week. This project teaches me much about my students and where they are developmentally.


I do basically the same lesson for first grade, but first grade classes are 10 minutes longer so I set up my art easel, shut off one row of lights and use it as a puppet stage. The kids love going up to the front to put on a mini show for the class.


Also, I have the 1st graders draw themselves as super heroes for the mural, with magic pens and paintbrushes, capes and masks....it is a fun change for me since I do the lesson so repetitively!

Supplies needed for this lesson: 6X12 drawing paper (from week before), sharpies, crayons, scissors, glue, craft sticks, small white paper for puppets You can see week 1 here!
You can see my 'script' for the 1st week of art here. 
0 Comments

Collaborative Murals

5/14/2013

1 Comment

 
Picture
With my after school art club, I decided to attempt a collaborative mural. Since I have anywhere from 15-22 students in grades 1st-4th, and it is only one hour....I decided to create some line drawings on bulletin board paper for the students to paint. Had I spent more than one session on this, I would've had students design the murals, but it was one final hoo-rah for the year with each group, so I figured they wouldn't mind a little glorified 'coloring'. These murals turned out really awesome. I had some fabric designs and other inspiring images scrolling across my SmartBoard so that the students could look up for inspiration at any time. The murals look amazing hanging in the hallways.

I had pre-mixed 25+ colors.....students carried one jar of paint around the room and added their color to each mural a little at a time. Some of the older students went around helping me touch up the black outlines as the paint dried. I did have to spend a little time after the session to touch up the black, but it was worth it. Each one-hour session completed 5 murals....that is 10 large art displays in the hallways! The cityscape below was inspired by James Rizzi!

Picture
Picture
Picture
Picture
Picture
Picture
Picture
Picture
Picture
Picture
1 Comment
    PictureWelcome!

    Mrs. Mitchell

    Art teacher from Missouri. 

    Instagram
    Add to Flipboard Magazine.

    Archives

    March 2021
    April 2020
    November 2019
    July 2019
    April 2019
    January 2019
    October 2018
    July 2018
    June 2018
    May 2018
    April 2018
    March 2018
    January 2018
    September 2017
    May 2017
    April 2017
    March 2017
    January 2017
    December 2016
    November 2016
    October 2016
    September 2016
    March 2016
    December 2015
    October 2015
    August 2015
    May 2015
    April 2015
    March 2015
    February 2015
    November 2014
    October 2014
    September 2014
    August 2014
    June 2014
    May 2014
    April 2014
    March 2014
    February 2014
    January 2014
    December 2013
    November 2013
    October 2013
    September 2013
    August 2013
    July 2013
    June 2013
    May 2013

    Categories

    All
    1st Day Of School
    1st Grade
    3d
    Abstract Art
    Alcohol Ink Tiles
    Alpacas
    Animal Art
    Animation
    Architecture
    Art Centers
    Art For Kids Hub
    Art History
    Art Hub For Kids
    Art Room
    Art Show
    Art Teacher Conference
    Bell Ringer
    Birds
    Blending
    Bunnies
    Cardboard
    Chalk Pastels
    Chalk Stencil
    Charcoal
    Choice Based
    Christmas
    Chuck Close
    Classroom
    Clay
    Club Day
    Collage
    Color Diffusing Paper
    Colored Pencil
    Colored Pencils
    Construction Paper Crayons
    Contest Art
    Creatures
    Crystal Bridges
    Design
    Dice Games
    Document Camera
    Dot Day
    Drawing
    Early Finishers
    Easter
    Emojis
    Fall
    Field Trip
    Food Art
    Foxes
    Green Screen
    Grid Drawing
    Group Challenge
    Halloween
    Haunted Houses
    Hearts
    Hermit Crab
    High School
    Human Form
    Ice Breaker
    Inspirational Posters
    Ipads
    Jim Dine
    Justand
    Killer Whales
    Kindergarten
    Landscape
    Lesson Plans
    Lettering
    Llamas
    Magazines
    Mandala
    Maori
    Markers
    Masks
    Matisse
    Metal
    Model Magic
    Mona Lisa
    Monster Trucks
    Mother's Day
    Mother's Day Card
    Mummies
    Mural
    Newspaper
    New Zealand
    Notan
    Observational Drawing
    Ocean Art
    Oil Pastel
    Oil Pastels
    Optical Illusions
    Origami
    Owls
    Painting
    Paper Weaving
    Pd
    Pencil Topper
    Perspective
    Pete The Cat
    Picasso
    Polar Bears
    Pop Art
    Portraits
    Printmaking
    Product Review
    Professional Development
    Quiver
    Reflection
    Reflective Teaching
    Room Tour
    Rooster
    Sea Horse
    Seals
    Sea Turtle
    Self Portrait
    Shading
    Shaving Cream Prints
    Shoes
    Sketchbooks
    Sloth
    Solar Eclipse
    Spinners
    Spring Conference
    Star Wars
    Statue Of Liberty
    Step-by-step
    Step By Step Drawing
    Step-by-step Drawing
    Still Life
    Stop Motion
    Story Board
    Sub Plans
    Summer School
    Symmetry
    Tab
    Teacher Appreciation Cards
    Technology
    Tempera Paint
    Tiny Food
    Tissue Paper
    Trees
    Tumbling Blocks
    Valentine's Day
    Warm Ups
    Watercolor
    Wax Resist
    Word Art
    Yellow Submarine
    Zentangle

    RSS Feed

Powered by Create your own unique website with customizable templates.