THIS LITTLE CLASS OF MINE
  • Home
  • Contact Me
  • Lesson Plans

The Next big thing

1/21/2014

1 Comment

 
Picture
Have you tried Smore.com yet? When I think of s'smores, I usually think of the quote from the movie Sandlot.

Picture
When a colleague showed me Smore.com....it changed my whole approach to using technology in the classroom. The ease of creating an online flyer allowed me to 'flip' the classroom: putting the information in my students hands at the touch of a few buttons. I created and imported the information that I wanted them to access  variety of sources: youtube, vimeo, school-safe images, quotes, etc. YAY!!


You can follow me on Smore here: https://www.smore.com/u/nelliemitchell

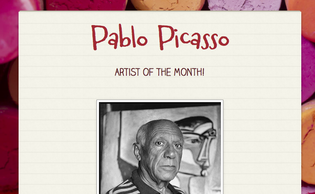
My most recent creation is pictured above: I created a flyer with videos, images, and information about Pablo Picasso, our artist of the month. Now, students can 'research' him during art and gain valuable background information. I also put a youtube video link to the book: Pigcasso Meets Mootisse, since I don't have a copy in my classroom.

I posted a QR code in an art center along with the usual posters and pictures. When students use i-nigma (or any QR code scanning app) to scan the code, it takes them right to this flyer. 

My first flyer, showed them how to create animations through thaumatropes, flip books and phenakistascopes.

Picture
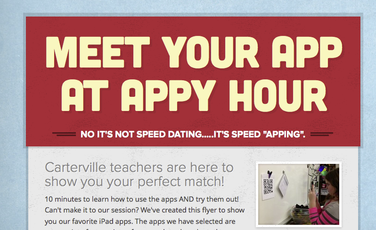
I also created a flyer for a presentation that a group of teachers in my building did for our recent in-service. We had everyone rotate from table-to-table, sort of like 'speed' dating....while they were at my table, we allowed them to interact with several apps and we explained how we are using them in our classrooms. I showed them this smore flyer, which contained all of the valuable information that they would need from the workshop, by showing them how to scan a QR code through the app i-nigma, which took them directly to this flyer. (I also told them how I use qrstuff.com to make my QR codes for free). I also showed them a couple of other art apps that I have already reviewed on my blog.

I love smore.com for allowing me to create my own content, and share it with my students in such a stunning, easy-to-use way. Instead of me showing them each activity in a whole-group setting, I can put the activities in their hands and allow them to navigate through each thing, using the steps that I post on the flyer.

After our workshop, we got some amazing feedback from a principal in another building:

Picture
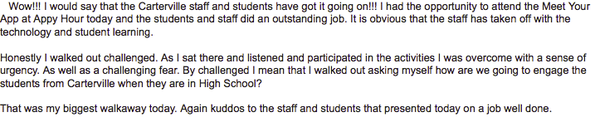
Such a good feeling to know that we are doing great things in our building!!

1 Comment

Collaborative Art: ANIMATION

1/8/2014

1 Comment

 
My theme this year is collaboration. I've made it my mission to sharpen my skills of facilitating collaborative projects in my classroom. Generally in art, students are lone wolves. Every choice they make is based purely on whatever they envision. By having them work in teams or pairs or whole-class, they are forced to compromise, problem-solve and they create something really special that couldn't have been done without input from someone else. It has been difficult for me...and my students...to get used to this way of creating. And they cheer when I tell them they get to work alone on a project...but as the year goes on, I have seen a remarkable difference in how they communicate and work together. This is the first project where I have almost totally relied on technology as the media...and I learned a lot about how to facilitate this sort of artwork in my classroom. I hope that this lesson will help you, should you attempt such a project in your classroom. Please leave comments+links if you decide to attempt a version of this!!

Let me also explain that this lesson was entirely inspired by a tutorial by Tricia Fuglestad. (In case you didn't know, Tricia was the 2012 Illinois art teacher of the year, I saw her in NY at the NAEA conference, and I was shocked and inspired by everything she is doing to pave a new technology infused-art-education program for art teachers) I figured if she could teach her kids how to make an alien run, then surely I could teach mine how to make an owl fly....(Vimeo: Tricia’s Do Ink tutorial  http://www.pinterest.com/pin/197102921165378574/ )

I watched her video like a dozen times to figure out how she explained each step of drawing the alien...and I realized that it really helped my students when I drew the owl 4 times in front of them, changing the wings with each drawing using the DO Ink app. They 'got' it a lot faster when I did it this way. My goal wasn't really to demonstrate the perfection of an owl in flight, it was to showcase a very basic animation and to give them chance to try something simple to gain some experience and confidence in the process. Next year (or during summer school), I can do a lot more with this--and it would probably be a whole lot easier with older students: 5th and 6th grade...and if I had BETTER stylus, that would've helped too...the stylus that I have kept falling apart or they just quit working all together.

Also, this project was really challenging because I only have 12 iPad minis...and my 3rd and 4th graders are USED to having their OWN iPad 24/7 in the regular classroom, it was difficult for them to work in teams. They were fighting, and complaining and at one point I got really, really frustrated with my 3rd graders...but the very next day, I did the same lesson with 4th grade and it went off perfectly...so I don't know, it might've just been that particular class/day/time and not this lesson at all to blame. Ha!


WEEK 1
Objectives/GLEs: STRAND I: Product/Performance (1.) Select and apply two-dimensional media, techniques, and processes to communicate ideas and solve challenging visual art problems. (not assessed in 3rd Grade) (3.) Communicate ideas about subject matter and themes in artworks created for various purposes. Figure: Create an original artwork of a figure in an action pose  

Procedure:

When students first arrive, have them re-group with a new partner. Record which group has which iPad so that students can get their same iPad back next week.  (I’m also changing the seating chart).

Explain that during ‘free’ time, students have a variety of activities they can do. If it works better for their team to work on the iPad and communicate at the same time, then that is fine…but if one team member (or both) works better alone, they can take turns and the one who is ‘off’ the iPad can use the stations to engage in an art activity while they are waiting for their turn to animate.

Students will also be coming over to a special station to create an alcohol ink tile. They will not be taking it home today because I have to spray it with a sealer…so they need to write their name on the bottom of the tile in sharpie. (Remember: swap with alcohol, drip ink on surface. Use 3 colors).

Today we will be using a STYLUS. Please be careful not to tear the tip of the stylus up….be gentle with it.

Lesson:

1.     Watch the Brainpop video about animation.  http://www.brainpop.com/technology/scienceandindustry/traditionalanimation/ You must have an account to access the video, but it is an awesome way to introduce this project!

2.     Demonstrate how to use the DoInk app on the iPads.

  • a.     Using a stylus, open the Do Ink app.
  • b.     Click on the Home button. (show them one that I’ve already made so they can get the overall picture of what they are doing).
  • c.      Click on drawings. Hit the + paintbrush button.
  • d.     Use the drawing tool to draw an owl flying. (Use black brush size 7 is just about the right size)
  • e.     Use the handout provided to put the wings, eyes, and beak in various positions on all 4 ‘onion’ skins.  (explain what onion skinning is) Do not ‘fill’ the background. If the color ‘spills’ students did not connect lines to form a solid shape.
  • f.      On my iPad, demonstrate how to add the 4th owl in the sequence. Demonstrate how to fill colors, erase, and resize the screen.*I Should have drawn all 4 instead of just the one.....it would've helped those first few classes to 'get' it.


Week 2

Objectives/GOAL: Both students need to finish animating the flying owl by completing 4 fully colored single frames. Each frame should show a different pose of the owl.

Then the ‘teams’ will create a composition. This will allow their owls have a path to walk across the screen. Students will collaborate to design the background and finish the flying owl composition.

Lesson:

1.  Watch the Brainpop video about animation.
  • a.     http://www.brainpop.com/technology/computersandinternet/digitalanimation/
  • b.     You must have an account to access the video, but it is an awesome one to introduce this segment of the lesson.

2.     Demonstrate how to create a new composition. Students who are sharing an iPad can merge their two owls (and resize them) on the composition (use the +gear button, add drawings over top). They will need to save the finished compositions to the camera roll with their names and class code as the title.
  • Demonstrate how to create a new drawing using the +paintbrush button, draw a very simple landscape and color it.
  • Demonstrate how to create a new COMPOSITION.
  •  Click the +gear button.
  •   Add the freshly designed background 'landscape'.
  •  Show how to resize
  • Show how to add the 2 animated owl drawings.
  • Demonstrate how to move the owl over to the left, and start a new path across the screen.
  • Demonstrate how to make the entire thing about 6-7 seconds long, this will slow down the path considerably.
  • Demonstrate how to RENAME, and SAVE the composition to the camera roll

Procedure:
  When students finish their composition on the iPad, they should use the Inigma app to scan the QR code that is posted in the room. This code will take them to a Smore flyer online that will lead them through a variety of animation activities. https://www.smore.com/egjp-animation All of the materials needed to create each of the animation activities are on a table in the art room. (I only did this with my 4th graders who were familiar with the inigma+smore apps.


REMINDER: Explain that during ‘free’ time, students have a variety of activities they can do. If it works better for their team to work on the iPad and communicate at the same time, then that is fine…but if one team member (or both) works better alone, they can take turns and the one who is ‘off’ the iPad can use the stations to engage in an art activity while they are waiting for their turn to animate.  Everyone should be working on SOMETHING at all times.


QR LINK TO S'mORE FLyer for 'free time' activities

Picture

QR Link to Rubric

Picture

WEEK 3
1. Students needed an additional week to work on animations. Since this happened around Thanksgiving break, we returned from Thanksgiving to start a new project, and reserved this for 'free time'. Several groups just needed a little more time to finish, while others needed a lot more time. And other groups, were completely finished. I did show the iMovie app, and challenge a few ambitions groups to make a 'Movie Trailer' for their owls, which would tell a story...and require more animations to fill up the video segments in the pre-designed trailers. No one has finished a trailer yet...
The first week, I wrote down which groups had which iPads. I took a picture of the seating chart on my iPad and mirrored it on my TV so that students could check the chart to remember which iPad+teammate they had.

**Note: Since I was doing this same project with 6 classes, we DID have trouble with some students 'forgetting' which owl was their original on the iPad. Since groups from every class were using the iPads, it was really hard to personalize the drawing so that no one else would claim it for their own. So like if one boy drew a blue owl, and the boy in the very next class really liked it, and 'couldn't remember which owl was his own' he might just pop that first boys owl into his composition and I would never know.....especially if they made some little change. In the future, I would have each grade do a different subject matter....or I would only do this project with one grade at a time.
Picture
Teacher Resources
Here are a couple of links to help navigate the Do Ink app. I watched these to help prepare myself for the lesson.

Download: Do Ink App https://itunes.apple.com/us/app/do-ink-animation-drawing/id364762290?mt=8

Do Ink: How to Animate and Draw http://blog.doink.com/post/45767533769/how-to-animate-and-draw-on-the-ipad-with-doink

Do Ink: Amazing 3rd Grade art http://blog.doink.com/post/21725802601/amazing-third-grade-project-on-doink-ipad-app

Vimeo: Tricia’s Do Ink tutorial (sorry it is linked through my Pinterest because I cannot access Vimeo anymore) http://www.pinterest.com/pin/197102921165378574/ my entire lesson is based on lessons done by Tricia Fuglestad.

 http://drydenart.weebly.com/ for more information on iPads in art education.
1 Comment
    PictureWelcome!

    Mrs. Mitchell

    Art teacher from Missouri. 

    Instagram
    Add to Flipboard Magazine.

    Archives

    March 2021
    April 2020
    November 2019
    July 2019
    April 2019
    January 2019
    October 2018
    July 2018
    June 2018
    May 2018
    April 2018
    March 2018
    January 2018
    September 2017
    May 2017
    April 2017
    March 2017
    January 2017
    December 2016
    November 2016
    October 2016
    September 2016
    March 2016
    December 2015
    October 2015
    August 2015
    May 2015
    April 2015
    March 2015
    February 2015
    November 2014
    October 2014
    September 2014
    August 2014
    June 2014
    May 2014
    April 2014
    March 2014
    February 2014
    January 2014
    December 2013
    November 2013
    October 2013
    September 2013
    August 2013
    July 2013
    June 2013
    May 2013

    Categories

    All
    1st Day Of School
    1st Grade
    3d
    Abstract Art
    Alcohol Ink Tiles
    Alpacas
    Animal Art
    Animation
    Architecture
    Art Centers
    Art For Kids Hub
    Art History
    Art Hub For Kids
    Art Room
    Art Show
    Art Teacher Conference
    Bell Ringer
    Birds
    Blending
    Bunnies
    Cardboard
    Chalk Pastels
    Chalk Stencil
    Charcoal
    Choice Based
    Christmas
    Chuck Close
    Classroom
    Clay
    Club Day
    Collage
    Color Diffusing Paper
    Colored Pencil
    Colored Pencils
    Construction Paper Crayons
    Contest Art
    Creatures
    Crystal Bridges
    Design
    Dice Games
    Document Camera
    Dot Day
    Drawing
    Early Finishers
    Easter
    Emojis
    Fall
    Field Trip
    Food Art
    Foxes
    Green Screen
    Grid Drawing
    Group Challenge
    Halloween
    Haunted Houses
    Hearts
    Hermit Crab
    High School
    Human Form
    Ice Breaker
    Inspirational Posters
    Ipads
    Jim Dine
    Justand
    Killer Whales
    Kindergarten
    Landscape
    Lesson Plans
    Lettering
    Llamas
    Magazines
    Mandala
    Maori
    Markers
    Masks
    Matisse
    Metal
    Model Magic
    Mona Lisa
    Monster Trucks
    Mother's Day
    Mother's Day Card
    Mummies
    Mural
    Newspaper
    New Zealand
    Notan
    Observational Drawing
    Ocean Art
    Oil Pastel
    Oil Pastels
    Optical Illusions
    Origami
    Owls
    Painting
    Paper Weaving
    Pd
    Pencil Topper
    Perspective
    Pete The Cat
    Picasso
    Polar Bears
    Pop Art
    Portraits
    Printmaking
    Product Review
    Professional Development
    Quiver
    Reflection
    Reflective Teaching
    Room Tour
    Rooster
    Sea Horse
    Seals
    Sea Turtle
    Self Portrait
    Shading
    Shaving Cream Prints
    Shoes
    Sketchbooks
    Sloth
    Solar Eclipse
    Spinners
    Spring Conference
    Star Wars
    Statue Of Liberty
    Step-by-step
    Step By Step Drawing
    Step-by-step Drawing
    Still Life
    Stop Motion
    Story Board
    Sub Plans
    Summer School
    Symmetry
    Tab
    Teacher Appreciation Cards
    Technology
    Tempera Paint
    Tiny Food
    Tissue Paper
    Trees
    Tumbling Blocks
    Valentine's Day
    Warm Ups
    Watercolor
    Wax Resist
    Word Art
    Yellow Submarine
    Zentangle

    RSS Feed

Powered by Create your own unique website with customizable templates.