Let me also explain that this lesson was entirely inspired by a tutorial by Tricia Fuglestad. (In case you didn't know, Tricia was the 2012 Illinois art teacher of the year, I saw her in NY at the NAEA conference, and I was shocked and inspired by everything she is doing to pave a new technology infused-art-education program for art teachers) I figured if she could teach her kids how to make an alien run, then surely I could teach mine how to make an owl fly....(Vimeo: Tricia’s Do Ink tutorial http://www.pinterest.com/pin/197102921165378574/ )
I watched her video like a dozen times to figure out how she explained each step of drawing the alien...and I realized that it really helped my students when I drew the owl 4 times in front of them, changing the wings with each drawing using the DO Ink app. They 'got' it a lot faster when I did it this way. My goal wasn't really to demonstrate the perfection of an owl in flight, it was to showcase a very basic animation and to give them chance to try something simple to gain some experience and confidence in the process. Next year (or during summer school), I can do a lot more with this--and it would probably be a whole lot easier with older students: 5th and 6th grade...and if I had BETTER stylus, that would've helped too...the stylus that I have kept falling apart or they just quit working all together.
Also, this project was really challenging because I only have 12 iPad minis...and my 3rd and 4th graders are USED to having their OWN iPad 24/7 in the regular classroom, it was difficult for them to work in teams. They were fighting, and complaining and at one point I got really, really frustrated with my 3rd graders...but the very next day, I did the same lesson with 4th grade and it went off perfectly...so I don't know, it might've just been that particular class/day/time and not this lesson at all to blame. Ha!
WEEK 1
Objectives/GLEs: STRAND I: Product/Performance (1.) Select and apply two-dimensional media, techniques, and processes to communicate ideas and solve challenging visual art problems. (not assessed in 3rd Grade) (3.) Communicate ideas about subject matter and themes in artworks created for various purposes. Figure: Create an original artwork of a figure in an action pose
Procedure:
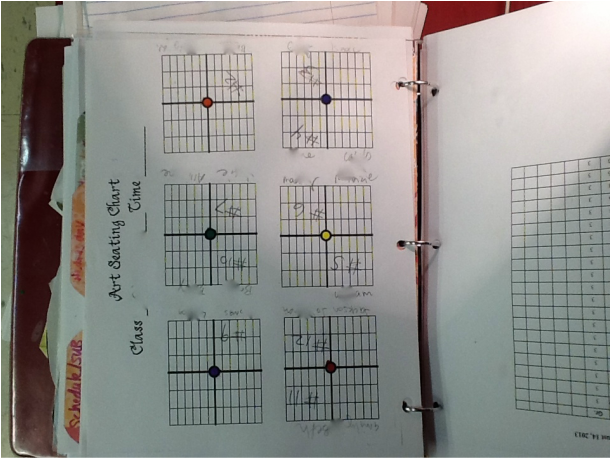
When students first arrive, have them re-group with a new partner. Record which group has which iPad so that students can get their same iPad back next week. (I’m also changing the seating chart).
Explain that during ‘free’ time, students have a variety of activities they can do. If it works better for their team to work on the iPad and communicate at the same time, then that is fine…but if one team member (or both) works better alone, they can take turns and the one who is ‘off’ the iPad can use the stations to engage in an art activity while they are waiting for their turn to animate.
Students will also be coming over to a special station to create an alcohol ink tile. They will not be taking it home today because I have to spray it with a sealer…so they need to write their name on the bottom of the tile in sharpie. (Remember: swap with alcohol, drip ink on surface. Use 3 colors).
Today we will be using a STYLUS. Please be careful not to tear the tip of the stylus up….be gentle with it.
Lesson:
1. Watch the Brainpop video about animation. http://www.brainpop.com/technology/scienceandindustry/traditionalanimation/ You must have an account to access the video, but it is an awesome way to introduce this project!
2. Demonstrate how to use the DoInk app on the iPads.
- a. Using a stylus, open the Do Ink app.
- b. Click on the Home button. (show them one that I’ve already made so they can get the overall picture of what they are doing).
- c. Click on drawings. Hit the + paintbrush button.
- d. Use the drawing tool to draw an owl flying. (Use black brush size 7 is just about the right size)
- e. Use the handout provided to put the wings, eyes, and beak in various positions on all 4 ‘onion’ skins. (explain what onion skinning is) Do not ‘fill’ the background. If the color ‘spills’ students did not connect lines to form a solid shape.
- f. On my iPad, demonstrate how to add the 4th owl in the sequence. Demonstrate how to fill colors, erase, and resize the screen.*I Should have drawn all 4 instead of just the one.....it would've helped those first few classes to 'get' it.
Objectives/GOAL: Both students need to finish animating the flying owl by completing 4 fully colored single frames. Each frame should show a different pose of the owl.
Then the ‘teams’ will create a composition. This will allow their owls have a path to walk across the screen. Students will collaborate to design the background and finish the flying owl composition.
Lesson:
1. Watch the Brainpop video about animation.
- a. http://www.brainpop.com/technology/computersandinternet/digitalanimation/
- b. You must have an account to access the video, but it is an awesome one to introduce this segment of the lesson.
2. Demonstrate how to create a new composition. Students who are sharing an iPad can merge their two owls (and resize them) on the composition (use the +gear button, add drawings over top). They will need to save the finished compositions to the camera roll with their names and class code as the title.
- Demonstrate how to create a new drawing using the +paintbrush button, draw a very simple landscape and color it.
- Demonstrate how to create a new COMPOSITION.
- Click the +gear button.
- Add the freshly designed background 'landscape'.
- Show how to resize
- Show how to add the 2 animated owl drawings.
- Demonstrate how to move the owl over to the left, and start a new path across the screen.
- Demonstrate how to make the entire thing about 6-7 seconds long, this will slow down the path considerably.
- Demonstrate how to RENAME, and SAVE the composition to the camera roll
Procedure:
When students finish their composition on the iPad, they should use the Inigma app to scan the QR code that is posted in the room. This code will take them to a Smore flyer online that will lead them through a variety of animation activities. https://www.smore.com/egjp-animation All of the materials needed to create each of the animation activities are on a table in the art room. (I only did this with my 4th graders who were familiar with the inigma+smore apps.
REMINDER: Explain that during ‘free’ time, students have a variety of activities they can do. If it works better for their team to work on the iPad and communicate at the same time, then that is fine…but if one team member (or both) works better alone, they can take turns and the one who is ‘off’ the iPad can use the stations to engage in an art activity while they are waiting for their turn to animate. Everyone should be working on SOMETHING at all times.
QR LINK TO S'mORE FLyer for 'free time' activities
QR Link to Rubric
WEEK 3
1. Students needed an additional week to work on animations. Since this happened around Thanksgiving break, we returned from Thanksgiving to start a new project, and reserved this for 'free time'. Several groups just needed a little more time to finish, while others needed a lot more time. And other groups, were completely finished. I did show the iMovie app, and challenge a few ambitions groups to make a 'Movie Trailer' for their owls, which would tell a story...and require more animations to fill up the video segments in the pre-designed trailers. No one has finished a trailer yet...
**Note: Since I was doing this same project with 6 classes, we DID have trouble with some students 'forgetting' which owl was their original on the iPad. Since groups from every class were using the iPads, it was really hard to personalize the drawing so that no one else would claim it for their own. So like if one boy drew a blue owl, and the boy in the very next class really liked it, and 'couldn't remember which owl was his own' he might just pop that first boys owl into his composition and I would never know.....especially if they made some little change. In the future, I would have each grade do a different subject matter....or I would only do this project with one grade at a time.
Here are a couple of links to help navigate the Do Ink app. I watched these to help prepare myself for the lesson.
Download: Do Ink App https://itunes.apple.com/us/app/do-ink-animation-drawing/id364762290?mt=8
Do Ink: How to Animate and Draw http://blog.doink.com/post/45767533769/how-to-animate-and-draw-on-the-ipad-with-doink
Do Ink: Amazing 3rd Grade art http://blog.doink.com/post/21725802601/amazing-third-grade-project-on-doink-ipad-app
Vimeo: Tricia’s Do Ink tutorial (sorry it is linked through my Pinterest because I cannot access Vimeo anymore) http://www.pinterest.com/pin/197102921165378574/ my entire lesson is based on lessons done by Tricia Fuglestad.
http://drydenart.weebly.com/ for more information on iPads in art education.


 RSS Feed
