THIS LITTLE CLASS OF MINE
  • Home
  • Contact Me
  • Lesson Plans

3-D Structures with Painted Paper

12/7/2015

1 Comment

 
Picture
Picture
Full disclosure. I've never actually taught anyone how to use perspective. I rarely use perspective. By teaching 300+ students how to use perspective, I've gotten a lot better at it myself and I can now figure out what they are getting or not getting and I've also learned how to show it one-on-one with some of them, when the whole group instruction wasn't making sense. I watched several youtube videos on how to do it, and it really helped me to simplify the instructions for my demonstration. 

For some reason, I decided this would be the year that I finally teach my students how to make things (besides spheres) how to appear 3-D. 

We started by drawing 3-D cubes in our sketchbooks. Some groups struggled with this----5th graders aren't ready in October. 6th graders did okay. 

Then, I had them get into pairs.....they loved working with a partner!

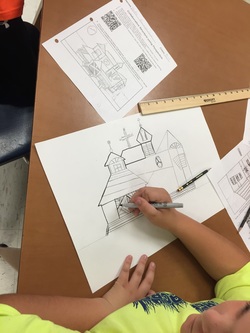
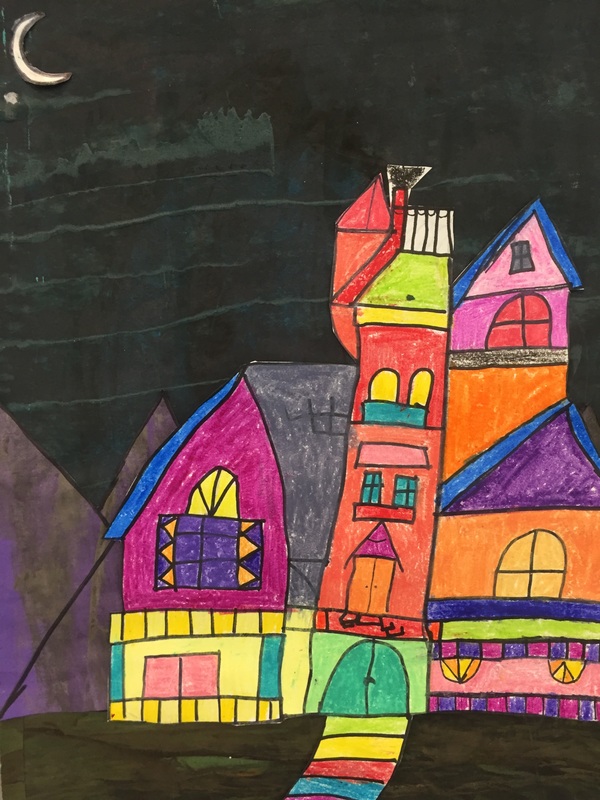
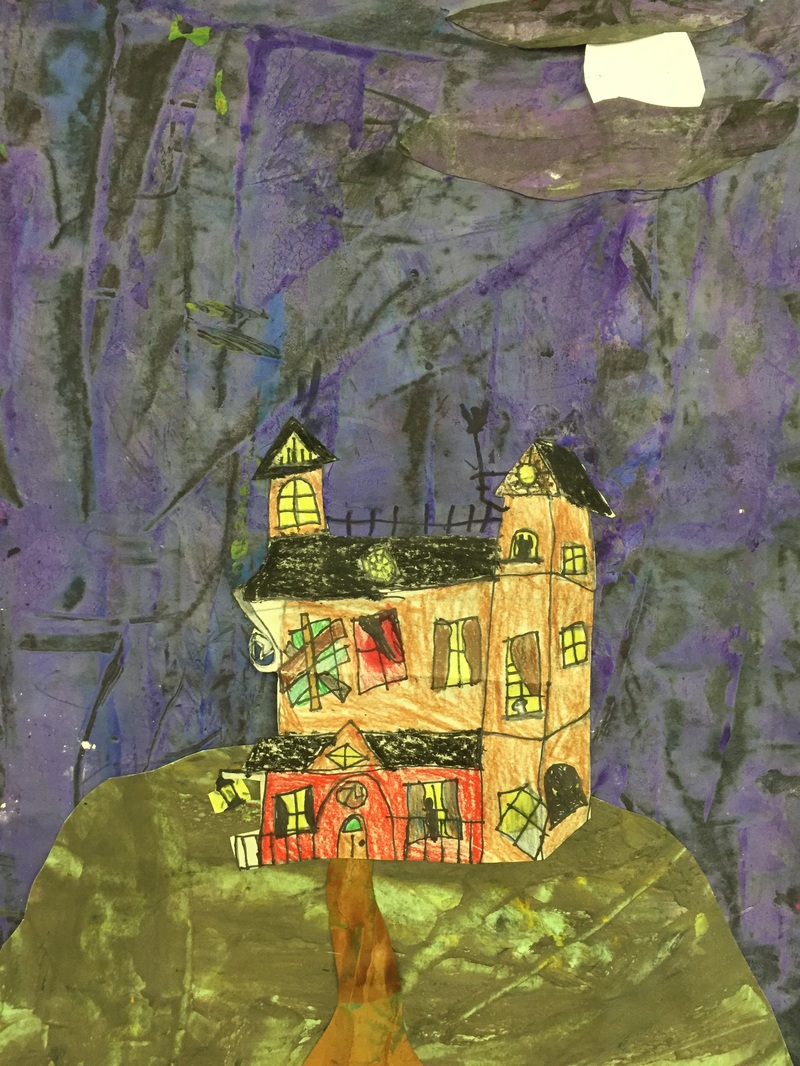
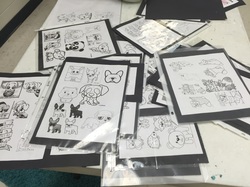
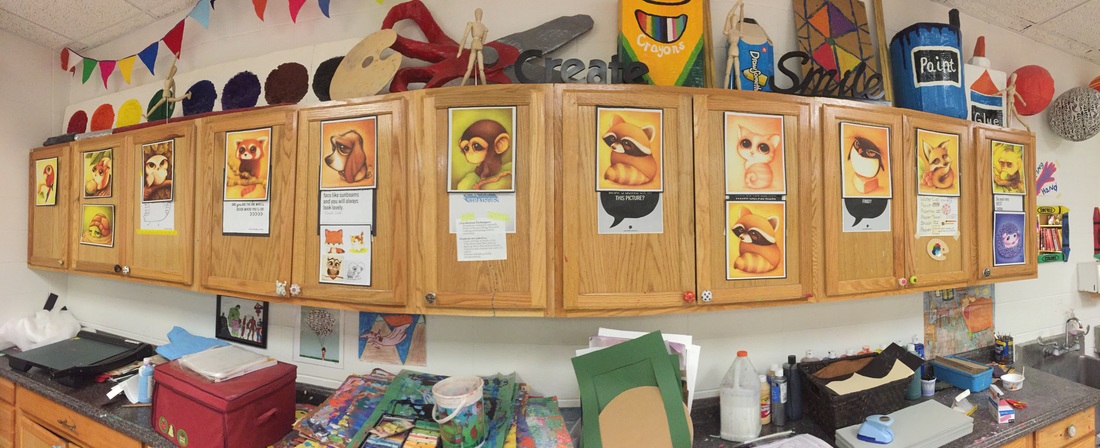
With their partner, they used the planning sheet to design a structure using perspective. They could use 1 point or 2 point perspective, and it could be spooky or not...since it was close to Halloween, I always like to do something with spooky architecture if I can. I have many visuals of Victorian houses, barns, pagodas, etc. for reference. Some of them are on this Smore flyer and I let my students access them digitally for this project. I also put 2 QR codes on the sheet, and let them watch the perspective videos we watched in class again, if they really struggled with the concept. (Flyer on Haunted houses and on Perspective)

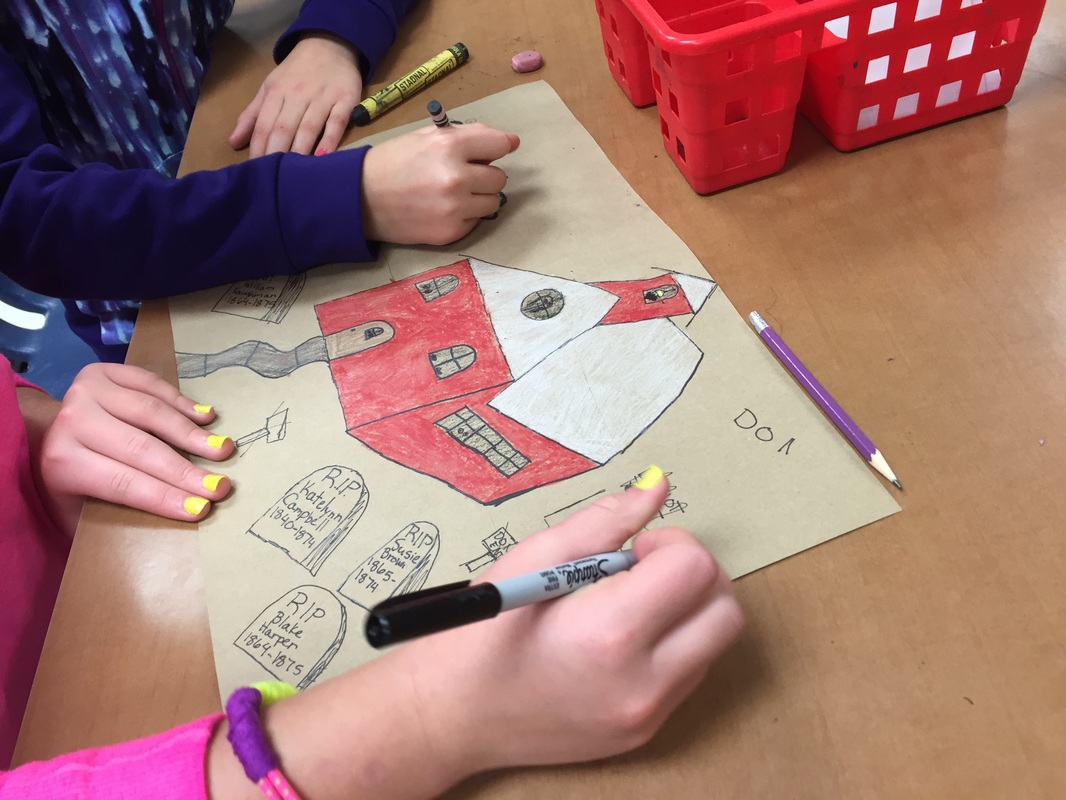
After they had a plan, they drew the structure on bigger paper---brown, gray or white paper. They outlined with a sharpie and could color with either colored pencils or construction paper crayons. 

While they were working on drawing and coloring, I called them over to a special art station to make painted paper. It took 2 art times to get every over to the center---which is about what it took for them to finish drawing/coloring. 

Picture
Picture
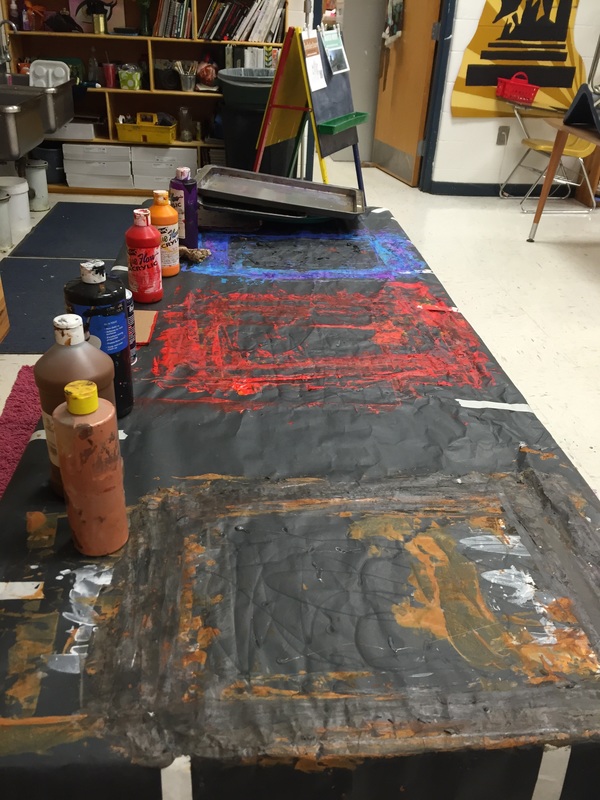
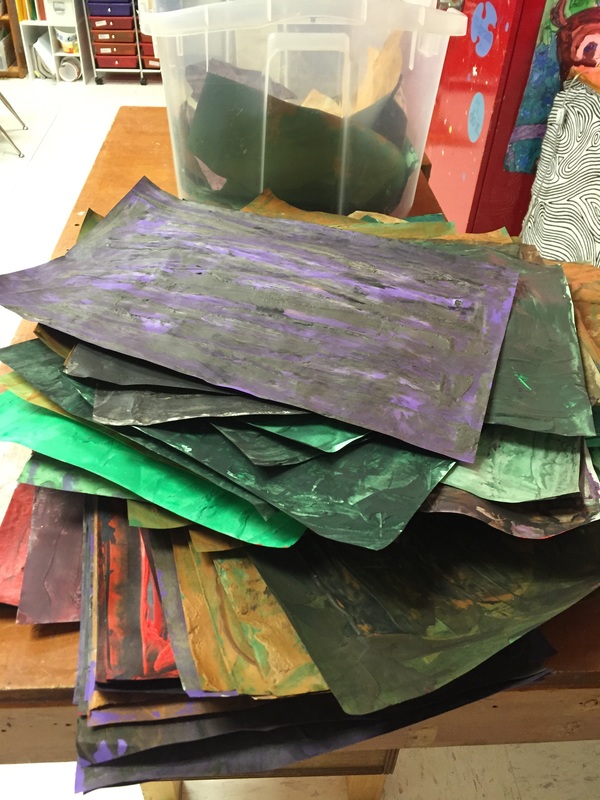
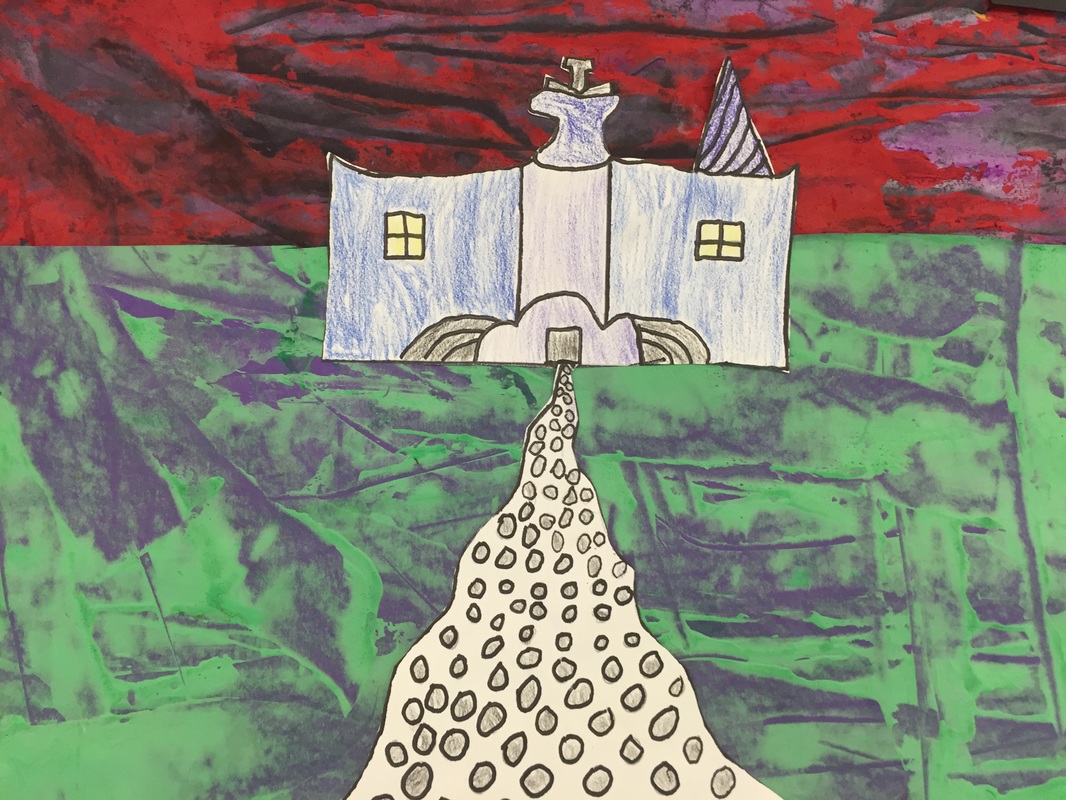
At the special art station, students smeared shaving cream+acrylic paint onto paper with a pallete knife. One student in each group did a paper for them to use as their sky (had to pick between red+yellow OR blue+purple OR white, for a hazy smoky sky). The other person in the group created a textured paper using the same process, but their paper went into a community pile for everyone to use. The community pile had lots of shades of green, blue, purple, grey, brown, and tan. I did different variations for each class depending on what I thought we might need for the finished collages. 

All of the 'sky' pages were created on black construction paper. The combination of the acrylic and the shaving foam gave the paint a thickness that we don't normally find in school grade paint. The pallet knife technique was very fun for some of the students, I stood right by as they created the textured papers. The other colors were made on dark green, purple, grey and light green construction paper. I don't have a photo of the station with students using the plastic palette knives and shaving foam, but we scraped the excess off the knife and onto a cookie sheet, so that it could be reused over and over. I let the students spray the shaving cream and squirted the paint. It was sort of like an assembly line. 
Picture
Picture
Picture
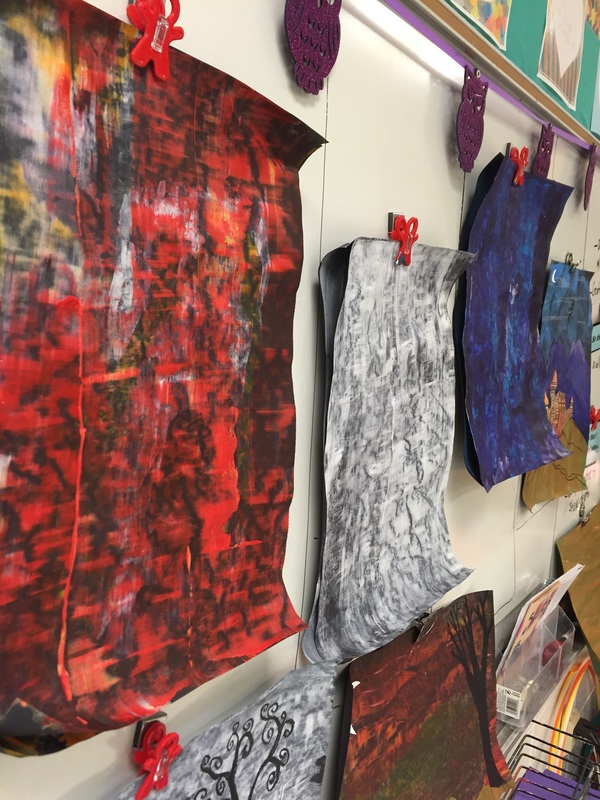
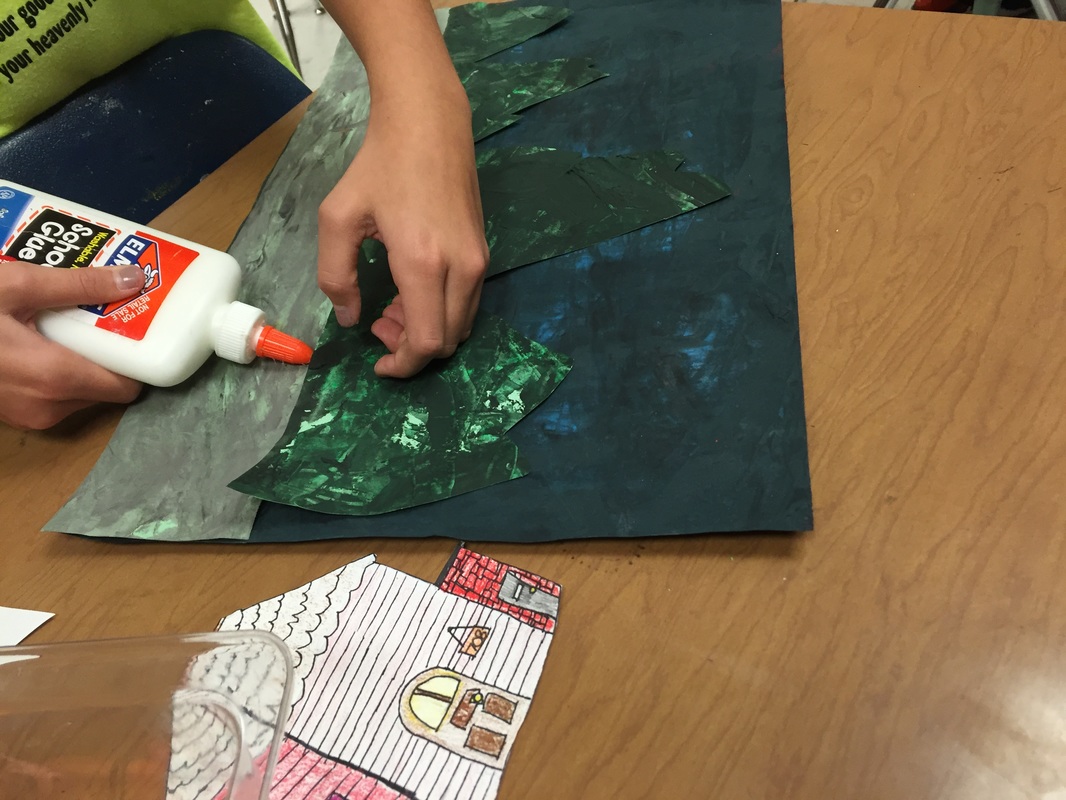
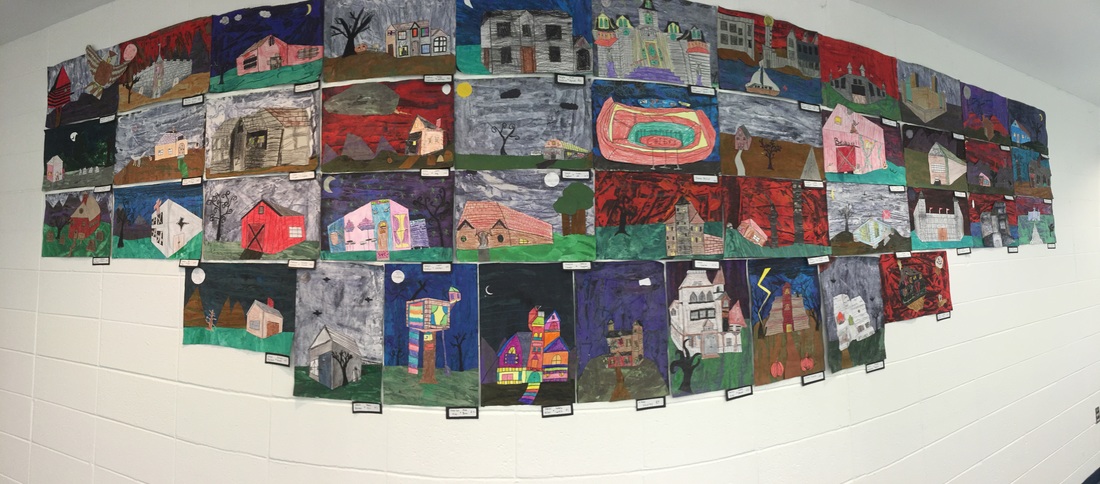
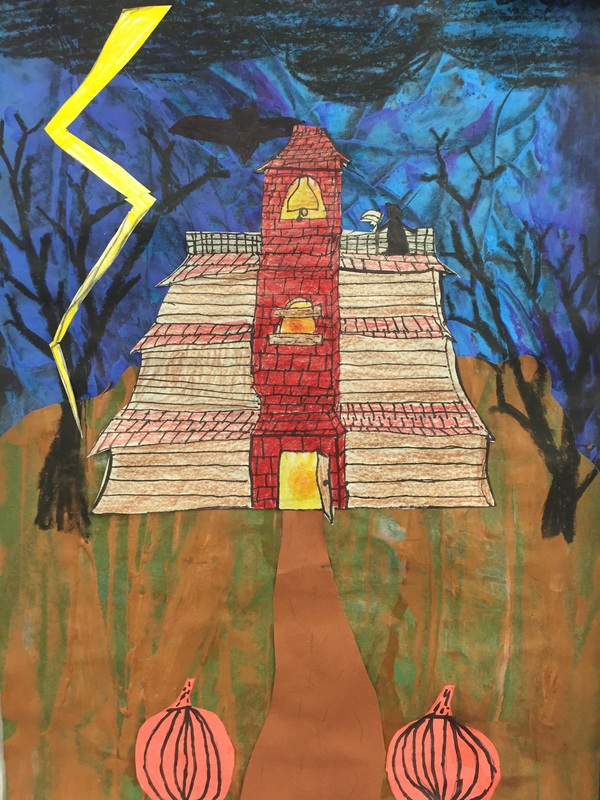
Once all of the textured papers were created, it was time to put everything together. I encouraged students to think about the foreground, as well as the middle ground and the background for their collages.

​Small details could either be drawn with black crayons (sharpies would not work on the texture paper) onto the background, or they could be drawn/colored around the edges of their structures, since we were planning to cut those out and adhere them to the sky paper. 

I also had to stress to them, DON'T cut the the 'sky' paper that is the 'canvas' we will be gluing everything to! 

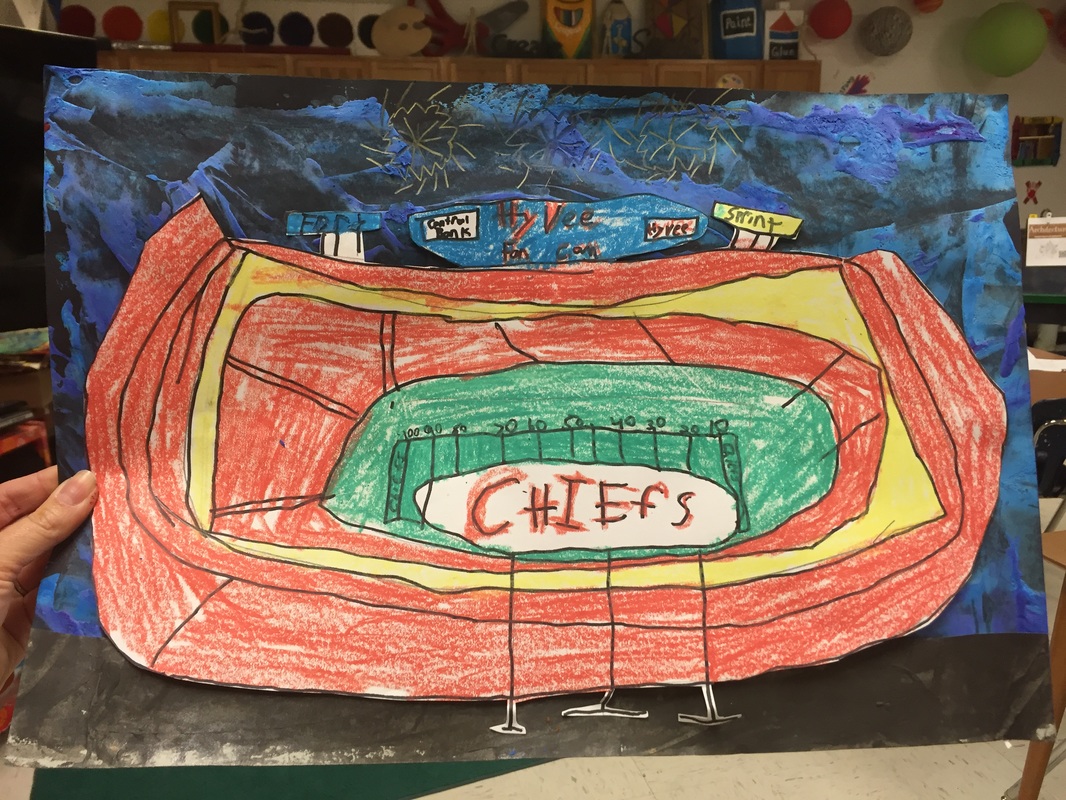
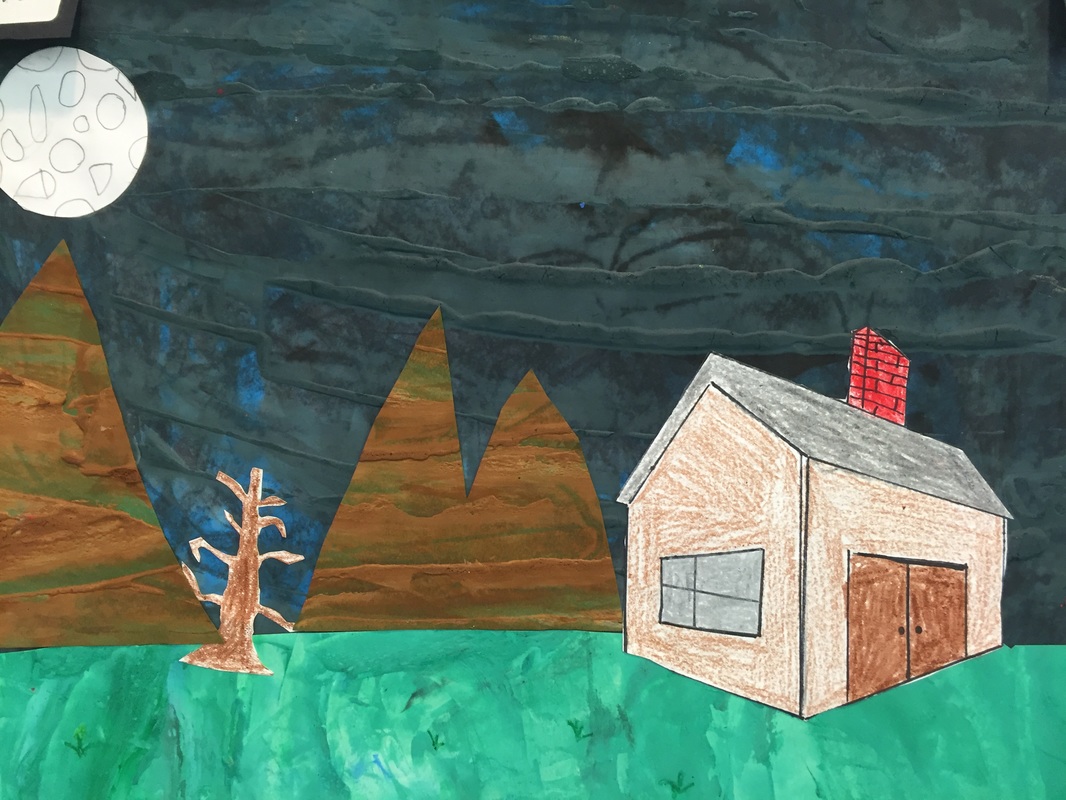
I was very proud of the variety of structures----there were tree houses, bird houses, stadiums, churches, schools, mansions, pagodas, and one group even re-created Alcatraz! 

Picture
Picture
Picture
Picture
Picture
Picture
Picture
Picture
Picture
Picture
Picture
Picture
Picture
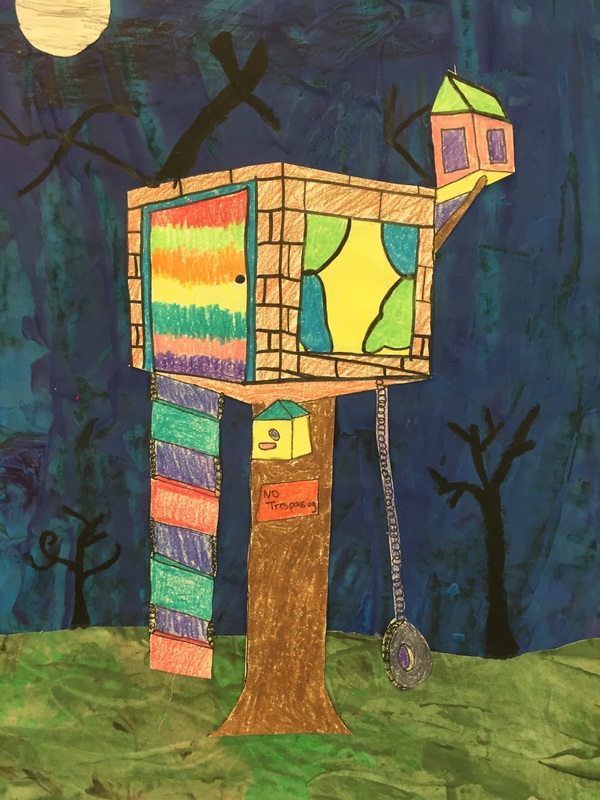
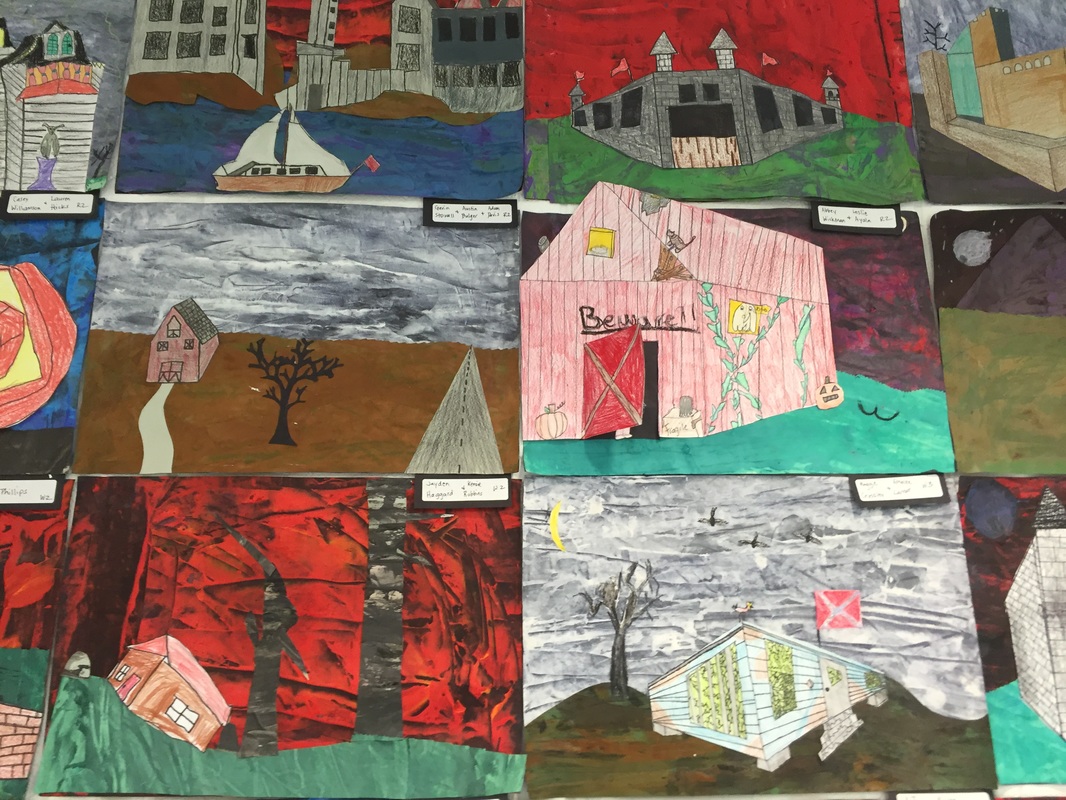
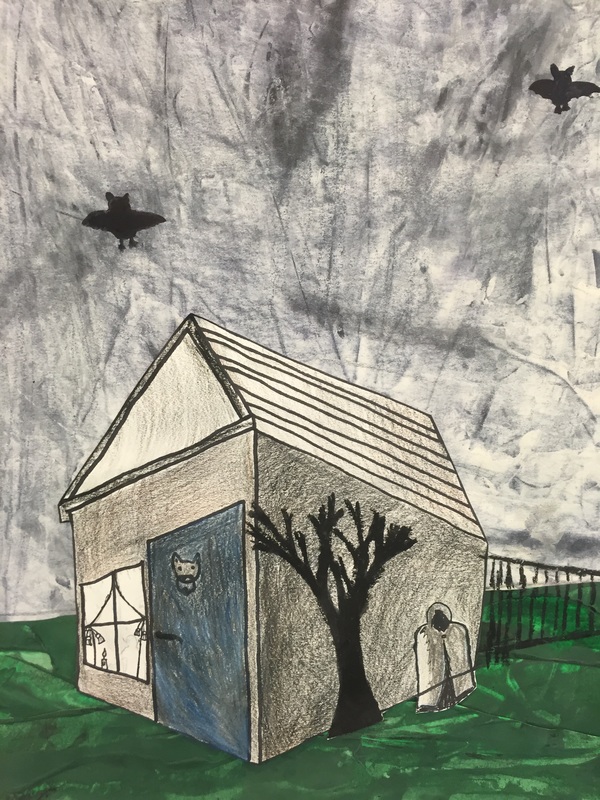
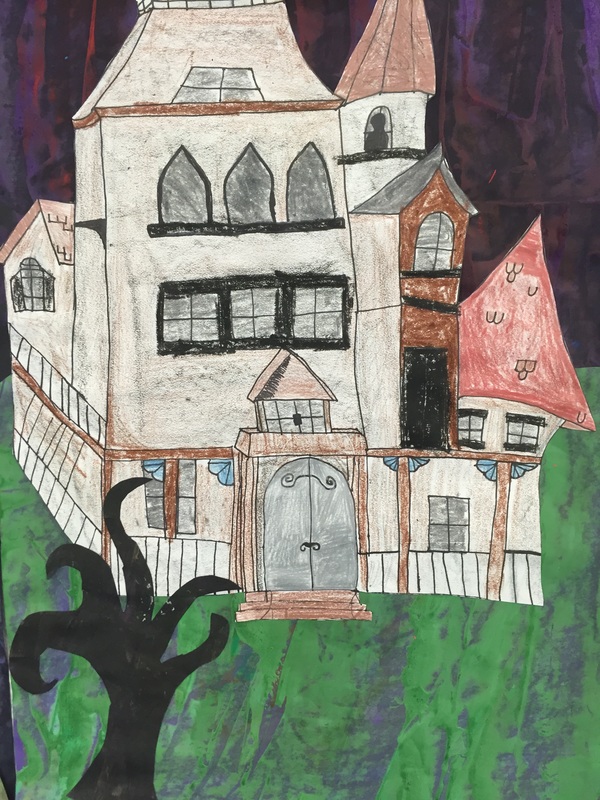
The spooky texture on the house above was made with a slightly dried out marker---a cool idea from one of my students!! 

We did spend at least one day practicing trees, before the final day of the project--it really helped them to get the hang of creating realistic looking branches. 
Picture
For my professional growth plan this year, I am trying to improve my use of student reflections in order to build rigor in the classroom. In our building the focus is on Quality Indicator 2.5 (Prior experiences, multiple intelligences, strengths and needs).

The research-based strategy to help me accomplish my goal: 

MDQ 2.13 The teacher engages students in activities that help them reflect on their learning and the learning process. 

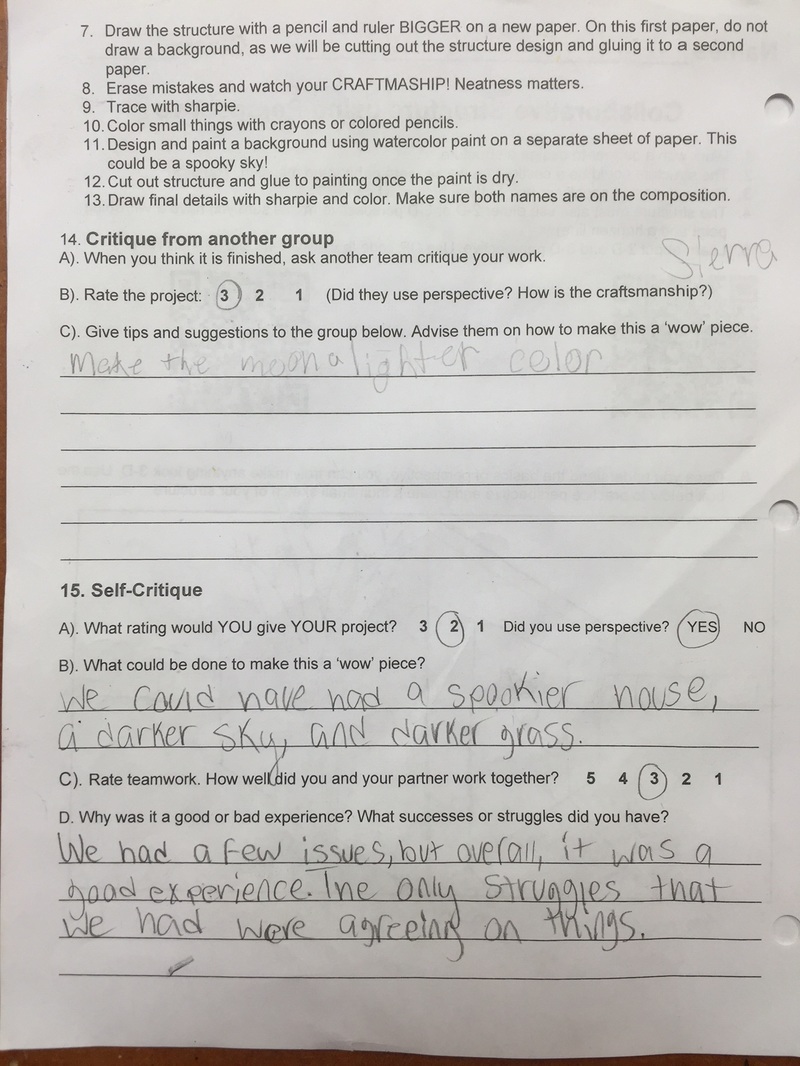
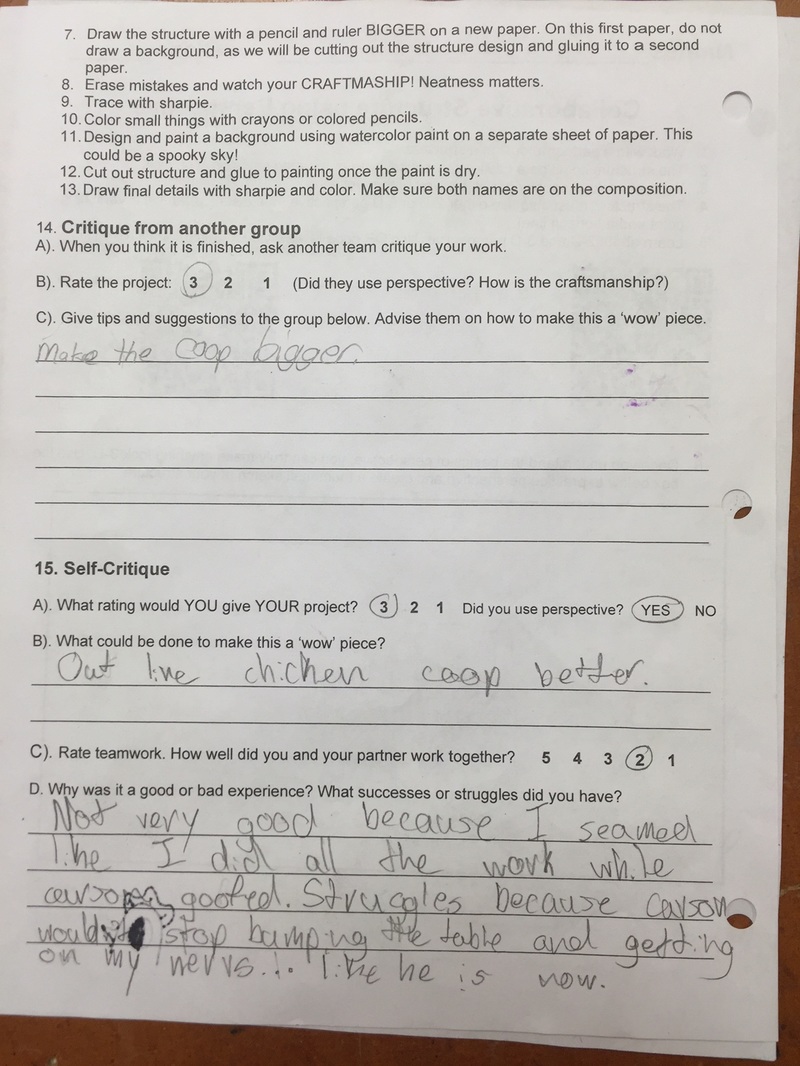
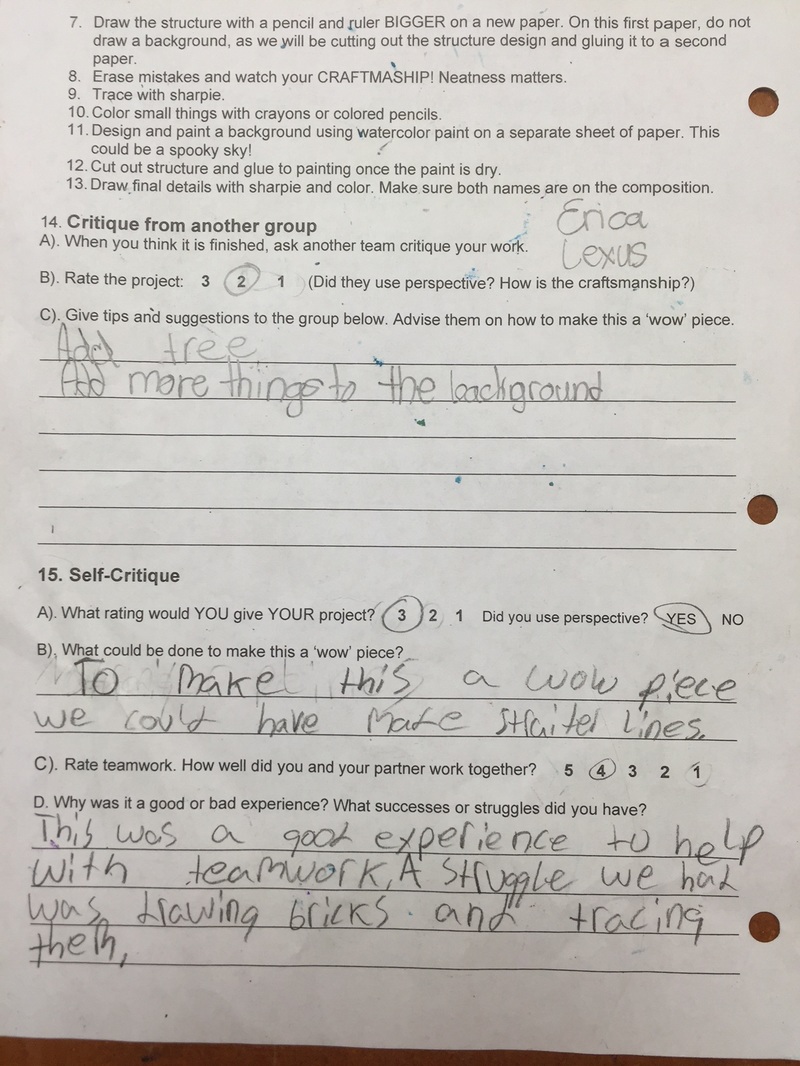
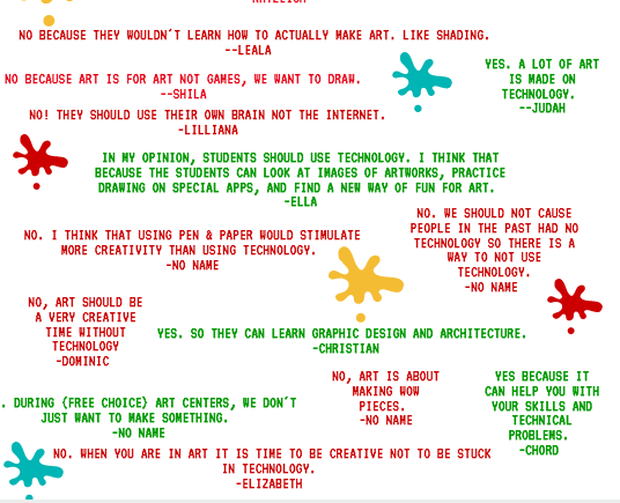
This activity added rigor by providing reflective thinking, adding a writing element, and also a peer critique.

Students collaborated on this project and they reflected on their collaborative experience---some struggled to compromise with each other, which is a very good life skill. 

By critiquing another group, and their own group's work, students actually had to get opinions from someone other than myself. It is good for students at this age to reflect on their own work.


Also, the opinions from peers hold a lot more value than what I say so sometimes they get really strong feedback and critiques from each other because other students tend to tell the truth in harsher terms and their words are more powerful coming from each other. 
​
Below, I have included a few samples of the student reflections. 


Picture
Picture
Picture
Picture
1 Comment

Technology and TAB in the Art Room

12/7/2015

0 Comments

 
Picture
Last week, a friend posted a link to an article about how technology and kids brains don't mix. I wholeheartedly agree that I spend too much time tethered to my screens. Between my iPhone, iPad, computer and television, it is easy to zone out in tech, instead of being productive. 

This year, I am implementing more Teaching for Artistic Behavior strategies in my art room with regularly scheduled free-choice art center days in our regular rotation between bigger portfolio/whole group projects. 

Since I am rather new to the free choice way of thinking, I did not have very many supply-heavy centers ready when school started. Since I only offer the centers once every-other week, I also cannot change my room too much to accommodate an entire sculpture corner so I have to be creative with what centers I have open and when. Implementing a variety of centers that address the huge variety of learning styles and trying to provide stuff for kids to do that are not 'babyish' and that are still cool to my middle school students was challenging and a little daunting at the beginning of the year. 

​Generally, drawing and 'research' are always open, allowing students to thumb through packets of images, info, and drawing guides. Collage is always open. I also have a 'architecture' center which consists of legos, blocks and marbles (my students love to set up 'marble runs'), and a couple of other rotating manipulative kits that I have. 

Sometimes iPads are an option for centers, and I explained in the beginning that students should use them for setting up green screen movies, stop motion movies, designing video games, and also creating movie trailers and a few suggested apps. My iPads had Google Earth and a couple of other apps that students would just seemingly waste time on, so I ended up taking some of the apps off, in order to encourage them to create something! 

I've been pleasantly surprised that many students would rather create something with wire or popsicle sticks than numbly play an iPad app. The difficult thing about supply-heavy activities in TAB, is that I don't have storage space for large sculptures and many of those things run dry if I don't monitor how much is used on a student-by-student basis. Which is a killer for creative ideas. SO many times, students want to make something with TONS of supplies and I have to limit them in some way because I just don't have enough for everyone to do that. 

The nice thing about having technology in the rotation, is that it uses almost no supplies. The video game design app has a paper template that I keep copies of for students to use, and I have a tub of supplies for green screen movies (green gloves, some cardboard painted green, green straw from starbucks for puppet show movies, and lots of toys for students to practice using in front of the cameras.)

Each class period when centers are open, I spend a little time introducing a new special center, like chalk or stippling with ink, or styrofoam or dice games or artist trading cards. Sometimes the special center reinforces something we are doing in class or relates to seasonal subject matter like fall or halloween. Some students work on WOW pieces like weavings, which take several class periods to finish. Others always go for the special centers. Some want iPads every single time. Others work in teams to set up a marble run or build a tower or use modeling clay with the modeling clay tools. This year, following our weaving unit, I opened weaving and sewing---allowing students the opportunity to use fibers in new ways---awesome and successful centers!

If students finish a project early, iPads are usually never an option for free time activities---the only time they have free choice on the iPads are on Free choice day. On regular art days, if students finish early, I have an activity cart with books, origami paper, collage materials, drawing paper and usually some type of coloring sheet. Occasionally, I will allow a responsible and trustworthy student to look up something to reference online, but I try to limit that, because they typically spend WAY too much time searching. Often, I will find a picture and we will both agree on it, and I will let them look at it---like if they want to see an eagle landing or something specific like that. 

We have used iPads to enhance 2 projects this year. Once, we used them to take a 'selfie' and upload it to google drive so I could print it for each student. The second time we used the iPads, students worked in pairs to enhance their understanding of 1 and 2 point perspective and design a structure using perspective. I gave them links and vides and photos to help explain perspective, after we had practiced as a class in our sketchbooks---some kids just weren't getting it, so I was a little desperate to find different ways to show them how it worked. I also let them look at some visuals of structures, like mansions, tree houses, castles, and other places as inspiration for their structures. I had a bunch of examples on a smore flyer. (More about that lesson later).  It was nice to have TONS of visuals at their fingertips, as I do not have a bunch of prints of those types of images.

The week of Halloween, we had a weird shortened schedule for two of our sessions, so I checked out the chrome book cart from the computer lab and had students take a Kahoot quiz. The quiz is super interactive and it is a great formative assessment tool. Since we were only together for 20-30 minutes, it was nice to play a review game instead of trying to get out supplies and then spend a bunch of time cleaning up. We were productive and it was super fun and engaging. 

Below is a collection of images I have taken throughout the semester. Most of the photos are of 'WOW' pieces, in which students are very proud to show off their work, and they spend multiple art sessions on the project. Other photos are in progress of the centers in action. 

Picture
Picture
Picture
Picture
Picture
Picture
Picture
Picture
Picture
 I decided to survey my students to get their opinions about the technology aspect in our class after reading the article I mentioned at the beginning of this post. Since we have used the technology a little bit this semester, they have experienced it in our class and have been exposed to it as I described above.  Also, I should mention that the biggest majority of my 5th-6th grade students do NOT have a laptop assigned to them, they get about ONE hour of computer lab a week, and they use a classroom computer to take AR tests.

 When students arrive to my class, I always have them fill out a slip---sometimes they draw, sometimes we review, other times I ask them questions. Here is an info graphic with the question on my poll. I took their slipps, counted all the yeses/nos and compiled some of my favorite responses to the 'Why and Why Not.' The results are below. Please take the time to read some of the responses. I was very surprised by what they said. 
Picture
Picture
Picture
0 Comments

Christmas Stocking

12/7/2015

0 Comments

 
Picture

IF YOU WOKE UP CHRISTMAS MORNING TO FIND A NEW PET PEEKING OUT OF YOUR STOCKING, WHAT ANIMAL WOULD YOU HOPE TO FIND?

Picture
 i
​This was the prompt I asked my students right before Thanksgiving break.I explained that when I was a little girl, I would lay in bed at night and WISH that I would wake up in the morning to find a new cuddly little pet peeking up at me from its little cage. I would pray that the sweet little new hamster or baby bunny would arrived equipped with all of its food, toys and accessories. 

I made a list of animals after they wrote them down and printed out a bunch of  'cute animal' visuals for them to reference. I also had them do some mini sketches to practice drawing the animal peeking out of a stocking. I opted for cute versions of the animals for my students to look at---as this project verges on toy versions of realism, and really appeals to my 5th grade students. The 6th graders are proud of their work, but weren't as sold on the project initially. 

The day we started, I had the cute visuals---clip art (simply drawn versions of cheetahs, sharks, horses, and it was helpful to have several varieties of dogs since some have snouts and others have snub noses.) I also had a few color prints hanging up that showed sad, big eyed-animals. We talked about the white highlight in the eyes, how that helped give the animal a lifelike quality.

Students drew their animal on 9X18 gray paper with white chalk. The nice thing about the chalk, is that it forced them to draw big and it also erases more easily than pencil, which can tend to leave a groove in the paper when they press hard with their pencil and attempt to erase, sometimes it still shows up when they switch to oil pastels.

I also had several 2" circles punched out of tagboard on the table and I encouraged my students to trace the circles for the eyes. For this project, I encouraged students to draw the eyes really big. The eyes were a little unnatural, and many of the animals look a little bit like stuffed toys---which I think is good for this particular project. 

TIP: Once students start coloring with oil pastels, I stressed to them that they should do ALL of the white first. Especially if their pet has a LOT of white, like a panda or a fox, because if they do the black first, it smears really bad! Also, if they are planning to trace the mouth or the nose with black, save that for last, after they color the fur around that area with another color, so it doesn't smear. 

Picture
Picture
I printed the photos above after finding them on a Pinerest search. I would love the give the artist credit, but I had trouble tracking down the original artist. I will post the link here if anyone finds it. 


Here is the paper, the tray of chalk+tagboard circles. I used my 2" punch to create the tracers. This size circle worked really well for this size paper. 

Picture
We spent a little time on one of the first, day before we drew the animal, practicing shading a sphere. Many students had never shaded a sphere and the eyes were looking really flat. I love the animals that have 'gum ball' looking eyes----they used the shading technique in their coloring, and did a nice job of blending the oil pastels! 

I posted steps 1-3 on the board and added 4-5 the 2nd day. 
1. Trace the eyes. Use chalk. (save room for ears/hat above the eyes)
2. Draw details and add a stocking.  
3. Color with oil pastels. 
4. Cut out. 
5. Glue to black paper, put name on black paper. 

Tip: Make sure eye highlight is white. The reflection needs to be white or else it looks strange. 
Picture

This is how they looked after day 1.

​Lots of foxes. Some had time to color the eyes. Some waited until the 2nd day to color the eyes. I encouraged them to do the eyes open, but the closed eyes are pretty cute too. Also, I suggested that they use multiple colors to make realistic textures. Some students spent a long time drawing, so they did not get as much colored. If they made the animal too big to squeeze the stocking on the same page, I let them use a 2nd piece for the stocking. The paws were optional. 

On the last day, we finished coloring, and cut out the animals, gluing them to a simple black background. This was all that some had time for, if they spent a lot of time designing the stocking or were slower at coloring. I had a few Christmas coloring pages for early finishers. 

Picture
Picture
Picture
Picture
Picture
I love the side view of the eagle and the 3/4 view of the red panda with open mouth above! 
Picture
Picture
Picture
Picture
Overall, this was a very successful project that we were able to finish in 2-3 art sessions. The kids loved them. At one point, I was so excited with the success: "You guys!! This room looks like a cute apocalypse, "I proclaimed with a class because there were SO many cute animals everywhere!! 

Students loved this project because pretty much any animal was approved...sharks, spiders, and peacocks were all welcome, and only a little bit of the head/shoulders had to peek out of the stocking. They were able to decorate and customize the stockings, and add toys/accessories, candy canes, hats, bows and anything else they wanted to make their image. 

One or two students that do not celebrate Christmas did not have to include the stocking, they could just draw the animal peeking out of its home or something. I would love another alternative if you have an idea, please leave it in the comments! 
Picture
0 Comments
    PictureWelcome!

    Mrs. Mitchell

    Art teacher from Missouri. 

    Instagram
    Add to Flipboard Magazine.

    Archives

    March 2021
    April 2020
    November 2019
    July 2019
    April 2019
    January 2019
    October 2018
    July 2018
    June 2018
    May 2018
    April 2018
    March 2018
    January 2018
    September 2017
    May 2017
    April 2017
    March 2017
    January 2017
    December 2016
    November 2016
    October 2016
    September 2016
    March 2016
    December 2015
    October 2015
    August 2015
    May 2015
    April 2015
    March 2015
    February 2015
    November 2014
    October 2014
    September 2014
    August 2014
    June 2014
    May 2014
    April 2014
    March 2014
    February 2014
    January 2014
    December 2013
    November 2013
    October 2013
    September 2013
    August 2013
    July 2013
    June 2013
    May 2013

    Categories

    All
    1st Day Of School
    1st Grade
    3d
    Abstract Art
    Alcohol Ink Tiles
    Alpacas
    Animal Art
    Animation
    Architecture
    Art Centers
    Art For Kids Hub
    Art History
    Art Hub For Kids
    Art Room
    Art Show
    Art Teacher Conference
    Bell Ringer
    Birds
    Blending
    Bunnies
    Cardboard
    Chalk Pastels
    Chalk Stencil
    Charcoal
    Choice Based
    Christmas
    Chuck Close
    Classroom
    Clay
    Club Day
    Collage
    Color Diffusing Paper
    Colored Pencil
    Colored Pencils
    Construction Paper Crayons
    Contest Art
    Creatures
    Crystal Bridges
    Design
    Dice Games
    Document Camera
    Dot Day
    Drawing
    Early Finishers
    Easter
    Emojis
    Fall
    Field Trip
    Food Art
    Foxes
    Green Screen
    Grid Drawing
    Group Challenge
    Halloween
    Haunted Houses
    Hearts
    Hermit Crab
    High School
    Human Form
    Ice Breaker
    Inspirational Posters
    Ipads
    Jim Dine
    Justand
    Killer Whales
    Kindergarten
    Landscape
    Lesson Plans
    Lettering
    Llamas
    Magazines
    Mandala
    Maori
    Markers
    Masks
    Matisse
    Metal
    Model Magic
    Mona Lisa
    Monster Trucks
    Mother's Day
    Mother's Day Card
    Mummies
    Mural
    Newspaper
    New Zealand
    Notan
    Observational Drawing
    Ocean Art
    Oil Pastel
    Oil Pastels
    Optical Illusions
    Origami
    Owls
    Painting
    Paper Weaving
    Pd
    Pencil Topper
    Perspective
    Pete The Cat
    Picasso
    Polar Bears
    Pop Art
    Portraits
    Printmaking
    Product Review
    Professional Development
    Quiver
    Reflection
    Reflective Teaching
    Room Tour
    Rooster
    Sea Horse
    Seals
    Sea Turtle
    Self Portrait
    Shading
    Shaving Cream Prints
    Shoes
    Sketchbooks
    Sloth
    Solar Eclipse
    Spinners
    Spring Conference
    Star Wars
    Statue Of Liberty
    Step-by-step
    Step By Step Drawing
    Step-by-step Drawing
    Still Life
    Stop Motion
    Story Board
    Sub Plans
    Summer School
    Symmetry
    Tab
    Teacher Appreciation Cards
    Technology
    Tempera Paint
    Tiny Food
    Tissue Paper
    Trees
    Tumbling Blocks
    Valentine's Day
    Warm Ups
    Watercolor
    Wax Resist
    Word Art
    Yellow Submarine
    Zentangle

    RSS Feed

Powered by Create your own unique website with customizable templates.