THIS LITTLE CLASS OF MINE
  • Home
  • Contact Me
  • Lesson Plans

Total Eclipse of the Art

1/16/2018

0 Comments

 
Picture

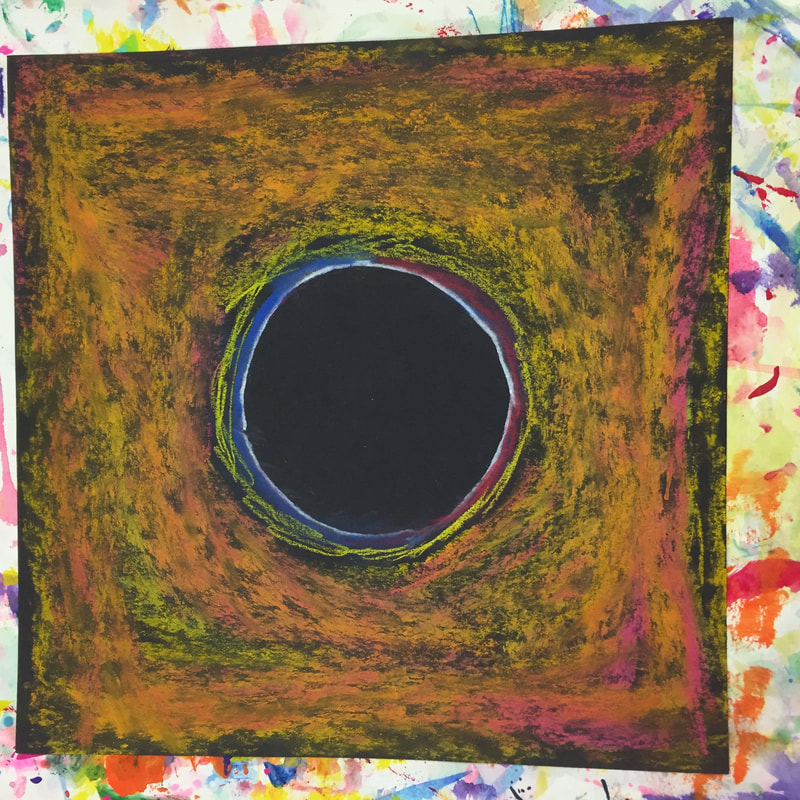
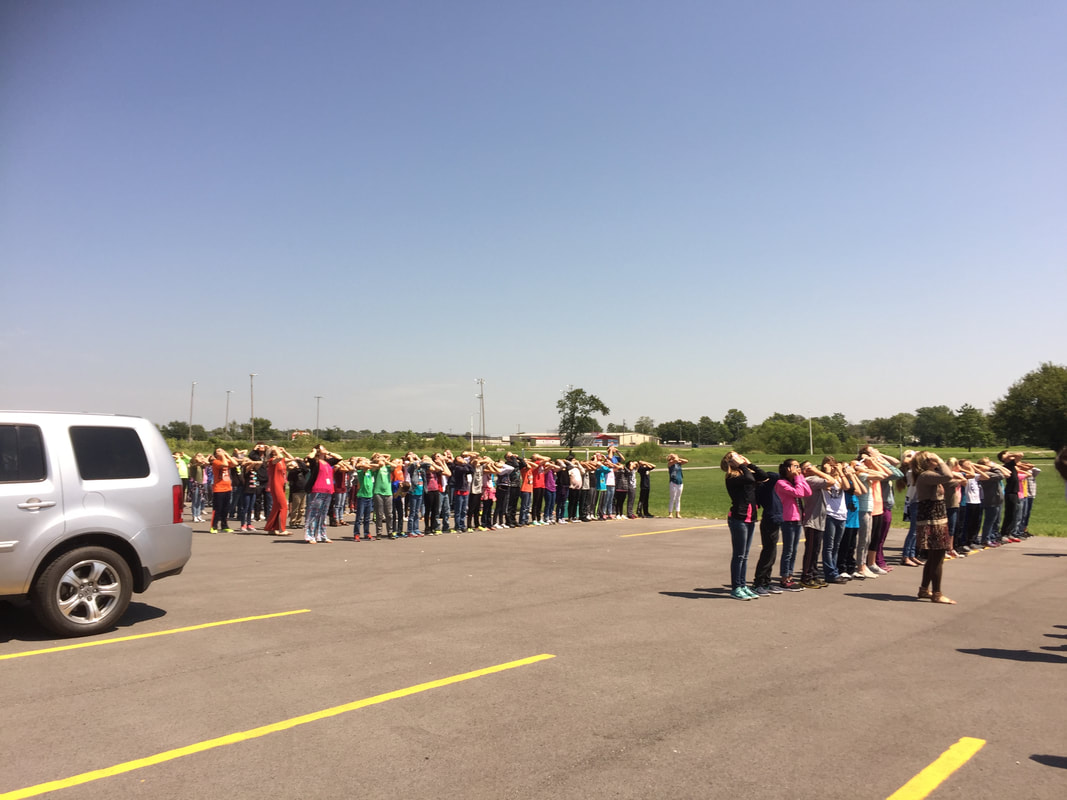
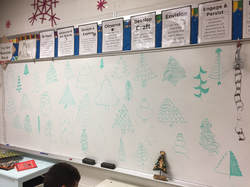
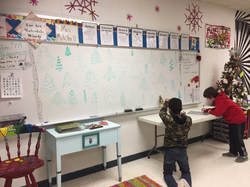
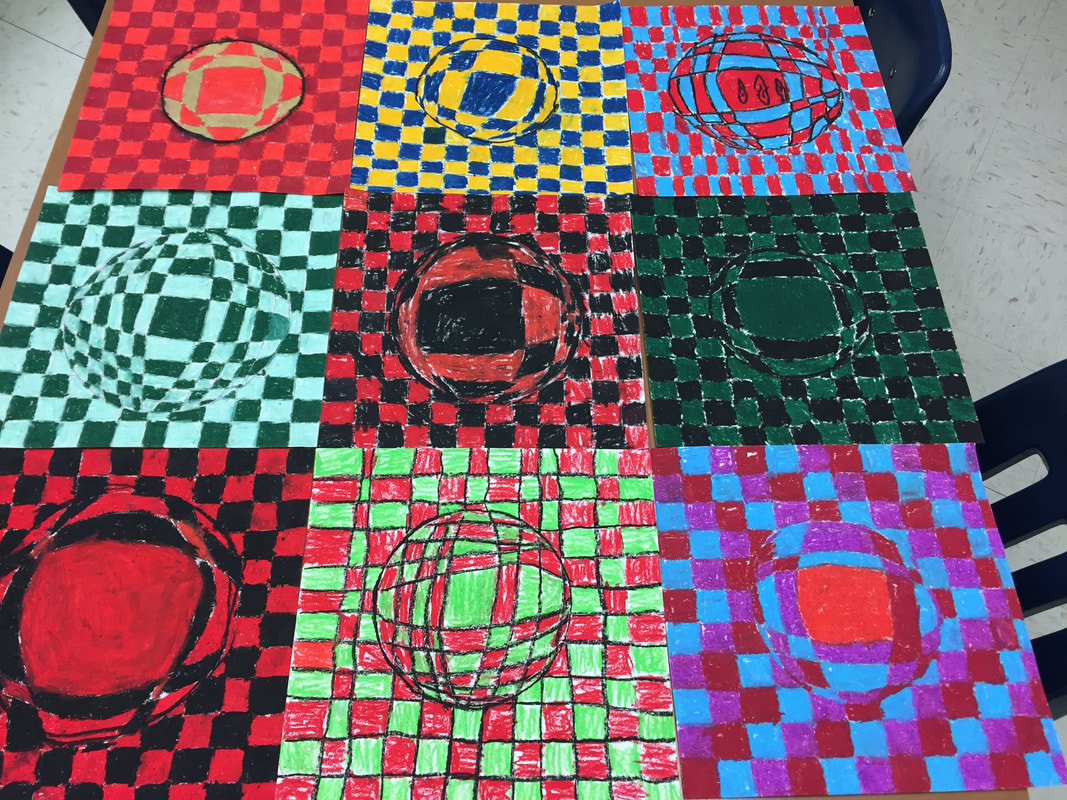
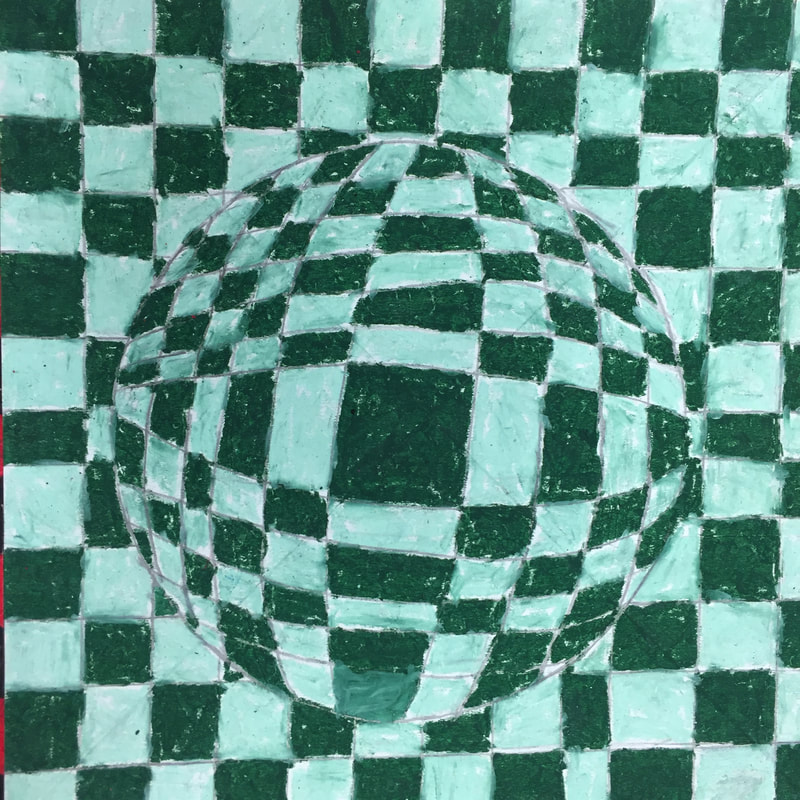
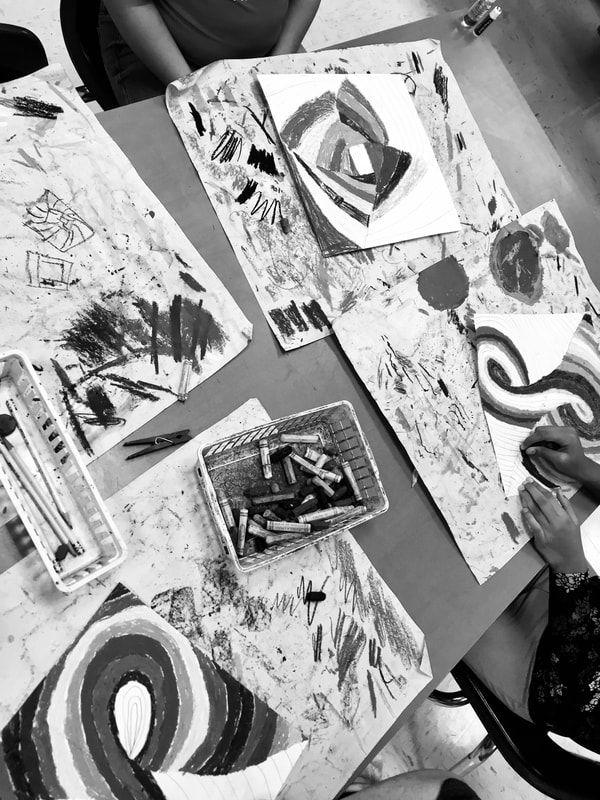
This is the first year I have experienced an eclipse as a teacher. It happened so early in the school year, it was hard because I hadn't even taught some of my usual clean up procedures since we had only been in school a couple of days. On August 21st, we had an eclipse party and it went so well, that I decided to let everyone make a 'corona' picture the next day too. 

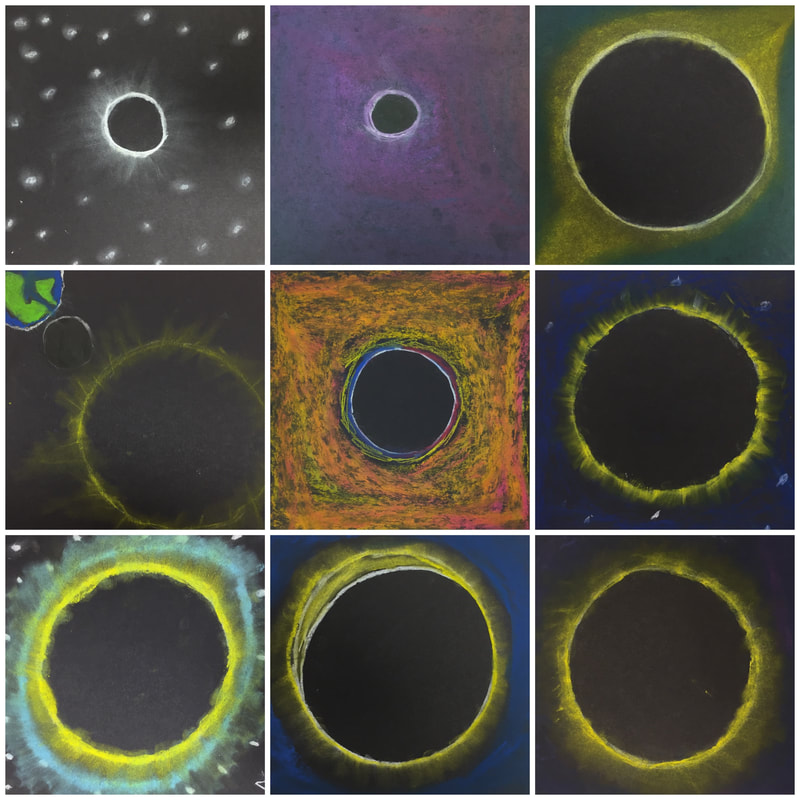
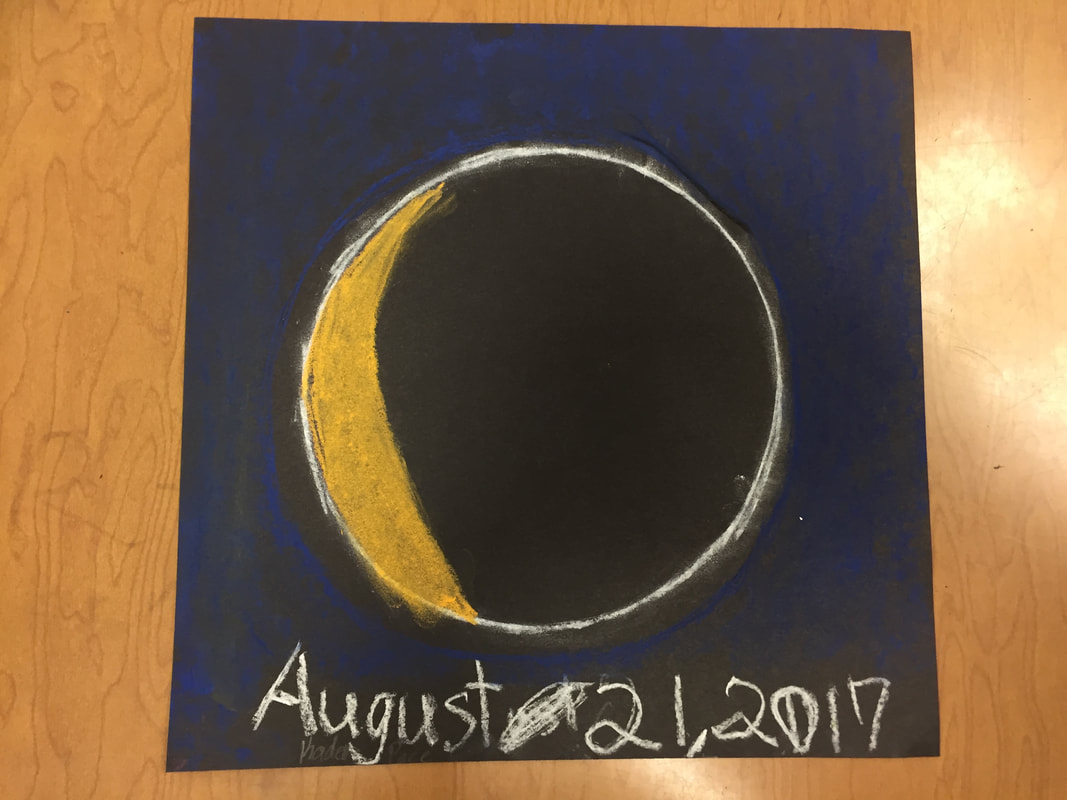
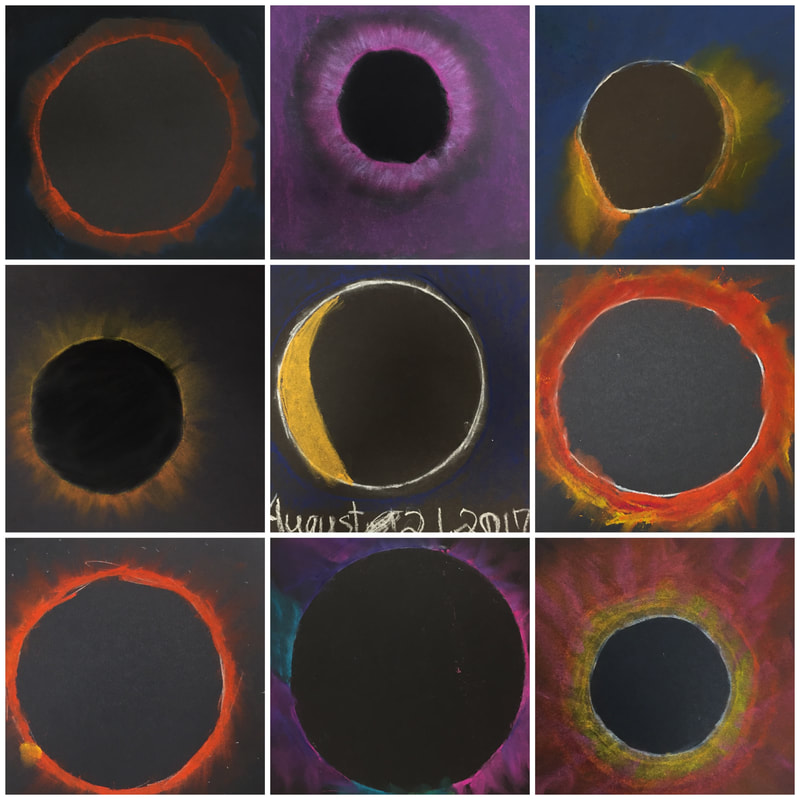
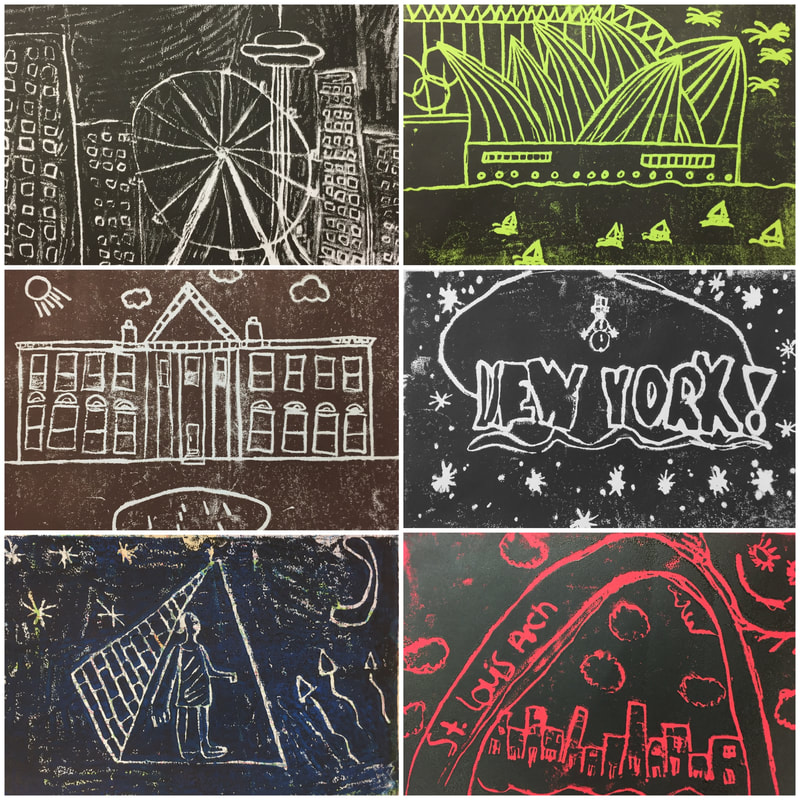
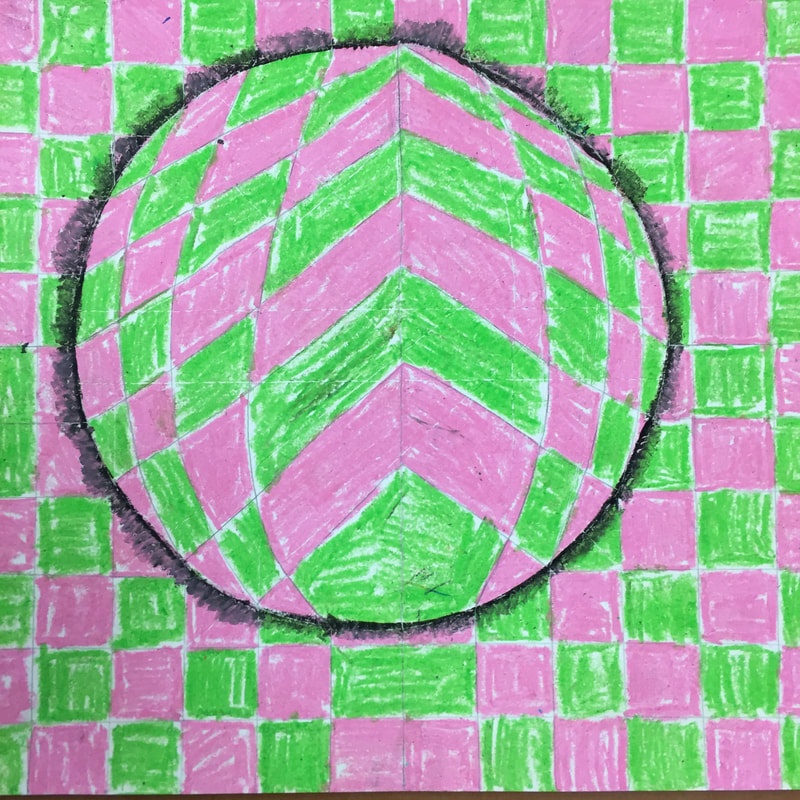
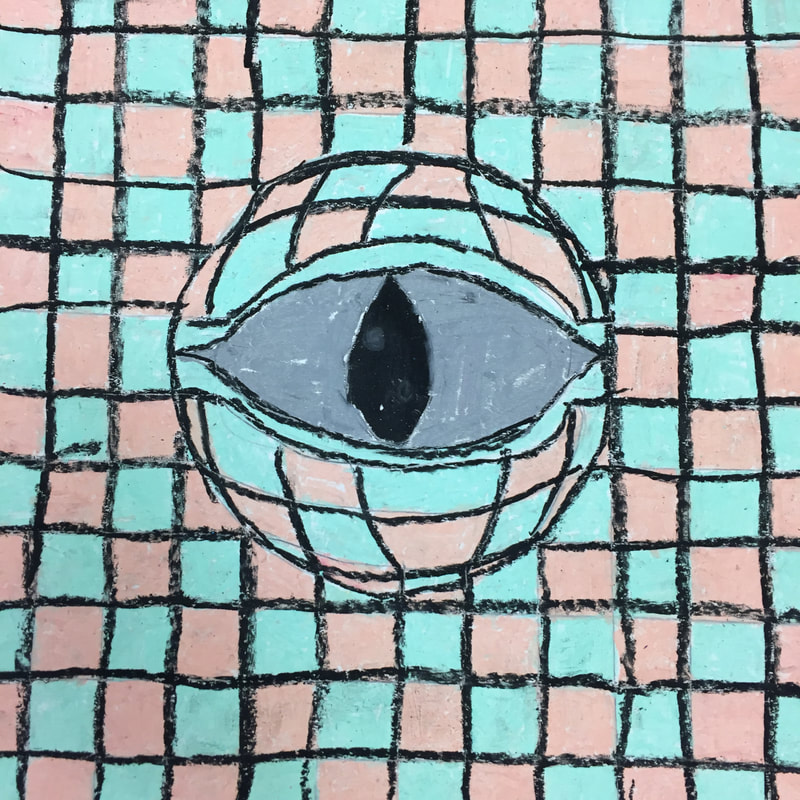
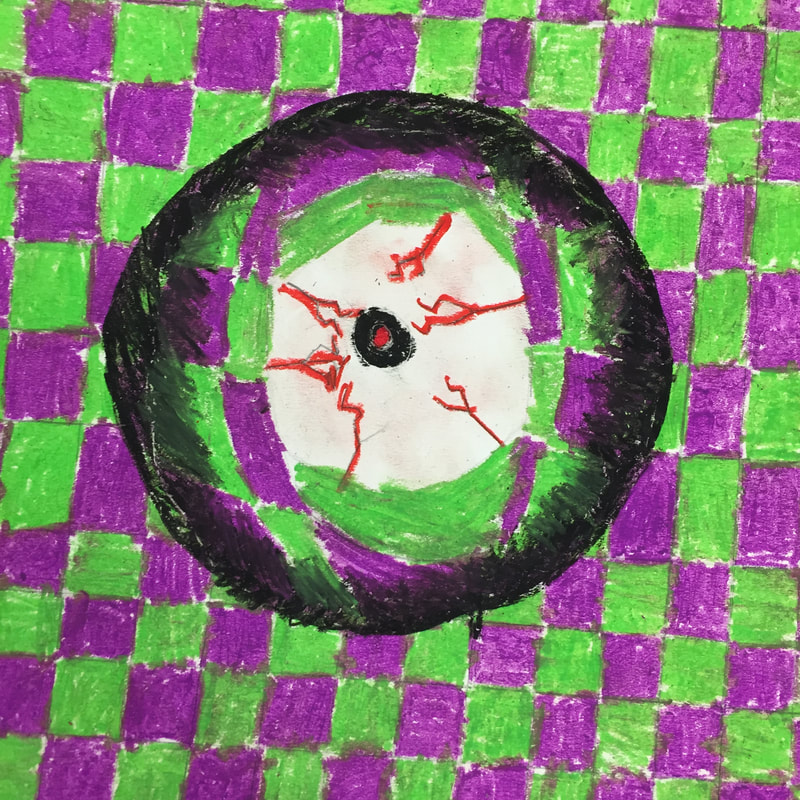
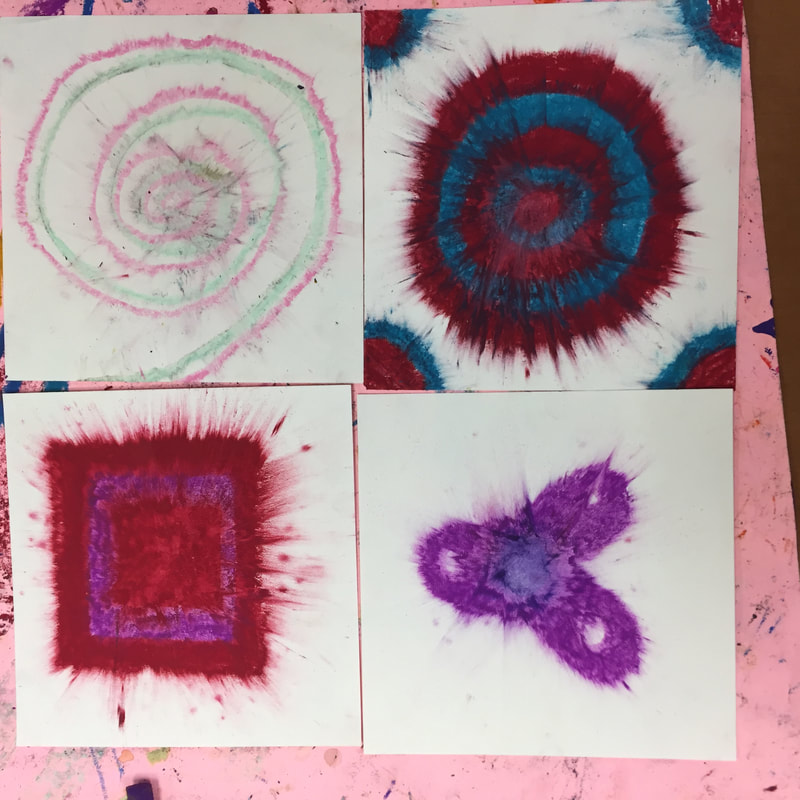
Basically, we traced a circle on square paper with chalk and then added additional color. We watched the footage of the eclipse as it happened all over the united states and we looked at examples through photos of the corona taken throughout historical eclipses by artists. We also practiced color blending with chalk. 
​
(Idea stolen from here)
Resource for photos of historical corona's here. 

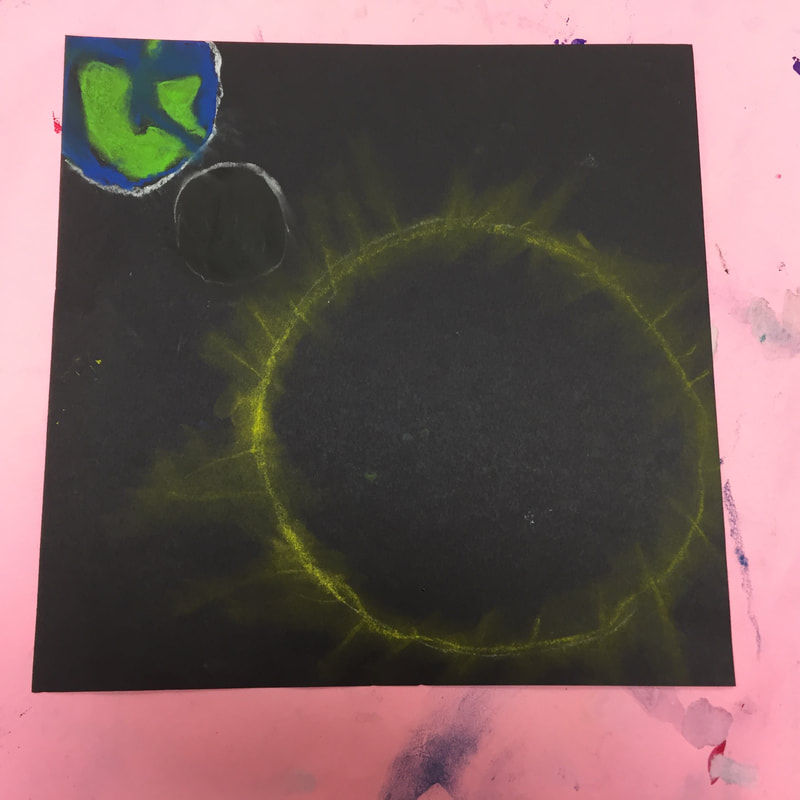
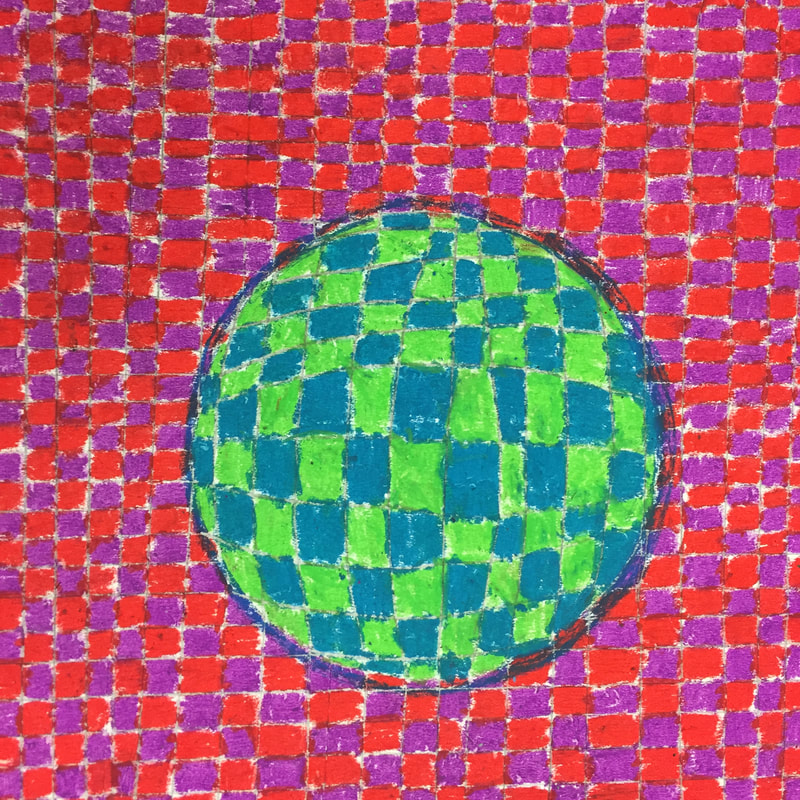
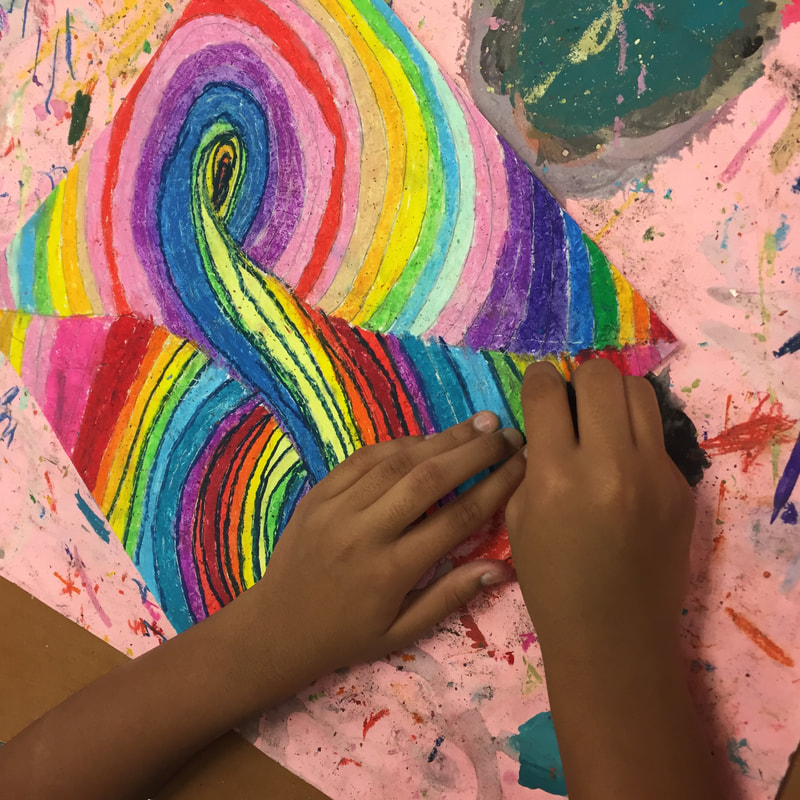
I demonstrated how to use the circle template as a mask and then pull the chalk away to create that glowing effect. I had lots of sizes of circles for students to choose from. 
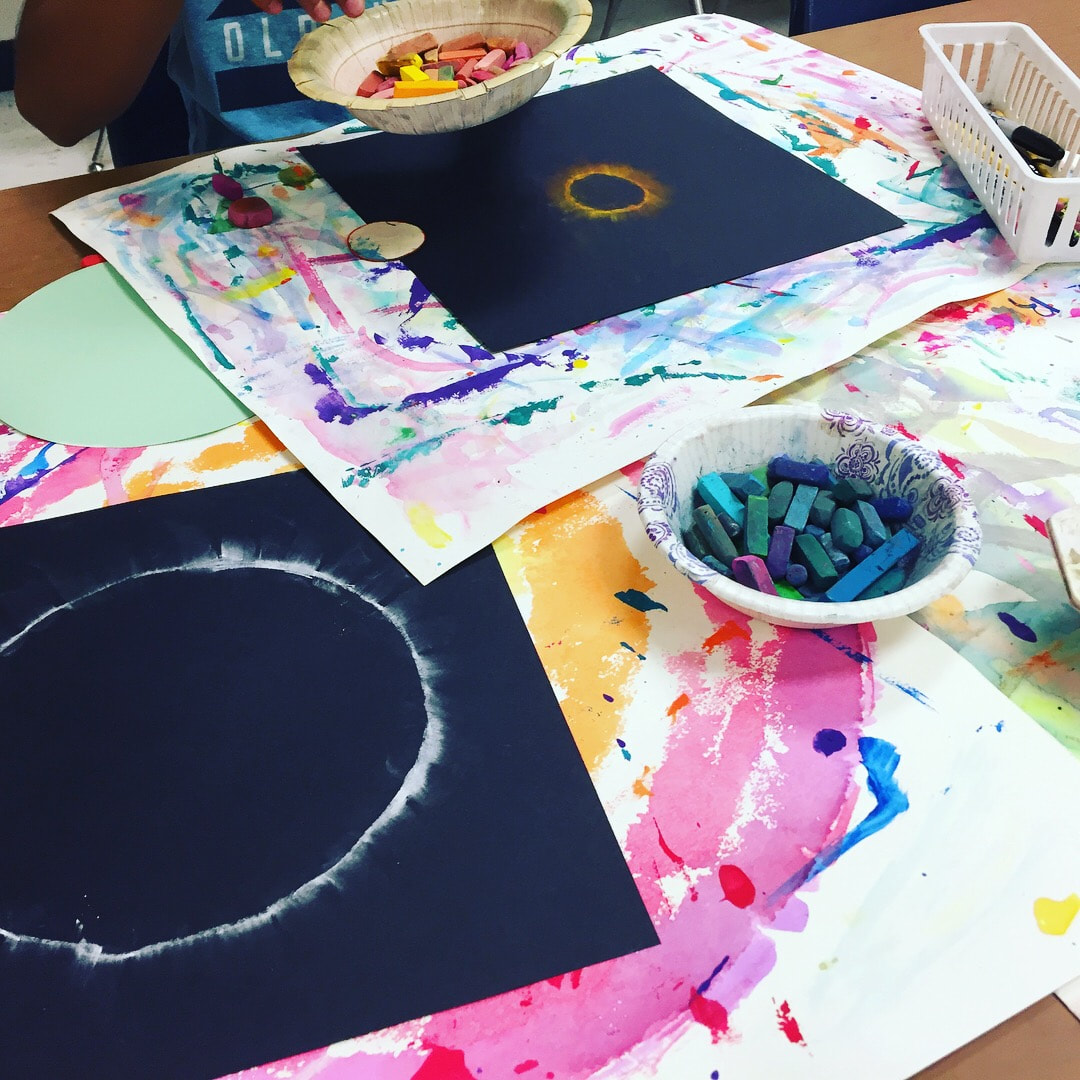
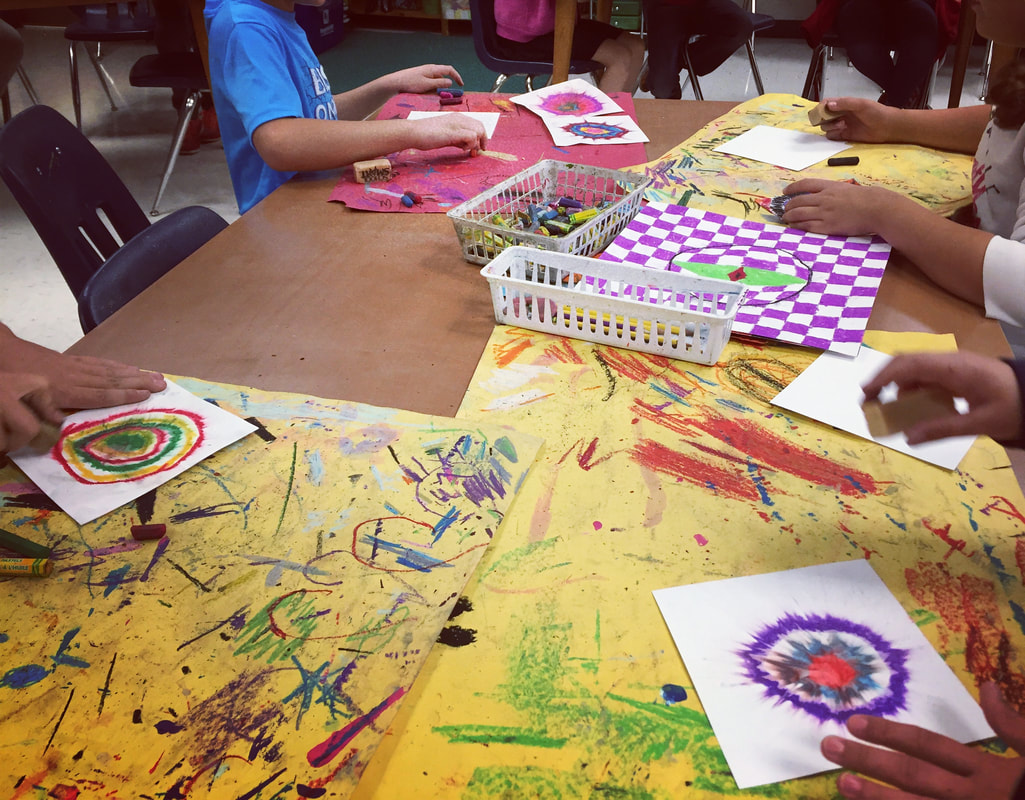
Supplies
chalk pastels (organized in bowls as hot or cool colors)
12X12 or 9X9 black paper
variety of circle templates 

Picture
Picture
Picture
Picture
Picture
Picture
Picture
Picture
Picture
Picture
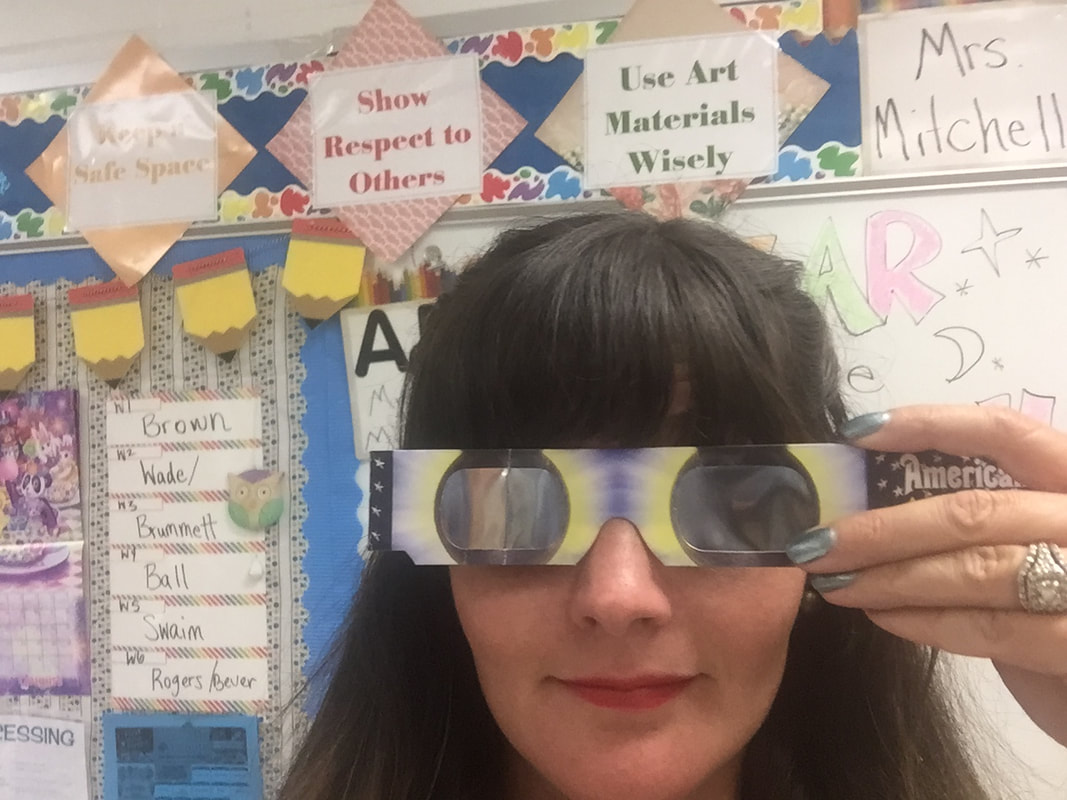
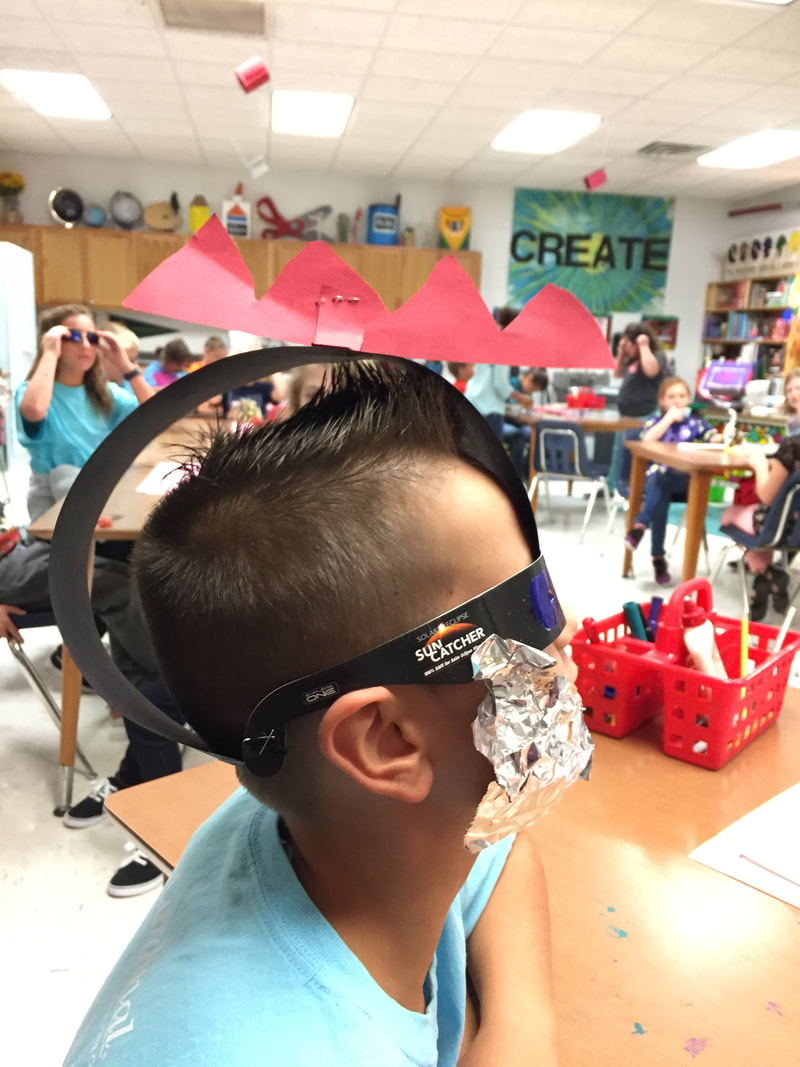
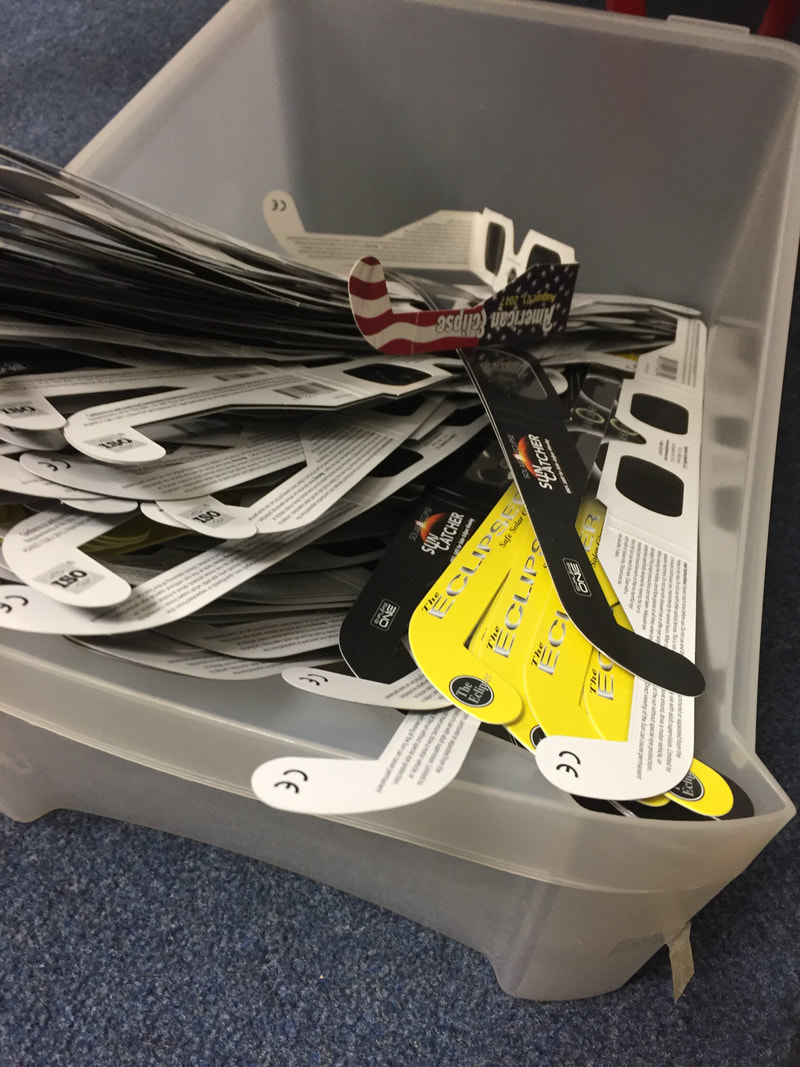
I scored a whole box of eclipse glasses after the eclipse was over. I let my early finishers transform them into masks and they loved it (even though they could not see out of them!) 
0 Comments

Inside An Art teacher's Sketchbook

1/14/2018

0 Comments

 
Picture
​Last year I participated in the Spiva Sketchbook Project. I've never kept the same sketchbook for so long and I've never been so inspired to incorporate little sketches, scraps of paper, and all those magazine clippings I've saved for whatever reason. Some of my sketches were a reflection of things that were happening at school or on little local trips. I kept it with me during work meetings, club meetings and it was always in my bag in case I felt up to sketching a bit. 

Over the summer, turned in this book and picked up a new one at Blick. I've been keeping it with me, but not as much. I would love to fill it with just as many lovely things and then start another one after that. I recently started re-reading the book An Illustrated Life: Drawing Inspiration from the Private Sketchbooks of Authors, Illustrators and Designers. It is SO motivating. 

When we submitted our sketchbooks, we had a little viewing party with a bunch of the other artists and we got to flip through their sketchbooks as well. There were some incredible books. My favorites were the themed ones. Mine are super random. 

Some of my favorite supplies:
Finetec Metallic Watercolor
Premium Gell Pens
Pentel Color Brush Black 
Prismacolor Colored Pencils
Crayola Supertips Markers
Photopaper (great with sharpies for zentangling)
Neon Sharpie Highlighters  
​
Gesso 
Hexagon Paper Punch
Tempera paint
​Watercolor Paint
Gelli Prints (paper made from gelli printing) 
Picture
Picture
Picture
Picture
Picture
Picture
Picture
Picture
Picture
0 Comments

Monster Squad

1/14/2018

0 Comments

 
Picture
I have over a dozen wooden manikins in my art room. Each year at least 1-2 drop an arm or a leg from regular wear and tear as I let my students reposition them. My students love to set them up into action poses and practice their drawing skills. 

When the first one broke, I worked like a cobbler to try to fix it, but I could not get the screw back under the spring inside the leg joint. So I stuck the wooden leg in my desk and put the manikin out of commission.

This year, I purchased 4 new guys and brought the old ones out of retirement. I hot glued the missing parts back in place, now they aren't as re-positionable, but they are stationary statues that I can use to decorate for Halloween. 

After hot-gluing the missing parts, I just used regular acrylic paint to jazz them up. I used an old scrap of a black canvas apron for the vampire. For the mummy, I tore a cheesecloth into strips and wrapped him up. Franky was made with just paint and a couple of screws. 

I kind of like that they are faceless.....it makes them a little less scary. What do you think, should I paint faces on them? 

Picture
Picture
Picture
0 Comments

New Additions To my Art room This year

1/14/2018

0 Comments

 
Picture
Over the summer, I read a couple of books on Fung Shui (here and here) and a couple of articles about fung shui in the classroom.

As a result, I decided that first, I needed to get rid of some of the red decor elements I had every where in the room. Our school colors are red and columbia blue, so I've always been drawn to red as a decor color but it does cause excitability. Red is an intense color, but I had about 6 pieces of furniture painted red and a bright red rug on the floor. I didn't want to totally repaint everything so I took a little inspiration from Cassie Stephens and turned this stool into a paint pallette and transformed the rungs into brushes.

​I did repaint one red metal cabinet with a very light blue. I'm thinking I will zentangle a design on here or something fun someday, it just hasn't happened yet. 
Picture
Picture
The smaller table in the photo below used to be hot pink and decoupaged with loud craft paper. I toned it down with the a layer of baby blue paint and put it near my desk. I need lots of little tables at the front of the room for each project as I always have tons of visuals and supplies. I put my desk at the front of the room, turned at an angle facing the door. It is not exactly in the center of the front, but it is off to one side and if I compare it to the bagua map, this is the perfect spot for knowledge and self cultivation. 

According to the bagua map (since my classroom door is in the southwest corner of the room, it isn't the ideal layout to work with the map, I am using the place on the chart below where the door icons are, is true North, with the left side being east and the right side being west). This puts my sinks in the perfect spot for career and life path, flowing water, etc. 

I also added a second white board to my room this year so that my students could face east instead of west. My clock is on the west wall, and now I can watch it but they can't really see it if they are facing front. And their backs are to the door, which is nice too, way less distractions. 

I feel like the 'flow' of my room and the energy has been better this year than ever before. Maybe it is just wishful thinking, maybe it is having nicer classes, or maybe there is something to this whole energy thing. 

Picture
Picture
Picture
Picture
Picture
I saw this paintbrush wreath on the facebook group Art Teachers: Beg Borrow and Steal by Vallerie Ivy  and I immediately had to order the paint brushes and make one myself. I worked on this in July, before I went back to school. It hangs in the all outside my room now. My husband helped me drill holes in the paint brushes and, one near the metal and one on the end. I strung some aluminum wire in the holes and it when together quite quickly. I even had some paint brushes left over that I painted to use as hall passes. 

Picture

This table got a makeover. It was solid red, and I painted the legs to look like pencils and added a little texture to the top. I used an old can of textured spray paint that was already in my room. 
Picture

This is a full on Cassie Stephens copycat. I needed a new door wreath that would last all year and this was so cheap and easy to throw together, I could not resist. I got an extra piece of wood and painted a sign for the hall with my name on it (below). 
Picture

0 Comments

Clay all Day

1/14/2018

0 Comments

 
Picture
My school installed a kiln last summer. 

This is the FIRST time in 13 years that I have been a teacher, that I have had a kiln in my building. WOOP WOOP!!! It is so exciting!! 

Since I haven't taught a clay project in 3 years, I was worried my skills would be rusty, but we had a practice day with modeling clay and then we did the entire thing in one day. I demonstrated under the document camera and they hand built and it worked pretty well. I did clay with 6 classes back to back.

I did separate the clay by a week for RED day kids vs. WHITE day kids so that I would have plenty of room for drying. It took 3-4 copy paper lids for each class to fit all of the projects, with 5 for some of the biggest classes. Even still, I wish I would have given everyone a LITTLE more clay so that their creations would've been a bit bigger. 

For our practice with modeling clay, everyone made an owl. This way I could demo how to make a beak and add eyes. For the clay demo, I showed how to make a generic monster so I could show how to add spikes, texture and teeth. Also, the added step of score and slip. 
Picture
The idea is that we would make a head/creature/character that would have an open mouth or opening in it's back big enough to use it as a phone docking station or a speaker amplifier. That did not happen for most kids...they were just too small and their phones are just too big.

​But they were happy to have little sculptures all the same. We made two pinch pots, scored and slipped them together to make an egg, and then we cut it open and attached the parts....it was pretty basic. The hardest part was trying to do this in 47 minutes. 

Picture
Clay before firing, so much bigger!
Picture
I organize the clay in copy paper box lids. Kids set their sculpture on the colored paper that matches their table color in the box labeled with their teacher's name. This way, during drying, I can keep track of everything. I write the date on a sticky note in the bottom of the box, otherwise it is easy to lose track of what needs to be fired and when. 
Picture
I made a few sample cardstock phones so kids could test out the opening size. Most of the clay shrunk so much that the openings were not big enough anyway.
Anticipating getting a kiln a few years down the road, I started buying clay accessories since I didn't actually need to purchase the clay yet. I bought stilts, glazes and 3 dozen of these masonite 8X8 paddle bats.

We used them for hand building and even for carrying around our clay from table to table during glazing. During clean up, students had to wipe them down and put them back in the middle of the table. We also use old pencils for scoring.....

These bats helped keep our clay from sticking to the table while we were working and it helped them carry their clay to the shelf when they were finished. Only one kid dropped his on the way over there. And we both laughed until we cried at the site of the splatted head. 

Before using the paddles, I EMPHATICALLY laid down the law that they would not be used for paddling, or pretend paddling of any bottoms!! Anyone caught pretending to whip anyone would get an automatic office referral and their clay would not be fired. If it was before clay, they would sit out at the office while the rest of us made our clay sculptures. #middleschool
PictureThese are my teacher samples. I needed to practice my hand building skillz.

Picture
Once the clay had been bisque fired, we were ready to glaze. I prepped some glaze cookies so the kids would have a realistic idea of what the colors looked like. I've ordered the Mayaco Stroke'n'coat class pack the past two years in anticipation of the kiln and I am glad I did.

Now I just need a couple of refills for next year and I am set on having a large variety of color choices. I set up the glazes in three pallets. 

Three tables had cool colors: blues, purples, greens. 
Three tables had hot colors: reds, oranges, yellows.
Three tables had neurtrals: whites, browns, black and an extra pink. 

Note to self: order gray and extra red Hot Tamale next year. I had plenty of options for pink so I encouraged kids to glaze pink inside their open mouths instead of red, as we needed to save red for the plethora of cardinals! 

I labeled the side of the condiment container and the lid with the name of the glaze. I told kids to check both before glazing as sometimes lids get put on the wrong color, and that only happened a couple of times. This method worked out perfectly. When I've used baby food jars in the past, it was hard to label and the rim always got gunked up. Now, they stay pretty clean and are easy to refill. Hopefully they don't dry out after a semester and I can reuse them over and over. I will let you know the verdict when I pull them out again in a couple of weeks. 

To advertise the colors, I posted a little poster with the name of the glaze and the glazed cookie for them to see. After going over a few basic rules, I let students move around the room to access the glazes of their choice. I love the realistic colors of the Stroke'n'coat glazes, but I do want to order some fun speckled glazes in the future. 

Picture
Picture
Glaze cookies prior to firing.
Picture
Just a few of the cutie cardinals!
0 Comments

Tree Design Warm Ups

1/14/2018

0 Comments

 
Picture

Lately, I've gotten into the habit of having dry erase boards on the table at the beginning of class for students to use as practice instead of their sketchbooks. 

Right before Christmas, we had a weird day where a bunch of kids were gone on a field trip and I wanted to do something with them a little different. I gave them an art challenge for the first 3 minutes. 

I set the timer on my smartwatch and challenged them to draw as many different types of trees as they could before time was up. Some kids drew the ones I had on the board, some made up their own, some drew the same tree over and over and over. 

I think it set the tone for the rest of the lesson. The kids were slightly more creative after having a 'do now' prompt that warmed up their creativity. 

When I first started at the middle school, I began each class period with seatwork. A prompt was on the board and the kids would spend 3-5 minutes responding with either a written response or a sketch. It was always such a pain to collect all the little papers (most of which went into the recycle bin) and keep the pencil trays stocked with paper. 

I always felt like it added extra pressure to my sub plan, do I include the seatwork in the instructions or not? What if I forgot to change the prompt on the board and I don't have a new one ready? 

Anyway, I'm toying with the idea of having a dry erase prompt more frequently this year.....

Do you do any bell ringers or seat work or art start prompts? 
Picture

Picture
Picture
0 Comments

Origami Christmas Tree Ornaments

1/14/2018

0 Comments

 
After finishing our 3-D metal bugs, we had some scrap metal left over. I decided the best way to use it up would be to cut it into triangles and glue it onto a 'shattered mirror' origami tree. 

A few students still needed to finish their bugs, so I gave everyone a piece of 5X5 newspaper to practice this tree shape. I demonstrated the folds under the document camera. After everyone had practiced, the ones that were finished, were allowed to grab a piece of green paper. We just used some scraps of green construction paper that I had leftover from another project to make their trees.

Then, they cut their scraps into triangles (I demonstrated how to do this under the camera too). Other shapes were REALLY hard to cut, but triangles were fairly simple. Students used tacky glue to attach the aluminum. Finally, they spent a little time designing a background.

Students could use metallic colored pencils, regular colored pencils and metallic sharpies to decorate black scraps that we used for backgrounds. Each class did different sizes depending on how much time they had---a few classes were behind because of early outs, assemblies and days off. 

I let kids grab a pipe cleaner just before leaving, and I showed them quickly how to make a hanger and punch to holes at the top, being careful not to put the hole punch too close to the edge. 

There were a lot of really cute ones, but I let them take them home the same day so I forgot to take very many pictures. 

Supplies
square practice newspaper
green squares
scraps of aluminum
tacky glue
metallic markers
colored pencils
pipe cleaners
hole punches
Picture
Picture
Picture
0 Comments

Metal Bugs

1/14/2018

0 Comments

 
Picture
I am guilty of pinning a LOT of ideas on pinterest, but never actually making anything from my pinsperation boards. I have a HUGE roll of aluminum that I have been hoarding for a while. It was pretty expensive so I didn't want to waste it on any old thing. While I was pondering how it could be used in a project, I ran across an old pin and I knew it was perfect for my 5th and 6th graders. 

Nichole Haun's color scheme bugs were perfect for my students. We had already gone over color schemes pretty extensively so we didn't focus on that too hard for this project, I mentioned color schemes, but I didn't spend a ton of time on the instruction going over color schemes again. 

​ I did use part of her video for the metal tooling steps, which I will share below. 

My students really enjoyed this project and I did too because it wasn't crazy messy....and it involved a lot of different media we don't use very often....also, MANY students were highly successful. I was sick throughout the entire process so I didn't take any 'in progress' photos, I only have finished products to share, but I hope you find some inspiration here. 
Day 1
We started by practicing some bug sketches. I made up a packet of visuals for each student (4 packets per table, shared amongst all the classes). Students could pick a bug from the packet, but they needed to choose something a little harder than a lady bug, because some of the bugs are pretty simple. They needed to practice on a dry erase board and then they could start on the real paper which was 6X9. 

I had cut the aluminum metal roll into roughly 6X9 sheets. Some were a little bigger, some a little smaller. I encouraged students to draw the insect as big as possible on their paper so they would not waste too much of their aluminum. They did not need to draw thin little antennae or skinny little leg segments, as we would add those later with wire, but they did need to study the bug enough to remember those parts. 

Once they had a good sketch, they brought it to me so I could tape their sketch to a piece of metal. I tried to match up the sketch with the right size piece of metal. If they drew their bug too little, I made them try again. A few kids had the idea to draw the body and the wings separately, like with dragon flies and butterflies, and those turned out great. 

Some classes were not giving me much detail in their insects so I showed them Austin's butterfly and it helped inspire some kids to try again when I gave them a little more specific feedback. 

To transfer the bug to the metal, students followed the directions in Nichole's video. We only watched part of it, as they would not be cutting it out or coloring it today. 

​Supplies:
6x9 paper
dry erase boards and markers
pencils
colored pencils (to transfer to aluminum)
thick sheets of aluminum (I buy from school specialty)
felt
plastic metal tool (i tried to find a link to this but I can't figure out what to search for)

Picture
Day 2
I was absent for day 2 of this project. So I had to leave a sub plan. Here are the instructions that I left for the sub. 
Today’s lesson involves making a paper collage, which will be the frame for the insects we started last time. Students will need to use a color scheme for their frame. The possible color schemes are listed on the board on the west wall and we have been discussing color schemes for a while so they should be able to pick one quickly and easily.
Project Steps

  1. Explain that students will be making a collage. A collage is a design made by cutting and gluing shapes to a paper.
  2. Students will use scissors and glue sticks to complete their designs and if they need extra glue sticks, they can get more from the container at the front of the room. If they want to some of the papers, that is fine as I taught them some easy folds at the beginning of the year like the kite, hat and samurai fold.
  3. As they cut out shapes, they need to put their scraps in the paper pal or in the paper store tub for others to use. The paper store tubs are labeled and the big background papers are spread out on the table at the front.
  4. Don’t leave the scraps in the table top tubs as those are filled with small ‘good squares’ that we will be using all day. You will need to point out where the paper is for the paper store and send them up 1-2 tables at a time to go shopping for paper for their background. While some are shopping, the others can go through the tubs on their table to pick out colors for the collage. Some of the table top tubs may not have all the colors they need for their collage, it is up to you if you want to let them go to other tables, I would probably let them if they ask but not if they just want to wander around.
  5. When students have finished their collages, they will put them in the drying wrack, but students need to make sure their NAMES ARE ON THE BACK. I put pencils on the tables for this purpose.
  6. If their collage is really simple, encourage them to go back and add more small shapes and details so that it will look interesting with their insect on top. They can’t just glue 3 small squares and call it finished. Encourage them to use patterns and they can overlap various shapes if it looks interesting. If they want to cut out a leaf shape, they might want to fold the paper so that it is symmetrical and lightly draw it with a pencil before cutting it out.
  7. If they finish early, they may get a coloring sheet or a free sheet or origami, but they must stay busy while others are finishing.
  8. I left a sweet book on my desk if you find that the classes are finishing quickly and you want to read it either at the beginning or the end. Please try to maintain the schedule, there are only 2 minutes between classes so if you get off track it throws the whole day off.

Tips about the drying wrack for the sub:
  • Try to only put one class on each side of the drying wracks.
  • When the class leaves, put a note on top so that it is labeled with the teachers name or the class code so I will know which class it is when I take them out.
  • You will have to turn the drying wrack around after each class leaves so the next class will have an easily accessible side to put their papers in.
  • Always start filling the drying wrack from the bottom so that everyone’s paper will fit.
  • After two classes, trade out an the full drying wrack by setting it on the floor and put an empty one on that table so it is easy to fill up again with the next two classes.
  • All six sides will be completely full by the end of the day and with the biggest classes, you might have to double up some shelves so they will all fit.

​Supplies
2X2 squares of construction paper and other specialty paper like scrapbook paper
12X12 and 9X12 background paper
glue sticks
scissors
pencils

Day 3 
After being gone and very sick, I was finally back to finish up the project. Today, I demonstrated how to cut out the insects, how to add wire or pipe cleaners and how I would hot glue their bugs to their background. 

Students used skewers and chop sticks to wrap wire, like is shown in the video. They used permanent markers to color their bugs and scissors to cut them out. I had students save their metal scraps by wrapping them up in their old bug sketch, which still had a little tape on the edges, they made a little envelope so save it for later. Then they used glue dots to attach the wire. When they had everything ready, they brought the bugs up to the front where I was waiting with my glue gun to attach their insects. 

I was still not feeling great so I made a little video to help explain the process for getting wire and using glue dots. I think I had another video but I can't find it so I think I deleted it.....

Supplies
permanent markers
scissors
glue dots (I needed about 4X this many)
​wire (twisteeze, pipe cleaners, stovepipe wire)
hot glue gun and hot glue
​chopsticks for wrapping wire
Picture
Picture
Picture
I draped twisteeze wire over my loom so that it would be displayed easily! Worked like a charm.
0 Comments

Printmaking Famous Structures

1/14/2018

0 Comments

 
We finally have a winner!!! 

I have finally found a highly successful method to the printmaking process. I have posted about my troubles with the printmaking process before: 

Winter Animals Reduction Printmaking
Tips for Middle School PrintMaking

But now I finally feel like I have learned how to make the process for run smoothly for my classroom, my students and my sanity. With fabulous results to boot. 

I have been gathering famous structure pictures for eons and I have been plotting the best way to do a 'famous places' project.
What materials? What is the theme? How to implement?
​
I decided to finally just go for it with printmaking and I am so glad that I did. 
Picture
Day 1
I introduced the printmaking unit with a story about how this was the absolute favorite thing we did all year to a 6th grade boy who had spent much of the year grumbling and complaining about every thing we had done so far. He was happy as a clam when I put that brayer in his hand, even though he did not pay attention at all to my instructions the first day and his design was pretty much terrible. All well!!

After explaining that printmaking is a process in which we will be making several copies of the same image, I explained that students needed to pick a famous structure that they were interested in researching so that they would be excited to work on it for several art sessions. The structure needed to be man-made and if it was a popular one like the Eiffel tower, they needed to think of a way to customize it that did not involve the everyday common place 'v' birds and sun in the corner because 100 kids had already done that. And not just a moon and stars, they had to really think of something creative, perhaps a plane or hot air balloon in the sky or themself in front of the structure taking a selfie. 

Students had access to TONS of books from the library. I ended up going back for more after my first 3 classes requested the Taj Mahal, the Burj Khalifa, and the Saint Basil's Cathedral in Russia. I have some very curious kids! Step one was to create a practice sketch in their sketchbook and start planning their stamp. 

Supplies
pencils
erasers
rulers
dry erase boards and markers (option for kids to warm up)
books and visuals about famous places
​
​
Picture
Day 2
Carving the stamp. 
Once students had their design planned, I gave them a piece of 6X9 paper so they could design their stamp. We used a pencil to draw the design and plan the background. When they had it all sketched out, they brought it to me for approval and I gave them a piece of 6X9 scratch foam and taped their sketch to the foam. They used a colored pencil to transfer the design to the foam. 

The colored pencil only lightly transfers the design. To really make it show up, students had to lift the drawing off the foam and trace over their lines with an ink pen. I had to borrow a bunch of ink pens, but this is a brilliant idea thank you Cassie Stephens!!! The ink pen forces them to make the lines deeper and they can tell what they have and have not retraced very easily. 

Supplies
6X9 paper
tape
colored pencils
ink pens
6X9 Scratch Foam 

Picture
Day 3
This was our catch up day for kids that needed to finish their drawing, finish carving the stamp and move on to something fun before the real action of printmaking with real printmaking ink. I decided to let them make a marker print with whatever colors they wanted, since we would be printing in solid colors for our finale. Not everyone had the opportunity to do the marker print, if they were absent or something but everyone who did was pretty happy with the results and so was I! 

After I watched Cassie Stephen's marker print video, I knew I could do a quick demo for my students. So I drew a little 3X4 mini example under my document camera for each class to demonstrate the transfer process. I set myself up at the front with white paper and squirt bottle and let kids come to me for the sponge/spray sesh. I will say that a couple of kids messed up their foam plates because they pressed WAY too hard with the markers and it carved a texture into the foam. Next time, I will stress that they do not need to press hard with the markers, just gently cover the surface. 

The other thing students needed to do on day 3, was to shop for paper for printing. I had each student select 4 papers to print on and write their name in pencil in the corner. This way, everyone would have their name on their papers for printing day. I had a big table set up with all types of paper, old maps, colored copy paper, patterned scrapbook paper, construction paper, sheet music, whatever I could find that was easy to chop into 9X12 pieces. 

Supplies
foam plates
washable markers
spray bottle
sponge
9X12 white paper
Picture
VERY Full drying racks at the end of the day
Picture
Picture
Black ink at the table
Day 4
​PRINTING


I showed my students Cassie Stephen's printmaking video in order to demonstrate how to actually print. It was SO helpful and perfect for this project. I set up the black ink on each table (I passed it out after we watched the video) and I set up colored ink at stations around the room. I wanted some students to be able to move around and some working at the table so there wouldn't be a huge line waiting to print at any given time. 

This year, I went to goodwill and found a set of plastic trays to use as ink stations and they worked perfectly. We used up so much of my ink, that I am almost completely out and I even ordered an emergency 7 bottles from blick to make it through the last day. So if you are printing with nearly 400 students make sure you have plenty of ink, especially black. I told my students that the first print would probably not turn out the best so they should use the paper they are least attached to for their first edition.

NOTE: I had several color options for students to choose from. I did not have them wash their foam plates between colors, I kind of like how it looks when the colors mix.  

Supplies
printing ink
brayers
paper
foam stamps
Picture
A variety of colors at the counter
Picture
This little genius made his own barren with our pencil cup.
Picture
Picture
Picture
Picture
0 Comments

Optical Illusions

1/14/2018

1 Comment

 
Picture
My middle schoolers love optical illusions. Every year, students request an optical illusion project. Here are a few of my favorites:

​Op Art Ornaments
Optical Illusion Heart/Sphere in Chalk
Optical Illusion Sketchbook Covers
​

For a while, I have wanted to figure out a way to select an optical illusion project that is engaging for all ability levels. At first, I made a smore flyer and allowed my students to choose an optical illusion that they wanted to create from the examples I had provided links to. This did not work well because some students chose things that were too time consuming, or too hard even for me to figure out, OR to easy and not time consuming enough and they finished in one day while everyone else needed weeks. Also, since we had the ipads out, I didn't want to use oil pastels so we were limited to colored pencils or markers. 

For the examples linked above, everyone basically followed the exact same steps. So there wasn't much variety. When my librarian ordered Optical Illusions (How to Art Doodle) by Carolyn Scrace book, I decided that this year, I would make students choose between 3 designs from the book. All 3 were similar in difficulty level and everyone would make a 12X12 oil pastel design. (I was on a 12X12 design kick this year...students did like 6 projects with 12X12 paper!)

The book has rather low reviews on amazon.com, but I found it very helpful in showing my students the steps and giving them ideas. 

This project was really successful as it gave us the opportunity to talk about quality, and I could show examples of really good quality and not so good quality.....but it isn't a lesson that I want to tackle again anytime soon and I am trying to figure out why.....because the results were stunning. 

Picture
Picture
Day 1
We looked at some examples of optical illusions and talked about various optical illusion artists. I share a slideshow with examples by Bridget Riley and M.C. Escher and students are happy to see some familiar images they have seen before. I have one copy of the scholastic magazine about optical illusions which has a ton of great info about Bridget Riley, which is what I basically summarize for my students. When I start a new big unit like this, I always have tons of visuals around the room that students can use for inspiration. I would love to find an optical illusion calendar to cut apart because printing stuff on a color printer just isn't as vibrant. 

Youtube video list of optical illusion videos. 
10 Amazing Optical Illusions---I usually show this the 1st day

Students looked at the examples they could choose from and started practicing in their sketchbooks. 

Supplies:
Sketchbooks
pencils
erasers
circle templates
​rulers
Picture
Day 2
Once students had a small thumbnail sketch of their idea (and many realized it was harder than it looked), we started drawing in pencil on 12X12 white paper. I took some time to demonstrate how to use a ruler to make lines across the paper and then how to make a grid. I also did a few mini demo's on how to make some of the illusions a little easier. Students used oil pastels to start coloring their designs. I highly stressed that they should save black for last, as it smears badly and they should be careful with very light colors and white, as those get dirty easy. I discouraged them from using traditional checkerboard black and white because black is just so messy that I knew the white would get ruined on many of their projects.

Supplies:
Rulers
circle templates
12X12 white paper
oil pastels (no black)
​cover sheets for tables

Picture
Day 3
Those checkerboard designs were getting very tedious....even though it is argubly the easiest one to draw, it is pretty hard to color and it is hard to fix mistakes so kids have to be very careful not to mess up their pattern. I showed students how to add black and blend it to make their illusion pop just a little more. I showed examples of good quality and not so good quality and encouraged kids to work towards getting a '3' on their project. We also discussed craftsmanship and scribbling. With oil pastels, you have to color pretty firmly to get good coverage. 

This is the video I showed every class to demonstrate the blending. It isn't the greatest video, but I made 6X6 mini versions of the projects so I could demonstrate the blending technique quickly. I didn't want to have to make a sample for every class, so the video was very helpful!

Supplies
​Cover sheets
oil pastels plus black
pencils
​
Picture
She used navy instead of black to outline and I really like it!
Picture
This design idea came from a different book.
Day 4
Okay, today many kids were already done or close to being done with their optical illusions. I had a bunch of 6X6 paper ready and I showed them the 'ol oil pastel firework trick with an  eraser. They loved it! Thanks art of ed!

Supplies
Oil pastels
Old erasers (we used hard rubber erasers)
cover sheets
6X6 squares
Picture
Picture

Okay so this project had variety, quality control, a bonus free time extra fun project for early finishers, high level of critical thinking, ruler skills training, and a medium-level-mess-factor.

It wasn't the messiest thing, but it wasn't super clean and boring either.

Why am I not excited to teach this unit the same way again the same way?

Some students did not like the limited options.....they were annoyed that I didn't have MORE variety. Okay, I get that. But as it was, I still had to start each day with instructions specific to each design and tips that would help individual students. If a student had a good idea, I was open to letting them give it a shot. 

While the results of the project are visually very beautiful, I will have to think long and about what I would do differently in the future. 

One of my professional development goals this year is to focus on critical thinking and how I implement it into student learning. I feel like most art projects require tons of critical thinking. Even if there is  an existing 'recipe' like in this project, there is still tons of room for error and each product is different depending on how students used the materials, techniques and executed the process. By giving students tons of opportunities to make decisions about their finished product, they were using critical thinking. This isn't one of those cookie cutter projects where everyone's ended up looking basically the same, there is tons of variety and room for interpretation. 

MDQ 1.1 The teacher provides a clearly stated learning goal accompanied by a scale or rubric that describes levels of performance relative to the learning goal

In order to grade this project, I posted a visual 'rubric'. I pointed to the examples that would be considered a '3' and would meet all of the requirements for the objective. Then, we discussed what a '2' and a '1' would look like. The examples of each are in the photo below. It helped some students to see where they could improve their design even if they said it was done, many students were able to set a goal for improvement. 
Picture
4 examples of a '3' and an example of a '2' and a '1'. Quality control.
Picture
1 Comment
<<Previous
Forward>>
    PictureWelcome!

    Mrs. Mitchell

    Art teacher from Missouri. 

    Instagram
    Add to Flipboard Magazine.

    Archives

    March 2021
    April 2020
    November 2019
    July 2019
    April 2019
    January 2019
    October 2018
    July 2018
    June 2018
    May 2018
    April 2018
    March 2018
    January 2018
    September 2017
    May 2017
    April 2017
    March 2017
    January 2017
    December 2016
    November 2016
    October 2016
    September 2016
    March 2016
    December 2015
    October 2015
    August 2015
    May 2015
    April 2015
    March 2015
    February 2015
    November 2014
    October 2014
    September 2014
    August 2014
    June 2014
    May 2014
    April 2014
    March 2014
    February 2014
    January 2014
    December 2013
    November 2013
    October 2013
    September 2013
    August 2013
    July 2013
    June 2013
    May 2013

    Categories

    All
    1st Day Of School
    1st Grade
    3d
    Abstract Art
    Alcohol Ink Tiles
    Alpacas
    Animal Art
    Animation
    Architecture
    Art Centers
    Art For Kids Hub
    Art History
    Art Hub For Kids
    Art Room
    Art Show
    Art Teacher Conference
    Bell Ringer
    Birds
    Blending
    Bunnies
    Cardboard
    Chalk Pastels
    Chalk Stencil
    Charcoal
    Choice Based
    Christmas
    Chuck Close
    Classroom
    Clay
    Club Day
    Collage
    Color Diffusing Paper
    Colored Pencil
    Colored Pencils
    Construction Paper Crayons
    Contest Art
    Creatures
    Crystal Bridges
    Design
    Dice Games
    Document Camera
    Dot Day
    Drawing
    Early Finishers
    Easter
    Emojis
    Fall
    Field Trip
    Food Art
    Foxes
    Green Screen
    Grid Drawing
    Group Challenge
    Halloween
    Haunted Houses
    Hearts
    Hermit Crab
    High School
    Human Form
    Ice Breaker
    Inspirational Posters
    Ipads
    Jim Dine
    Justand
    Killer Whales
    Kindergarten
    Landscape
    Lesson Plans
    Lettering
    Llamas
    Magazines
    Mandala
    Maori
    Markers
    Masks
    Matisse
    Metal
    Model Magic
    Mona Lisa
    Monster Trucks
    Mother's Day
    Mother's Day Card
    Mummies
    Mural
    Newspaper
    New Zealand
    Notan
    Observational Drawing
    Ocean Art
    Oil Pastel
    Oil Pastels
    Optical Illusions
    Origami
    Owls
    Painting
    Paper Weaving
    Pd
    Pencil Topper
    Perspective
    Pete The Cat
    Picasso
    Polar Bears
    Pop Art
    Portraits
    Printmaking
    Product Review
    Professional Development
    Quiver
    Reflection
    Reflective Teaching
    Room Tour
    Rooster
    Sea Horse
    Seals
    Sea Turtle
    Self Portrait
    Shading
    Shaving Cream Prints
    Shoes
    Sketchbooks
    Sloth
    Solar Eclipse
    Spinners
    Spring Conference
    Star Wars
    Statue Of Liberty
    Step-by-step
    Step By Step Drawing
    Step-by-step Drawing
    Still Life
    Stop Motion
    Story Board
    Sub Plans
    Summer School
    Symmetry
    Tab
    Teacher Appreciation Cards
    Technology
    Tempera Paint
    Tiny Food
    Tissue Paper
    Trees
    Tumbling Blocks
    Valentine's Day
    Warm Ups
    Watercolor
    Wax Resist
    Word Art
    Yellow Submarine
    Zentangle

    RSS Feed

Powered by Create your own unique website with customizable templates.