THIS LITTLE CLASS OF MINE
  • Home
  • Contact Me
  • Lesson Plans

Christmas Stocking

12/7/2015

0 Comments

 
Picture

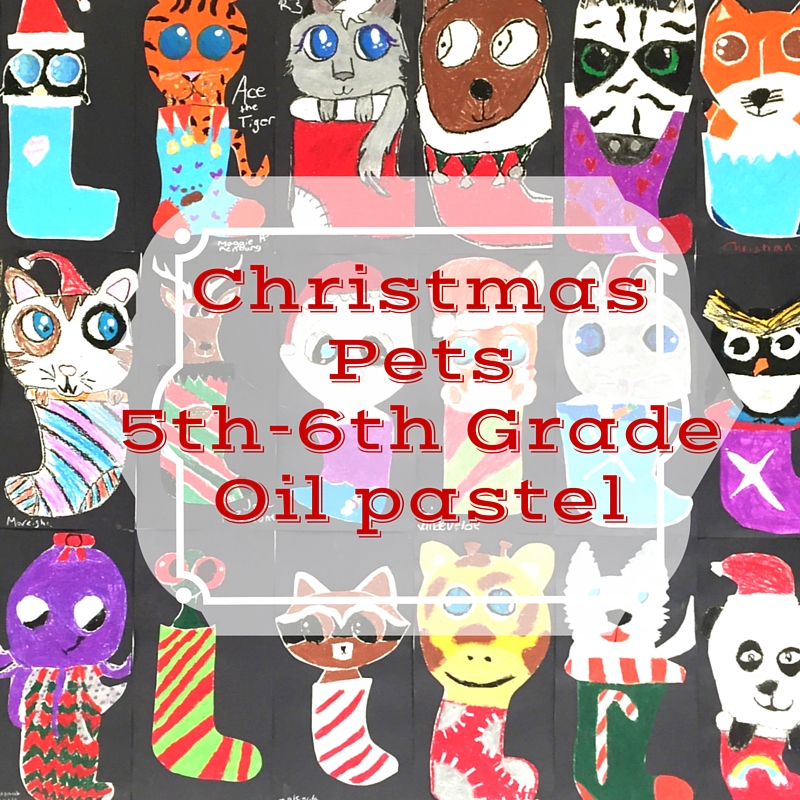
IF YOU WOKE UP CHRISTMAS MORNING TO FIND A NEW PET PEEKING OUT OF YOUR STOCKING, WHAT ANIMAL WOULD YOU HOPE TO FIND?

Picture
 i
​This was the prompt I asked my students right before Thanksgiving break.I explained that when I was a little girl, I would lay in bed at night and WISH that I would wake up in the morning to find a new cuddly little pet peeking up at me from its little cage. I would pray that the sweet little new hamster or baby bunny would arrived equipped with all of its food, toys and accessories. 

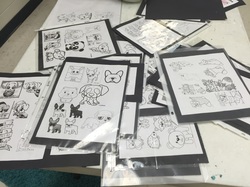
I made a list of animals after they wrote them down and printed out a bunch of  'cute animal' visuals for them to reference. I also had them do some mini sketches to practice drawing the animal peeking out of a stocking. I opted for cute versions of the animals for my students to look at---as this project verges on toy versions of realism, and really appeals to my 5th grade students. The 6th graders are proud of their work, but weren't as sold on the project initially. 

The day we started, I had the cute visuals---clip art (simply drawn versions of cheetahs, sharks, horses, and it was helpful to have several varieties of dogs since some have snouts and others have snub noses.) I also had a few color prints hanging up that showed sad, big eyed-animals. We talked about the white highlight in the eyes, how that helped give the animal a lifelike quality.

Students drew their animal on 9X18 gray paper with white chalk. The nice thing about the chalk, is that it forced them to draw big and it also erases more easily than pencil, which can tend to leave a groove in the paper when they press hard with their pencil and attempt to erase, sometimes it still shows up when they switch to oil pastels.

I also had several 2" circles punched out of tagboard on the table and I encouraged my students to trace the circles for the eyes. For this project, I encouraged students to draw the eyes really big. The eyes were a little unnatural, and many of the animals look a little bit like stuffed toys---which I think is good for this particular project. 

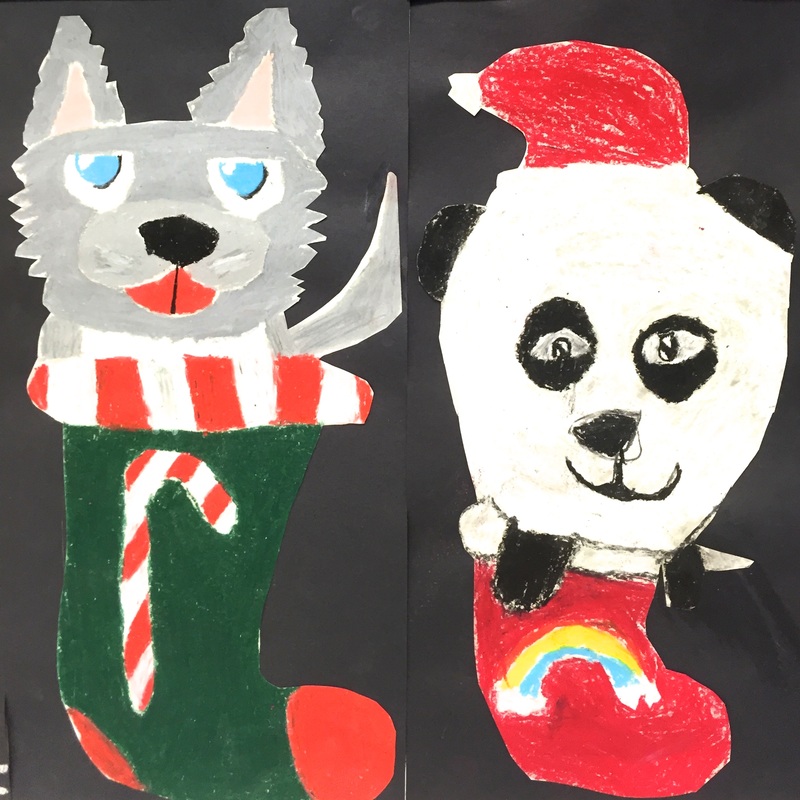
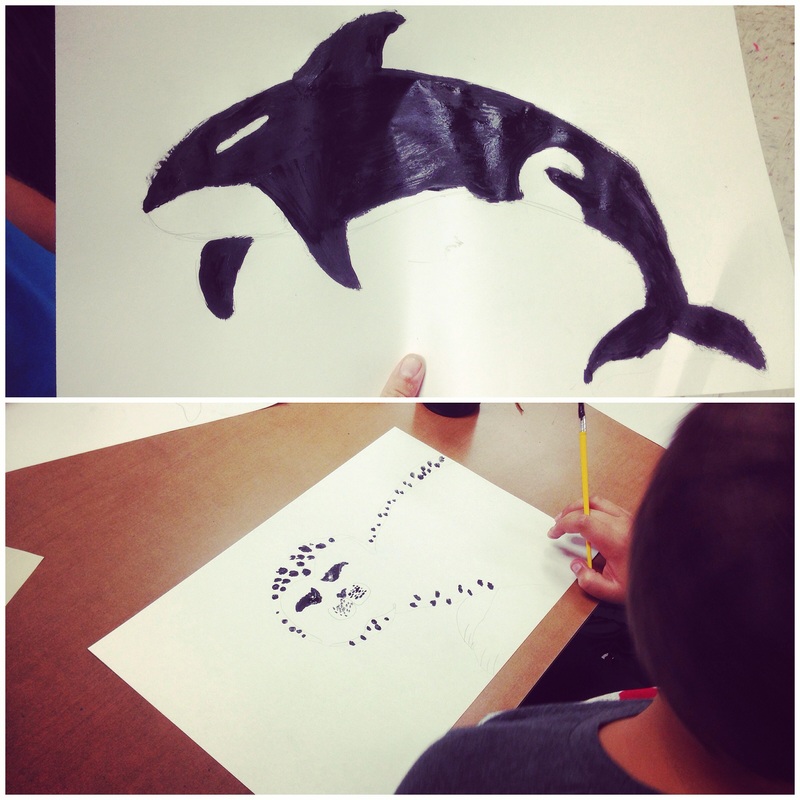
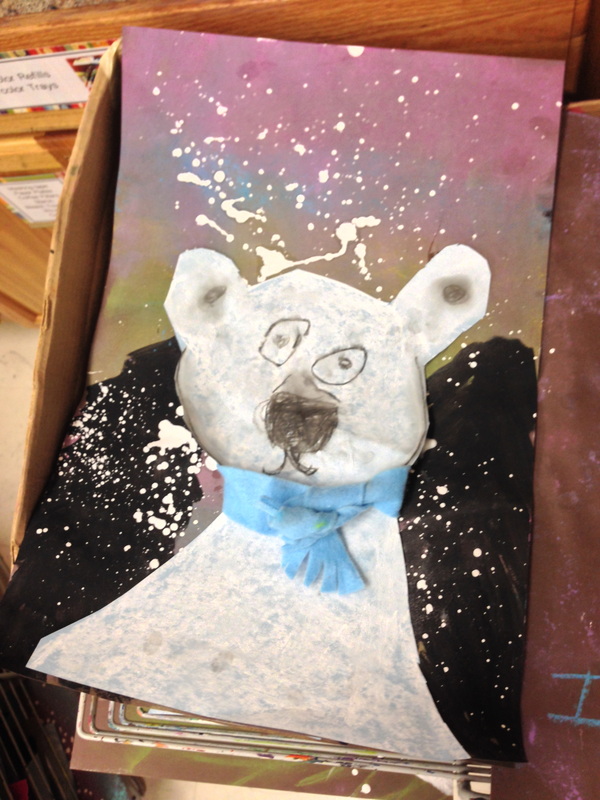
TIP: Once students start coloring with oil pastels, I stressed to them that they should do ALL of the white first. Especially if their pet has a LOT of white, like a panda or a fox, because if they do the black first, it smears really bad! Also, if they are planning to trace the mouth or the nose with black, save that for last, after they color the fur around that area with another color, so it doesn't smear. 

Picture
Picture
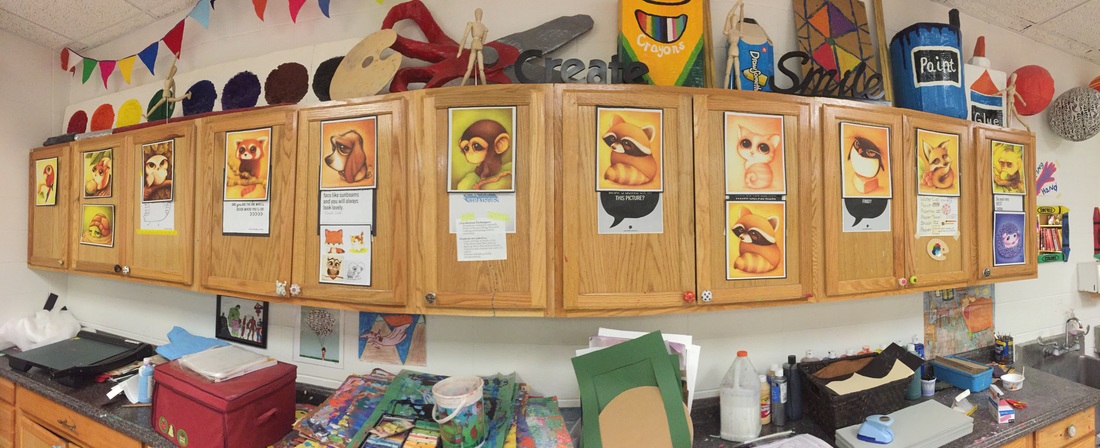
I printed the photos above after finding them on a Pinerest search. I would love the give the artist credit, but I had trouble tracking down the original artist. I will post the link here if anyone finds it. 


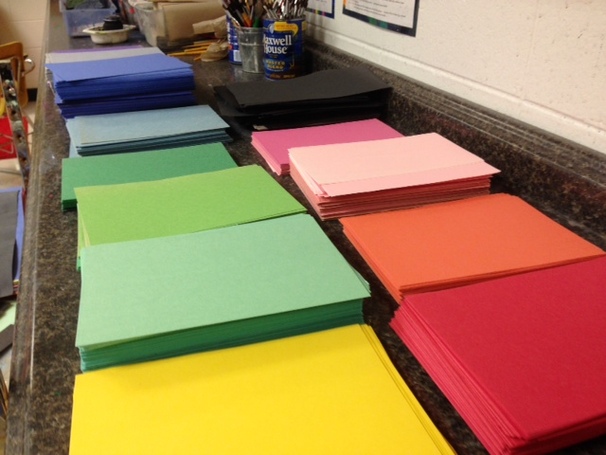
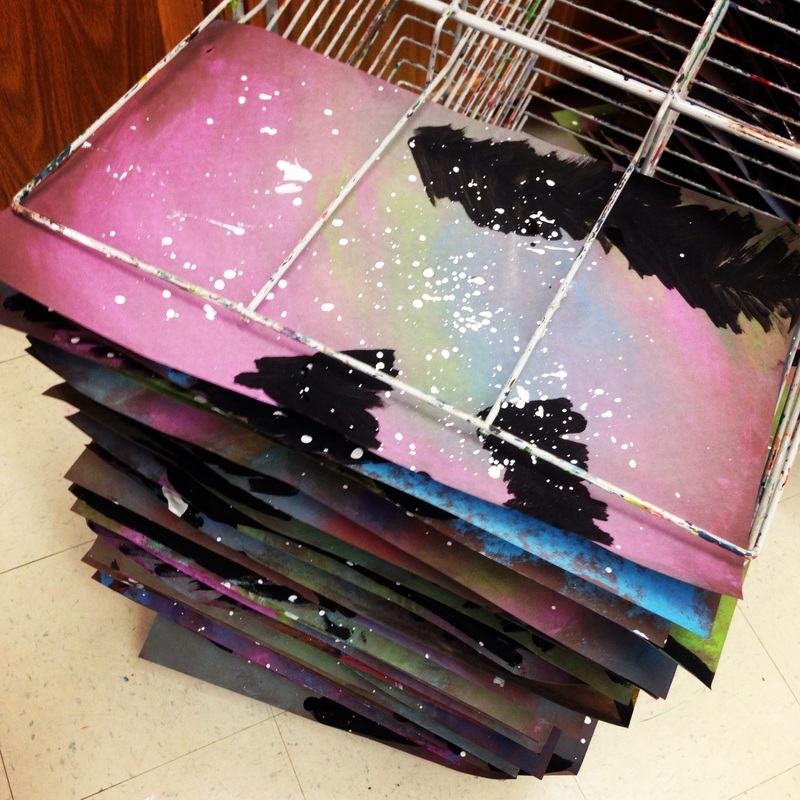
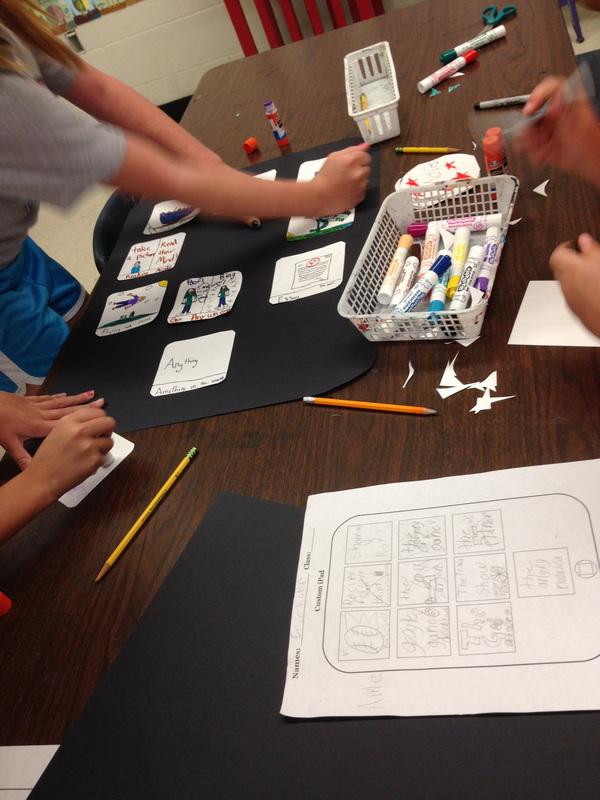
Here is the paper, the tray of chalk+tagboard circles. I used my 2" punch to create the tracers. This size circle worked really well for this size paper. 

Picture
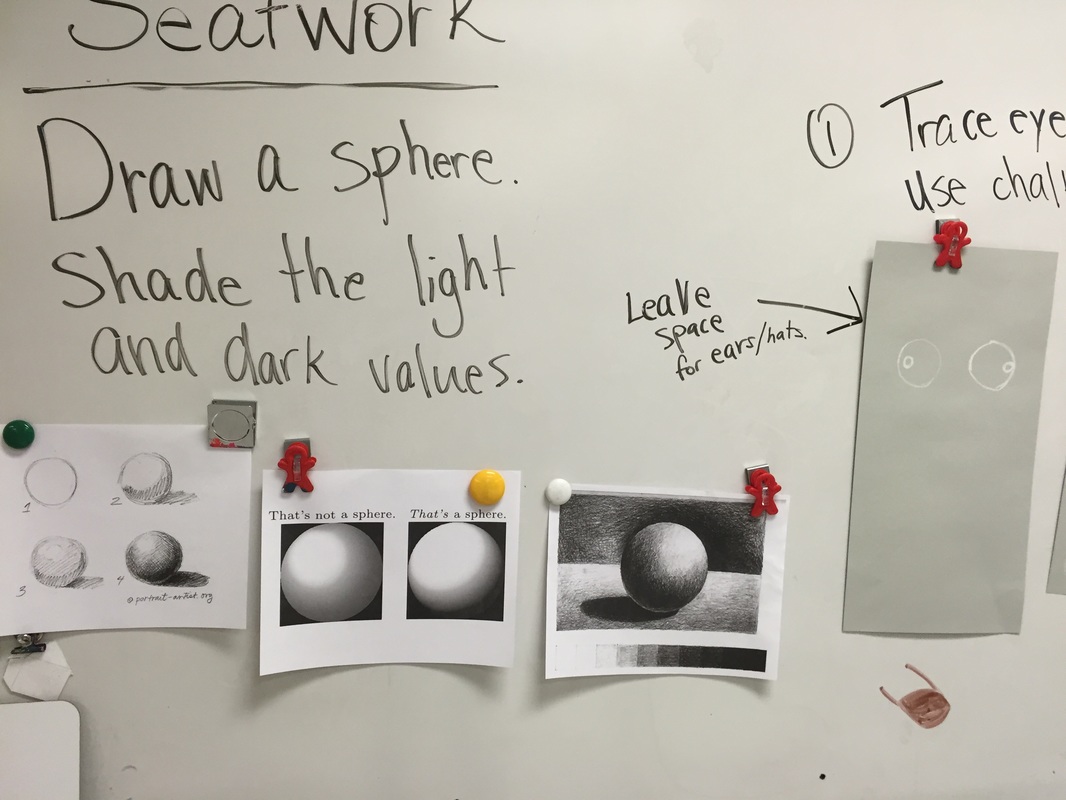
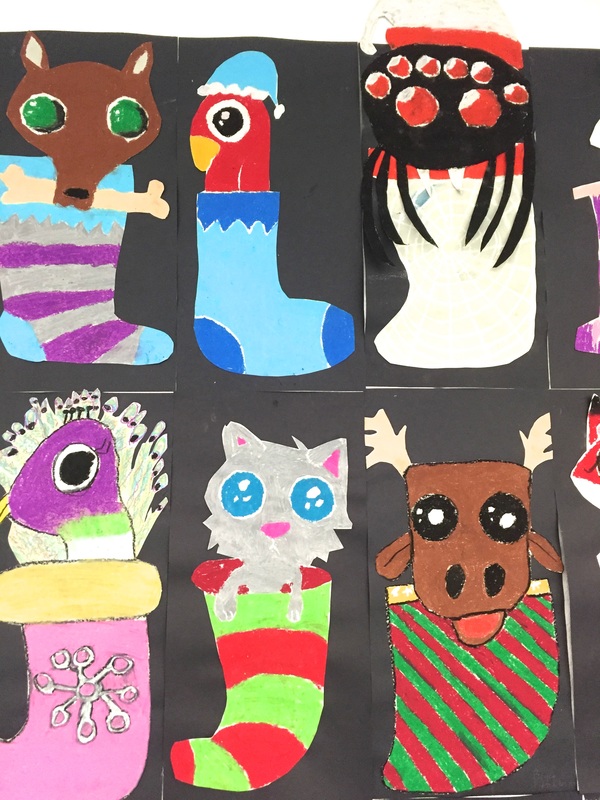
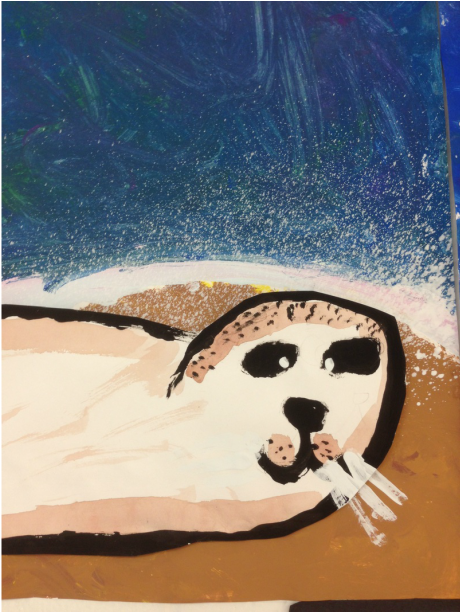
We spent a little time on one of the first, day before we drew the animal, practicing shading a sphere. Many students had never shaded a sphere and the eyes were looking really flat. I love the animals that have 'gum ball' looking eyes----they used the shading technique in their coloring, and did a nice job of blending the oil pastels! 

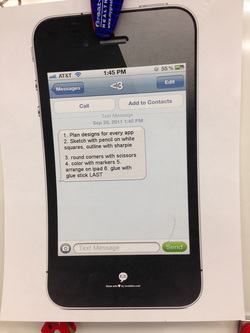
I posted steps 1-3 on the board and added 4-5 the 2nd day. 
1. Trace the eyes. Use chalk. (save room for ears/hat above the eyes)
2. Draw details and add a stocking.  
3. Color with oil pastels. 
4. Cut out. 
5. Glue to black paper, put name on black paper. 

Tip: Make sure eye highlight is white. The reflection needs to be white or else it looks strange. 
Picture

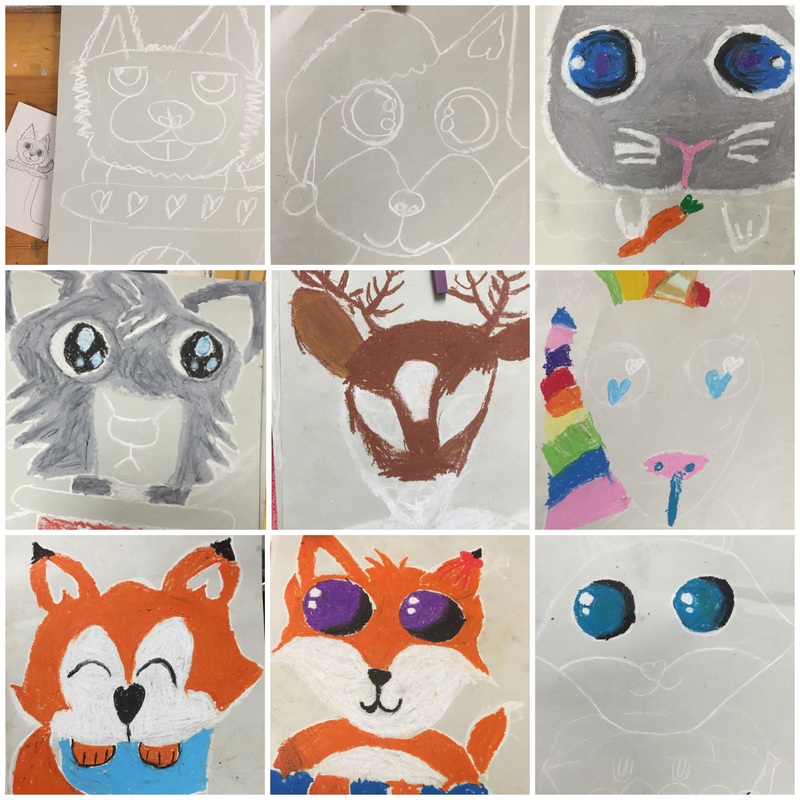
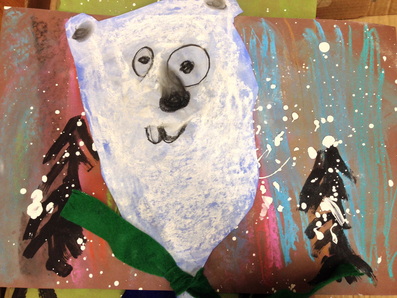
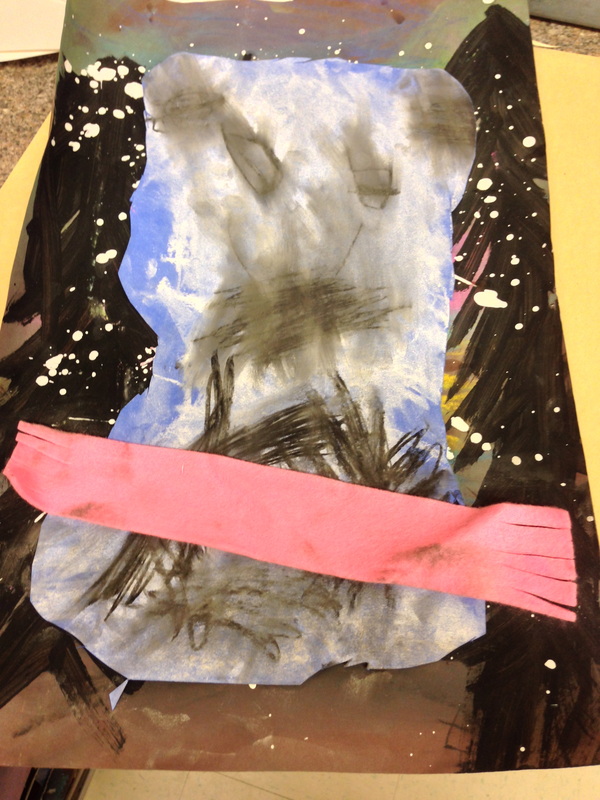
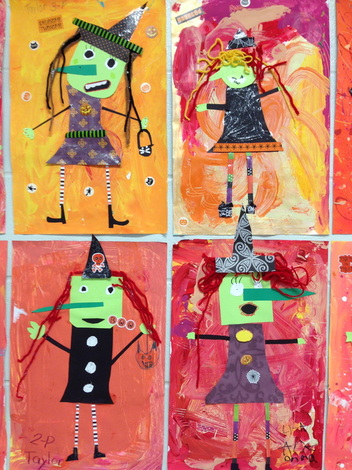
This is how they looked after day 1.

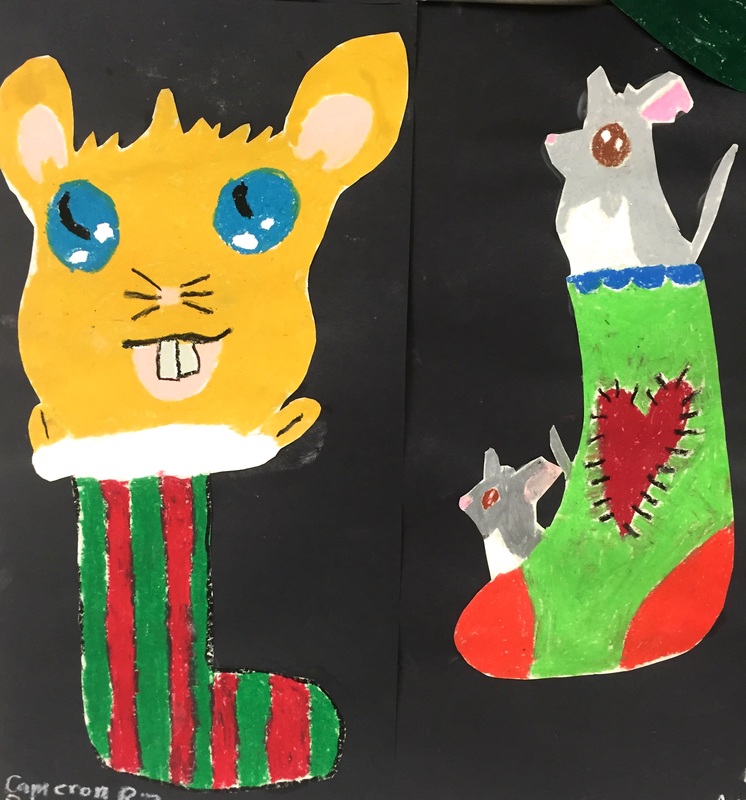
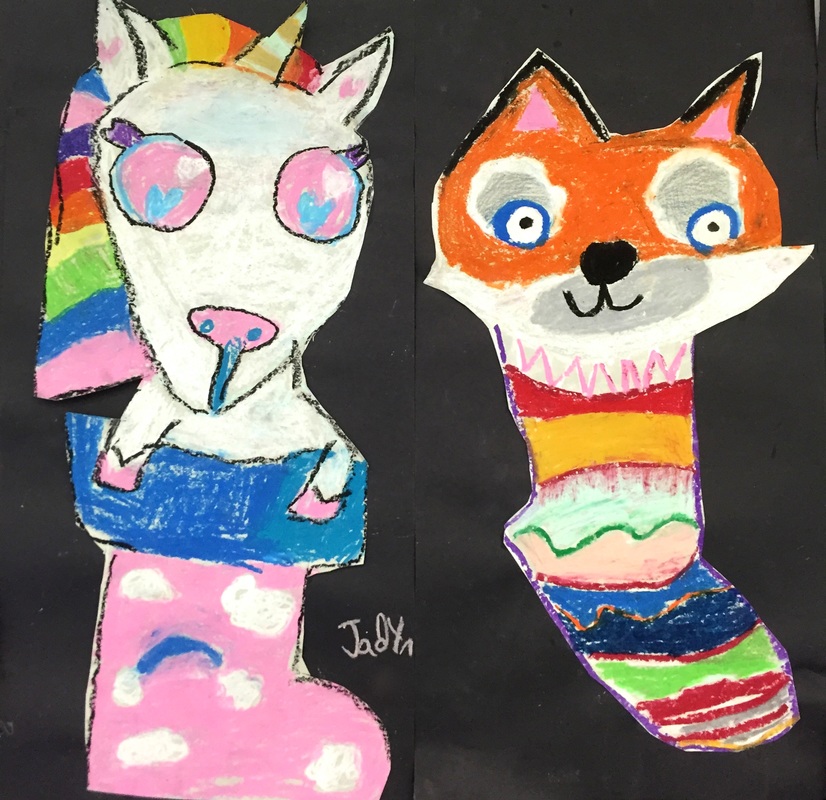
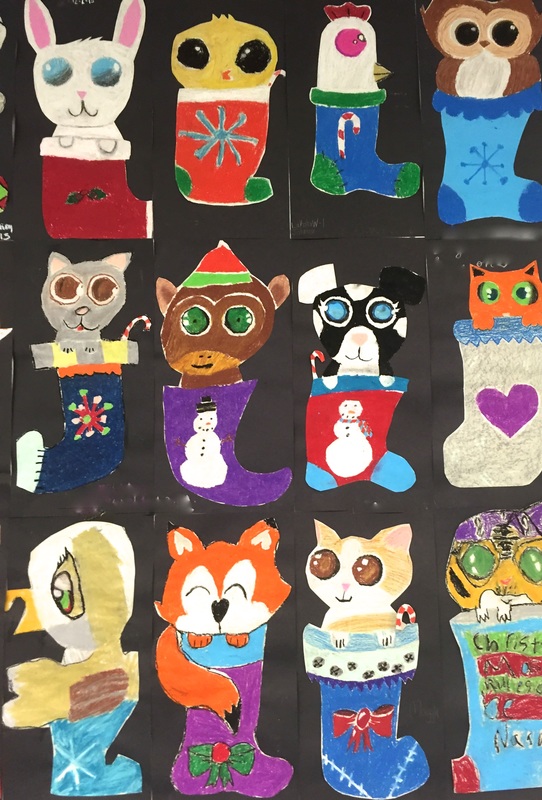
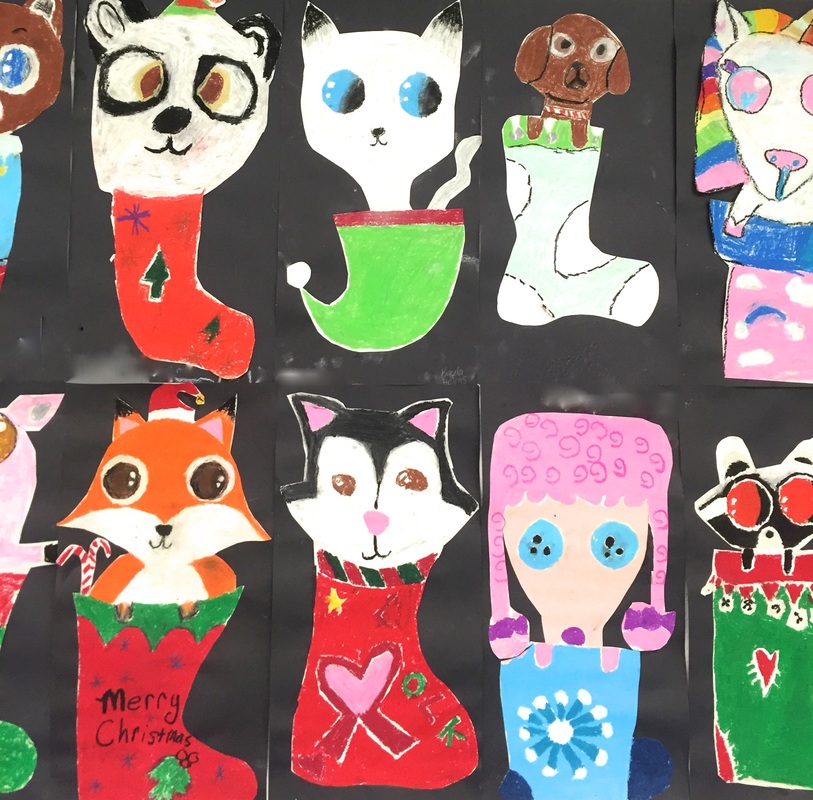
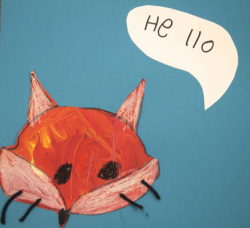
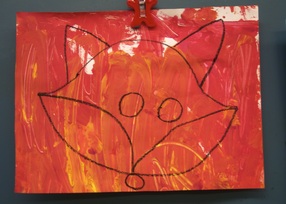
​Lots of foxes. Some had time to color the eyes. Some waited until the 2nd day to color the eyes. I encouraged them to do the eyes open, but the closed eyes are pretty cute too. Also, I suggested that they use multiple colors to make realistic textures. Some students spent a long time drawing, so they did not get as much colored. If they made the animal too big to squeeze the stocking on the same page, I let them use a 2nd piece for the stocking. The paws were optional. 

On the last day, we finished coloring, and cut out the animals, gluing them to a simple black background. This was all that some had time for, if they spent a lot of time designing the stocking or were slower at coloring. I had a few Christmas coloring pages for early finishers. 

Picture
Picture
Picture
Picture
Picture
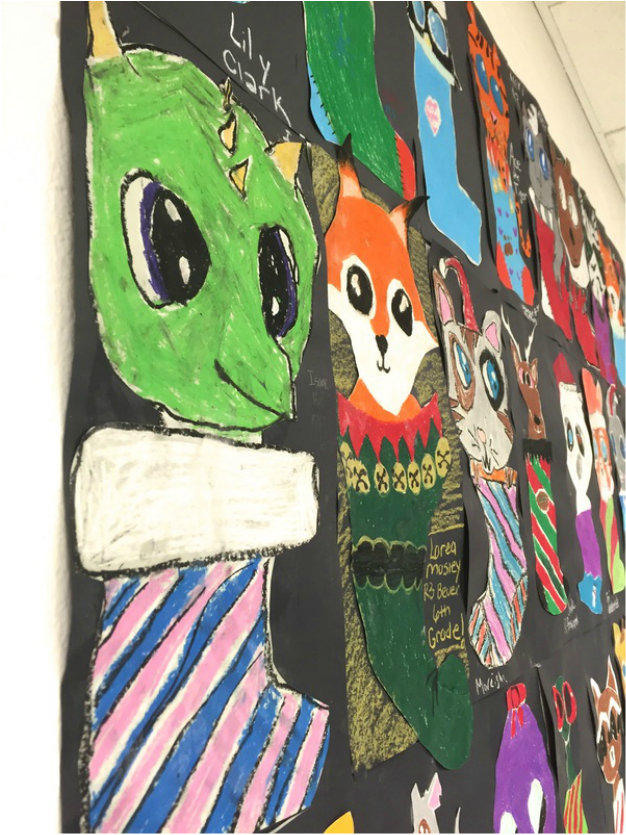
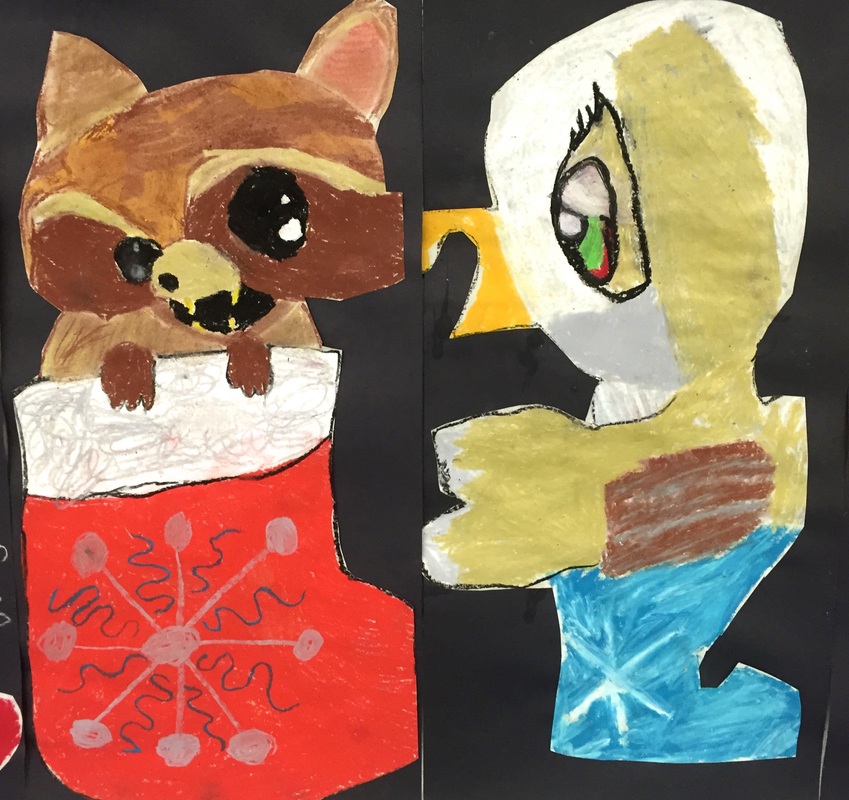
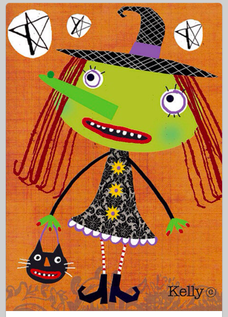
I love the side view of the eagle and the 3/4 view of the red panda with open mouth above! 
Picture
Picture
Picture
Picture
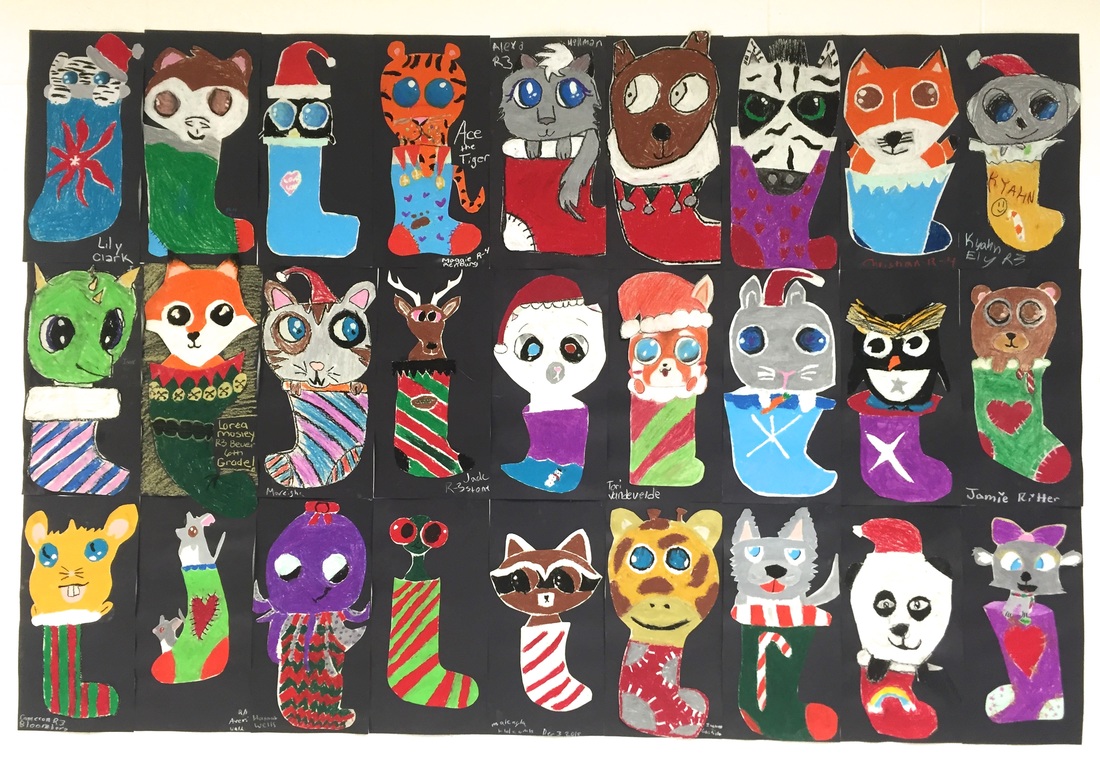
Overall, this was a very successful project that we were able to finish in 2-3 art sessions. The kids loved them. At one point, I was so excited with the success: "You guys!! This room looks like a cute apocalypse, "I proclaimed with a class because there were SO many cute animals everywhere!! 

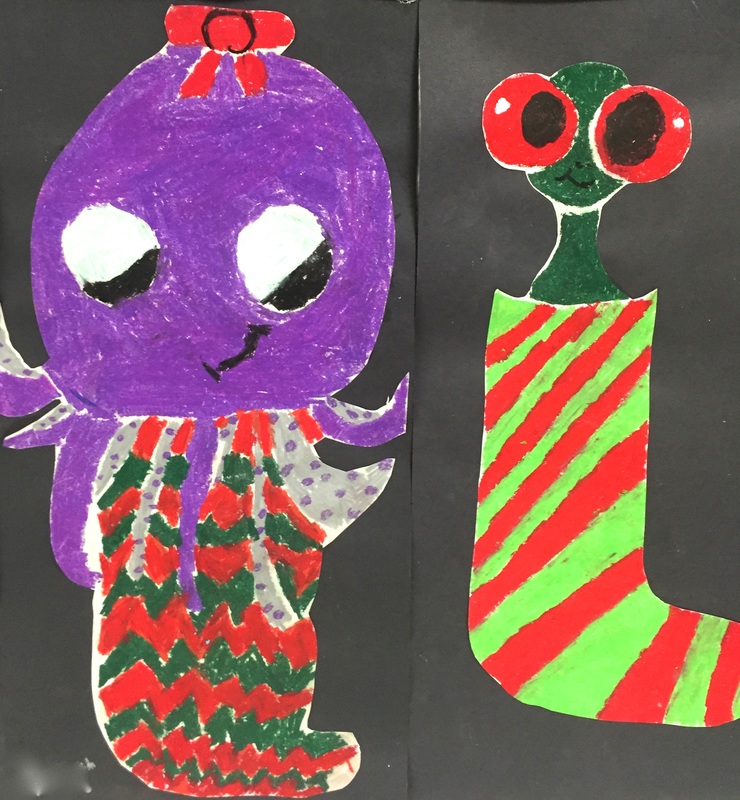
Students loved this project because pretty much any animal was approved...sharks, spiders, and peacocks were all welcome, and only a little bit of the head/shoulders had to peek out of the stocking. They were able to decorate and customize the stockings, and add toys/accessories, candy canes, hats, bows and anything else they wanted to make their image. 

One or two students that do not celebrate Christmas did not have to include the stocking, they could just draw the animal peeking out of its home or something. I would love another alternative if you have an idea, please leave it in the comments! 
Picture
0 Comments

Star Wars 'Portraits'

4/6/2015

1 Comment

 
On Thursday, my school is having a little writing fair. I was quick to jump on board with the planning so that we could display some artwork as part of the writing fair---to boost attendance, and show off my amazingly talented students.

Since we were studying Pop Art---I had my students create a 'portrait' in a colorful pop art style.

Star Wars is a huge element of pop culture so it is a perfect theme.

I told my students they could make 'baby' versions of some of the characters if they weren't too keen on the serious and boyish theme and that helped convince some of my 5th and 6th graders that they could personalize and customize the portrait of their choice. I also pointed out that if they liked animals, robots, humans, or creatures, there is a little something for everyone, but they have to do a little research if they aren't familiar with the movies in order to learn a little more.

Honestly, I got the idea from the fabulous Drip, Drip, Splatter Splash blog.

Day 1
I introduced the idea of Pop Art to my students.
I had them research characters in Star Wars and make a practice sketch in their sketch books. The research was mostly done via my smore flyer (they scanned a QR code to access it), but some characters needed to be googled---because I did not provide visuals for every single one. I also had some printed 'coloring sheet' versions of some of the characters.

Day 2
Since so many of my students knew nothing about Star Wars, I showed them this quick summary.
Make a background using 9X12 colored construction paper (don't use the same color as your character) using oil pastels. Could design with space, lasers, bright colors, patterns, etc.
Begin drawing character on a 2nd color of paper---for R2D2, use white, for C3P0, use yellow--for yoda, use green. Trace character in sharpie, add color with oil pastels.

Day 3
Finish drawing, outlining and coloring character. Cut, out and glue to background. Sign name on front since we are hanging everyone's in the hall.

My amazing parent volunteer helped hang over 300 of them today! YAY!!

There are so many awesome ones, I tried to take a few pictures to show off some of my favorites below, enjoy!!
Picture
1 Comment

Orcas and Harbor Seals

11/18/2014

0 Comments

 
For this project, I was personally inspired by a summer trip to Victoria, BC, where I went whale watching.

I knew I wanted to my students to have some options so I thought about how to keep the materials (PAINT) slightly limited so that I could focus my instruction. For seatwork, everyone practiced drawing an Orca. For the project, students could choose between an orca and a harbor seal. The first day was all about drawing, and then painting with black paint.

Since we are landlocked by at least a 1,000 miles, my students don't have a lot of experience with marine animals. Students watched a video about Harbor Seals.
http://www.blubberblog.org/index.html

**Please don't use this guide as a definitive 'how to draw a killer whale guide'....this one was hastily drawn on my whiteboard, and several students pointed out the inconsistencies with some of the body parts from step to step. But I erased it after two days so...eh.....Just google 'how to draw killer whales' for tons of great sources. I did not have a ton of photos for them to work from so I went with this method and it worked well.

I was inspired by the MaryMaking Blog: Breaching Orcas for the killer whale option.
Picture
Picture
Picture
The second day was devoted to painting the water. Students had to remember if they were doing a whale or a seal, because I suggested that they paint their seal laying on the beach....but if they were doing the whale, they definitely wouldn't want the beach because whales usually swim in very deep water. If they wanted land in the distance, I had some examples of this for them to reference. I made a demo video since this process involved a lot of paint mixing on the actual paper, and not on a pallet or in a cup.

I don't have any pictures of the painting process. It was WAY too wild to have my camera out! ;-)

Their favorite part of this day was the final step, when I SPRAYED watered down white paint on the wet painting to look like ocean spray. They pointed, I sprayed.
Picture
Picture
The third day was devoted to cutting out the harbor seal or the killer whale an attaching it to the painted background. This seems easy enough, but I did add one more element to the harbor seals....I allowed students to use water color paint to add some brown to their blubber, and use white paint for a little sparkle on the eye and whiskers. While I was passing out the papers, students watched a tribute to free willy.
Picture
Picture
Picture
Picture
The seals definitely had more personality than the whales. Since I did this project with 330+ 5th and 6th graders, there was a lot of room for individuality. I also demonstrated how to add a little bit of brown or gray watercolor to the seal's blubber if they didn't want it to be a snow white. Many of them did want this option. I also let them add white whiskers and a dot of white to the eyes for that sparkle.

Picture
Picture
Picture
Picture
Picture
Picture
0 Comments

How do you curate student work?

9/20/2014

0 Comments

 
Curating student work is a big job.

Between art shows and building displays, the act of setting up all of the displays is an incredible undertaking. Just the act of selecting a few pieces for a show can be really difficult.

Generally I don't really work on-on one with my students to determine what will be displayed. I usually just sit down and
sort through pile after pile of artwork, taking in to consideration themes, color choices, paper orientation, size of my bulletin board, and how many pieces I have selected from that student in the past. I make selections methodically, with an idea in my mind for the final layout of the display.


Picture
Picture
Recently, I collaborated with a professor friend to organize some student work for a show at her university. The deadline sort of snuck up on me and I had to squeeze the project into the middle of a big unit. The lesson plan was ready-made, it was just a matter of cutting the paper and getting the supplies organized.

It worked out great because I had the chance to introduce my students to the artist of the month: Henri Matisse. (Students read and view the information on a S'more flyer that is accessed via QR code).

I was also able to try out Emaze. Instead of creating a Powerpoint, I created a slideshow on Emaze. I synced my apple tv to my computer with air parrot, so that I could use the cool flash-only template: gallery. I had the slideshow on repeat throughout the entire lesson so students could read and see about the artwork continuously.

I followed the lesson plan pretty closely, demonstrating how to cut out an organic shape, using that free 'painting with scissors' sort of style that Matisse is famous for. While students were working, I allowed them to 'jazz' up the adjoining hallway with organic shapes taped to the walls. They really enjoyed installing their piece to the collaboration. It was a fun experience. When I asked the teachers who work down that hallway if I could use the two walls for my installation, I'm not sure what they were expecting....but I think they are a little creeped out at the results...art people get it....others kind of don't.....but that is okay. It was especially cool that the music teacher down the hall had jazz music playing while we were installing the installation....again, only an art teacher would appreciate the perfection of that sound while we were taping paper scraps to a wall.

Picture
Here is the hallway 'before'. I chose this hallway because it doesn't get a ton of traffic, and students who use the busier hallway (with the creepy Cardinal eye peeping out), can get a peek at the installation.
Picture
Picture
Picture
From the collages that were created during class, I selected around 30, out of 330 to go to the exhibit at PSU. When I told students whose I had selected, some of them were bummed that theirs was not selected...so that always make it harder!

How do you curate student work?


This post is part of the Reflective Teaching Blog Challenge from TeachThought.
0 Comments

Did Picasso invent mine craft?

2/25/2014

0 Comments

 
Picture
Last month, while introducing the January 'Artist of the Month' a student asked an interesting question. Did Picasso invent Mine Craft?

Using my best VTS questioning skills I responded, 'What do you see that makes you ask that?'

He pointed to a large reproduction in my classroom of the Three Musicians.

Brilliant! The student had connected something in his real life with a work of art that he might not otherwise have made a connection with, and I explained his connection to all of my other classes and related the work of art to students in a completely new way.

No, Picasso did not invent 'mine craft' but in what ways is this work of art similar to your game?
How are Cubism and Mine Craft visually similar?
In what ways are the two things different?
Think-pair-share: Find someone in the room who is an expert on Mine Craft. Ask them to explain the concept of the game. Find someone in the room who is an expert on Cubism. Ask them to explain the concept.


Higher order thinking to the max!

From that point, students were directed to design a collage based on one of three of Picasso's ideas: a guitar, another instrument, or The Three Musicians. I encouraged the Mine Craft lovers in my school to use their game as a visual reference if they wanted to recreate the Three Musicians.

Students had to work with a partner to design their work of art by sketching and coloring a small version the first week. On week two, they had to make a large 18"X24" collage of
their sketch. Both artists had to give input on the design and both had to work on the collage to make it look neat and well-crafted.

Some of the designs came out more 'Mine Craft'-centric and a little less 'Picasso' influenced, but it was a fun activity and it allowed students with an interest in a video game to incorporate it into our classroom. Also, some of the students felt more comfortable drawing a figure as a 'cube' like a mine-craft musician than if they had to draw a guitar or other instrument, so it gave that element of variety and confidence to many artists!

Picture
Picture
0 Comments

Kindergarten: Polar Bears

12/9/2013

0 Comments

 
Picture
Polar Bear

This is a two-week project. The first week, students create a 'Northern Lights' sky background using chalk and paint. The second week, introduce polar bears with a book and then draw them step-by-step with the students.


Supplies for week 1
12X18 dark brown paper (black or dark blue might be good too)

Chalk pastels (in Northern Lights colors)

Tissues for blending

Black paint in jars for every table

White ‘snow’ paint….I watered it down for splattering and had it a special art center

Week 1:

1.     Start the lesson by showing them this video: http://www.planet-science.com/categories/under-11s/our-world/2012/01/have-you-seen-the-northern-lights.aspx Some kids have heard of the Northern Lights because of the movie: The Polar Express. Give a brief explanation about what causes the sky like this. I had to explain that we would not be able to see this in the sky where we live because we don’t live near the North Pole.  The students loved this 'North Pole' video...it is very appropriate for this time of year!

2.     I pointed out a couple of photos in the art room of the Northern Lights and then got right to work on the demonstration.

3.     Northern Lights Sky Picture:

a.     Use the side of the chalk to quickly fill up the whole paper with color.

b.     Use a tissue to blend the color.

c.      Use black paint to paint some Fir trees. Paint a long stick for the trunk, and then pull the branches downward, starting at the top. I showed them how to “NOT” do it, spreading out the limbs with a lot of space between each one.

d.     I demonstrated how to bring the paper to a special art painting center to do the splatters. I had the stick one stiff finger out and pretend to hold a brush to practice before they do it later.

e.     After adding the snow, put the paper in the drying wrack and wash down table with a wet paper towel.

f.      For free time, students may look at books or do the free time activity.


Week 2

Supplies:

Blue paper (I cut mine to 10X16) Baby blue worked better than the darker blue

White chalk

Black chalk

Scissors

Glue

Felt cut into strips

1.     Read Eric Carle Polar Bear book….or use any book.

2.     Demo how to draw the bear with white chalk. Use a fingers to blend the white chalk. Use black to make the ears and chin. Add dark black for the nose and eyes. Don’t blend the eyes and nose! The bears turned out  better when I demonstrated 3 ways of making the mouth: with teeth, smiling, and with the 'cat' sort of mouth.

3.     Cut out the bear, be careful not to cut out off the head (and ears), we want the neck attached.

4.     Wash hands. I passed out a wet paper towel to each student to wipe off fingers.

5.     As soon as hands are clean, students can pick out a piece of felt for a scarf. Demonstrate how to cut fringe on the ends. Wrap around the neck. Some kids can tie, but some of my felt wasn't long enough that. Glue bear down towards the bottom of the background from last week.

6.     Put bear in the drying wrack. For free time, students may look at books or do the free time activity. I had a little 3-d bear for them to make...using a tracer, they could cut out the bear on a folded piece of paper towards the fold at the top, and after cutting it out, it would stand up. They had to have hands and table really clean since it was a white polar bear.

Picture
If you follow me on Instagram, you might've seen this sneak peek of my drying wrack. Follow me @ nelliemaeii
Picture
Picture
Picture
Picture
Picture
Picture
If you teach K and 1st, then you know that sometimes you need a 'what not to do' example. This was the worst case scenario. OVER-blended the face, got the scarf dirty, etc.
Thanks to MaryMaking for all of the inspiration for this very successful project, I am obsessed with some of her polar bears..I've got them on my desk top and I looked at them a LOT to help me prep for this project.  I am currently doing it with 1st and 2nd grade also this year. Also to my mentor for suggesting the felt scarves. I ordered a BUNCH of felt and wasn't sure what to do with the strips...this was the perfect solution.
0 Comments

What does the fox Say?

11/18/2013

0 Comments


Kindergarten and 1st grade Painted paper Collage 

Picture
Way back at the end of September, students painted a 12X18 sheet of white paper with hot colors. Most of them mixed all the colors together to create a lovely, textured orange paper. In October, I cut the papers in half for students to create a pumpkin collage. I still had tons of the paper left over, so I decided to design a project to use up the last of the paper. 

I designed this specifically for K, but I am going to use it for 1st grade as well. 

At the end of this post, I will explain my modifications for each grade.

Picture
Supplies: 
Black and white oil pastels
Previously painted orange papers (could use construction paper...might be able to add fur texture with orange oil pastels)
Black crayons
glue
black yarn cut into small bits for whiskers
12X12 turquoise paper
white speech bubble (I pre-cut all of these)
Sharpies

Step 1: Demonstrate how to draw the fox with a black crayon. I had my kinders draw this step-by-step with me...since I wanted them to draw this BIG on the 9X12 painted orange paper, I knew that I needed to model this step perfectly. 
Step 2: Color in the white cheeks with an oil pastel. Also color the black nose and eyes with a black oil pastel (could just use a black crayon). I demonstrated how to add a white highlight on the eyes.
Step 3: Cut it out. Be careful not to cut off the nose or ears...if an ear is snipped off, I demonstrated how to use a corner scrap to make a new ear.
Step 4: Glue to the 12X12 turquoise background paper. Could use either a glue stick or white glue.
Step 5: Explain what a 'speech' bubble is...and how to put it on the paper. Make sure the point, is pointing at the fox. Give a few suggestions for 'what the fox says.' Write the sentence or phrase in sharpie. Sign name on the front in sharpie then glue the speech bubble in place. 
Step 6: Add black whiskers with a big dot of white glue. I point out where the whiskers should go...and mention that some kids have used the black yarn as eyebrows and eyelashes as well. 

Picture
When students were finished, I allowed them to color a fox coloring sheet to take home or look at a book. The fox coloring page is from Feed Your Soul Art. Please head over there to print your own free version!

I also allowed them to watch the video during the last few minutes of art. I projected it on the smart board. If they wanted to get up and dance around, I also allowed them to do that. Here it is on YouTube if you haven't seen it. 

I asked them PLEASE do NOT torture your classroom teacher with the song all afternoon. PLEASE do not sing it in your classroom!! This was a special treat today, and the classroom teachers will be so mad at me if everyone is singing this song all day. 

In the slideshow above, you will notice that I have a few foxes with the body and legs....I tried that with my very first class of kindergarteners...it was super hard for them to cut out the legs...so I changed up the design for kindergarten, and decided that the HEAD only would be best.

 For first grade, I will demonstrate BOTH methods and allow them to choose which one they want to do on their painted paper. 

This lesson would be best for a 30 minute art time....stretching it out to 50 minutes was a little tough to keep them busy the entire time because they will race through the fox. It might be good to squeeze in a little fox poem or book if you have one. I have 1st grade for one hour, so I will plan an additional activity at the end....

Please let me know if you try this lesson, I would love to see a link to your student work in the comments! Some of you may have seen a sneak peek of this if you follow me on Instagram at nelliemaeii. 

0 Comments

Pete the Cat

10/18/2013

0 Comments

 
Picture
I searched and searched the internet for the perfect Pete the Cat lesson. I found TONS of great ideas and put them all together for one fantastic kindergarten unit. I did this in September...and I was a little disappointed at first...but then I took a deep breath...and reminded myself: IT IS ONLY SEPTEMBER, and they turned out pretty cute. However, I know this would've been a supremely successful unit a little later in the year. 

Week 1: We watched the Pete the Cat 'I love my white shoes' video on Youtube. 

I explained that we were going to be painting Pete the Cat and the kids were very excited! They love Pete!

Step 1:
Demonstrate how to draw a 'portrait of Pete' from the 'shoulders up'. I gave everyone a yellow 9X12 paper, that was folded in half like a book. 
Students drew along with me, step-by-step, drawing the head, neck, ears, eyes, nose, etc. On the other 'half' of the fold, we drew Pete's body. I explained that this would be 2 versions, or two different poses. I had a copy of the book, and I pointed out images that showed a close-up portrait, and an 'action' shot of Pete walking in his shoes. 

Students wrote their name down the fold, and slid the drawing into the middle of the table. This yellow paper is the practice paper. Students had to choose their best version for their painting, which we would be doing next. If the action shot was hard, choose the close-up portrait.  I picked up all of the yellow practice books while students put on paint shirts. 

Picture
Step 2: On the board, I taped up two sheets of 12X18 white paper. I used a small brush dipped in black paint to paint both versions of Pete: the portrait and the whole body with his shoes. I explained as I demonstrated that students needed to paint each shape large, and if they made a mistake, try to 'make it work' and DON'T paint the whole paper solid black. We can always paint over a little black blob, but if the whole face is solid black, that is harder to fix later. 
Picture
Picture
This reminds me of a little 'mine craft' cat...teehee. 
Step 3: At the end of week 1, students could look at other Pete the Cat books or practice drawing him again on a 'free' sheet. I also let some classes watch the '4 Groovy Buttons' video if we had time. 

WEEK 2: Finish painting Pete the Cat, and make a Pete the Cat book to take home. 

Step 1 Demonstrate how to color Pete's eyes with a yellow oil pastel. I also encouraged students to add any other 'tiny' details with oil pastels BEFORE we painted. If they forgot whiskers, draw them with a black oil pastel, if they wanted flowers or a sun or rainbow, draw those things with oil pastels. If they wanted pink inside the ears or ANYTHING, do it before we paint. 

Step 2 Paint Pete with blue tempera paint. I demonstrated this whole thing in front of the class and explained thoroughly, that the blue tempera was ONLY for Pete's body, not the whole paper. Some still painted the whole paper blue. It happens. 

Step 3: Use tempera cakes (watercolor would've been better), to color the sky, ground, etc. I demonstrated how to do a wash, getting the paper wet with water before putting the color on. It worked out OK, but some of the black smeared a tiny bit...that was frustrating. Watercolor would've been a little more vibrant. 
Picture
This was a LOT of supplies on the tables for the students to manage. Two kinds of brushes, oil pastels, two kinds of paint. I could've used regular blue watercolor, or blue oil pastels...but the SAX Versatemp Ultramarine blue was just too perfect for Pete. 

Step 4: When students were finished, they had a chance to make a little Pete Collage to take home the same day. YAY!

After trying to explain how to make a collage cat head, right before painting, and failing miserably to convey that the tan 'head' shape in the supply bucket was a "TRACER", mean to trace around to make a blue 'copy'....many, many, many of my 'tracers' were covered with whiskers and eyes....

I gave up trying to 'tell' and decided to 'show'....I made a poster, that I pointed to, while I demonstrated every step of this little cat head. Students could much more easily grab the supplies and complete this on their own after we were finished painting, once I had modeled HOW to do it. 

Did I mention that I have kindergarten for 50 minutes?....and in September, it seems like I need multiple activities to keep them busy. 

Once they had started the cat heads, I went around the room, and dropped off the yellow practice 'books' from the week before...students could glue the cat head to the front, and color the pictures and even write a sentence inside: I like my blue shoes. 

Picture
This poster had to be very simple for my kinders to follow....but only after I modeled each step, could they really do it. 
Picture
Picture
Picture
0 Comments

Design your own 'Custom' iPad

10/4/2013

0 Comments

 
Picture
Picture
Working collaboratively is such an important skill for students. Recently, I had my 2nd-4th graders work with a partner on two large-scale projects back-to-back. Usually, the question is, 'who gets to take it home?'. I had them complete two projects together so that they can make that decision later on down the road, after I have had a chance to display the artwork for a few weeks. (Hopefully there won't be any major battles over who gets what!). 

Students worked together to design icons for ten apps. If found this iPod printable on teachers-pay-teachers, and modified it to say iPad at the top. 

They were to plan out each icon, and then draw it on a 4X4 white square. After outlining with a fine point sharpie, and coloring with markers, they laid the squares out onto a 24X36 black piece of paper, and used a glue stick to adhere. White colored pencils were used to add the iPad home button and other symbols. 

Picture
I used recitethis.com to compose a text to my students. I printed this sign in color, and hung it on the board, so that students could refer back to it throughout the lesson. 

They were excited to get a 'text' from me...even though it was just a list of the steps...normally, I write those on the board...but this was a cool way to get the information to them. 

I was amazed at the creativity that some students exhibited in this project. Their 'app' ideas blew me away! There were apps for all sorts of things: towing service, sewing, dentist, homework, and one boy even made an app that would activate his iPad from his phone an allow spider legs to pop out so it could crawl to him. WOW!

If I do this again, I will spend 3 weeks on this project, instead of 2....I allowed time at the end for students to stand up and share some of their best apps with the class and I wish I would've spent a little more time showing them really cool icons, and encouraging them to color the entire square....This would be a great project for older students....mine had some trouble with spelling, but its sort of charming so I don't have too many issues with a few misspelled words. 

Check out the slideshow below for more examples of the finished product!

Picture
0 Comments

Wacky Witch Collages

10/4/2013

1 Comment

 
Picture
Picture
Back in the day....I was an avid scrapbooker. I still occasionally dabble in cards and memory albums...but my former obsession has me OVER stocked with pretty papers and embellishments that I will most likely never use. I decided to purge some of these items by donating them to my art room. I had a large amount of Halloween stickers, ribbon, and papers so I decided to design a craft project to incorporate them.

Since I really only have enough of these materials for one or two classes, I decided to spoil my after school art club. I know they are the ones who truly appreciate all the 'extras' on a collage like this one. 

I had found a really cute witch on Pinterest and put it on my 'art ideas' board. This sweet little witch was the perfect project! I totally stalked this artist's Flicker page for TONS of cute collage ideas. She is one of my new favorites.

For the background, we used 'painted paper' that had been created during the 1st month of school. I had 25 'orange' pieces in my collection so I allowed them to choose one for the background...some are more pink or yellow, but it works. My students had made elf shoes last year, so they were able to make the boots pretty easily.

I gave a short demo on how to cut the dress, head, and explained how to make arms and legs. I had a parent volunteer in charge of cutting yarn for hair, and ribbon for trim on the bottom of the dress or around the hat. 

As a finishing touch, I allowed them to paint glitter glue on to some spots with a small brush, and add a few halloween stickers to act as buttons. I encouraged some students to draw bats or spiders in the background if they wanted it a little more spooky. If they were going for glam, I told them to color the lips/blush with crayons. 


Picture
SOURCE: http://www.flickr.com/photos/kelbugstudio/3566609077/in/set-72157620989053642/
If you decide to try this project, I would love to see! Please post a link in the comments. 
1 Comment
<<Previous
Forward>>
    PictureWelcome!

    Mrs. Mitchell

    Art teacher from Missouri. 

    Instagram
    Add to Flipboard Magazine.

    Archives

    March 2021
    April 2020
    November 2019
    July 2019
    April 2019
    January 2019
    October 2018
    July 2018
    June 2018
    May 2018
    April 2018
    March 2018
    January 2018
    September 2017
    May 2017
    April 2017
    March 2017
    January 2017
    December 2016
    November 2016
    October 2016
    September 2016
    March 2016
    December 2015
    October 2015
    August 2015
    May 2015
    April 2015
    March 2015
    February 2015
    November 2014
    October 2014
    September 2014
    August 2014
    June 2014
    May 2014
    April 2014
    March 2014
    February 2014
    January 2014
    December 2013
    November 2013
    October 2013
    September 2013
    August 2013
    July 2013
    June 2013
    May 2013

    Categories

    All
    1st Day Of School
    1st Grade
    3d
    Abstract Art
    Alcohol Ink Tiles
    Alpacas
    Animal Art
    Animation
    Architecture
    Art Centers
    Art For Kids Hub
    Art History
    Art Hub For Kids
    Art Room
    Art Show
    Art Teacher Conference
    Bell Ringer
    Birds
    Blending
    Bunnies
    Cardboard
    Chalk Pastels
    Chalk Stencil
    Charcoal
    Choice Based
    Christmas
    Chuck Close
    Classroom
    Clay
    Club Day
    Collage
    Color Diffusing Paper
    Colored Pencil
    Colored Pencils
    Construction Paper Crayons
    Contest Art
    Creatures
    Crystal Bridges
    Design
    Dice Games
    Document Camera
    Dot Day
    Drawing
    Early Finishers
    Easter
    Emojis
    Fall
    Field Trip
    Food Art
    Foxes
    Green Screen
    Grid Drawing
    Group Challenge
    Halloween
    Haunted Houses
    Hearts
    Hermit Crab
    High School
    Human Form
    Ice Breaker
    Inspirational Posters
    Ipads
    Jim Dine
    Justand
    Killer Whales
    Kindergarten
    Landscape
    Lesson Plans
    Lettering
    Llamas
    Magazines
    Mandala
    Maori
    Markers
    Masks
    Matisse
    Metal
    Model Magic
    Mona Lisa
    Monster Trucks
    Mother's Day
    Mother's Day Card
    Mummies
    Mural
    Newspaper
    New Zealand
    Notan
    Observational Drawing
    Ocean Art
    Oil Pastel
    Oil Pastels
    Optical Illusions
    Origami
    Owls
    Painting
    Paper Weaving
    Pd
    Pencil Topper
    Perspective
    Pete The Cat
    Picasso
    Polar Bears
    Pop Art
    Portraits
    Printmaking
    Product Review
    Professional Development
    Quiver
    Reflection
    Reflective Teaching
    Room Tour
    Rooster
    Sea Horse
    Seals
    Sea Turtle
    Self Portrait
    Shading
    Shaving Cream Prints
    Shoes
    Sketchbooks
    Sloth
    Solar Eclipse
    Spinners
    Spring Conference
    Star Wars
    Statue Of Liberty
    Step-by-step
    Step By Step Drawing
    Step-by-step Drawing
    Still Life
    Stop Motion
    Story Board
    Sub Plans
    Summer School
    Symmetry
    Tab
    Teacher Appreciation Cards
    Technology
    Tempera Paint
    Tiny Food
    Tissue Paper
    Trees
    Tumbling Blocks
    Valentine's Day
    Warm Ups
    Watercolor
    Wax Resist
    Word Art
    Yellow Submarine
    Zentangle

    RSS Feed

Powered by Create your own unique website with customizable templates.