I spray painted the watercolor cases....I didn't have enough of any one color so I had to make a variety of colors: brown, black, gold. The students were allowed to choose which case they wanted, most wanted gold, but it was nice that some chose brown to look like wood.
WEEK 1
-- Use heavy drawing paper (or scraps of watercolor paper) into a sized that will fit on the front of the watercolor case. I just eye-balled it and cut enough strips for every student. I made a template that was rounded on top and bottom so that they could draw inside the outlines and make it rounded on top and bottom.
Step 1: Draw a mummy case in pencil. You could focus on symmetry, show examples of ancient Egyptian mummy cases (I went to a cool mummy exhibit in San Antonio and purchased a little mummy case with an ornate mummy inside, it was so fun to show the kids!), teach about hieroglyphics, etc. I demonstrated the basic steps on the board, drawing a face, adding arms and hands (optional: hands can be hard so students could just make an interesting necklace). I don't think any of my examples show mummy cases with the arms, but several kids did draw hands holding a staff and they turned out really great.
Step 2: Trace over the drawing with skinny sharpies or thin tip permanent markers. Color with colored pencils, make sure to use silver and gold if available.
WEEK 2
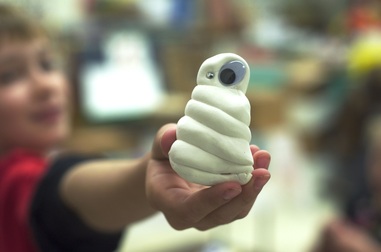
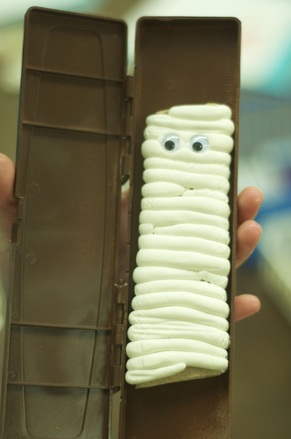
Step 1: Create a mummy out of model magic. I had them wad up a paper towel to be the inside of the mummy, (you know, brown and crunchy like a dead body) and then make a bunch of coils to wrap around the 'mummy'. I had to let them have the cases at this point so that they could make sure it wasn't too fat or thick to fit inside. Some made their mummies really fat and the door wouldn't close, some didn't want the door to close so they made theirs sitting up.
Step 2: Add googlie eyes with elmers glue. I told them the eyes would stay, but once the model magic dries, they eyes might fall out if they don't glue them down...same with the mummies....there is a chance the mummy will fall out of the case once the model magic dries if they don't glue it. This was my favorite part, I had a bunch of different sizes and the kids made the silliest mummies! Some only used one eye, like it was peeking out from the wrapping.
Step 3: The model magic mummies don't take a whole hour...some students needed to finish coloring the mummy case design, some were ready to glue it on to the front of the case. Since I had them trace a template, they needed to trim off the sharp corners of the paper so it would fit perfectly on the case. Once they are completely finished coloring the case, use a brush to put glue on the surface of the mummy case, but also cover the drawing with a layer of glue so that it won't peel off. A layer of glue will help protect the drawing, creating a layer of varnish. You could also use ModPodge for this.
--In the pictures below, you will see a giant pyramid that I constructed in my classroom for my students to go inside. I let a few at a time go in with flashlights. On the walls inside, I had glued magazine images of ancient Egyptian artwork. It was really fun!


 RSS Feed
