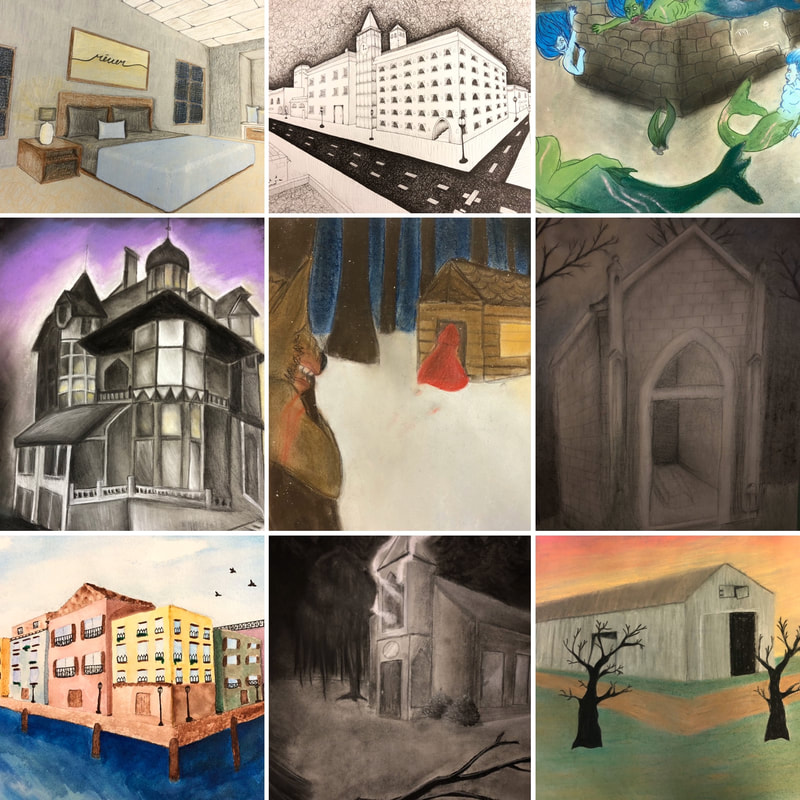
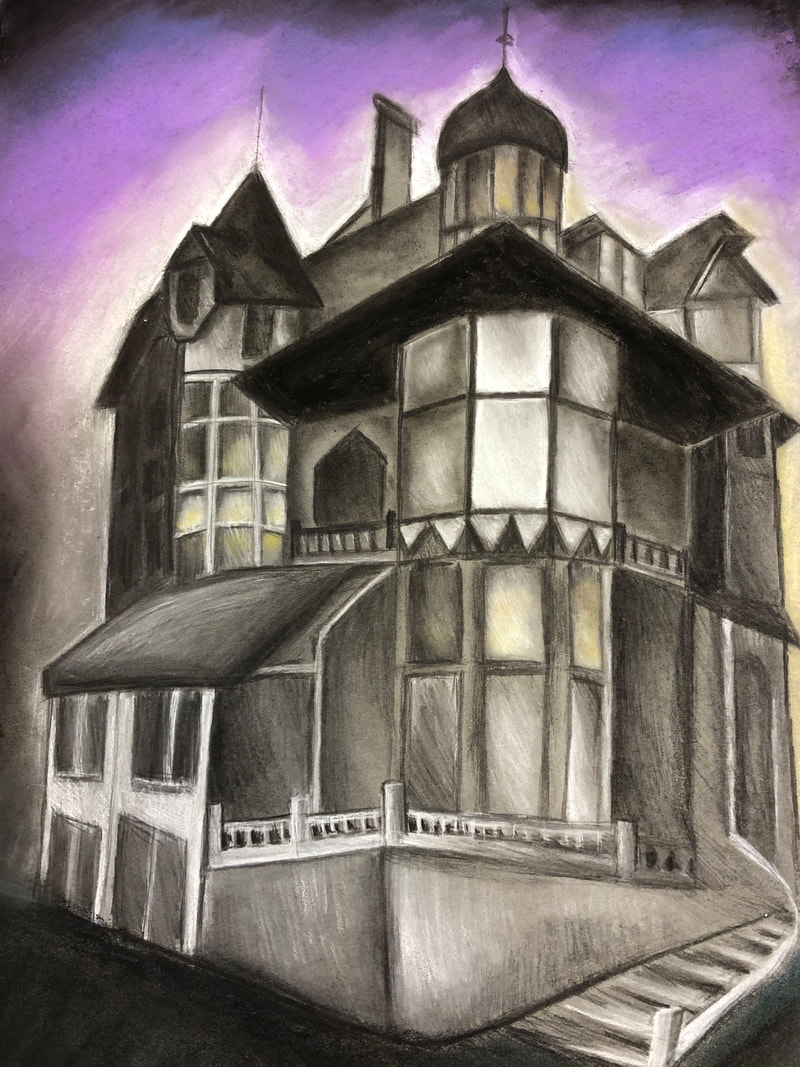
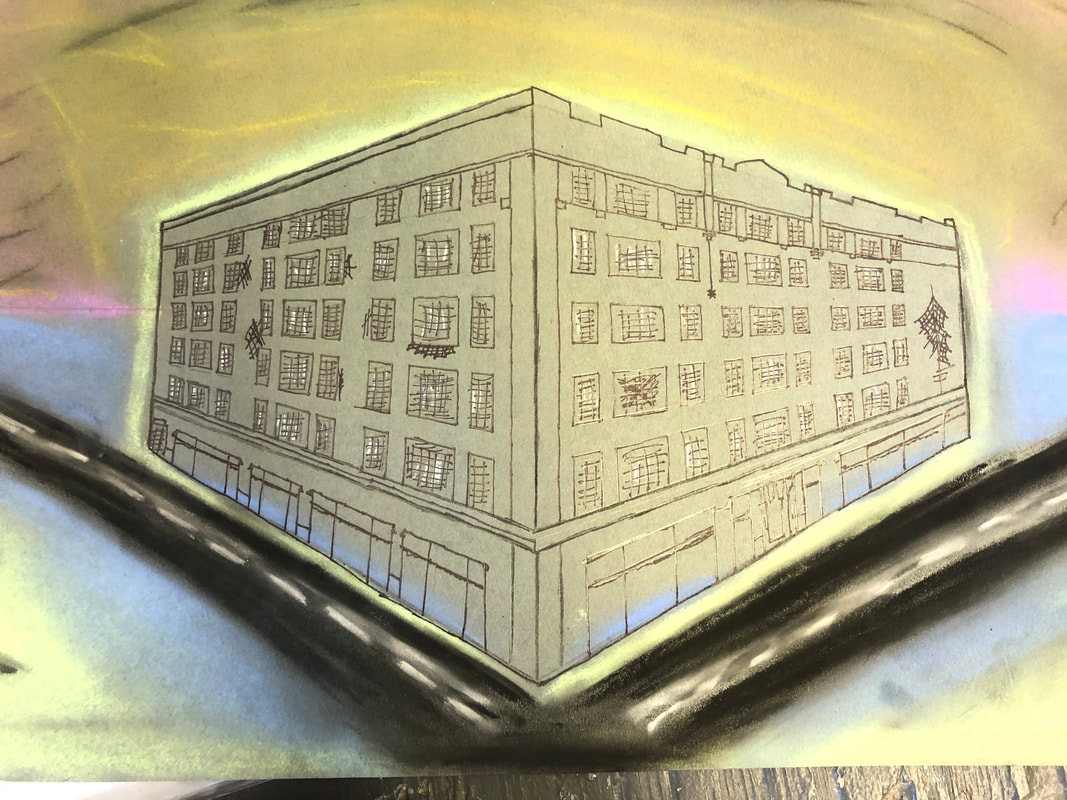
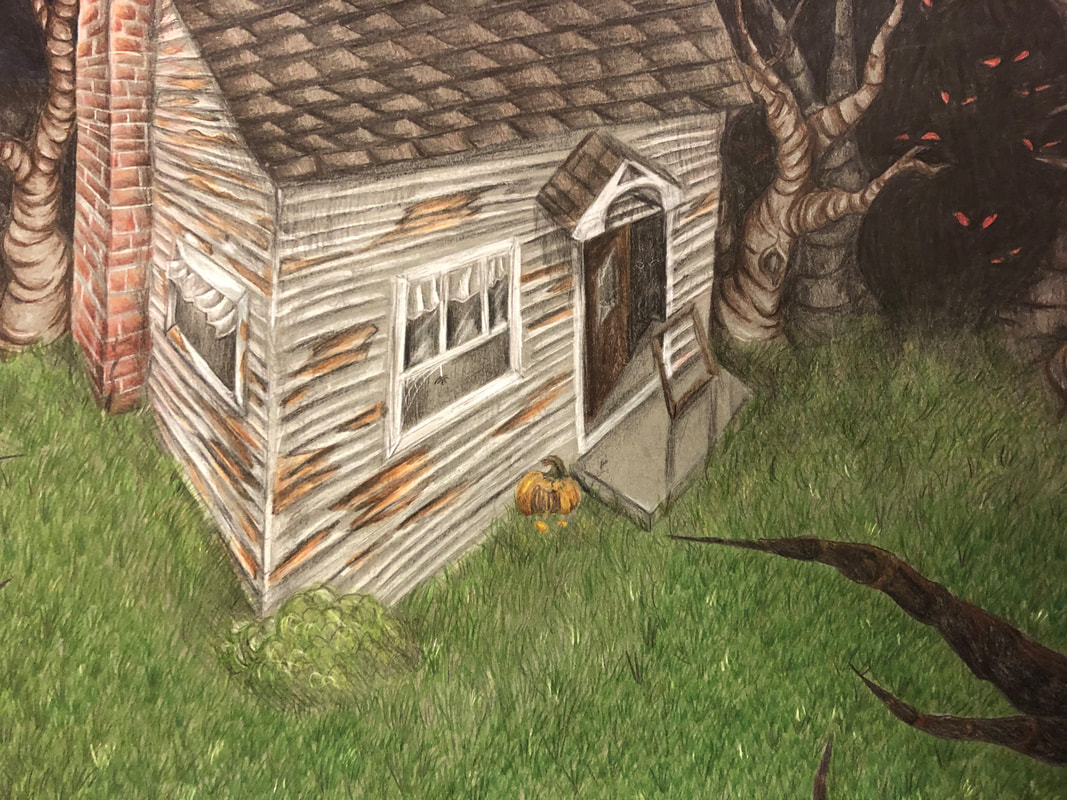
Last year, I totally dropped the ball on teaching perspective. I just never had all of the resources ready in a way that made sense. As a result, my advanced art class has no idea how to use perspective and it was really limiting what they could do. So this year, I finally assembled the perfect combination of resources and we had some great results.
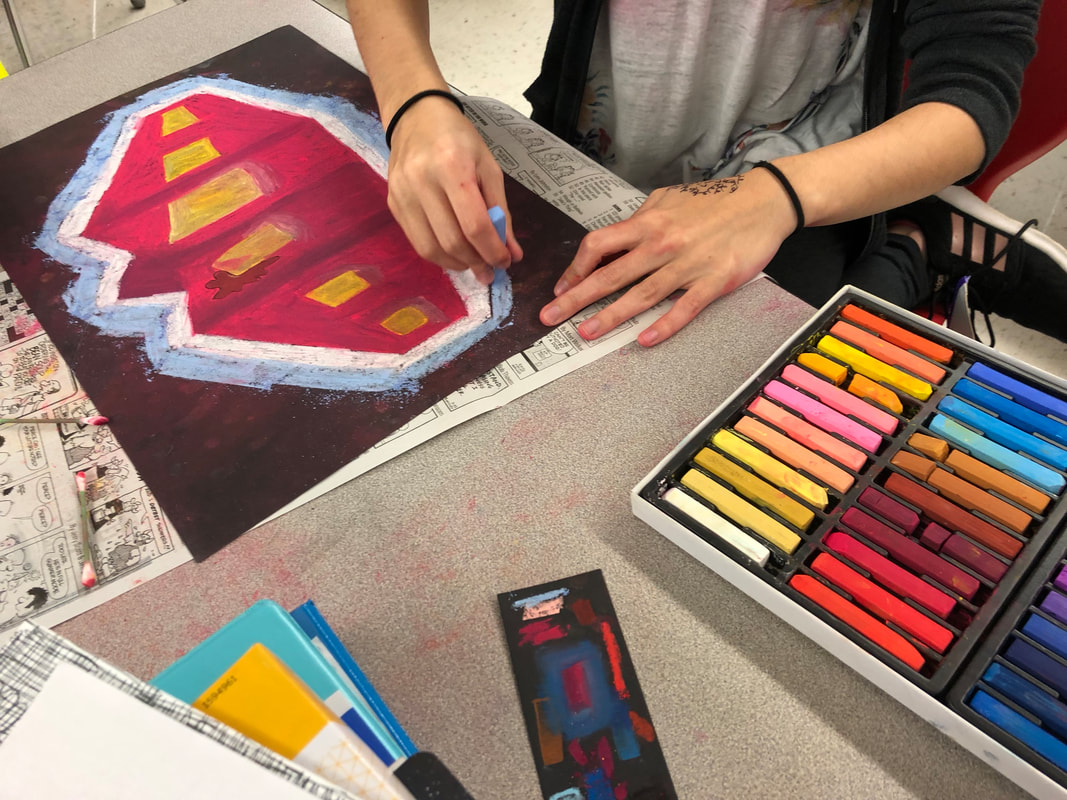
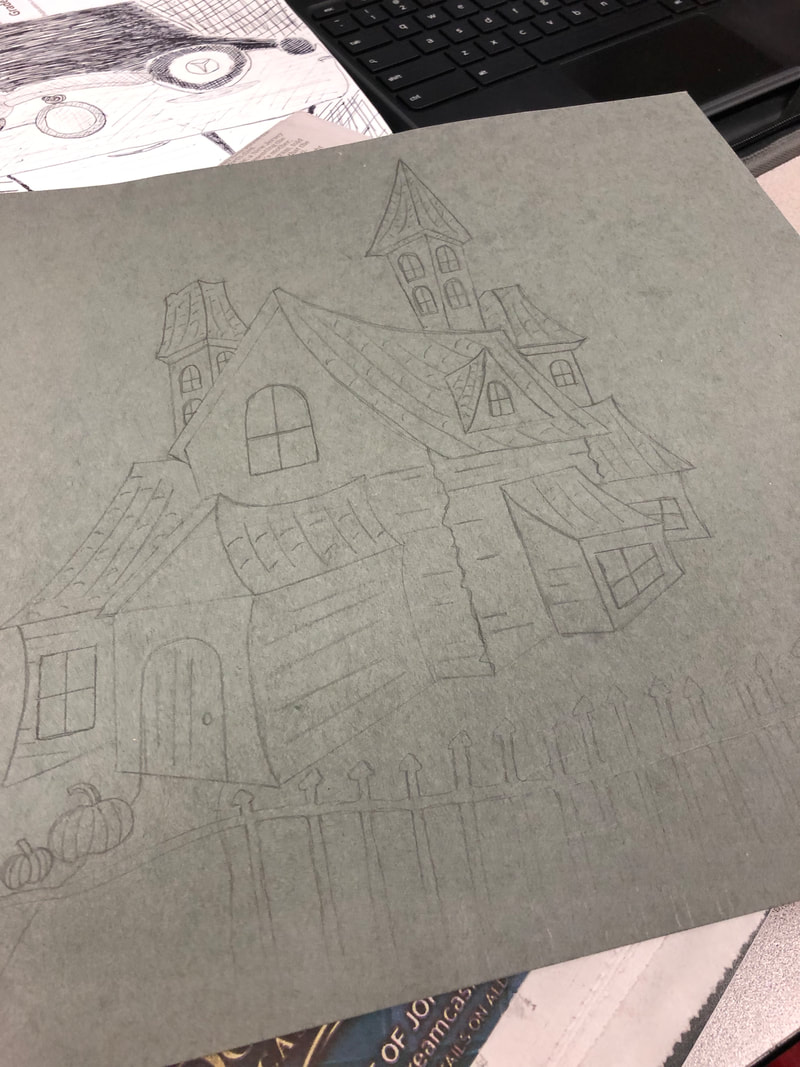
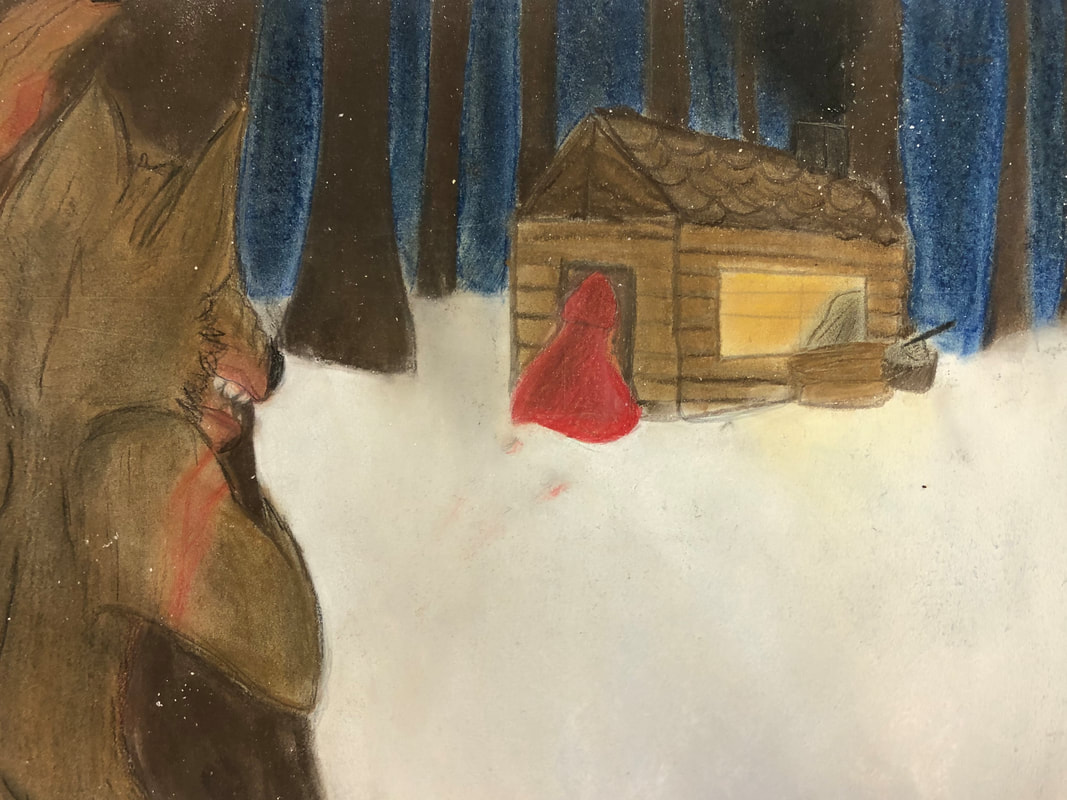
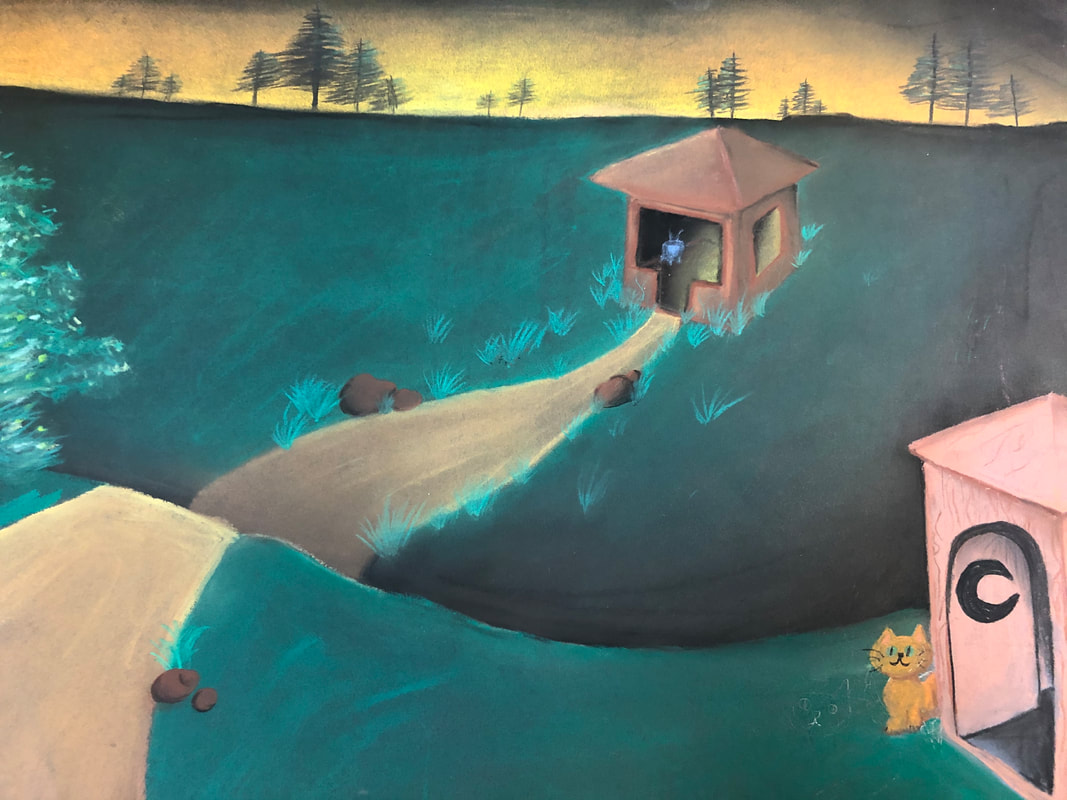
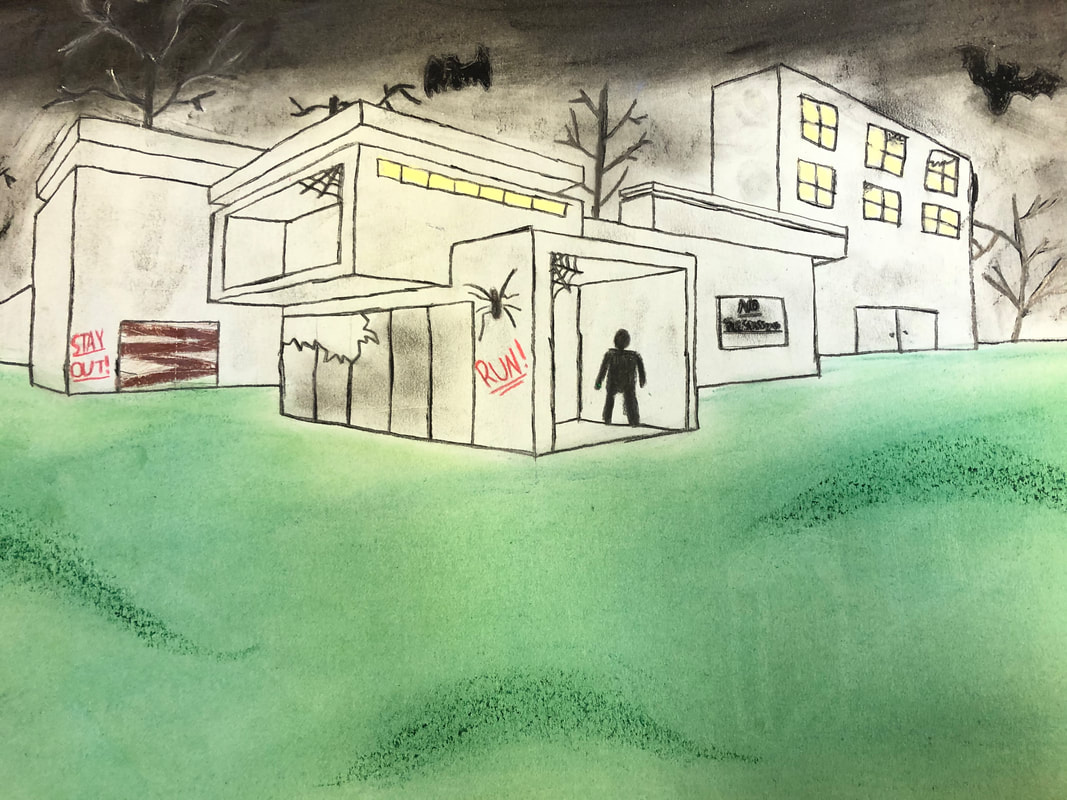
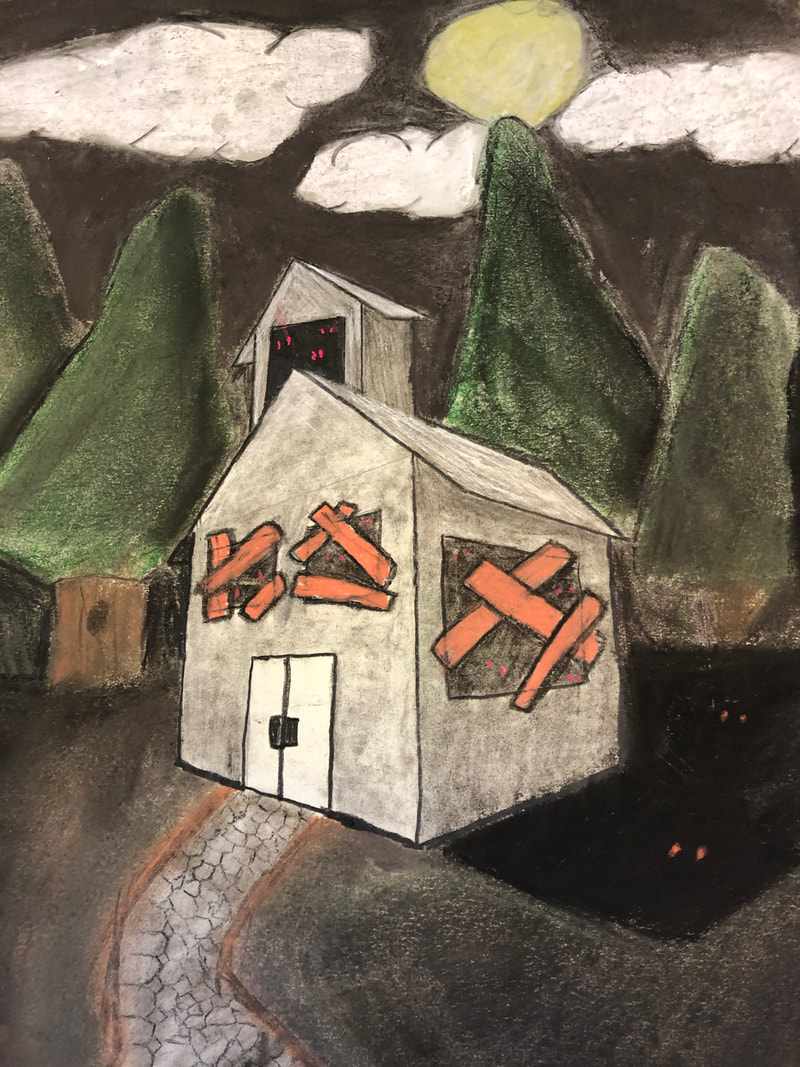
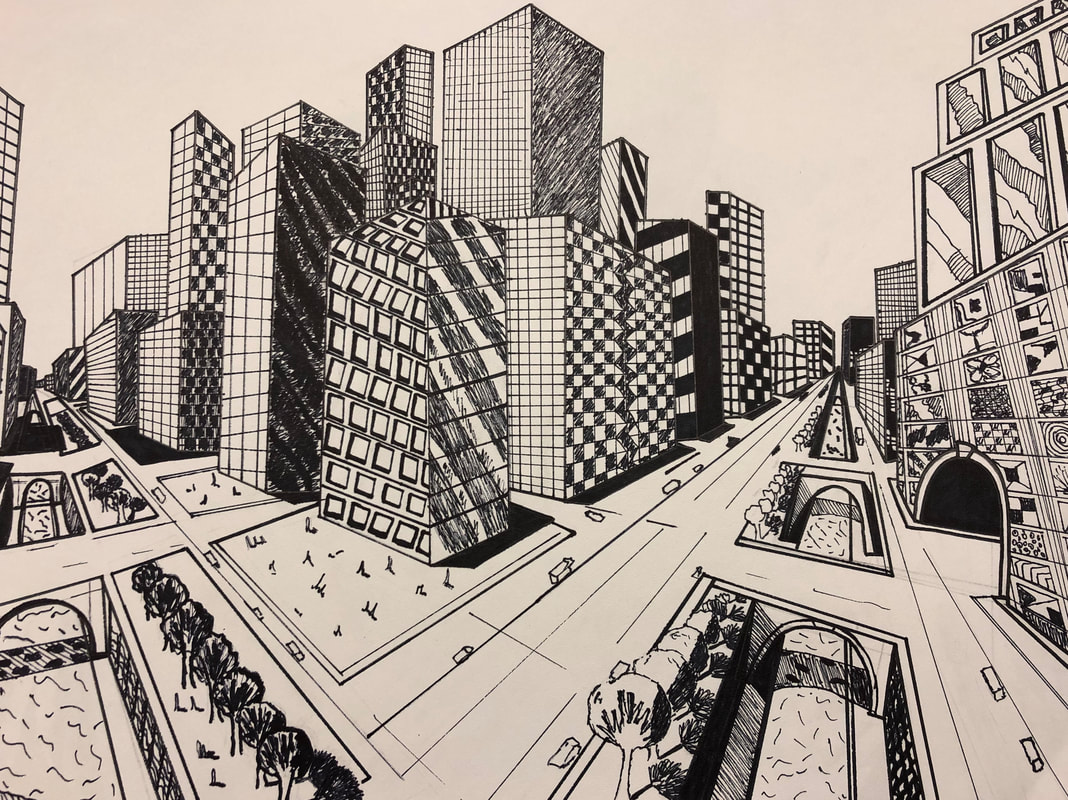
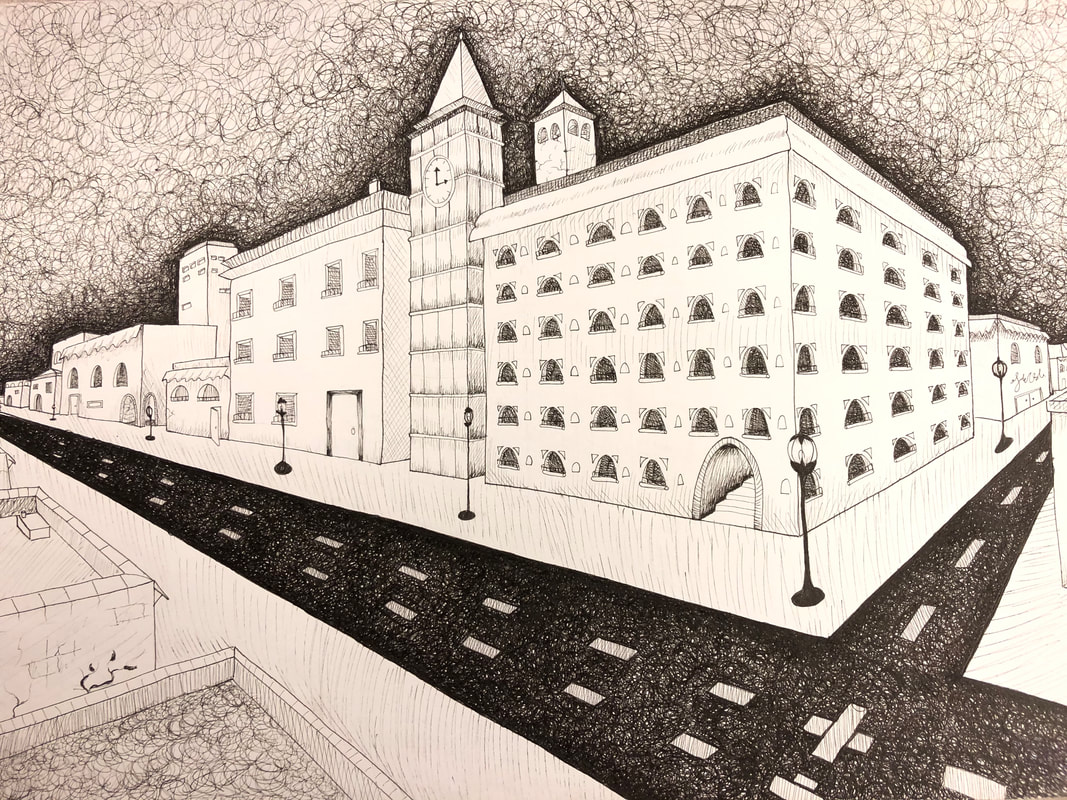
My art 1 students used the handout (linked below) to practice the basic steps of perspective. Then, they could design their own 'spooky scene' on brown, black or gray 12X18 paper. Students could continue to use the handout, or they could expand and use one of the step-by-step packets from the TPT spooky scene resource collection, or if they wanted a challenge, they could use one of the videos (or design their own using the technique) from the you tube playlist.
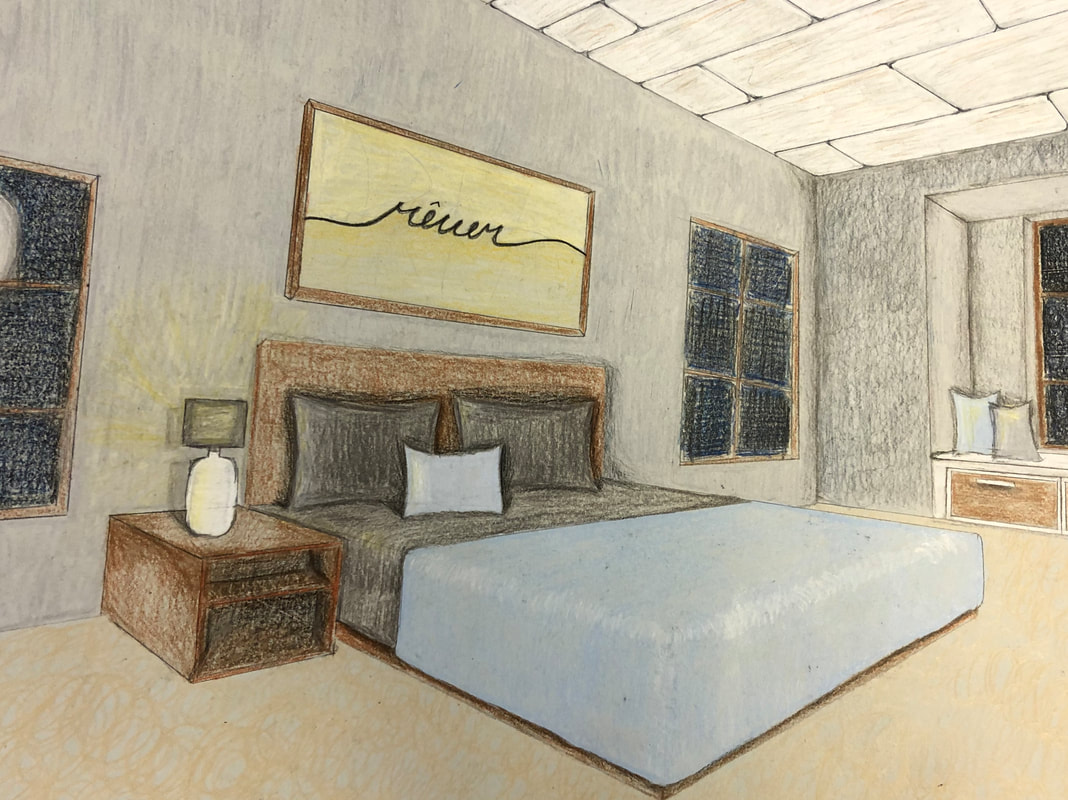
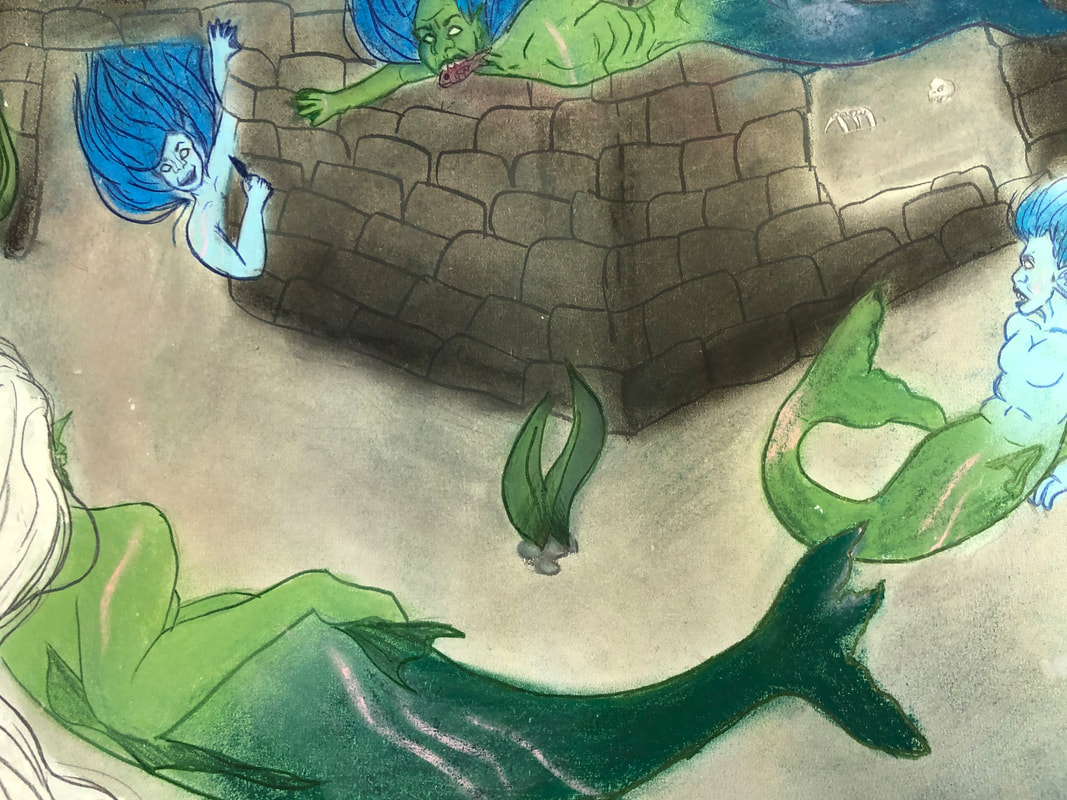
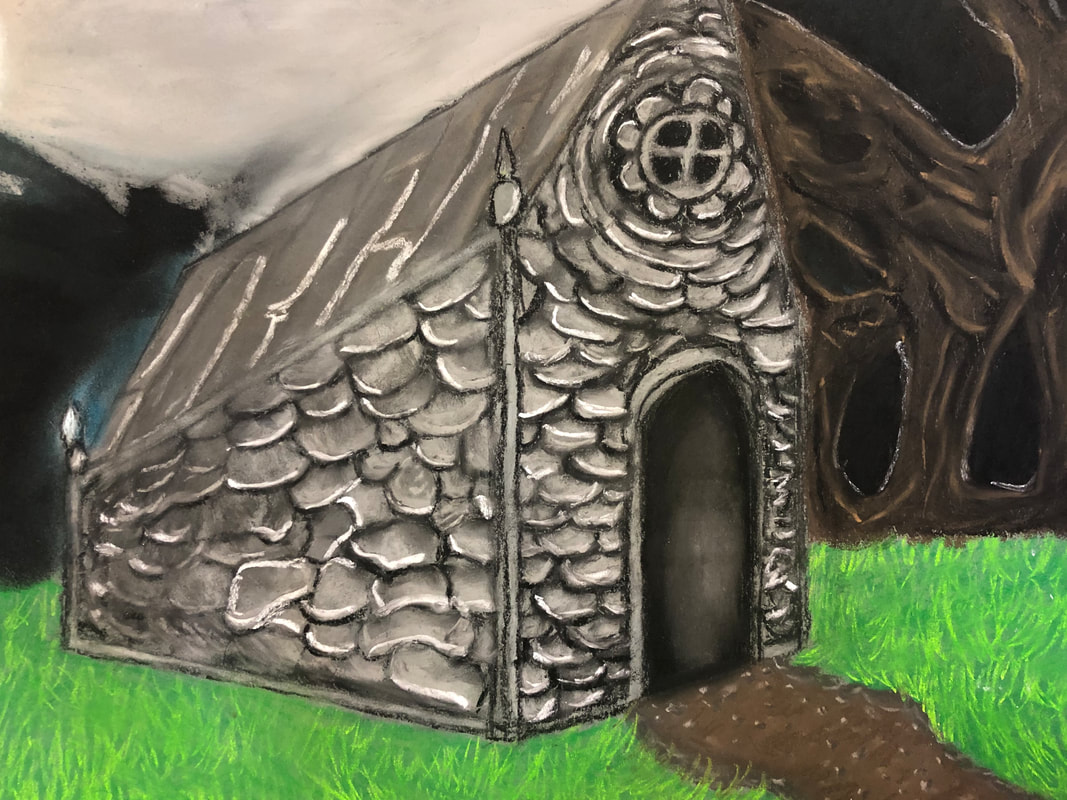
In art 1, they could color the scene with chalk pastels, black/white charcoal, or colored pencils. My advanced art class could use anything, which is where the watercolor and pen and ink compositions came from. The cozy bedroom drawing was done in colored pencil and she followed along with one of the videos in the youtube playlist for the majority of the elements in the scene.
Youtube Playlist --I linked this on canvas so they could just use the videos to follow along.
Handout from TPT --everyone had to practice this basic drawing in their sketchbooks first.
Packet from TPT --definitely worth the money! I can't show you my slide show because I used several images from this purchase to help explain how to use perspective. It was great for kids who were struggling to understand how to use a ruler, because there are step-by-step photos on how to align the ruler to the vanishing point.
My art 1 students used the handout (linked below) to practice the basic steps of perspective. Then, they could design their own 'spooky scene' on brown, black or gray 12X18 paper. Students could continue to use the handout, or they could expand and use one of the step-by-step packets from the TPT spooky scene resource collection, or if they wanted a challenge, they could use one of the videos (or design their own using the technique) from the you tube playlist.
In art 1, they could color the scene with chalk pastels, black/white charcoal, or colored pencils. My advanced art class could use anything, which is where the watercolor and pen and ink compositions came from. The cozy bedroom drawing was done in colored pencil and she followed along with one of the videos in the youtube playlist for the majority of the elements in the scene.
Youtube Playlist --I linked this on canvas so they could just use the videos to follow along.
Handout from TPT --everyone had to practice this basic drawing in their sketchbooks first.
Packet from TPT --definitely worth the money! I can't show you my slide show because I used several images from this purchase to help explain how to use perspective. It was great for kids who were struggling to understand how to use a ruler, because there are step-by-step photos on how to align the ruler to the vanishing point.


 RSS Feed
