My school installed a kiln last summer.
This is the FIRST time in 13 years that I have been a teacher, that I have had a kiln in my building. WOOP WOOP!!! It is so exciting!!
Since I haven't taught a clay project in 3 years, I was worried my skills would be rusty, but we had a practice day with modeling clay and then we did the entire thing in one day. I demonstrated under the document camera and they hand built and it worked pretty well. I did clay with 6 classes back to back.
I did separate the clay by a week for RED day kids vs. WHITE day kids so that I would have plenty of room for drying. It took 3-4 copy paper lids for each class to fit all of the projects, with 5 for some of the biggest classes. Even still, I wish I would have given everyone a LITTLE more clay so that their creations would've been a bit bigger.
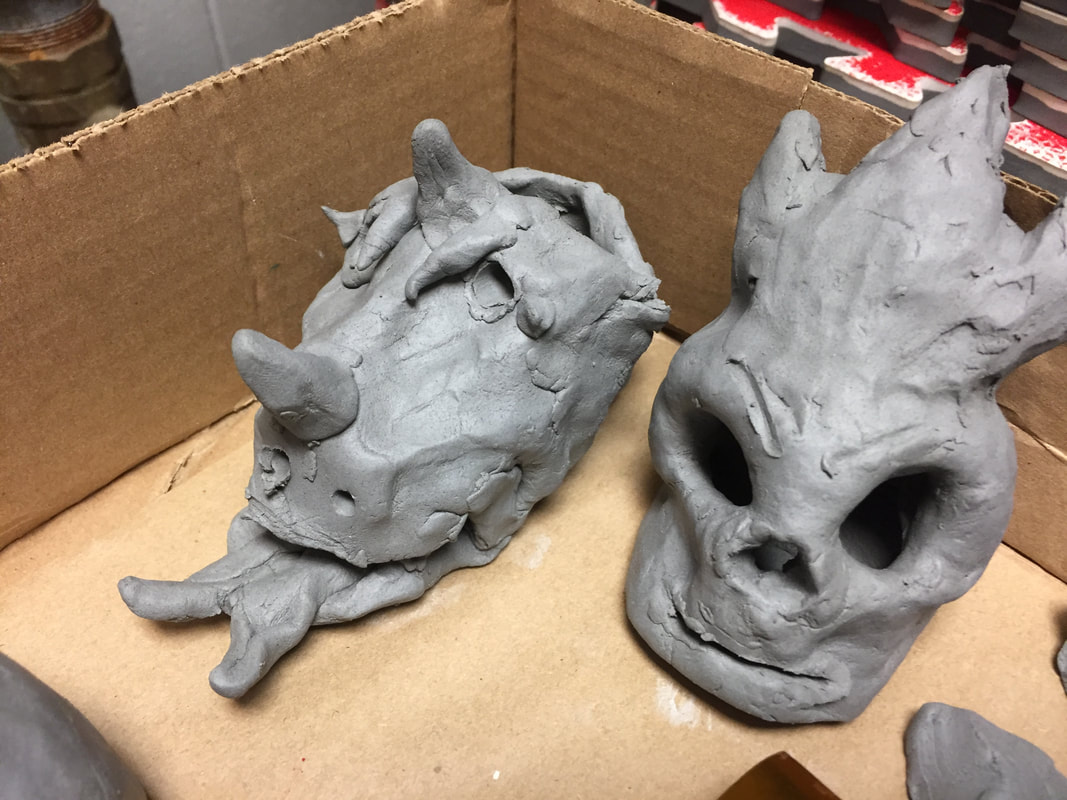
For our practice with modeling clay, everyone made an owl. This way I could demo how to make a beak and add eyes. For the clay demo, I showed how to make a generic monster so I could show how to add spikes, texture and teeth. Also, the added step of score and slip.
This is the FIRST time in 13 years that I have been a teacher, that I have had a kiln in my building. WOOP WOOP!!! It is so exciting!!
Since I haven't taught a clay project in 3 years, I was worried my skills would be rusty, but we had a practice day with modeling clay and then we did the entire thing in one day. I demonstrated under the document camera and they hand built and it worked pretty well. I did clay with 6 classes back to back.
I did separate the clay by a week for RED day kids vs. WHITE day kids so that I would have plenty of room for drying. It took 3-4 copy paper lids for each class to fit all of the projects, with 5 for some of the biggest classes. Even still, I wish I would have given everyone a LITTLE more clay so that their creations would've been a bit bigger.
For our practice with modeling clay, everyone made an owl. This way I could demo how to make a beak and add eyes. For the clay demo, I showed how to make a generic monster so I could show how to add spikes, texture and teeth. Also, the added step of score and slip.
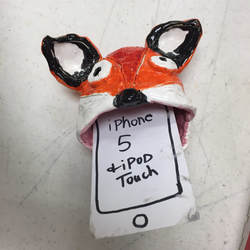
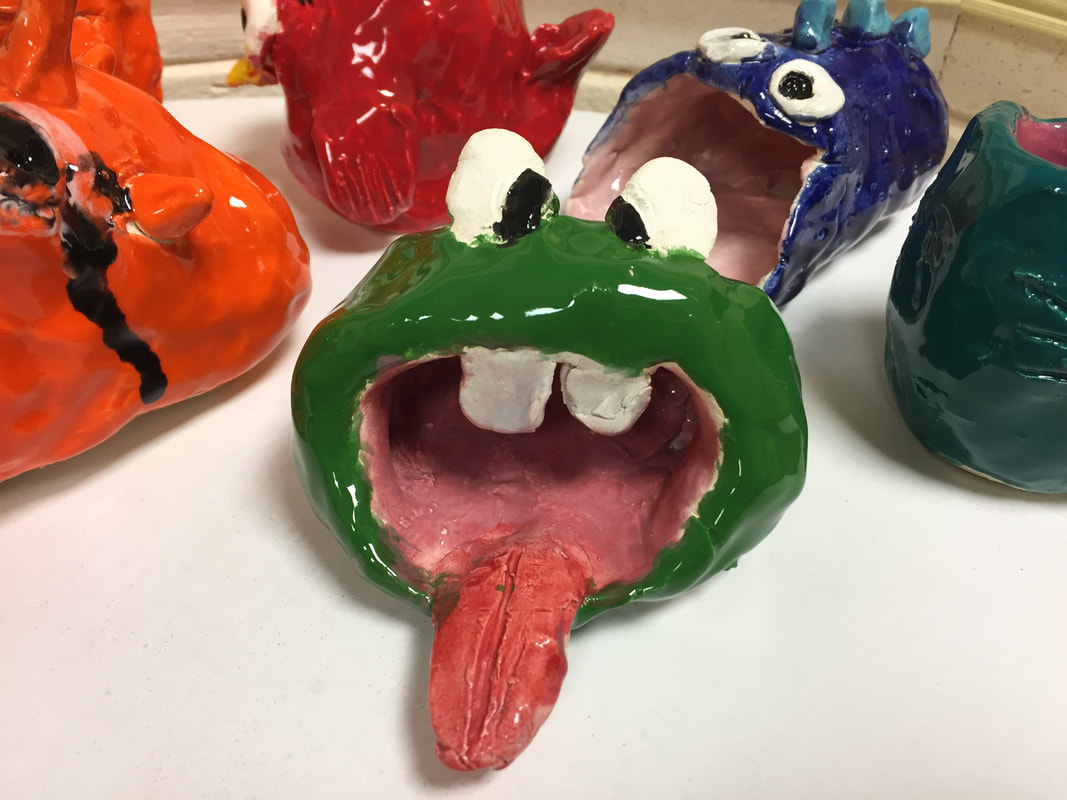
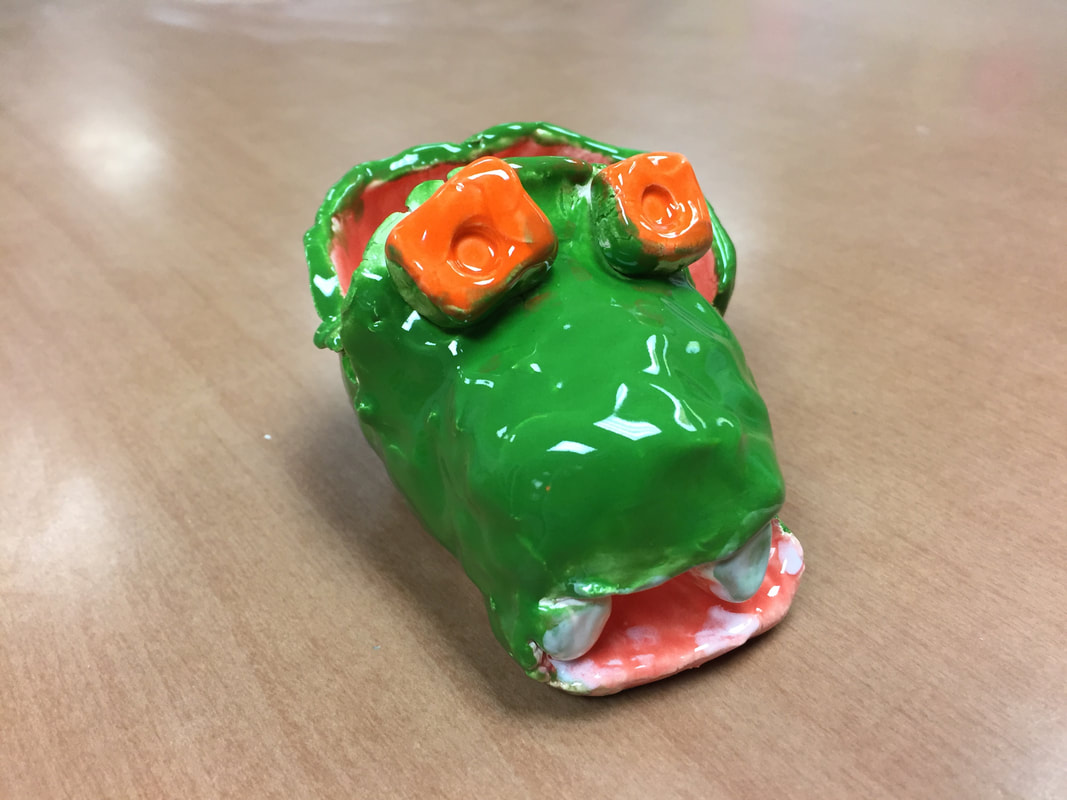
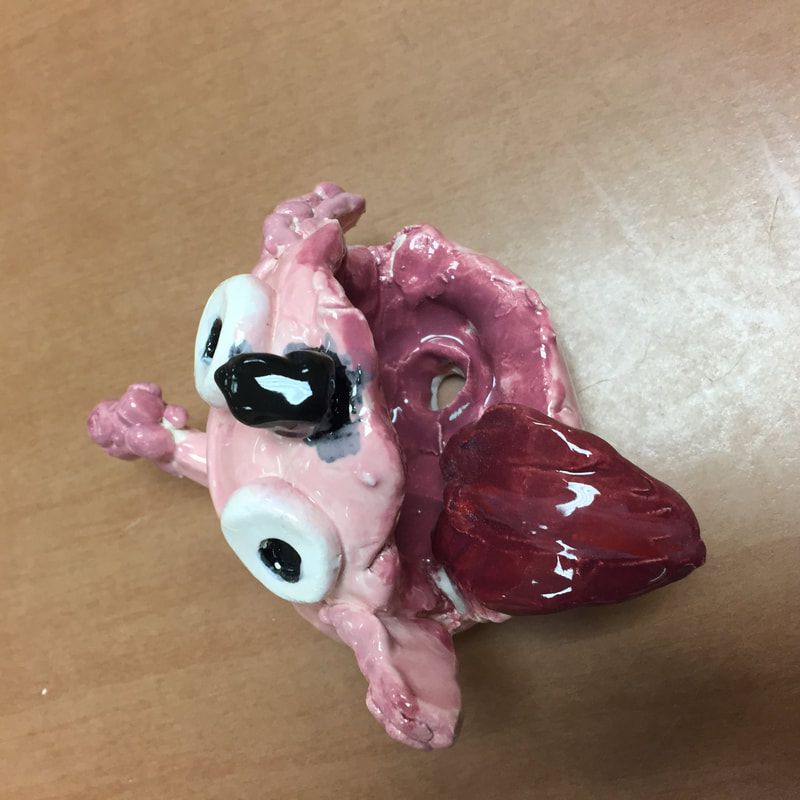
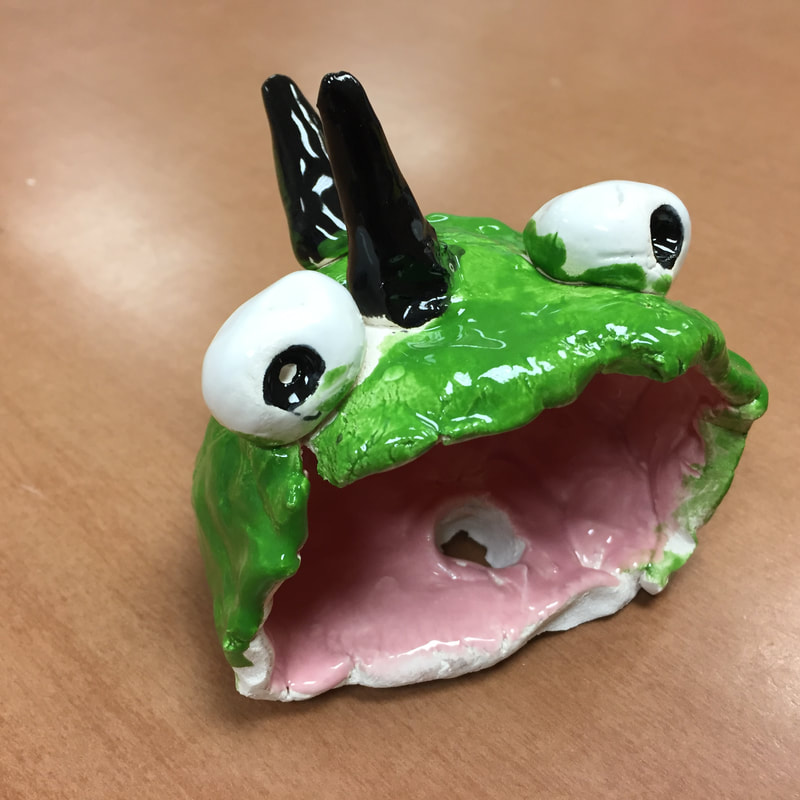
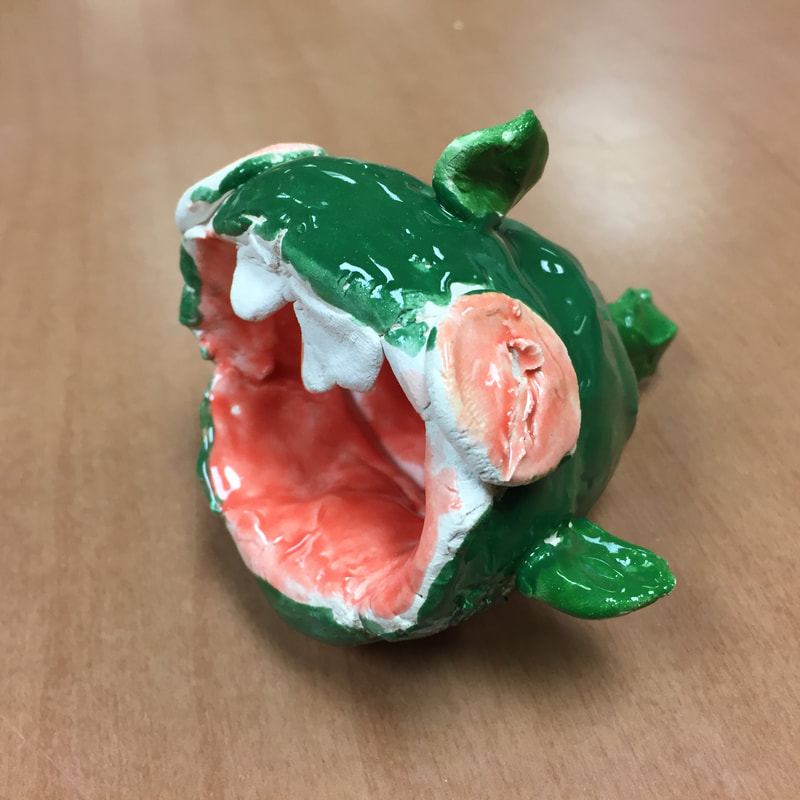
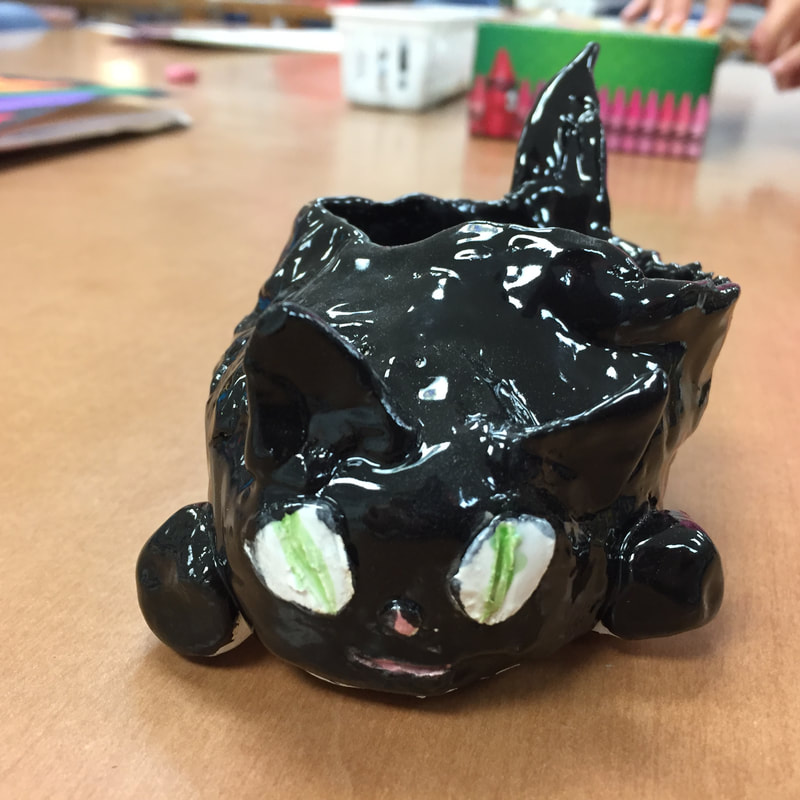
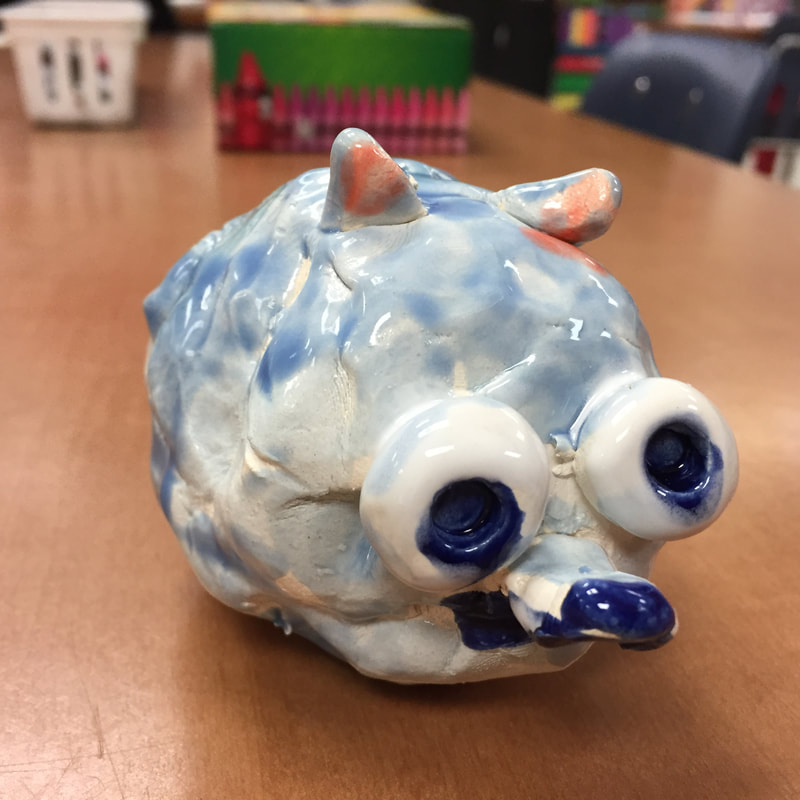
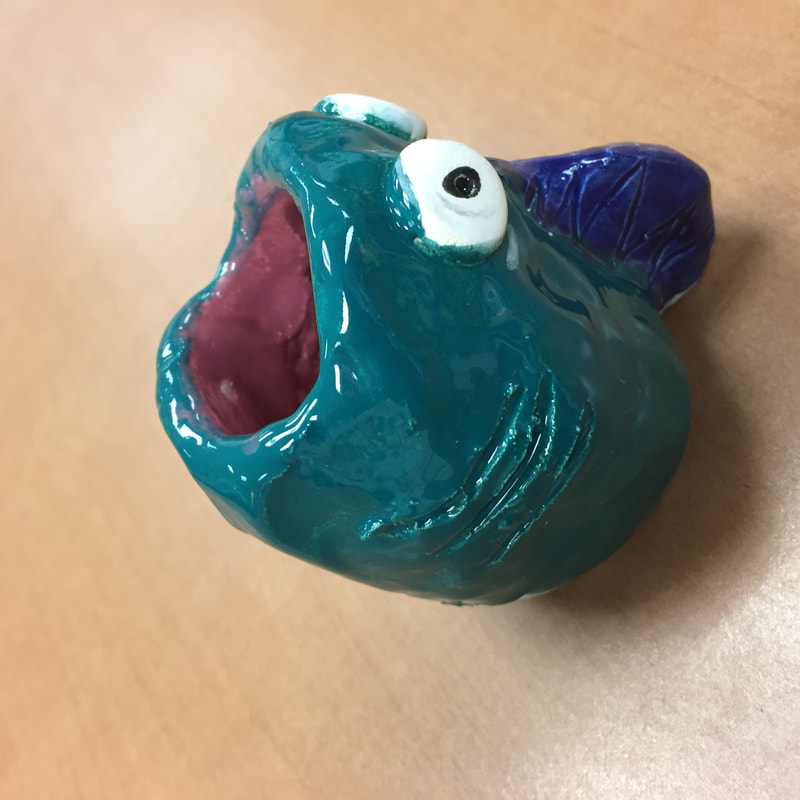
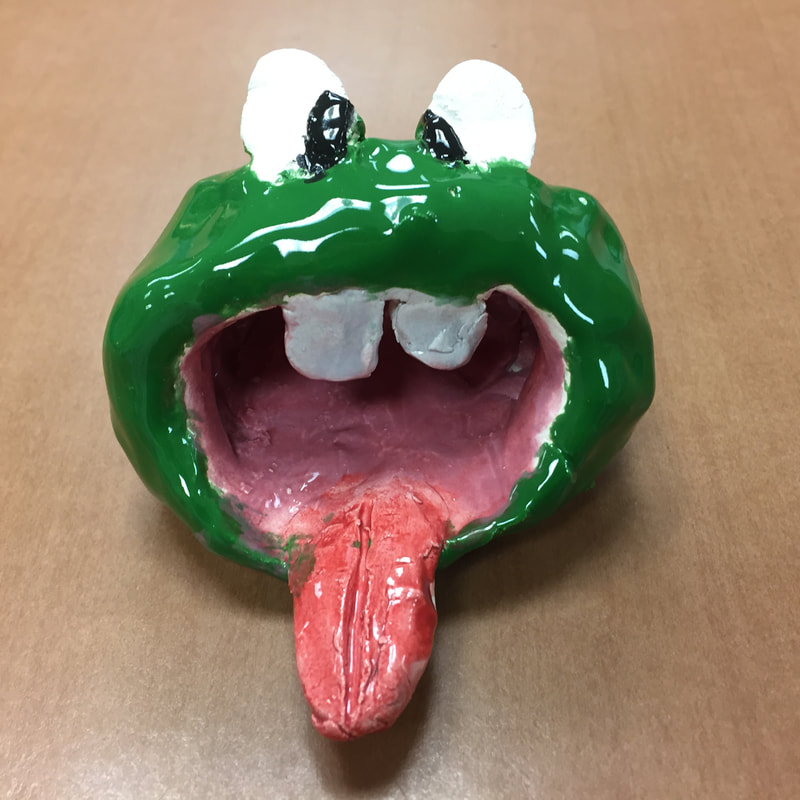
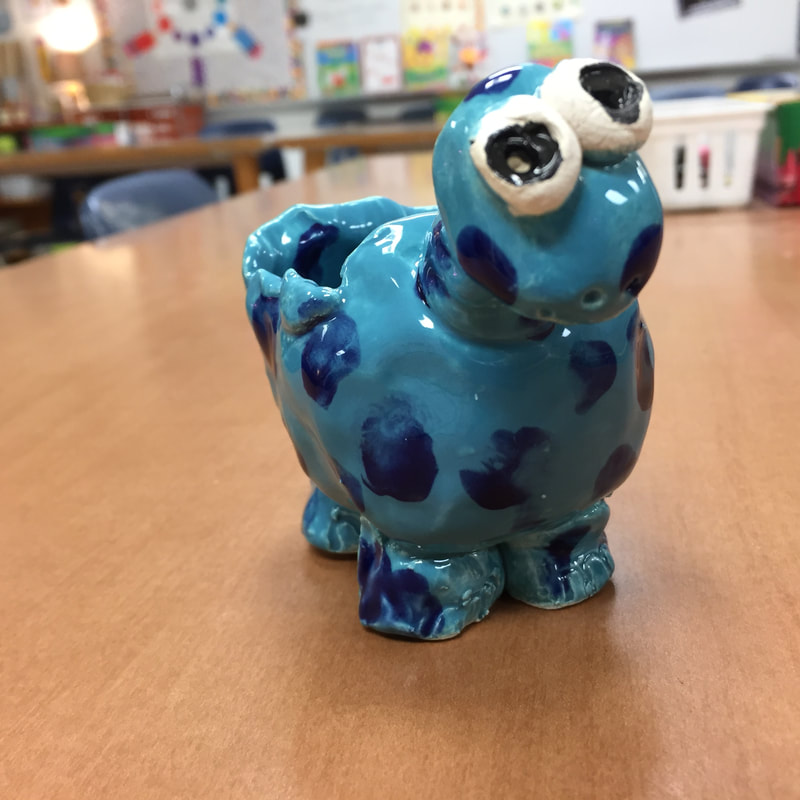
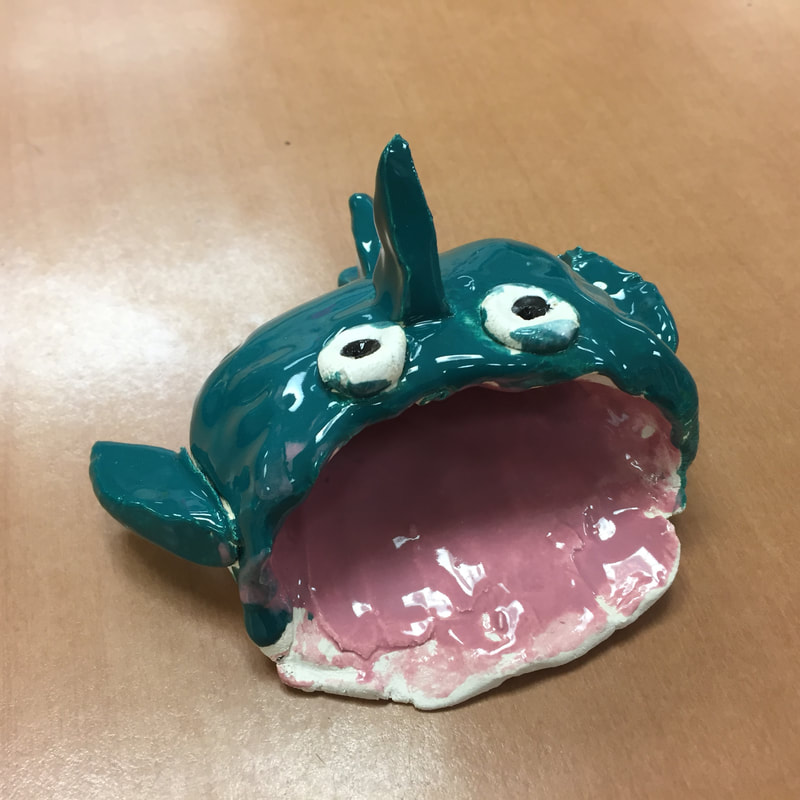
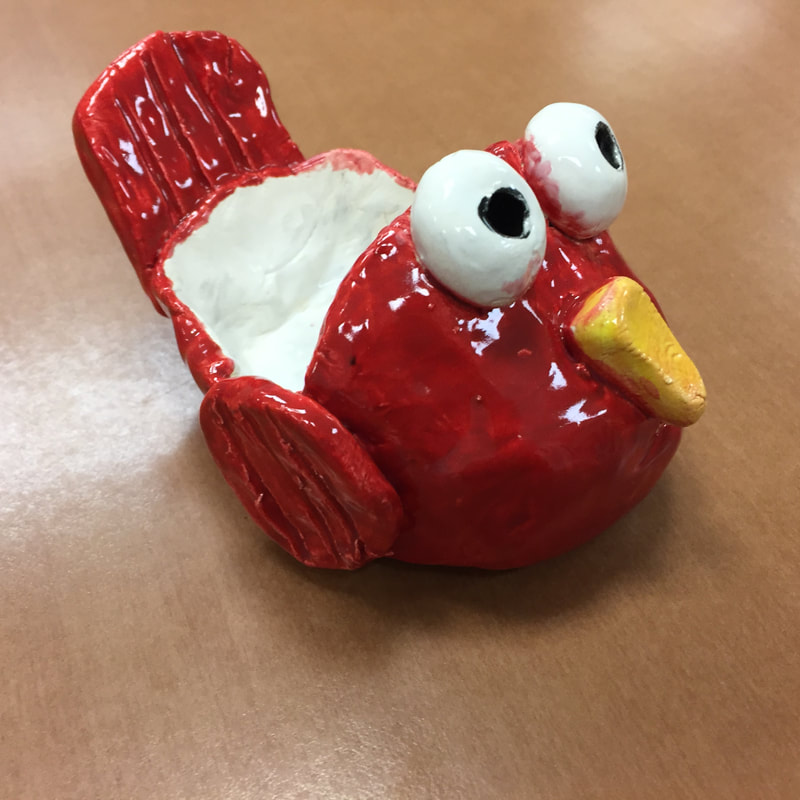
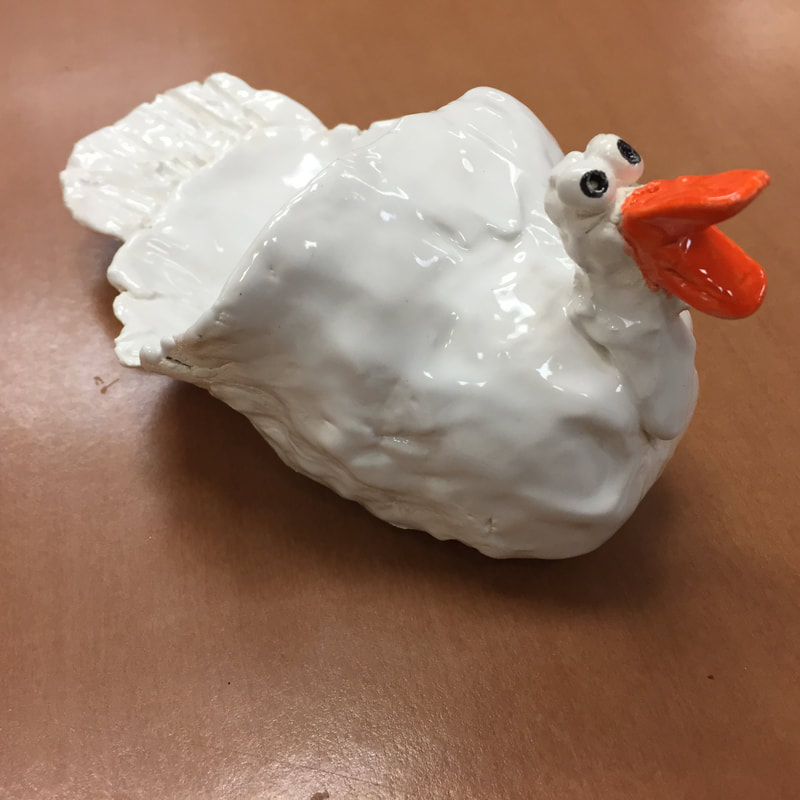
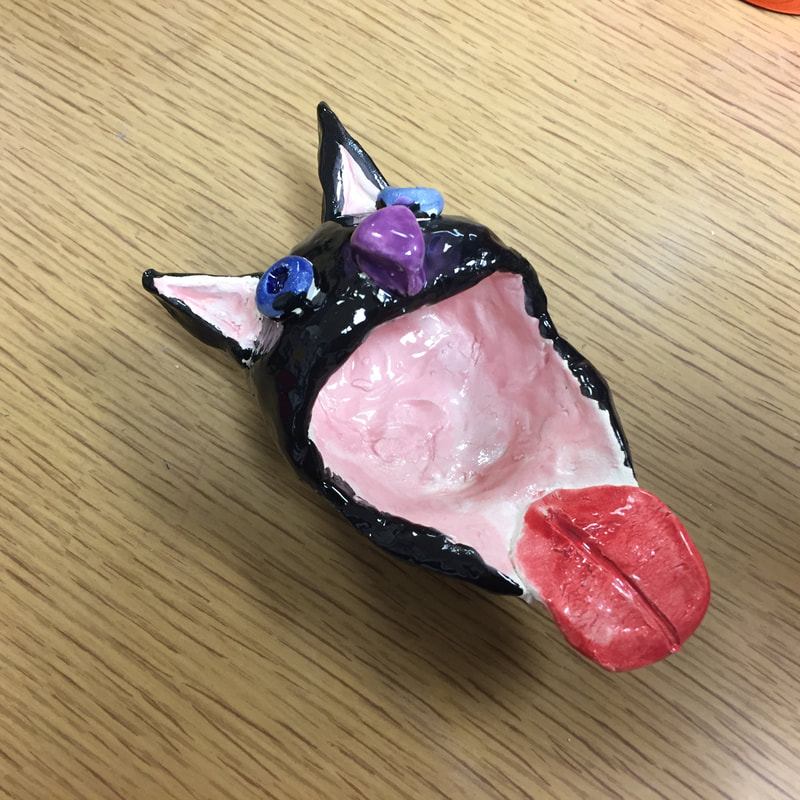
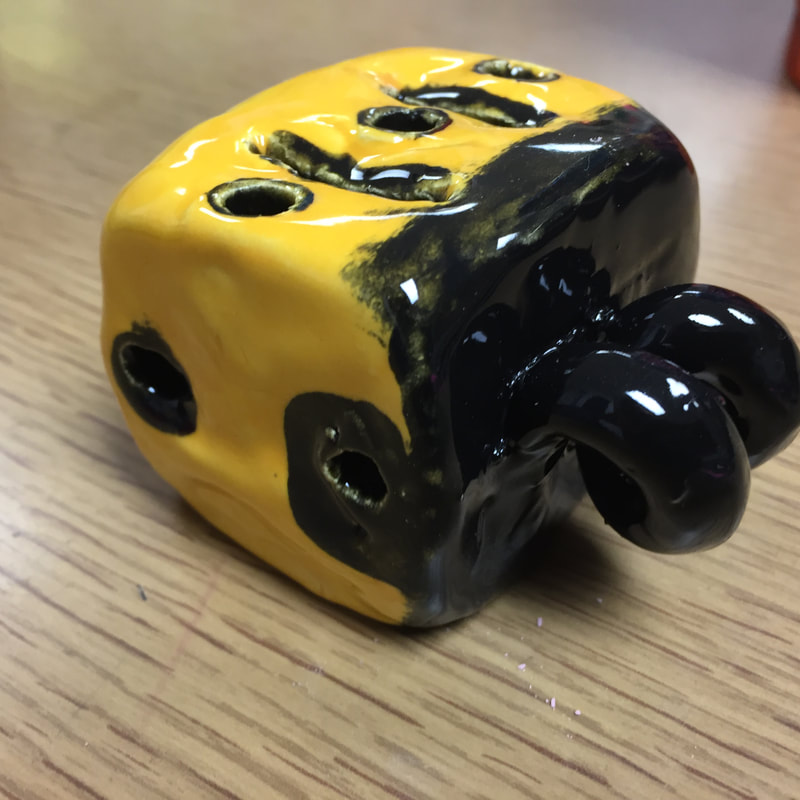
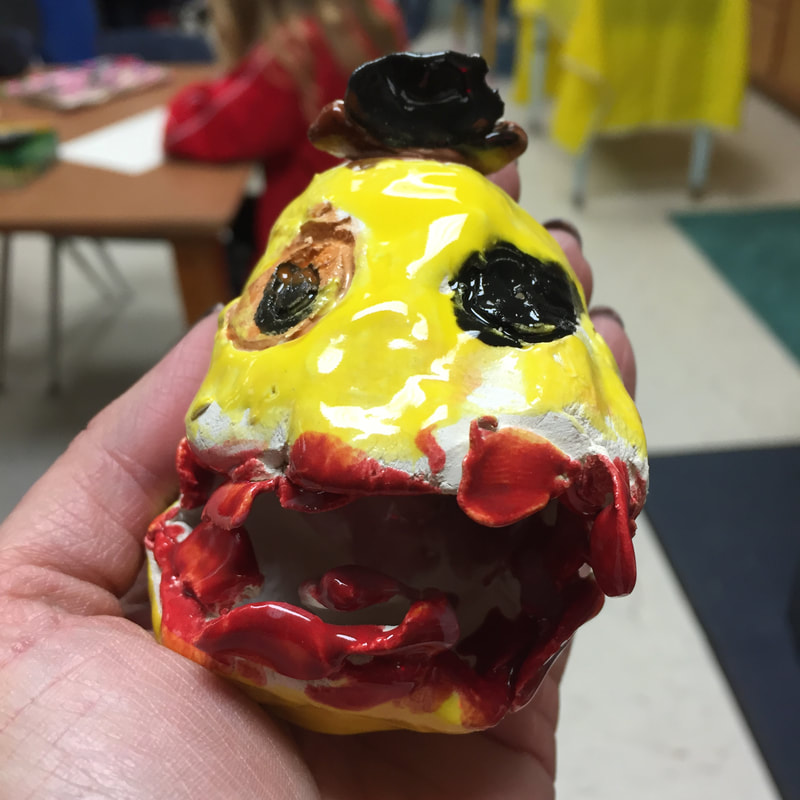
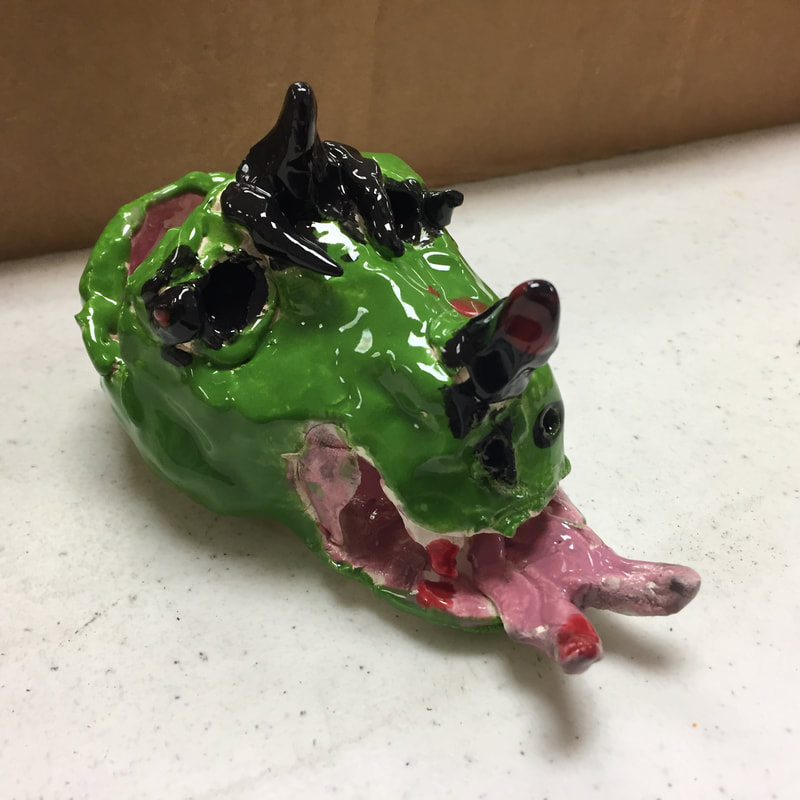
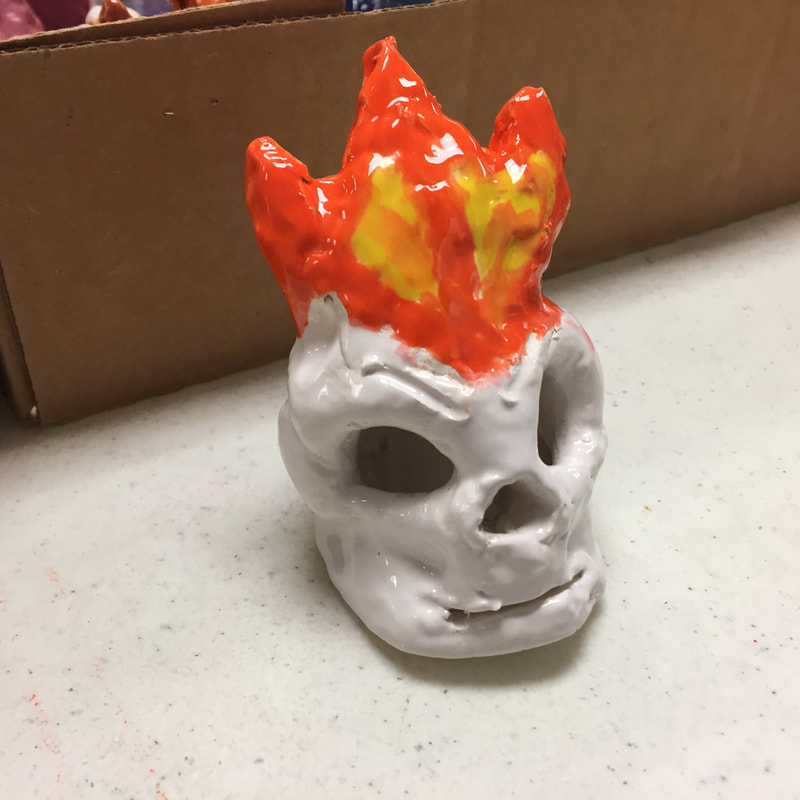
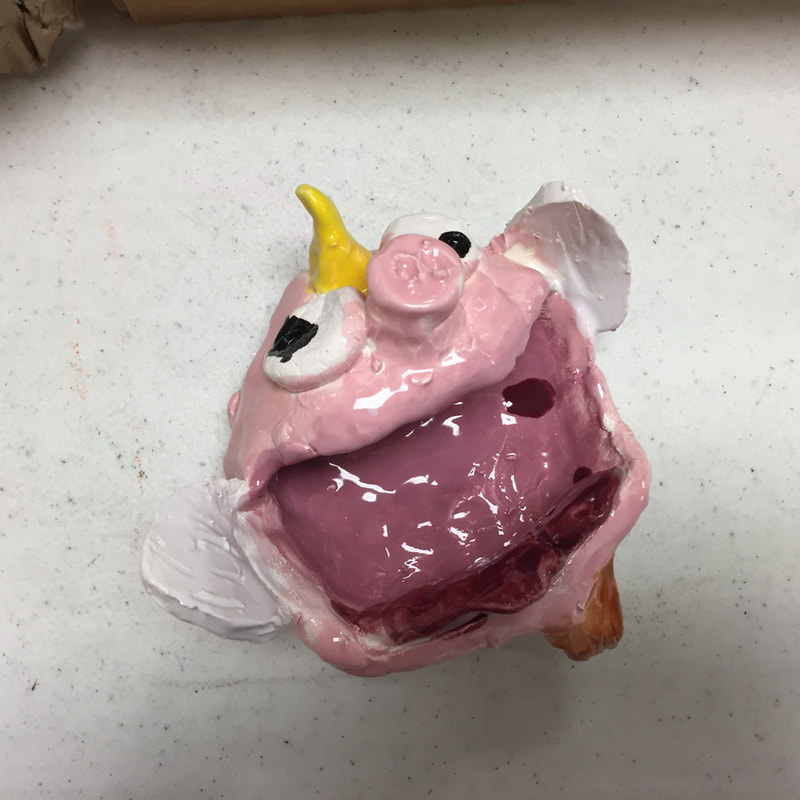
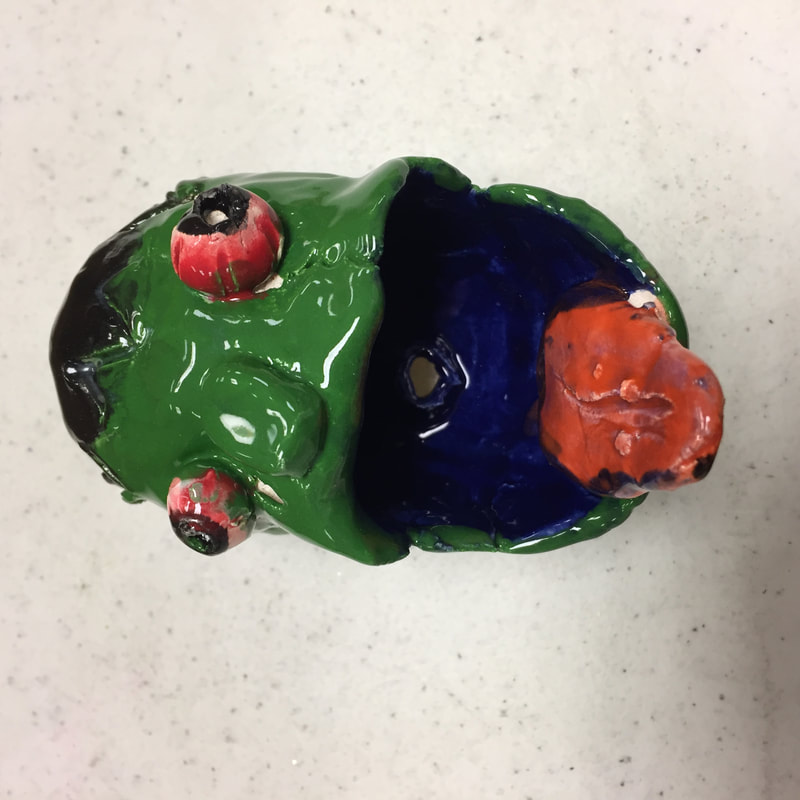
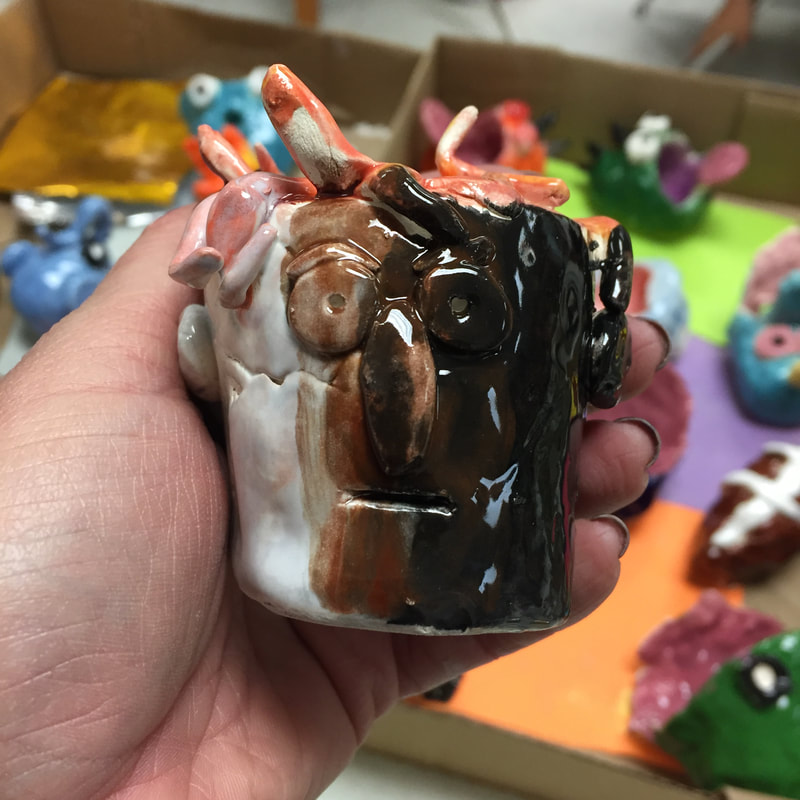
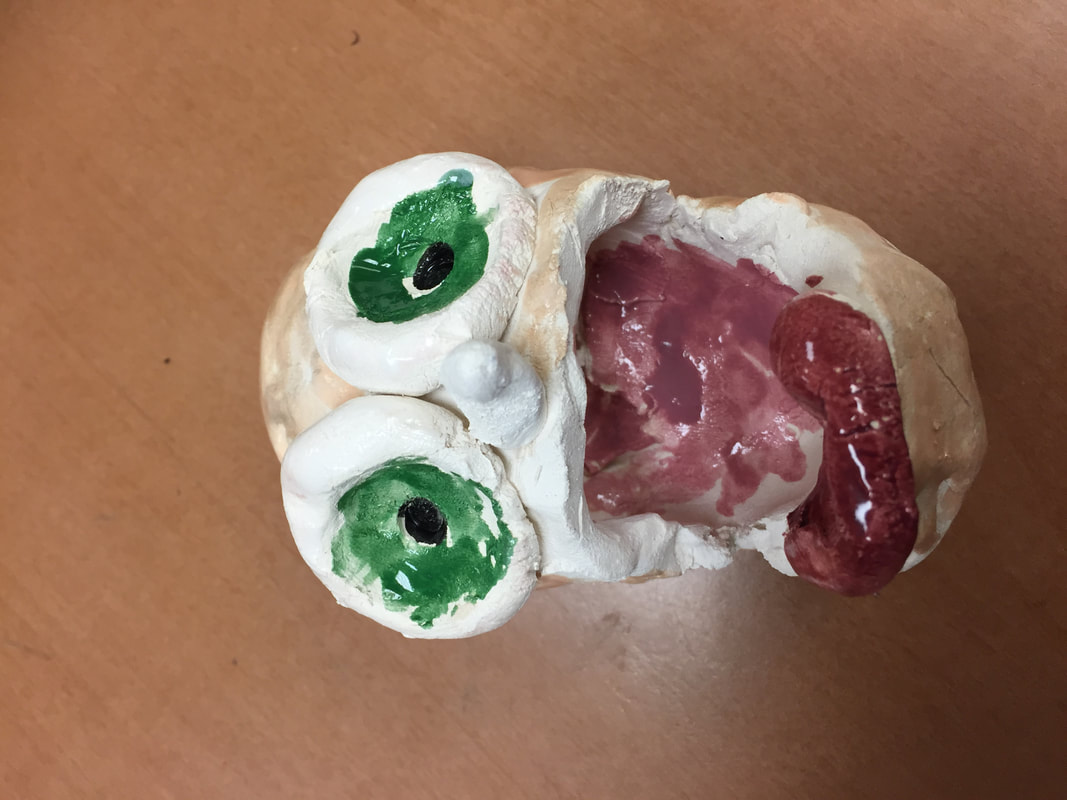
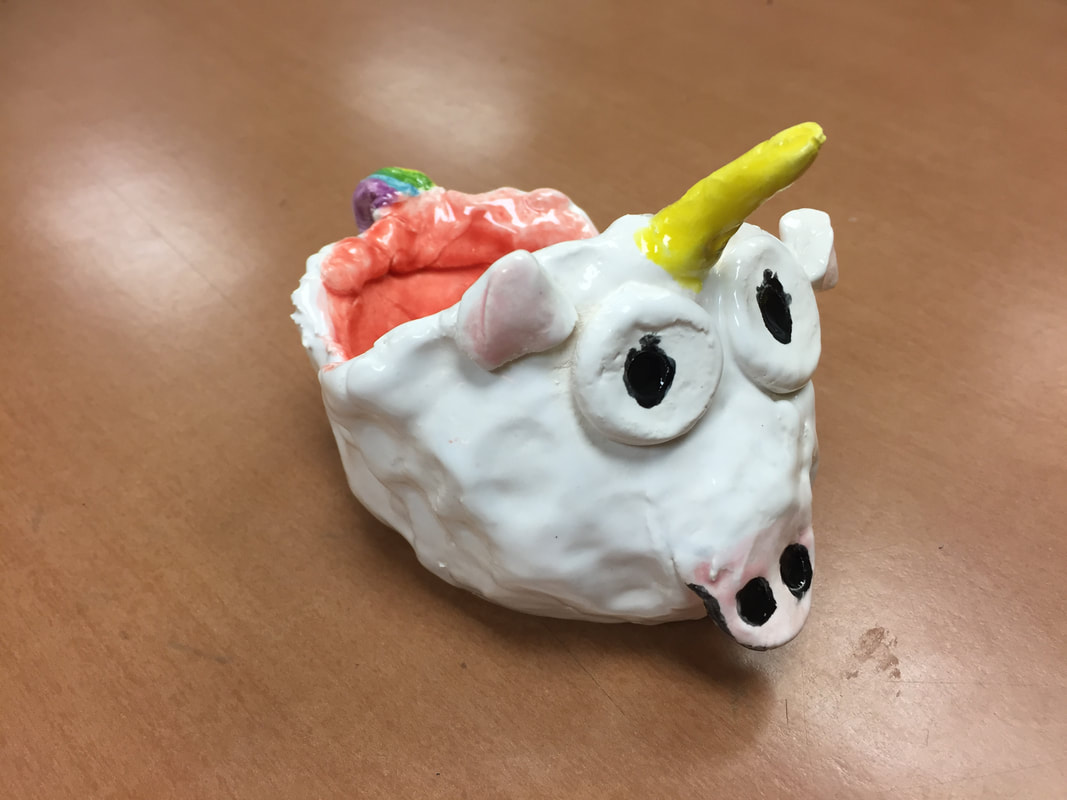
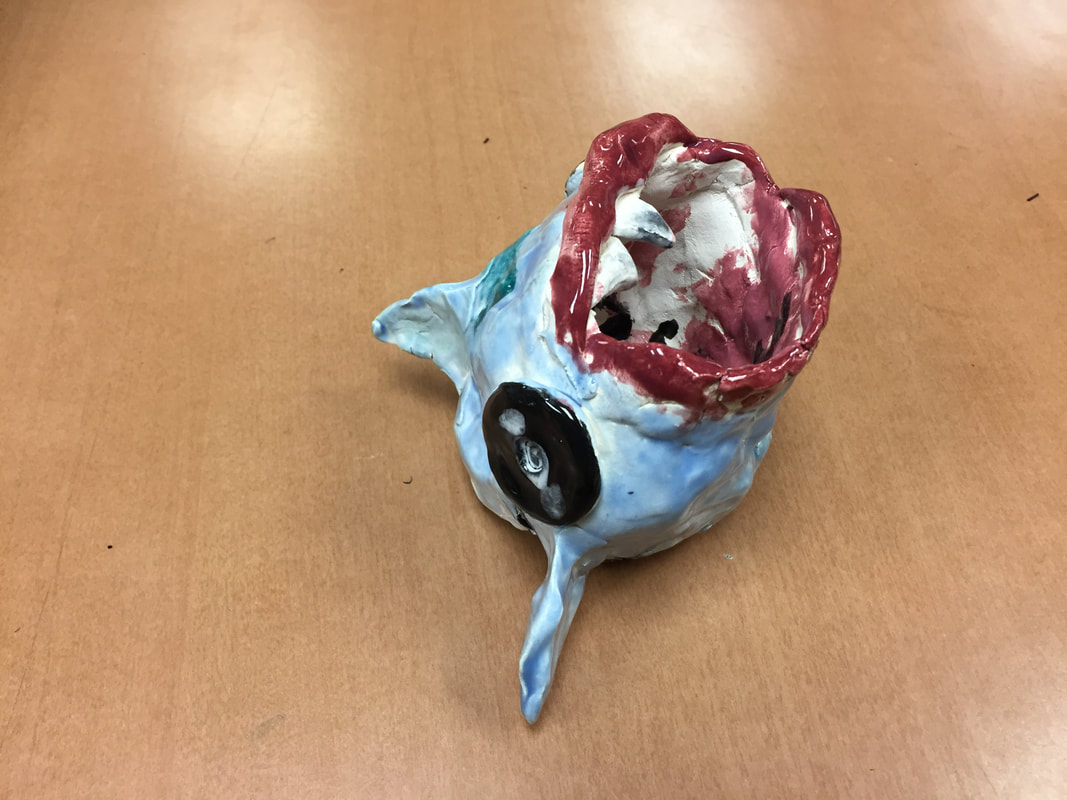
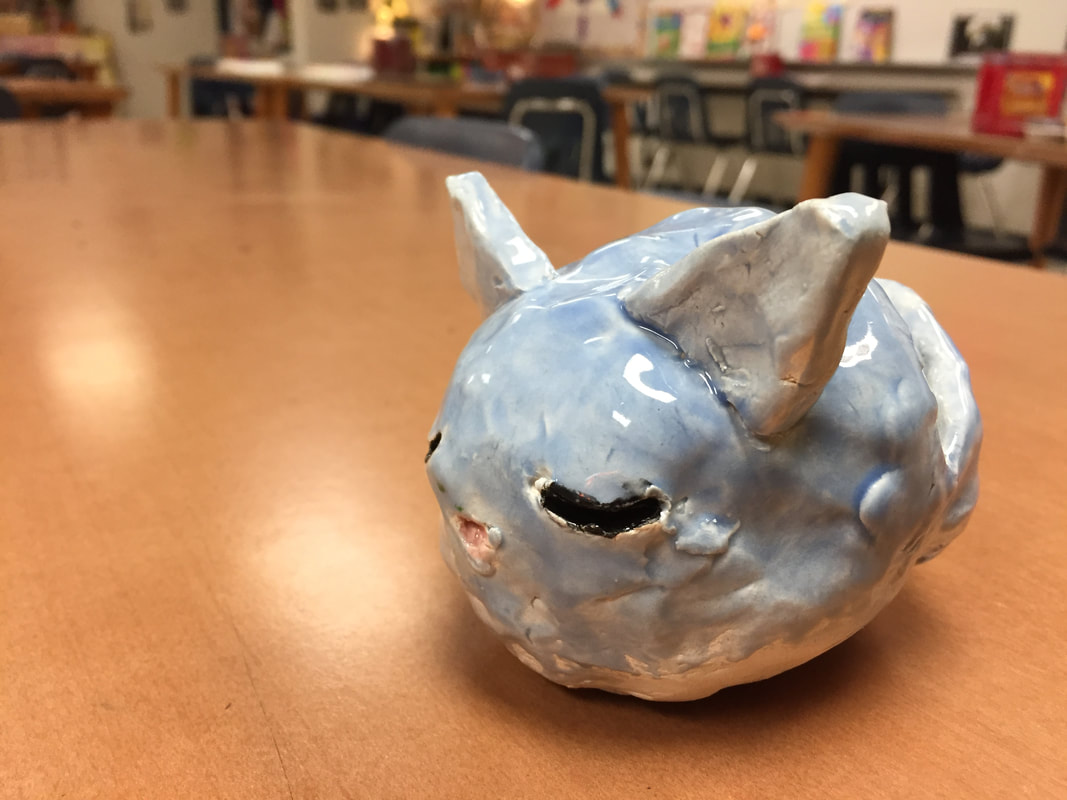
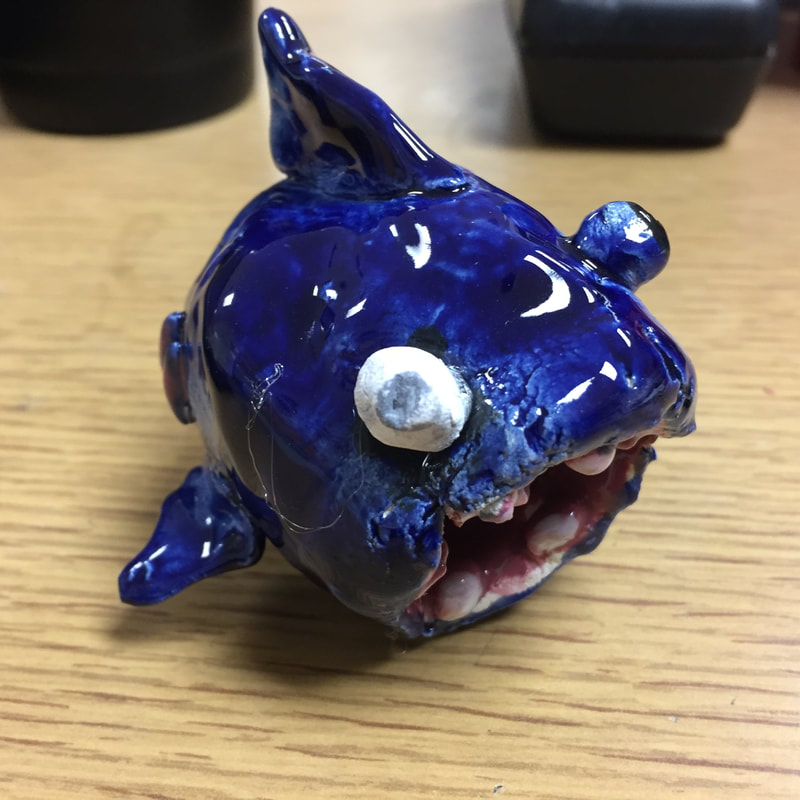
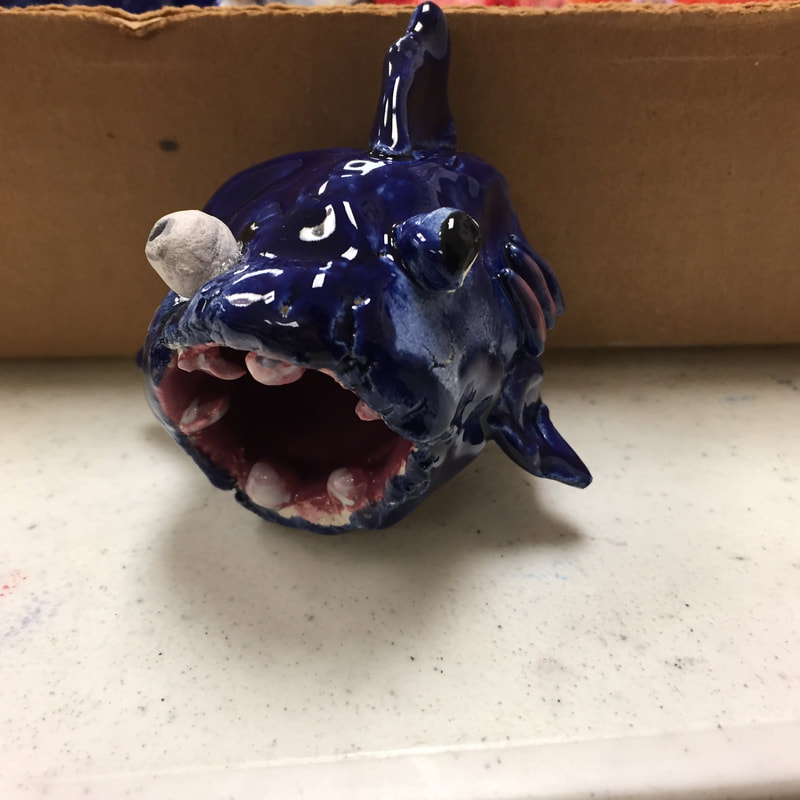
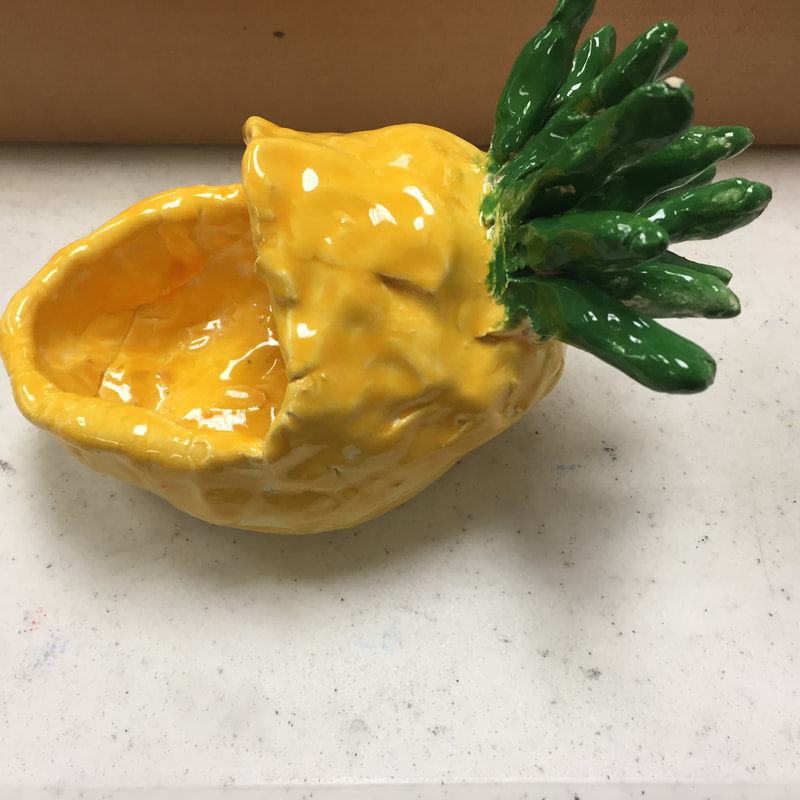
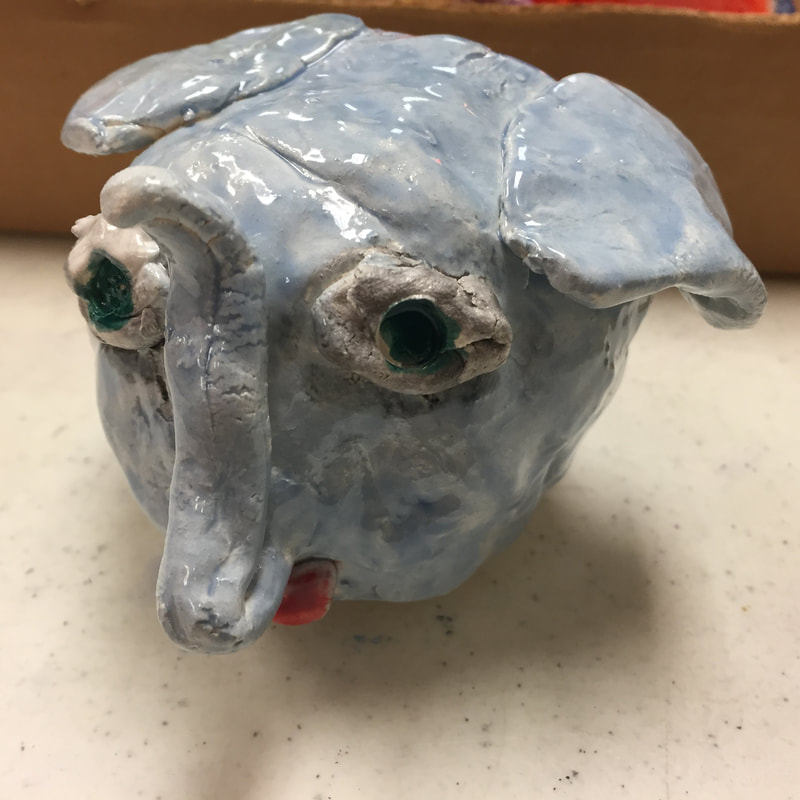
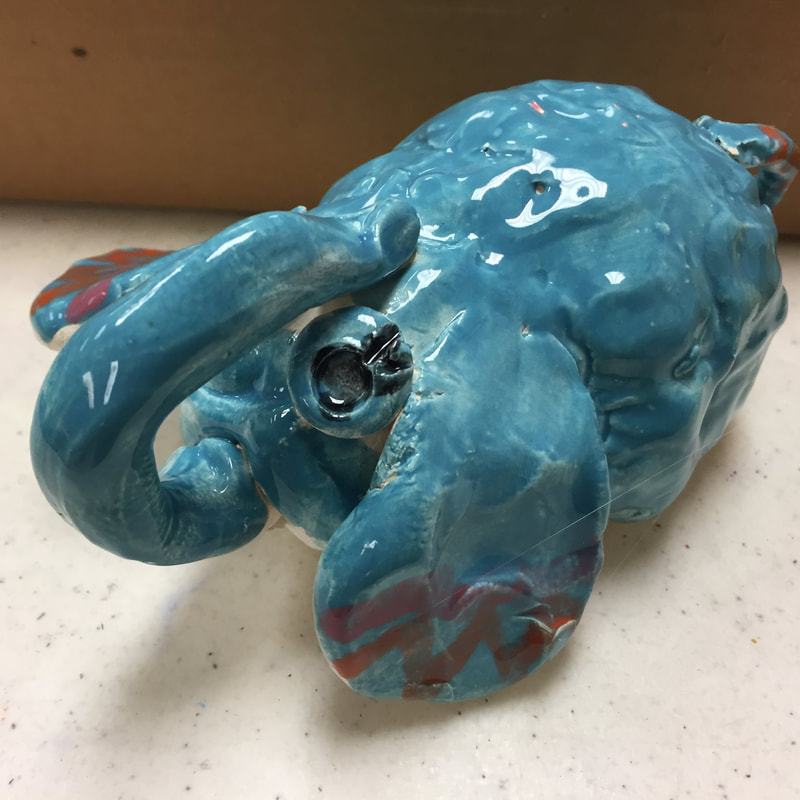
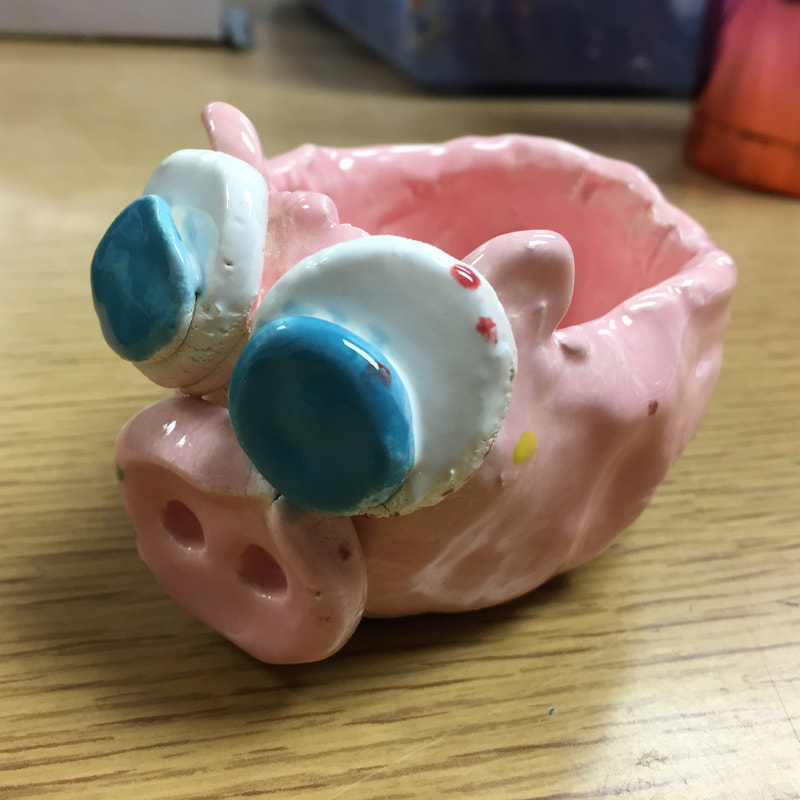
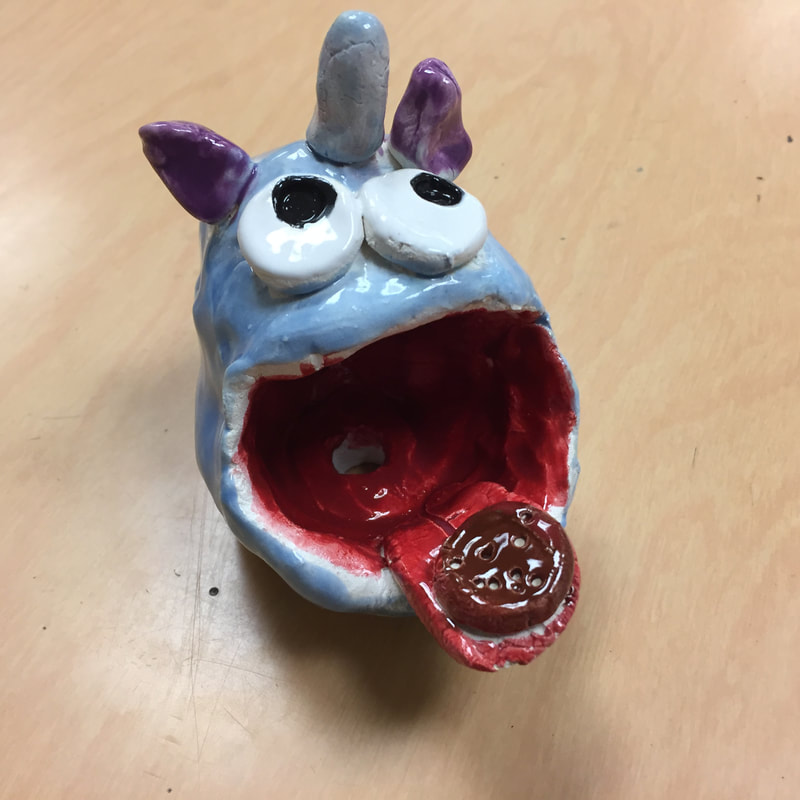
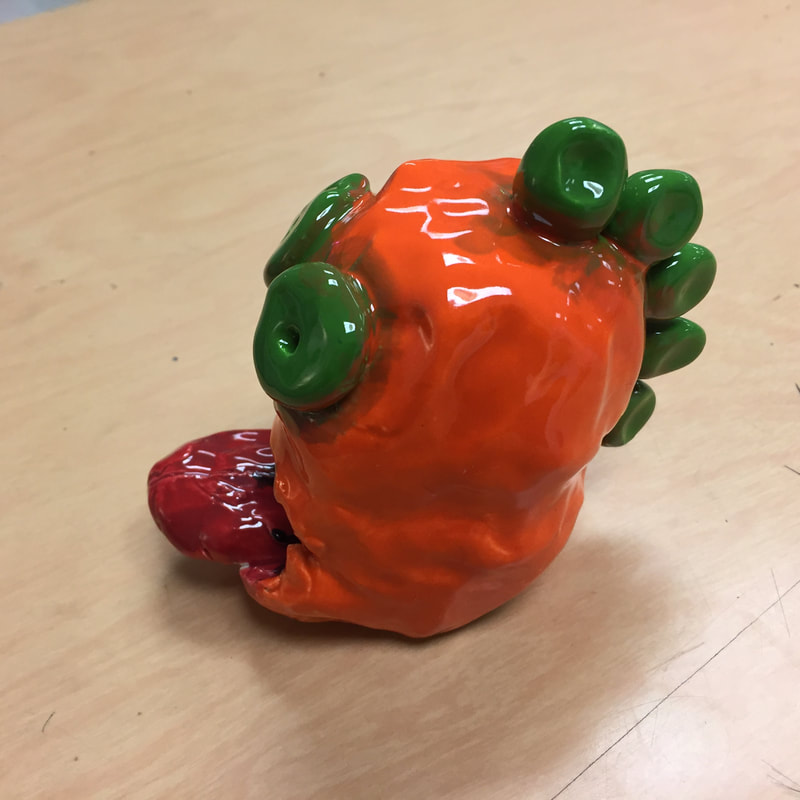
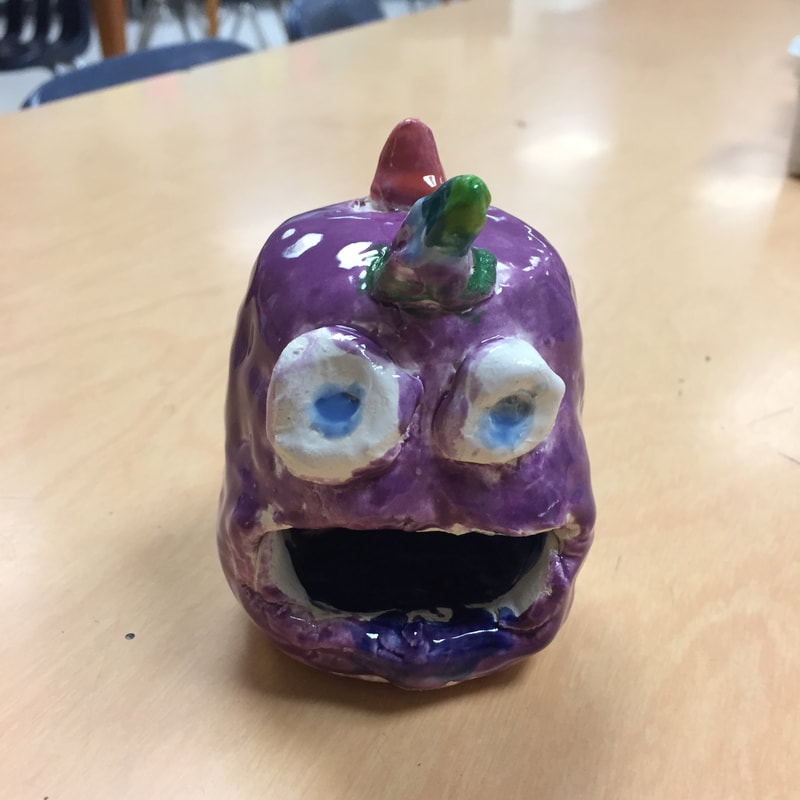
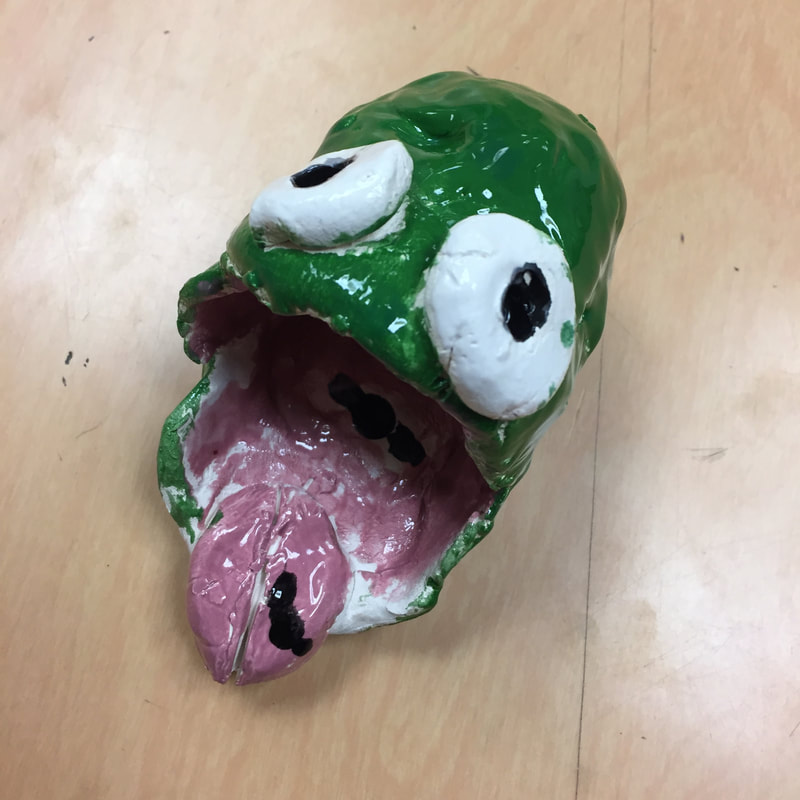
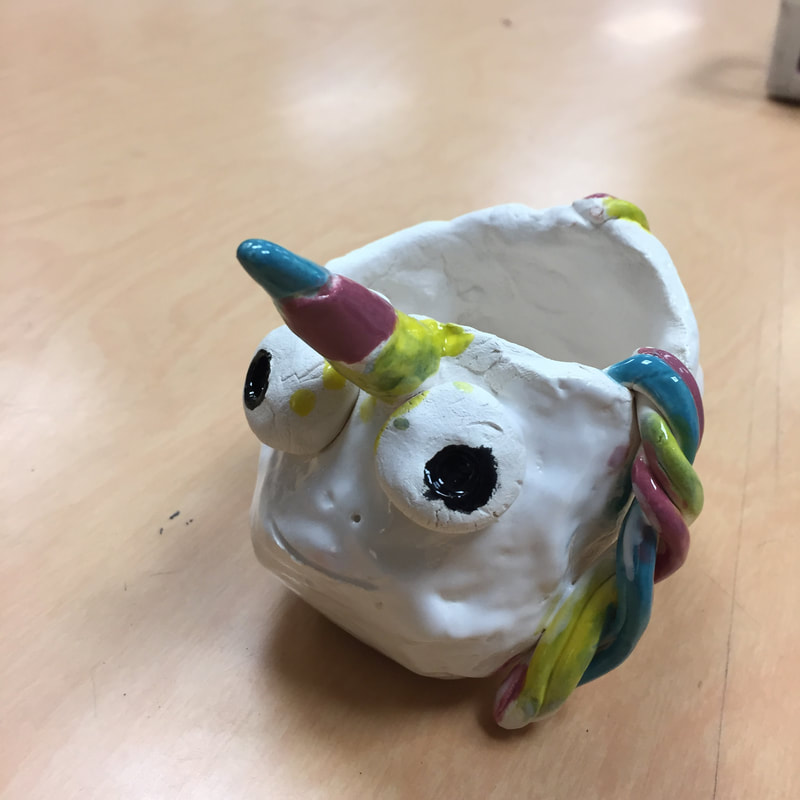
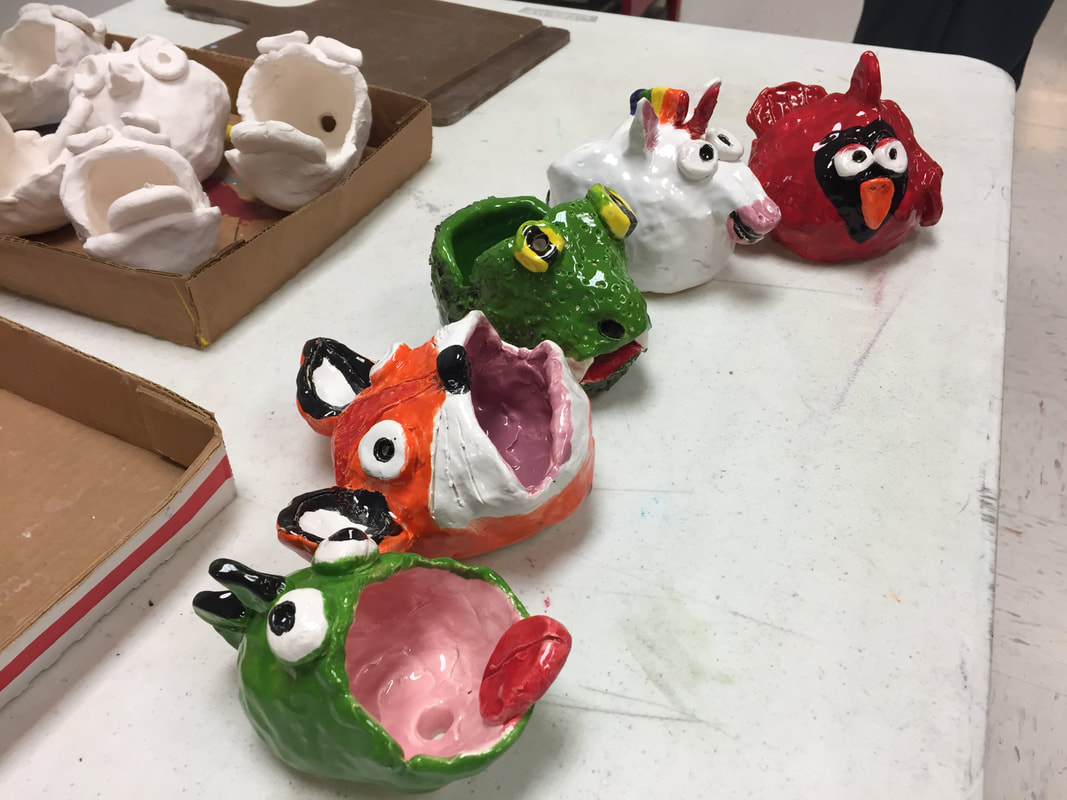
The idea is that we would make a head/creature/character that would have an open mouth or opening in it's back big enough to use it as a phone docking station or a speaker amplifier. That did not happen for most kids...they were just too small and their phones are just too big.
But they were happy to have little sculptures all the same. We made two pinch pots, scored and slipped them together to make an egg, and then we cut it open and attached the parts....it was pretty basic. The hardest part was trying to do this in 47 minutes.
But they were happy to have little sculptures all the same. We made two pinch pots, scored and slipped them together to make an egg, and then we cut it open and attached the parts....it was pretty basic. The hardest part was trying to do this in 47 minutes.


Clay before firing, so much bigger!
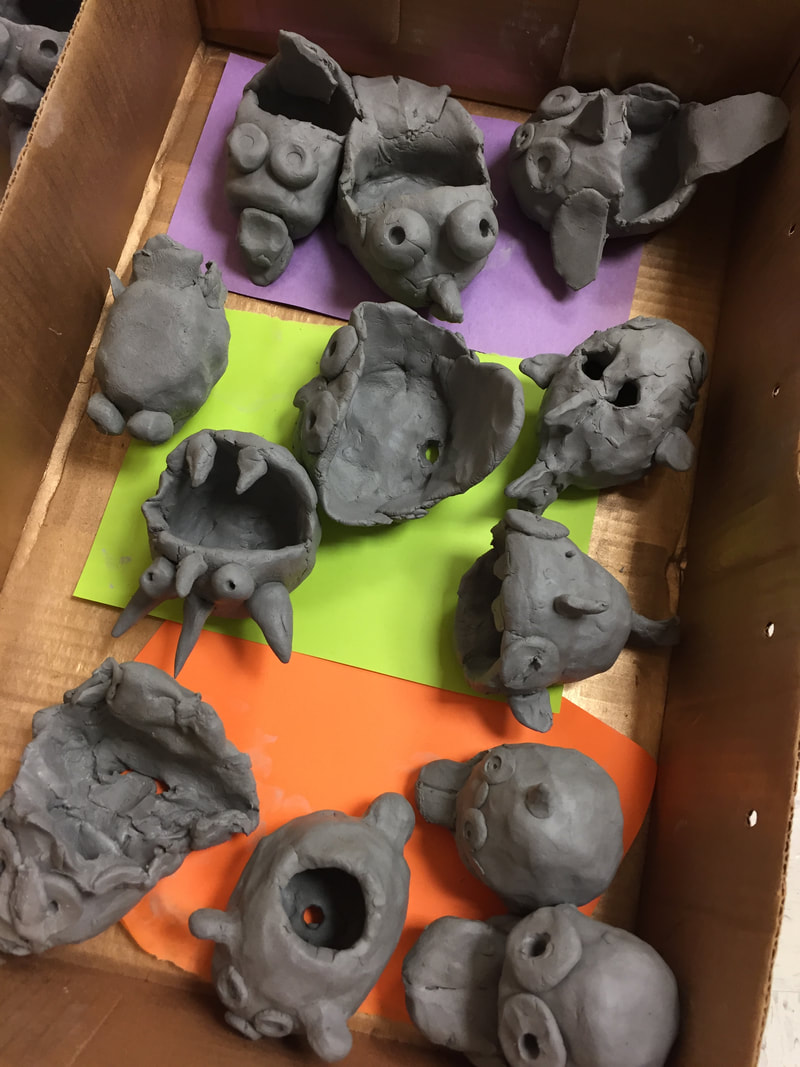
I organize the clay in copy paper box lids. Kids set their sculpture on the colored paper that matches their table color in the box labeled with their teacher's name. This way, during drying, I can keep track of everything. I write the date on a sticky note in the bottom of the box, otherwise it is easy to lose track of what needs to be fired and when.
I made a few sample cardstock phones so kids could test out the opening size. Most of the clay shrunk so much that the openings were not big enough anyway.
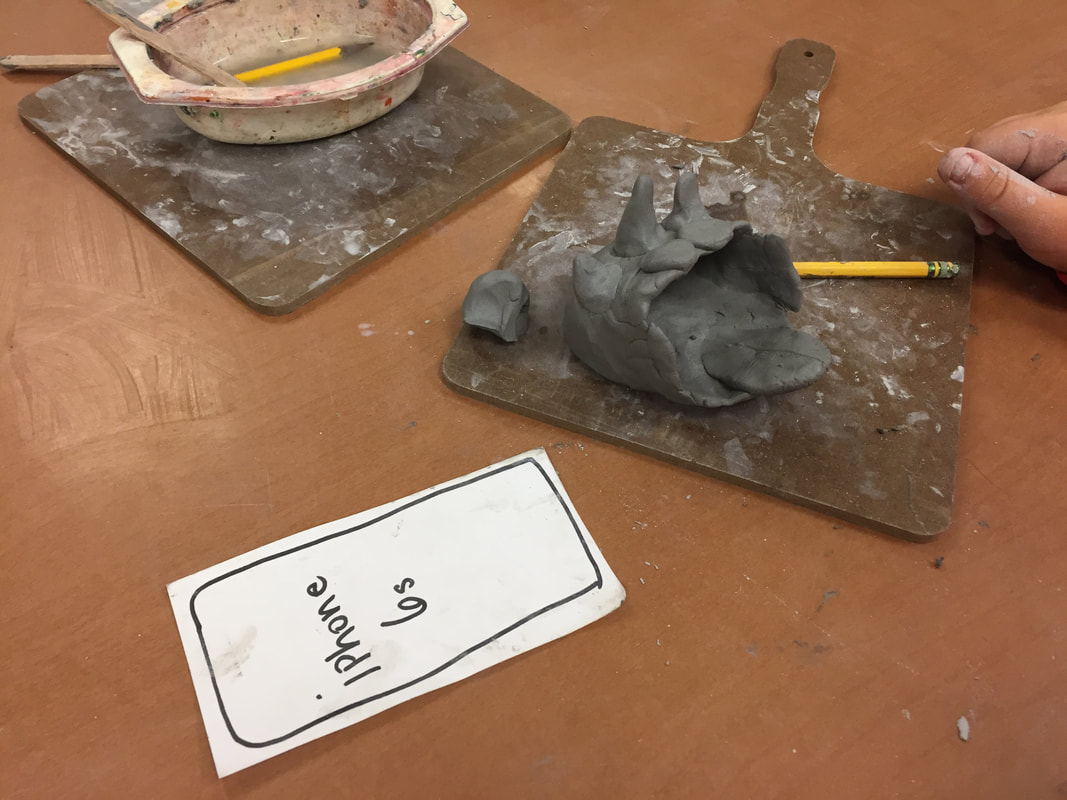
Anticipating getting a kiln a few years down the road, I started buying clay accessories since I didn't actually need to purchase the clay yet. I bought stilts, glazes and 3 dozen of these masonite 8X8 paddle bats.
We used them for hand building and even for carrying around our clay from table to table during glazing. During clean up, students had to wipe them down and put them back in the middle of the table. We also use old pencils for scoring.....
These bats helped keep our clay from sticking to the table while we were working and it helped them carry their clay to the shelf when they were finished. Only one kid dropped his on the way over there. And we both laughed until we cried at the site of the splatted head.
Before using the paddles, I EMPHATICALLY laid down the law that they would not be used for paddling, or pretend paddling of any bottoms!! Anyone caught pretending to whip anyone would get an automatic office referral and their clay would not be fired. If it was before clay, they would sit out at the office while the rest of us made our clay sculptures. #middleschool
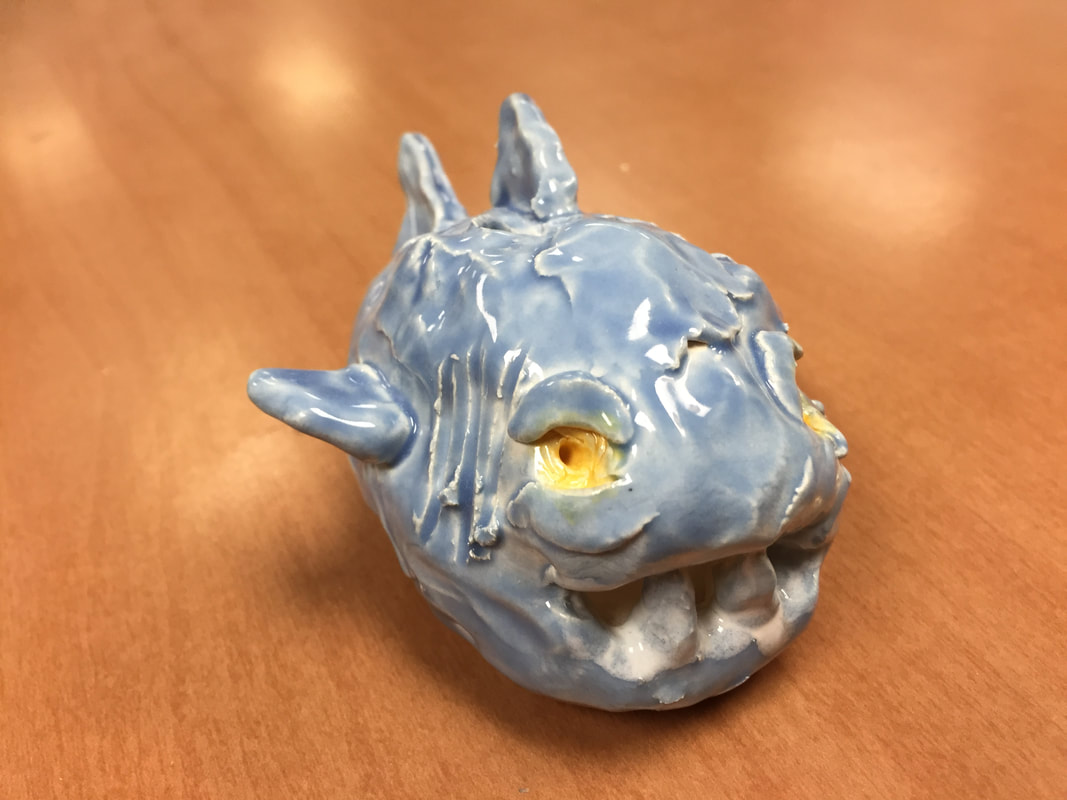
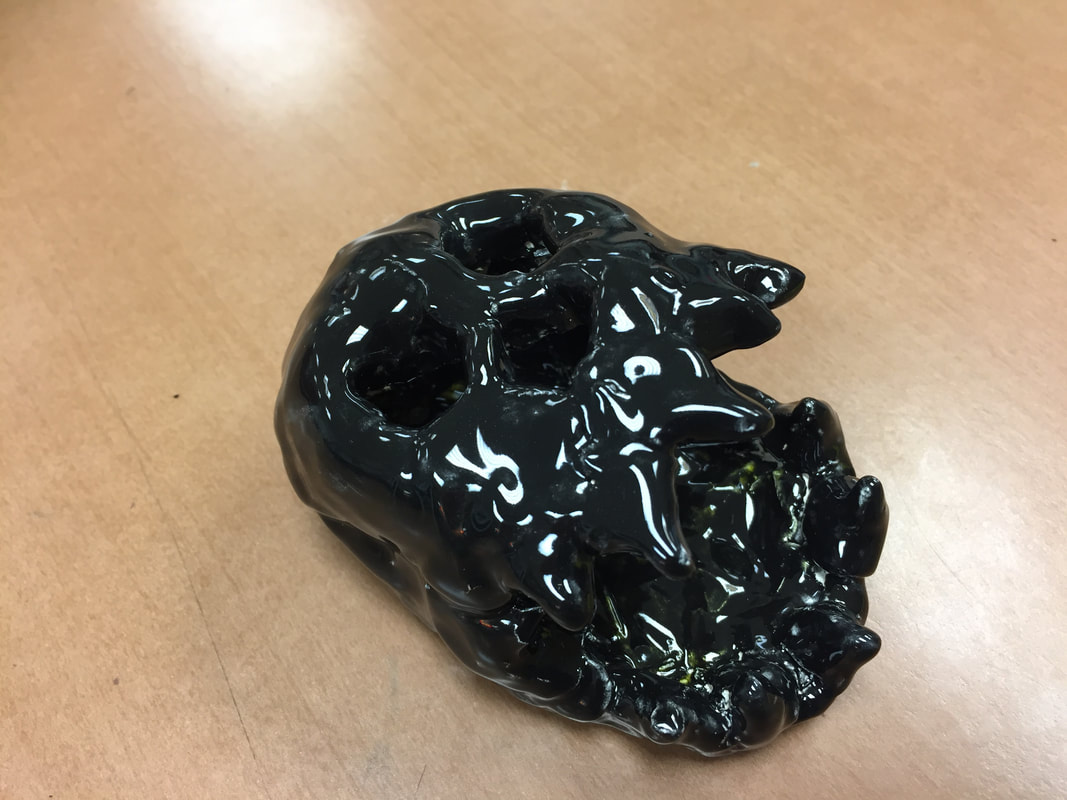
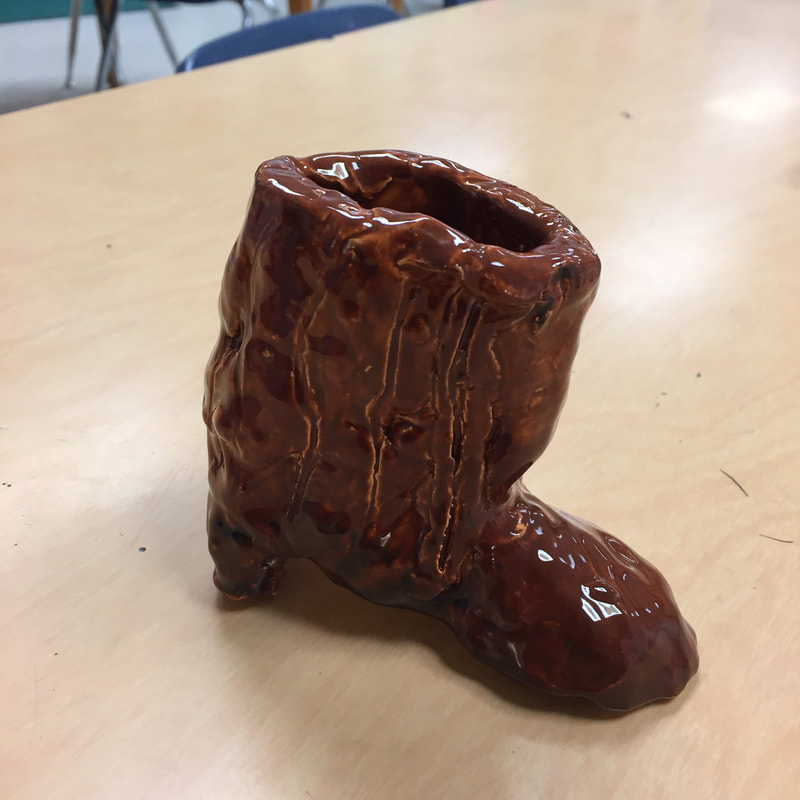
 These are my teacher samples. I needed to practice my hand building skillz.
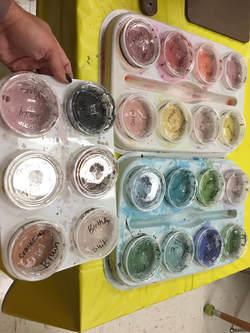
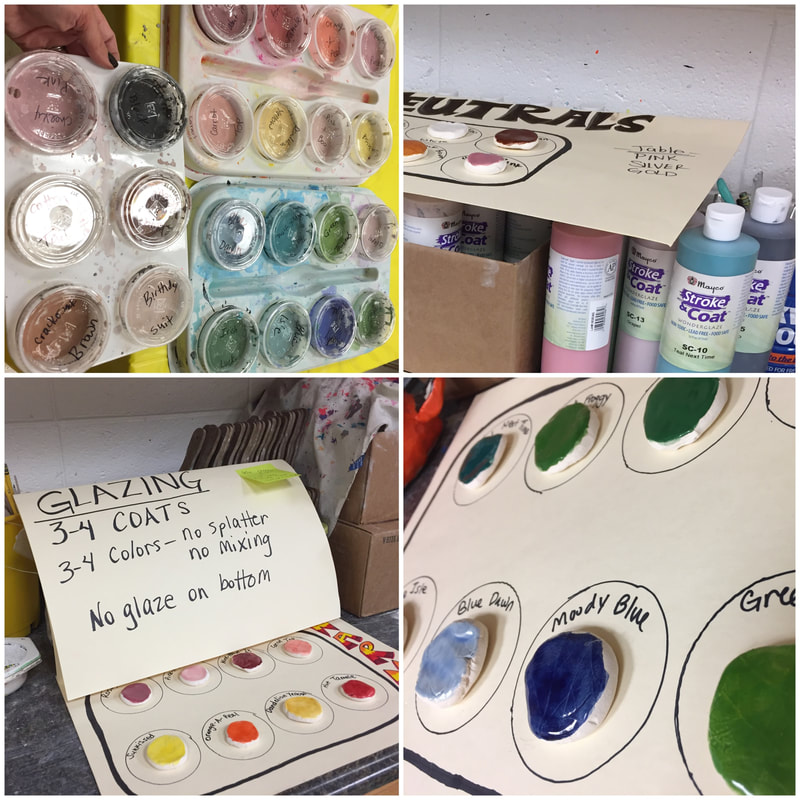
Once the clay had been bisque fired, we were ready to glaze. I prepped some glaze cookies so the kids would have a realistic idea of what the colors looked like. I've ordered the Mayaco Stroke'n'coat class pack the past two years in anticipation of the kiln and I am glad I did.
Now I just need a couple of refills for next year and I am set on having a large variety of color choices. I set up the glazes in three pallets.
Three tables had cool colors: blues, purples, greens.
Three tables had hot colors: reds, oranges, yellows.
Three tables had neurtrals: whites, browns, black and an extra pink.
Note to self: order gray and extra red Hot Tamale next year. I had plenty of options for pink so I encouraged kids to glaze pink inside their open mouths instead of red, as we needed to save red for the plethora of cardinals!
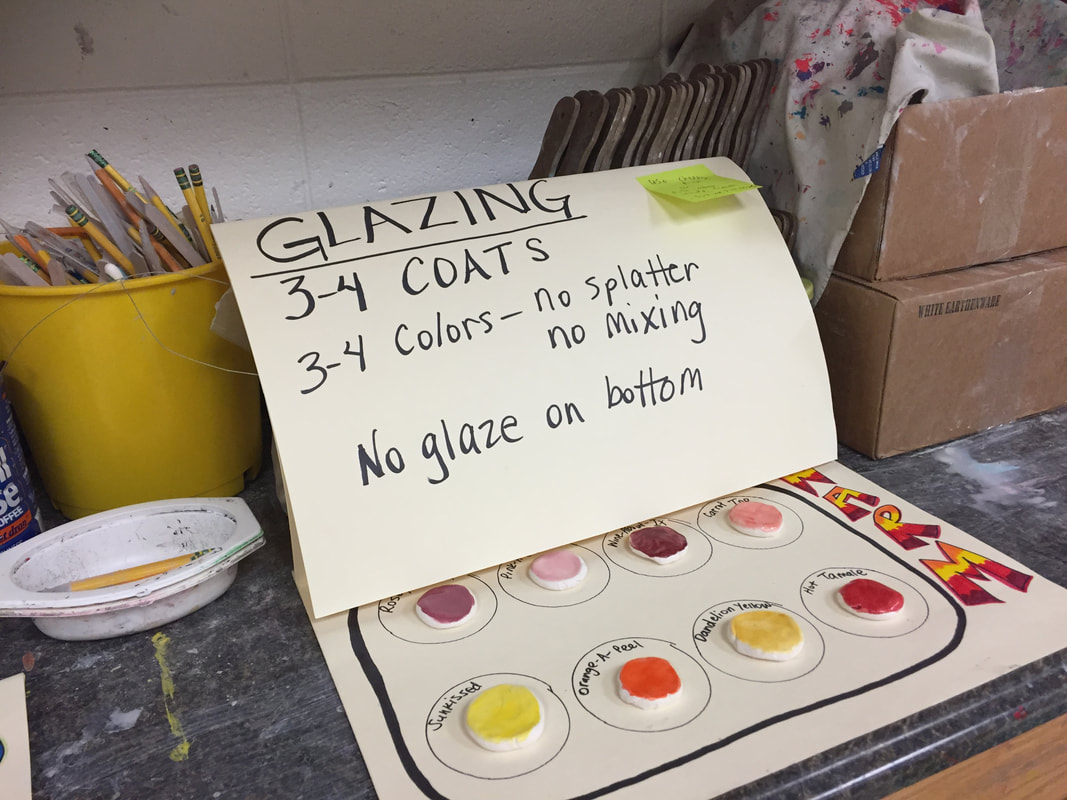
I labeled the side of the condiment container and the lid with the name of the glaze. I told kids to check both before glazing as sometimes lids get put on the wrong color, and that only happened a couple of times. This method worked out perfectly. When I've used baby food jars in the past, it was hard to label and the rim always got gunked up. Now, they stay pretty clean and are easy to refill. Hopefully they don't dry out after a semester and I can reuse them over and over. I will let you know the verdict when I pull them out again in a couple of weeks.
To advertise the colors, I posted a little poster with the name of the glaze and the glazed cookie for them to see. After going over a few basic rules, I let students move around the room to access the glazes of their choice. I love the realistic colors of the Stroke'n'coat glazes, but I do want to order some fun speckled glazes in the future.
Now I just need a couple of refills for next year and I am set on having a large variety of color choices. I set up the glazes in three pallets.
Three tables had cool colors: blues, purples, greens.
Three tables had hot colors: reds, oranges, yellows.
Three tables had neurtrals: whites, browns, black and an extra pink.
Note to self: order gray and extra red Hot Tamale next year. I had plenty of options for pink so I encouraged kids to glaze pink inside their open mouths instead of red, as we needed to save red for the plethora of cardinals!
I labeled the side of the condiment container and the lid with the name of the glaze. I told kids to check both before glazing as sometimes lids get put on the wrong color, and that only happened a couple of times. This method worked out perfectly. When I've used baby food jars in the past, it was hard to label and the rim always got gunked up. Now, they stay pretty clean and are easy to refill. Hopefully they don't dry out after a semester and I can reuse them over and over. I will let you know the verdict when I pull them out again in a couple of weeks.
To advertise the colors, I posted a little poster with the name of the glaze and the glazed cookie for them to see. After going over a few basic rules, I let students move around the room to access the glazes of their choice. I love the realistic colors of the Stroke'n'coat glazes, but I do want to order some fun speckled glazes in the future.
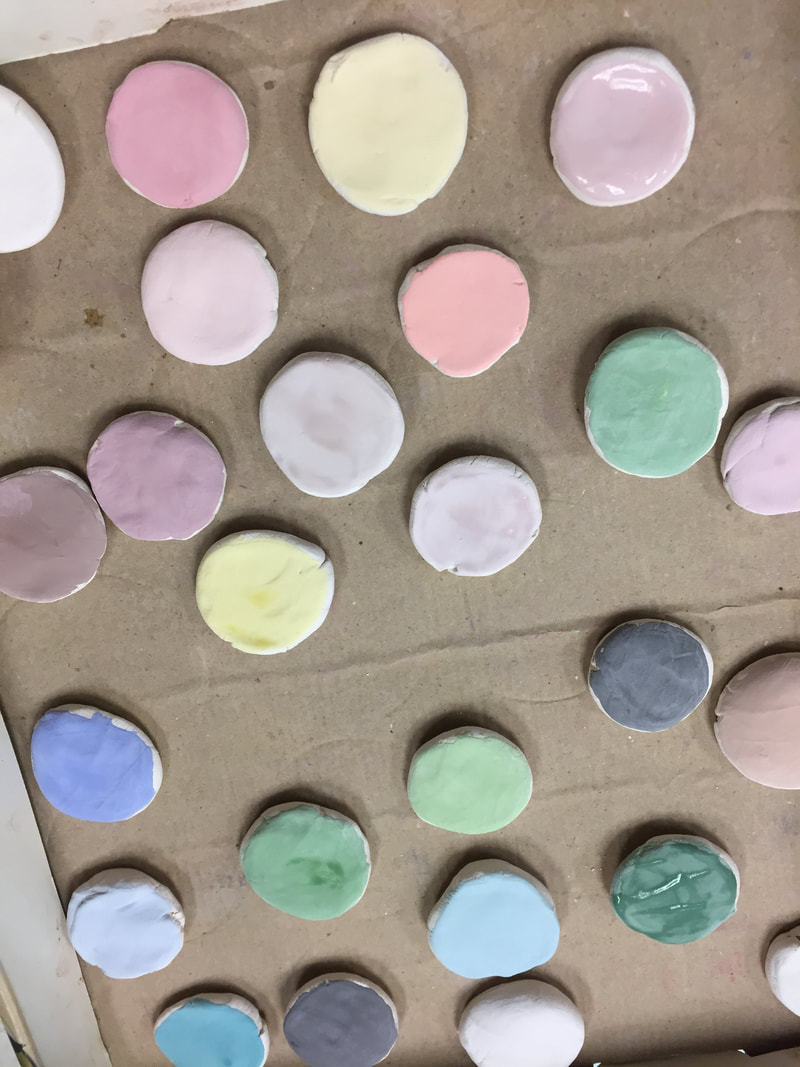
Glaze cookies prior to firing.
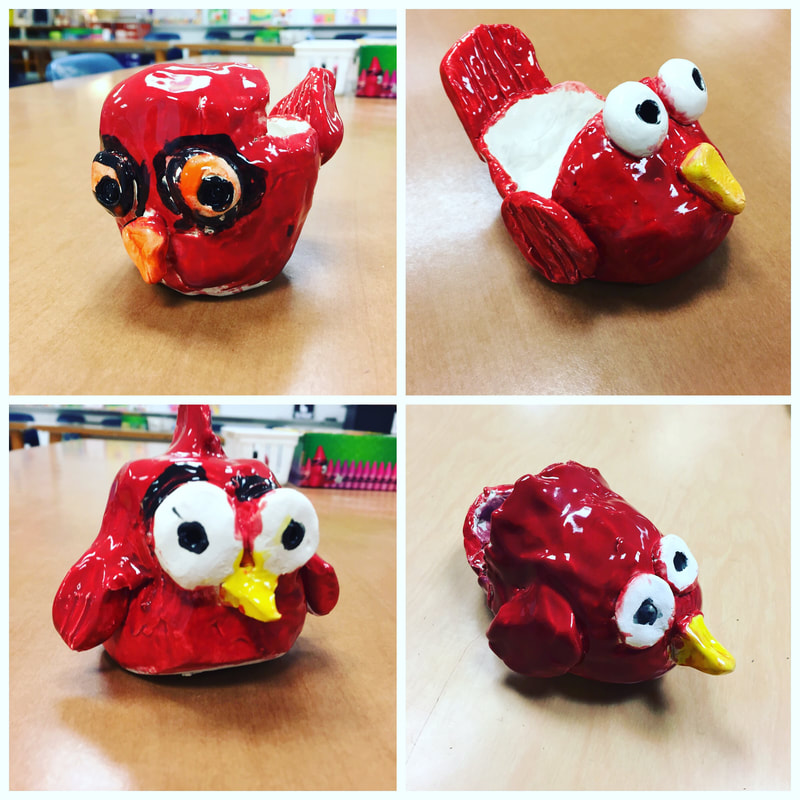
Just a few of the cutie cardinals!

 RSS Feed
