
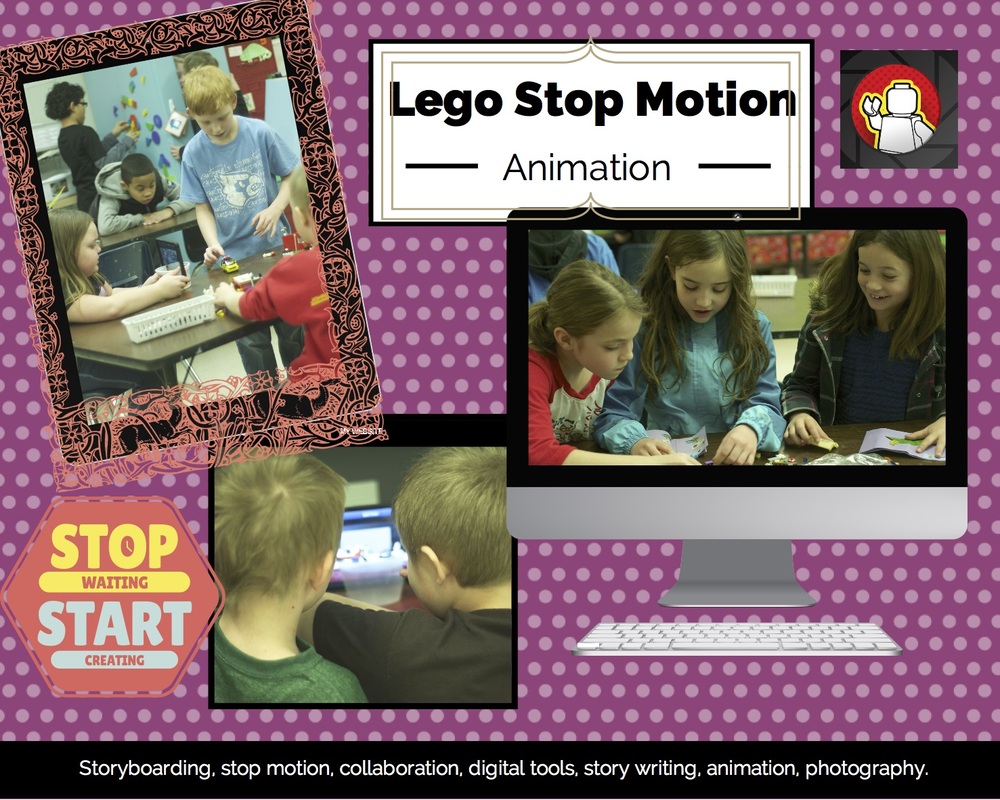
In March, I jumped into a stop-motion unit with my students. When I first began teaching, in 2006, I actually did a stop motion project with high school students and it was such a memorable and fun experience. Until this year, I haven't had the right equipment to do it with my elementary students.
Using the Lego Movie Maker app, 2nd, 3rd, and 4th grade students created stop-motion animations. Below, I've explained the entire process from start to finish with links to all of my videos and instructional input. Whew!
The video below is from my youtube channel, it has a student example and serves as a basic overview of the project. I created it in iMovie. The 'time lapse' portion of the video, I recorded using my iphone during about 2 class periods. I set it up on a bookshelf using the Lapse it App, and just let it record how incredibly busy the room was during those two sessions.
Week 1
Introduce students to the next project: LEGO Stop Motion Movies. (They were SO excited!)
1. Explain that students will be working in teams to create their next project. I always have them sort out their team in the hall before we go into the room and sit together, allowing them to choose their own teammate and where they sit before the lesson even begins. This has worked pretty well this whole year.
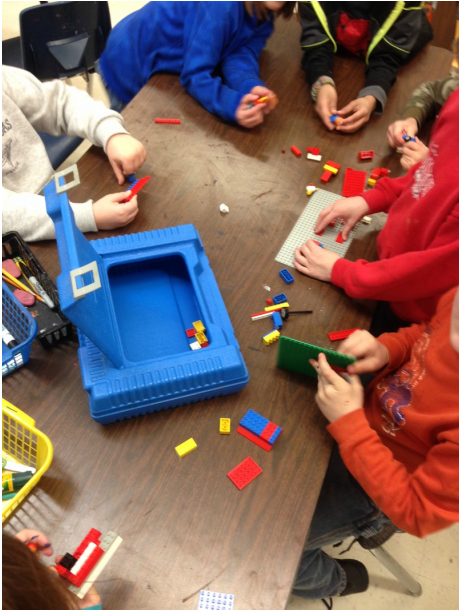
2. I explained that we would be creating a movie using Legos over the next two art sessions. Today, students will be working together to tell a story, sketching out a plan for their movie using a storyboard. I showed them the letter that would be sent home to parents, requesting just a few Legos be brought to school for 2 art sessions, a total of one full week. (Here is a link to the letter if you are interested in how I worded things. I stapled a ziplock to each letter, along with a syllabus for the project. On white label sticker affixed to the ziplock, I wrote each student's name, class and date which they needed to bring the Legos. If anyone wanted to bring a larger prop that was essential to their story, I just told them to keep it in a shoebox. Otherwise, only a couple of Lego figures would be needed for the purpose of this project). The fact that they could bring TOYS to school and they could use their OWN props from home, made many kids incredibly excited. If students did not own Legos, I told them to make props, use other small toys (like from Barbie) or pick up sticks and rocks to use, and this satisfied many. I also had a few Lego figures and small toys from a doll house set that I brought from home for students who were absent or forgot. (The ones that forgot, only did so because of a snow day that I couldn't remind them the day before).
3. Once we had gone over the parent letter, I showed them 3 short videos.:
(a). In some classes, I started with this video before I explained what we were doing.
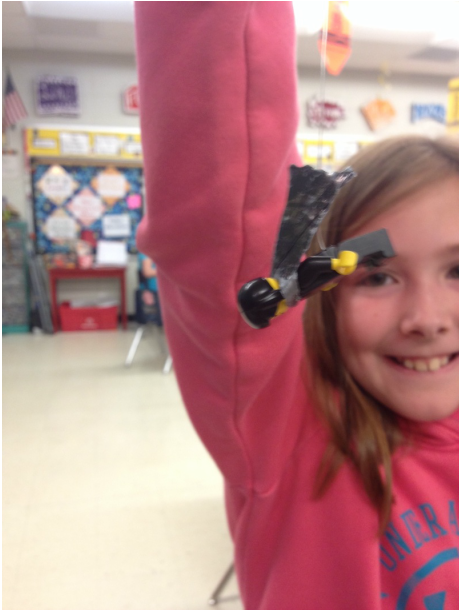
This is my 'teacher sample' that I made in order to get familiar with the app and lighting and everything. Later, I would go around with the mini-figure in the video and say 'Here she is, straight from Youtube, 'Mrs. Mitchell' the Lego, live and in person. The kids love asking to borrow the 'Mrs. Mitchell Lego' for their videos.
(b). I showed them this Lego Movie trailer (just for fun).
(c). Then, I showed them this HowCast video on how to storyboard. I explained that they would be creating a storyboard today, which would be the plan for the movie. It would help them figure out which characters they would need to bring, what they would need for their set, and what props would be necessary. I made this document for them to use: Lego Storyboard Document.
4. Finally, I had a list of Themes on the board. The students were antsy to begin, but I needed to get this info to them. The themes I encouraged them to use are from the song choices in the Lego Movie Maker app. I went through each one had them discuss and explain the meaning of the title and possible ideas:
Bank Heist
Flying High
Justice Served
The Chase
The Showdown
Victorious
3…2…1…
Secret Hideout
The assignment
Takeoff
The Protector
On My Way
The one thing that I did mention as far as 'school appropriate guidelines' was, please try not to make your movie too violent. We don't want a bunch of scary movies, we want to tell a story. Several asked if they could bring toy light sabers and Lego guns and we just sort of talked through it. I never told them absolutely NO, I just asked if they could tell the story using a different prop...and let them solve it on their own....
1. Explain that students will be working in teams to create their next project. I always have them sort out their team in the hall before we go into the room and sit together, allowing them to choose their own teammate and where they sit before the lesson even begins. This has worked pretty well this whole year.
2. I explained that we would be creating a movie using Legos over the next two art sessions. Today, students will be working together to tell a story, sketching out a plan for their movie using a storyboard. I showed them the letter that would be sent home to parents, requesting just a few Legos be brought to school for 2 art sessions, a total of one full week. (Here is a link to the letter if you are interested in how I worded things. I stapled a ziplock to each letter, along with a syllabus for the project. On white label sticker affixed to the ziplock, I wrote each student's name, class and date which they needed to bring the Legos. If anyone wanted to bring a larger prop that was essential to their story, I just told them to keep it in a shoebox. Otherwise, only a couple of Lego figures would be needed for the purpose of this project). The fact that they could bring TOYS to school and they could use their OWN props from home, made many kids incredibly excited. If students did not own Legos, I told them to make props, use other small toys (like from Barbie) or pick up sticks and rocks to use, and this satisfied many. I also had a few Lego figures and small toys from a doll house set that I brought from home for students who were absent or forgot. (The ones that forgot, only did so because of a snow day that I couldn't remind them the day before).
3. Once we had gone over the parent letter, I showed them 3 short videos.:
(a). In some classes, I started with this video before I explained what we were doing.
This is my 'teacher sample' that I made in order to get familiar with the app and lighting and everything. Later, I would go around with the mini-figure in the video and say 'Here she is, straight from Youtube, 'Mrs. Mitchell' the Lego, live and in person. The kids love asking to borrow the 'Mrs. Mitchell Lego' for their videos.
(b). I showed them this Lego Movie trailer (just for fun).
(c). Then, I showed them this HowCast video on how to storyboard. I explained that they would be creating a storyboard today, which would be the plan for the movie. It would help them figure out which characters they would need to bring, what they would need for their set, and what props would be necessary. I made this document for them to use: Lego Storyboard Document.
4. Finally, I had a list of Themes on the board. The students were antsy to begin, but I needed to get this info to them. The themes I encouraged them to use are from the song choices in the Lego Movie Maker app. I went through each one had them discuss and explain the meaning of the title and possible ideas:
Bank Heist
Flying High
Justice Served
The Chase
The Showdown
Victorious
3…2…1…
Secret Hideout
The assignment
Takeoff
The Protector
On My Way
The one thing that I did mention as far as 'school appropriate guidelines' was, please try not to make your movie too violent. We don't want a bunch of scary movies, we want to tell a story. Several asked if they could bring toy light sabers and Lego guns and we just sort of talked through it. I never told them absolutely NO, I just asked if they could tell the story using a different prop...and let them solve it on their own....
Week 2
Time to film.
1. This week, I showed them ONE video to help them get started.
2. (I actually watched tons of 'How to' videos to help me know what essential information they needed. I tried to show a couple of them, but in the end, it was best if I demonstrated myself using the props and equipment that I actually had in the room.) I did show this 'tips and tricks' video because it was the most appropriate for what we were doing.
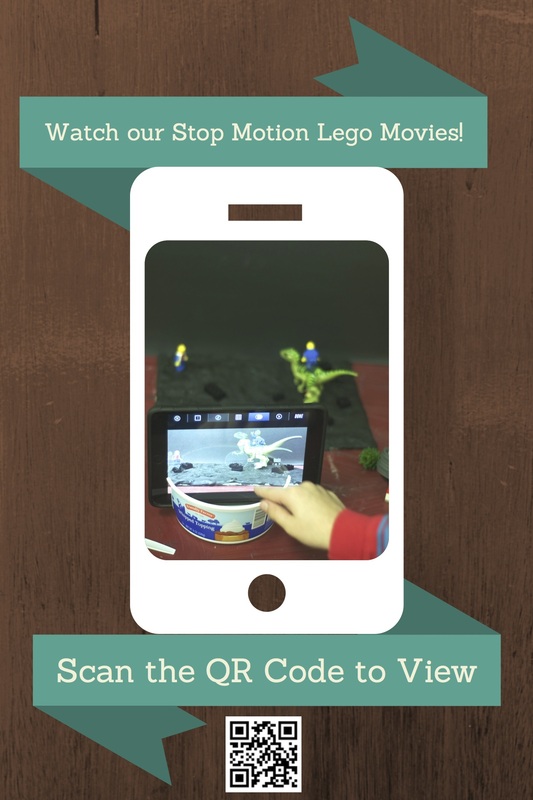
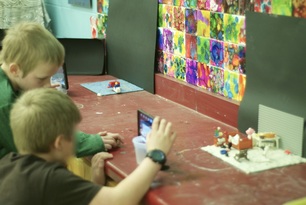
3. I demonstrated how to set up a SIMPLE scene. I created this document that students could use to help set up their scene, but most of them wanted to build a set, which took up a lot of time. Those students had a really hard time finishing the video on time. The ones that made a very simple set, had the most successful films. I showed them how to set up the set, camera using a home-made tripod, open the app, start a new movie with a title and their names, set up the figure, move the figure a tiny bit, take a picture, move it, take a picture, move it, take a picture. They really liked it when I had a little toy car drive towards the little 'Youtube-famous-Mrs-Mitchell' and POW! using the Lego movie maker app, I was able to put in some onomatopoeia, you get the idea. Quickly, I used the app to demonstrate how to remove a picture, save the video and put in the word bubbles.
4. Homemade Props:
(a). In one of my after-school art clubs, I had a group of girls help me cover some canvas boards and old chalk boards with modeling clay. It was left over from 7 years ago when I taught at the high school. I had them spread a thin layer on the board so that when students set up their mini figures, they wouldn't fall over. This worked really well since we did not have enough big peg boards for each group.
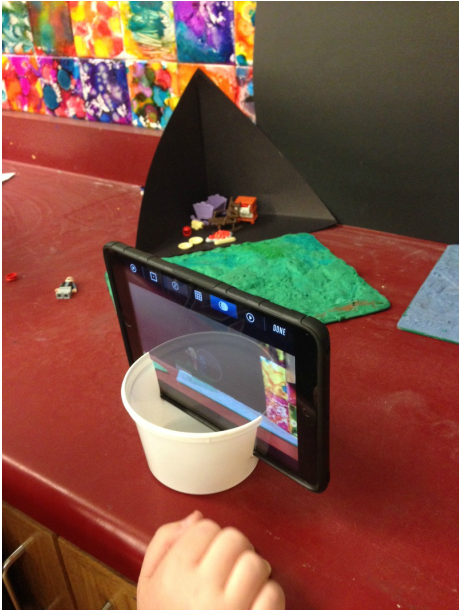
(b) Tri-pods: I found a youtube video for an iPhone using a plastic cup and I decide to do the same thing using plastic cool-whip containers for my iPad Minis. These worked pretty well, the only problem was trying to convince my students to make sure the camera doesn't move!! They would slide it over and pick it up a lot, so it was hard to teach them to keep it still.
(c) Black paper as the backdrop. In most of the videos online, it suggests using black backdrops as opposed to white ones because of bad shadows that are created with white backgrounds. I taped paper up around the room, and encouraged students to make sure that the black paper was the only thing in the background. Many videos show part of the classroom in the corner of the movie, and it is distracting and hard to crop out, the app doesn't let you crop the pictures.
(d) White cotton for smoke, fishing line for 'flying' and clear straws to help keep hands out of the shot. We went through a lot of fishing line and tape, but once I suggested those supplies, most students could envision how to implement it into their movie without my help.
It was seriously exciting to watch them referring to their storyboards, talking through their movies, and use problem solving to compromise their ideas with their partner. This whole process, even if some of the finished results are a little sloppy and 'elementary' is totally fine with me. The fact that they can go home, use the app for free, and continue making movies on their own is really exciting. Also, this is just the sort of project-based learning that is truly going to take my students to the next level of Bloom's taxonomy.
Some students were really intuitive with the app, and able to figure it out quickly. Some needed help on each step, I tried to be hands-off, encouraging them to figure it out on their own...just as I tried not to jump into group drama if someone felt their ideas weren't being heard, I gave a few suggestions, but I didn't try to control the whole movie.
1. This week, I showed them ONE video to help them get started.
2. (I actually watched tons of 'How to' videos to help me know what essential information they needed. I tried to show a couple of them, but in the end, it was best if I demonstrated myself using the props and equipment that I actually had in the room.) I did show this 'tips and tricks' video because it was the most appropriate for what we were doing.
3. I demonstrated how to set up a SIMPLE scene. I created this document that students could use to help set up their scene, but most of them wanted to build a set, which took up a lot of time. Those students had a really hard time finishing the video on time. The ones that made a very simple set, had the most successful films. I showed them how to set up the set, camera using a home-made tripod, open the app, start a new movie with a title and their names, set up the figure, move the figure a tiny bit, take a picture, move it, take a picture, move it, take a picture. They really liked it when I had a little toy car drive towards the little 'Youtube-famous-Mrs-Mitchell' and POW! using the Lego movie maker app, I was able to put in some onomatopoeia, you get the idea. Quickly, I used the app to demonstrate how to remove a picture, save the video and put in the word bubbles.
4. Homemade Props:
(a). In one of my after-school art clubs, I had a group of girls help me cover some canvas boards and old chalk boards with modeling clay. It was left over from 7 years ago when I taught at the high school. I had them spread a thin layer on the board so that when students set up their mini figures, they wouldn't fall over. This worked really well since we did not have enough big peg boards for each group.
(b) Tri-pods: I found a youtube video for an iPhone using a plastic cup and I decide to do the same thing using plastic cool-whip containers for my iPad Minis. These worked pretty well, the only problem was trying to convince my students to make sure the camera doesn't move!! They would slide it over and pick it up a lot, so it was hard to teach them to keep it still.
(c) Black paper as the backdrop. In most of the videos online, it suggests using black backdrops as opposed to white ones because of bad shadows that are created with white backgrounds. I taped paper up around the room, and encouraged students to make sure that the black paper was the only thing in the background. Many videos show part of the classroom in the corner of the movie, and it is distracting and hard to crop out, the app doesn't let you crop the pictures.
(d) White cotton for smoke, fishing line for 'flying' and clear straws to help keep hands out of the shot. We went through a lot of fishing line and tape, but once I suggested those supplies, most students could envision how to implement it into their movie without my help.
It was seriously exciting to watch them referring to their storyboards, talking through their movies, and use problem solving to compromise their ideas with their partner. This whole process, even if some of the finished results are a little sloppy and 'elementary' is totally fine with me. The fact that they can go home, use the app for free, and continue making movies on their own is really exciting. Also, this is just the sort of project-based learning that is truly going to take my students to the next level of Bloom's taxonomy.
Some students were really intuitive with the app, and able to figure it out quickly. Some needed help on each step, I tried to be hands-off, encouraging them to figure it out on their own...just as I tried not to jump into group drama if someone felt their ideas weren't being heard, I gave a few suggestions, but I didn't try to control the whole movie.
Week three
For the final week, I explained that they HAD to finish today. I showed them how to find their movie, edit and add music. Finally, they needed to save them to the camera roll.
By this point, students essentially 'get it'. I showed them one example by another student group, and I reminded them not to let their hand get in the shot, make sure the background is solid black (not half the classroom on one edge), and take LOTS of pictures per scene.
I also opened the Lego Pics portion of the app and showed them a somewhat professional video using the exact same app they were using...they were impressed by this.
Most groups had lots of work to do to re-set up their scene from the week before. Some just made a 'part 2' version of the same characters, and some made a completely different movie just for fun. If they were completely finished with the app, or their partner was absent, I had some activities available for them:
I created a Flipboard magazine for each iPad. In the magazine, I attached articles, videos, art images, really anything cool and school appropriate that I thought they would enjoy. The Magazine is called 'Lego Stop Motion' and you can find it on Flipboard Here.
I also allowed them to look at some of the other examples of 'Lego Picks' videos on the Lego movie maker app, students could choose to look at the flipboard magazine, look at Lego books from the library, or use makers to color one of these (Lego Movie, Lego Men, Green Ninja) Lego coloring pages. They had LOTS of engaging activities to choose from if they finished their movie early.
Final Reflections
I wish we would've done a mini lesson on stop-motion before we even started story boarding. I wish I would've used a different app and had them animate an eraser or a glue bottle, just so they could understand how many pictures were necessary to make a movie really work. In the future, this will be an essential lesson in my unit. (I thought since we had done the DoInk animations, that would've been enough, but it really wasn't enough prior knowledge for some kids).
Now the hard work for me begins, as I have to figure out how to share all the videos. I will probably put them in dropbox and then make an imovie for each class, but that will take lots of hours to edit all that stuff together since every class used every iPad, it will be hard to organize them all...and it will take up lots of room on my computer.....hmmm...maybe I will have my art club kids do it for their final art club of the year.......using iMovie......
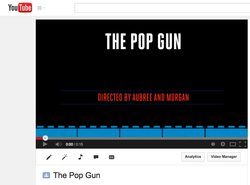
Keep your eye on my Youtube channel for more of the videos to appear.
As challenging as this unit was for me, as a teacher, I know that it is right on track with educational trends.
Other art teachers are using Legos as a format for their educational lessons and my students were definitely engaged throughout the entire process. Here are a couple of links you might find useful.
Art of Ed Using Legos in the Art room.
Fugleblog Celebrating Black History with Legos
Lego Art Pinterest Board
Now the hard work for me begins, as I have to figure out how to share all the videos. I will probably put them in dropbox and then make an imovie for each class, but that will take lots of hours to edit all that stuff together since every class used every iPad, it will be hard to organize them all...and it will take up lots of room on my computer.....hmmm...maybe I will have my art club kids do it for their final art club of the year.......using iMovie......
Keep your eye on my Youtube channel for more of the videos to appear.
As challenging as this unit was for me, as a teacher, I know that it is right on track with educational trends.
Other art teachers are using Legos as a format for their educational lessons and my students were definitely engaged throughout the entire process. Here are a couple of links you might find useful.
Art of Ed Using Legos in the Art room.
Fugleblog Celebrating Black History with Legos
Lego Art Pinterest Board
Have you used Legos in the art room? Have you made stop-motion animations with your elementary students? I would love for you to share links in the comments with your experiences!

 RSS Feed
